
Subscribe to continue reading
Subscribe to get access to the rest of this post and other subscriber-only content.

Subscribe to get access to the rest of this post and other subscriber-only content.
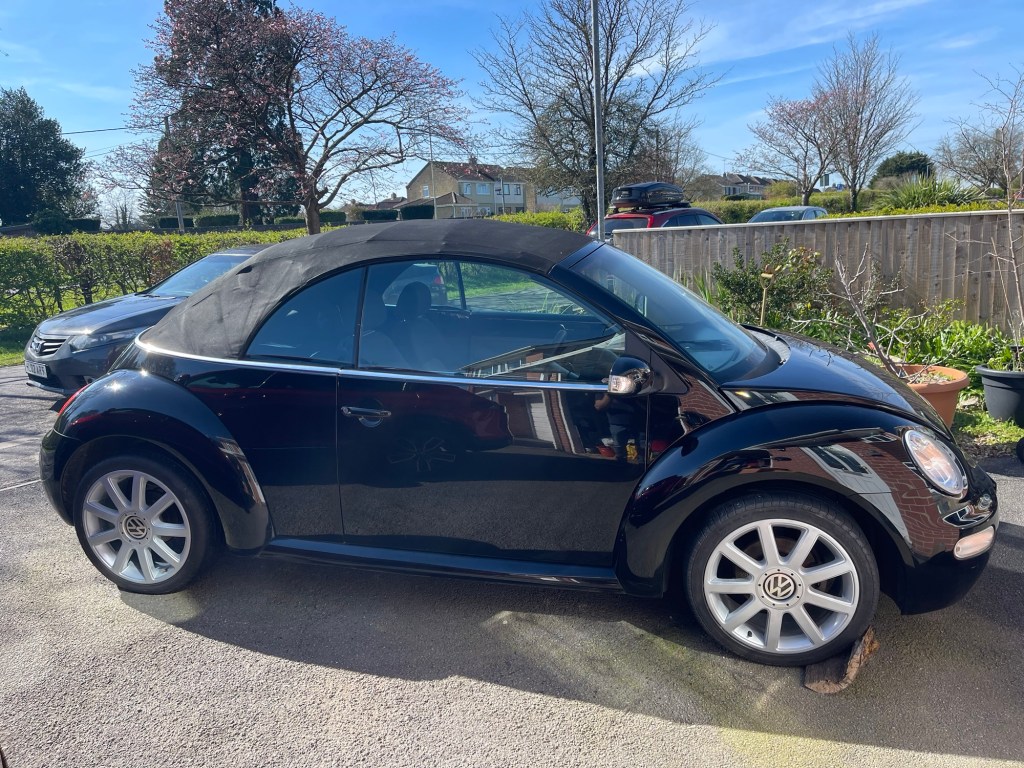
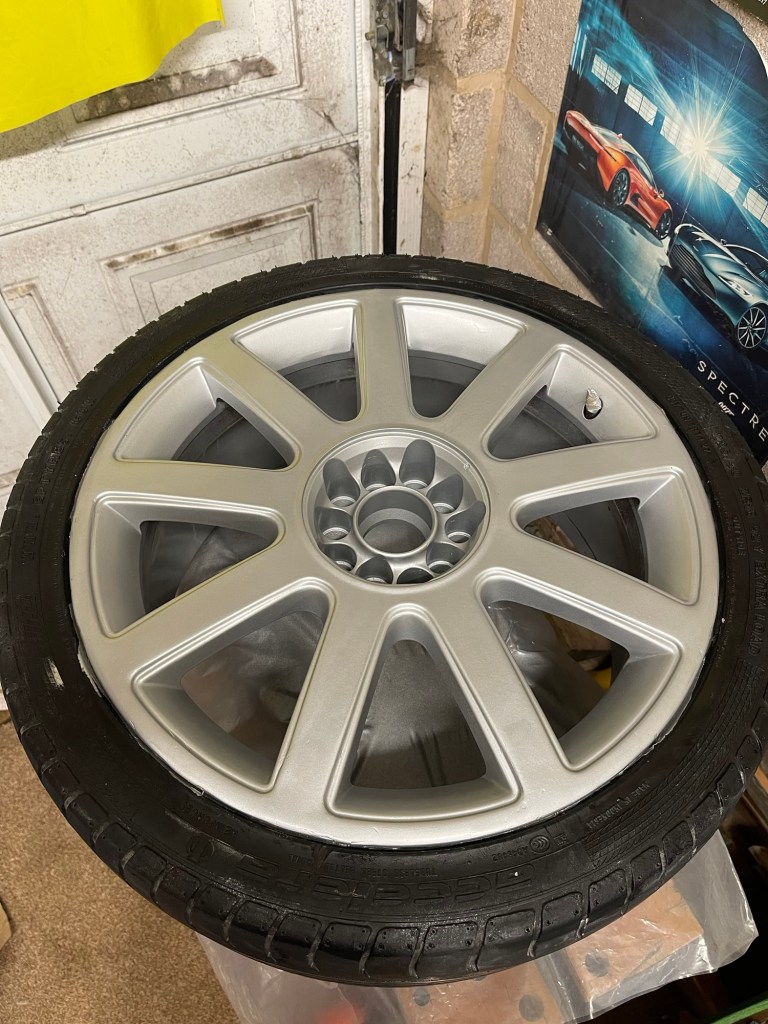
I managed to finish my repaint of the rear wheels through the week so first thing this morning I removed the last of the masking tape and refitted the wheels. There’s a nack to putting a large heavy alloy wheel on with studs and I started to get there today, with it between my knees and shuffling on my knees to ease it onto the stub at the same time threading one stud to secure it.
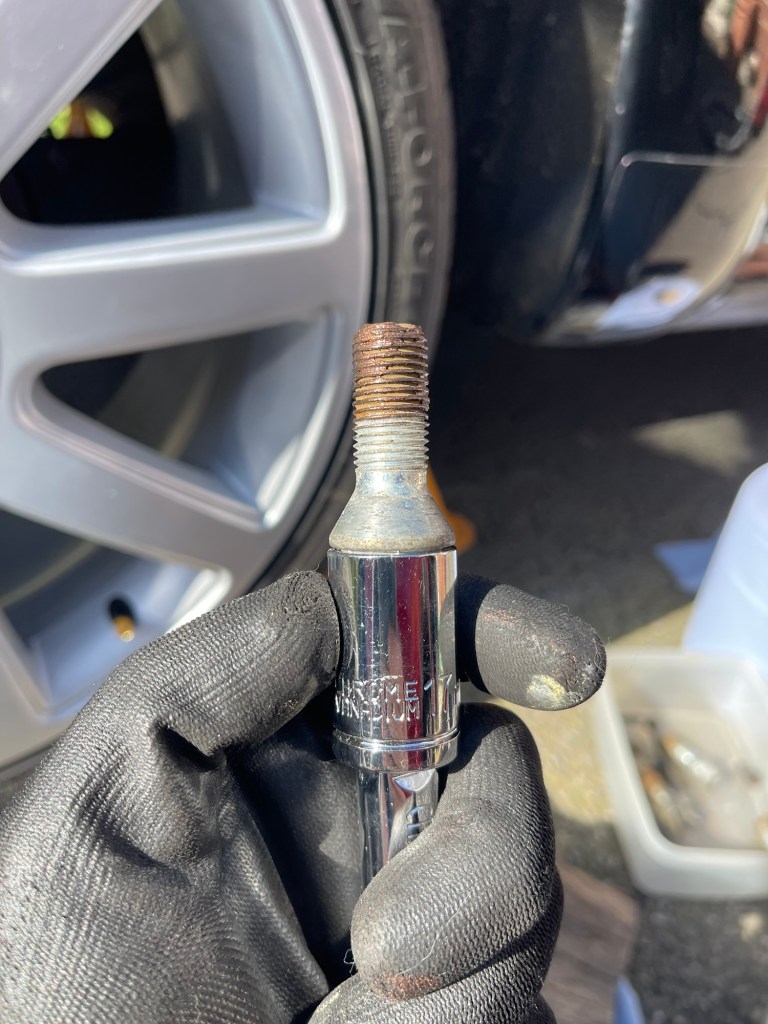
Given the aggro when removing the wheels (one broken wheel wrench) I applied a little Copper grease to each thread on the rear wheels. Then I had to remove the front wheel studs one by one to grease them. So that’s 16 studs I greased and then had to retighten to the correct torque with my torque wrench. I really do sometimes question my life choices and as I’m selling the car will anyone really care.
Anyway, a few mins of a puny compressor had both rears inflated and the Beetle was once again in its own four wheels.
I am never ever doing alloy wheels myself again, it takes such a long time and is very fiddly. The results are pretty average versus the effort but as this is a budget job it will have to suffice. The car sadly is not worth enough to send the wheels away for refurbishment.
In between doing this I had given the bodywork a quick once over with a spray on cleaner that you can use dry. This was just to give it a bit of shine as it was looking a bit sad.
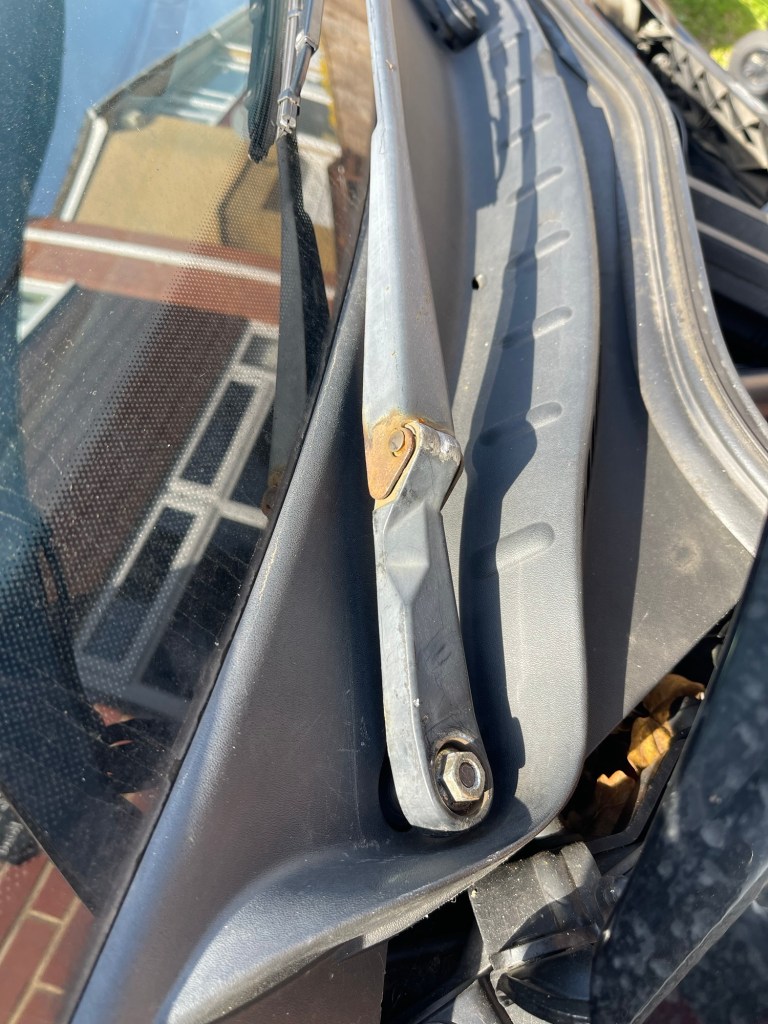
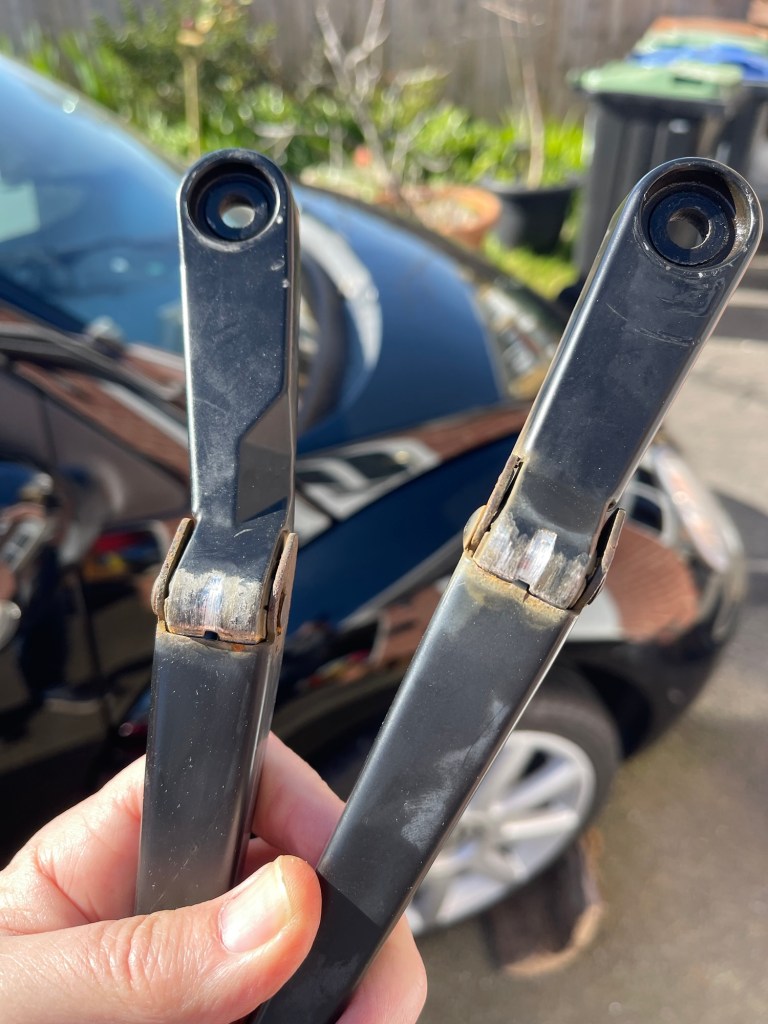
Next I removed the wipers arms which are in a rough state. The sprung mechanism is worn and so it’s scratched itself to bits. To begin with I’ve oiled it but I may need to replace as I can’t see a way to repair them. New units are over £60 so I will see what can be had second hand.
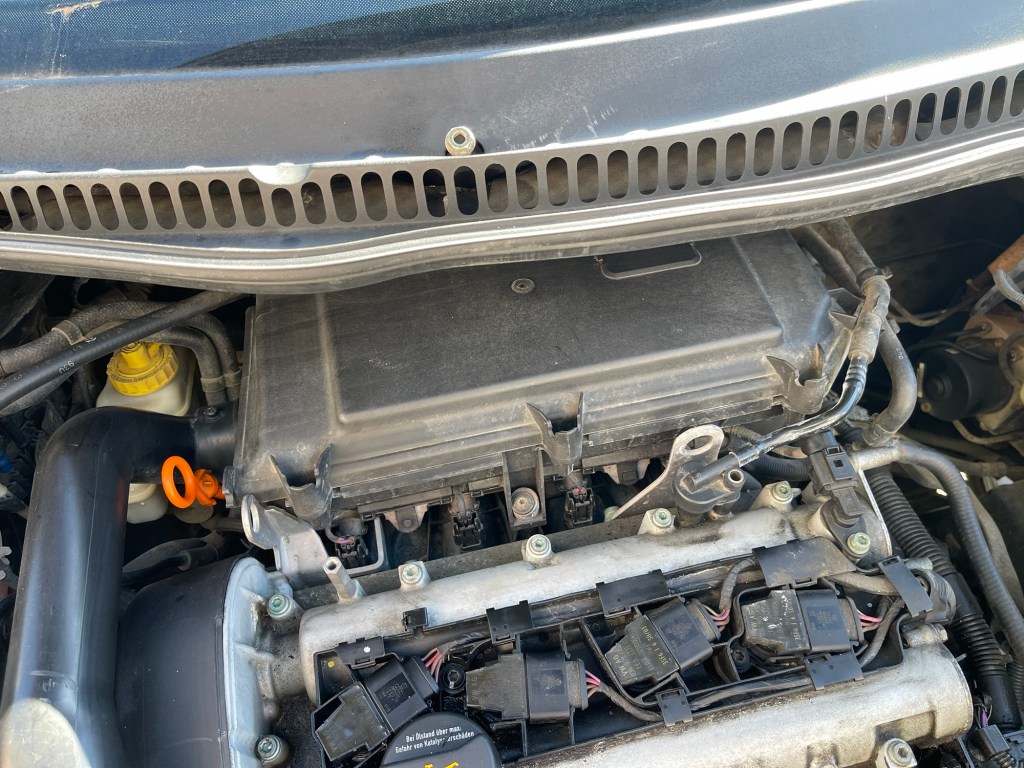
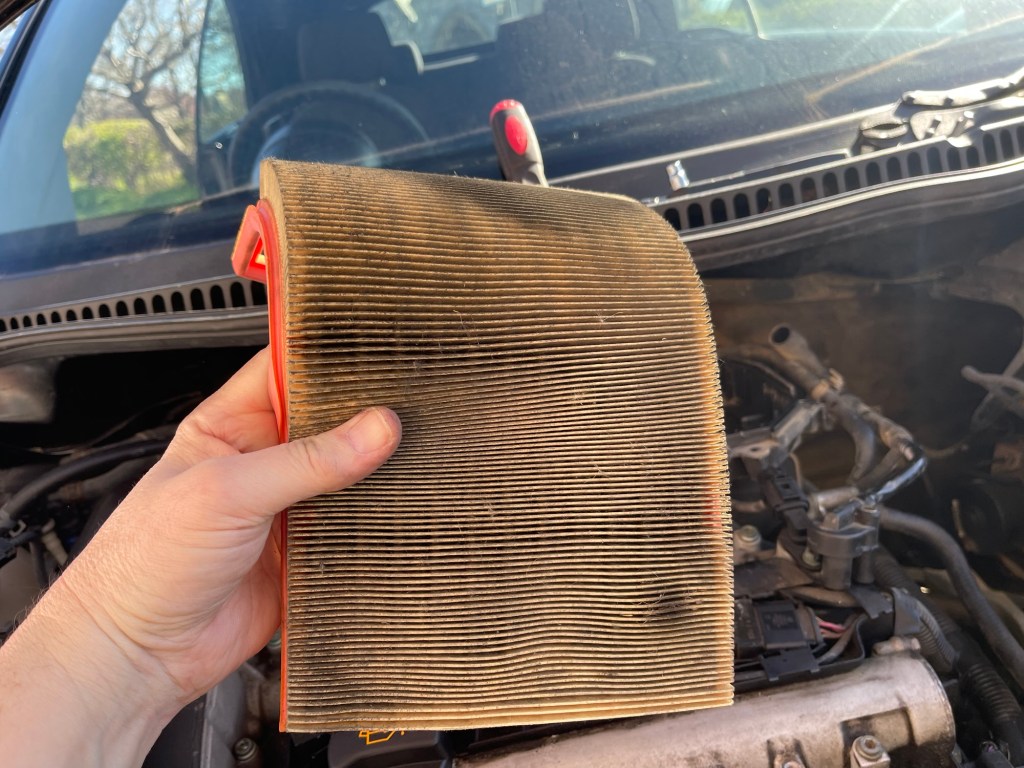
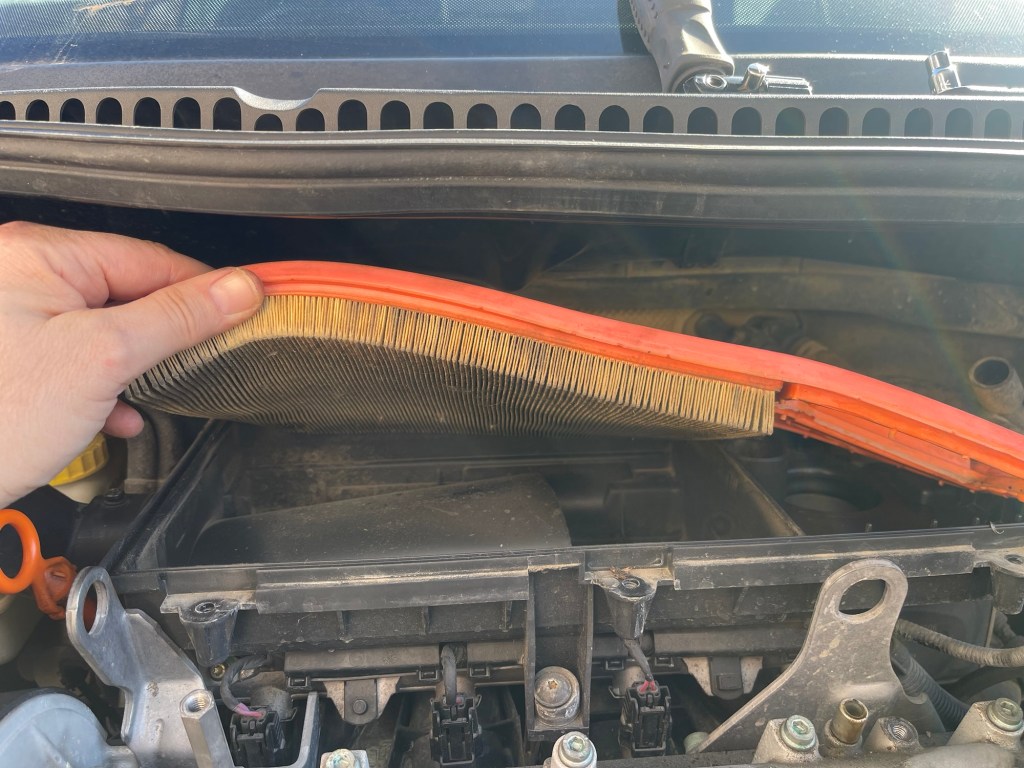
As I still had some time I explored removing the air filter which is at the rear of the engine bay tucked under the scuttle. This means that the front three screws come out easily but the back two are very awkward. I tried a few different tools, eventually finding that my screw bits fitted a socket in my mini-socket set and that gave me a low profile screw using the ratchet. I was impressed with myself for my ingenuity! I was glad when the air filter was found to be dirty because that justifies the effort in removing it. I’ll order a new one online.
Unbelievably that little work took most of a day but to be honest I was just doing it all for fun really and just enjoying being outside in the sunshine. Oh – I did clean the interior of Helen’s car as well so not that unproductive!
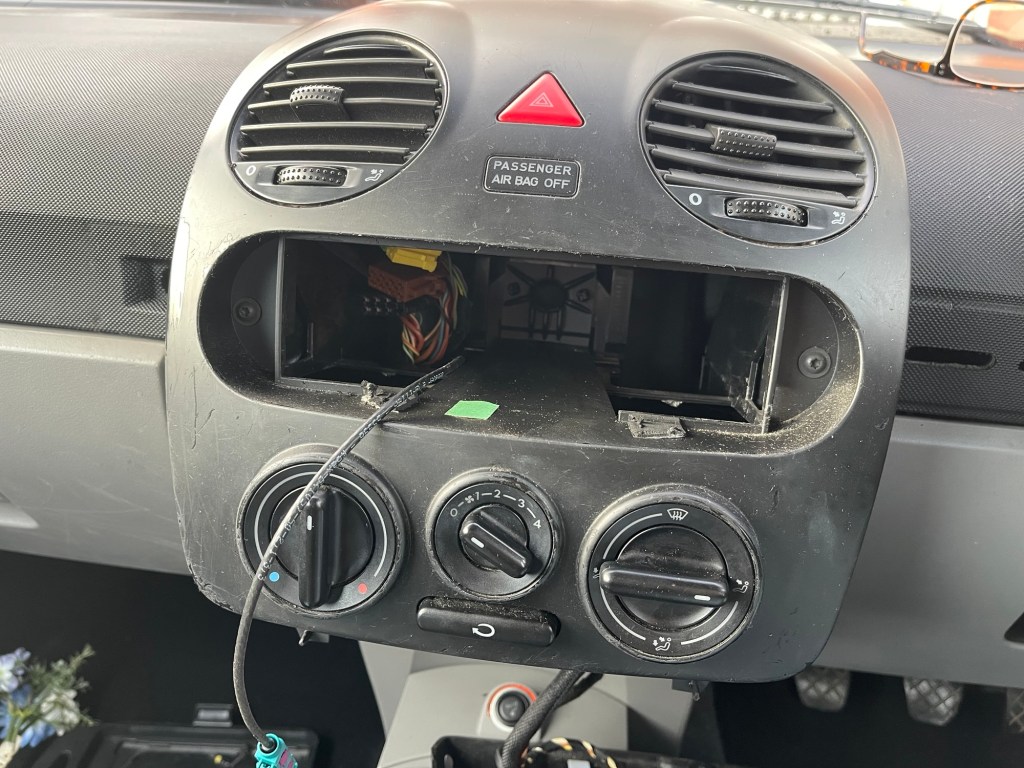
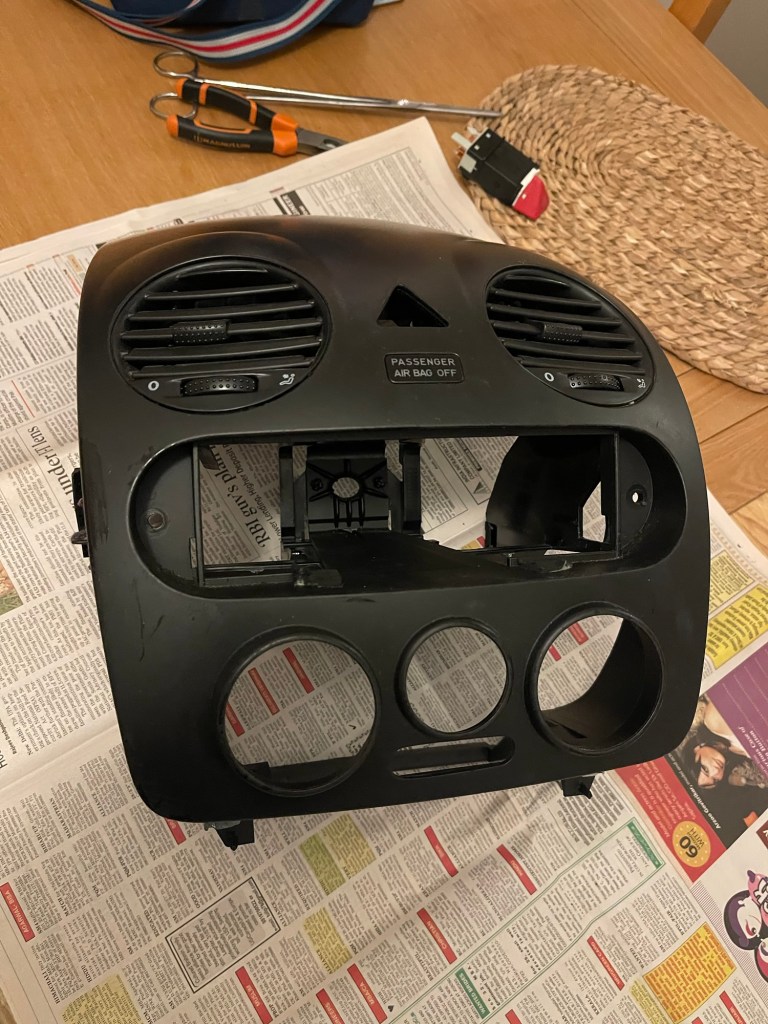
One of the face vents on the Beetle had ceased working a long time ago and with me also wanting to replace the hazard lights switch which is in the same panel it was time to tackle the not uncomplicated task of removing the central dashboard panel.
First you have to remove the front top panel which simply slides out and lifts off to reveal 2 x screws. At the bottom end there is a switch panel which comes apart with a combination of push fit and screwed fittings.
Next to remove is the radio and I’m going to give the short version here. I used two special keys which slide into slots on either side of the radio unit which unclip the radio and allow you to pull it out and disconnect it. I made that sound simple. It wasn’t.
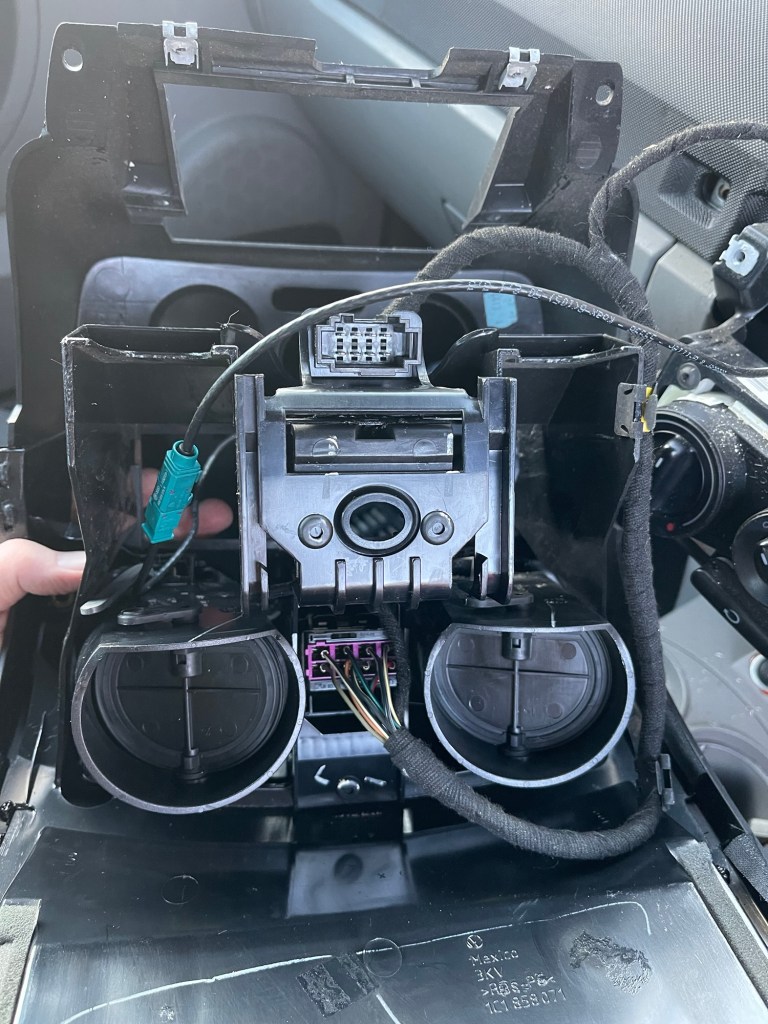
This reveals the final 2 x screws which enables the panels to be removed and all cables disconnected. Only the panel doesn’t want to come off. Something is keeping it on – it comes so far then stops fast. Mmm. A wiggle. An exploratory tug and the brittle plastic creaks ominously. more perseverance, a few different angles and I can ease the panel off – phew.
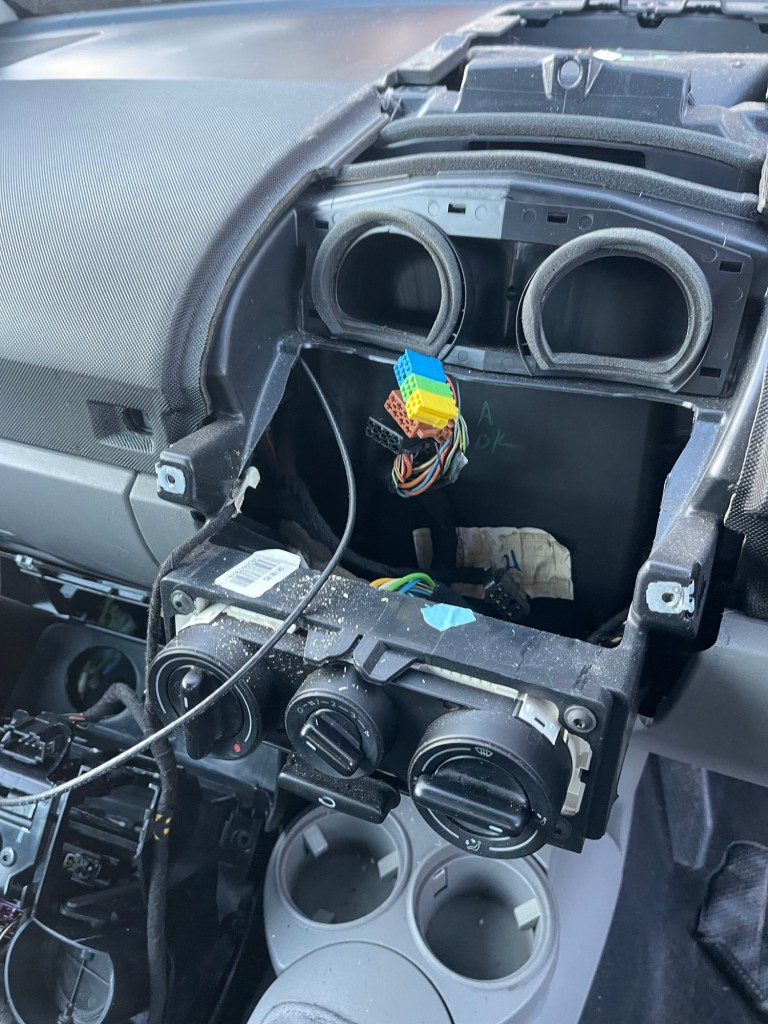
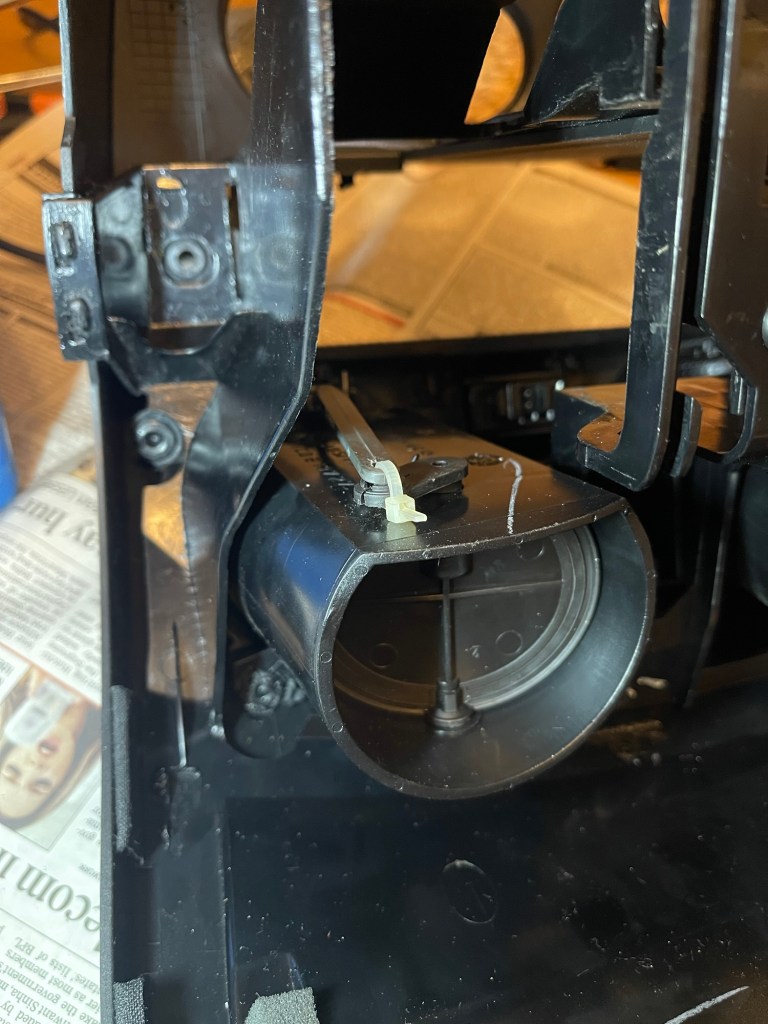
Panel removed I can clearly see the snapped lever which operates the face vents. Later I try to screw it together and end up drilling a tiny hold and using a small cable tie. Not elegant but effective.
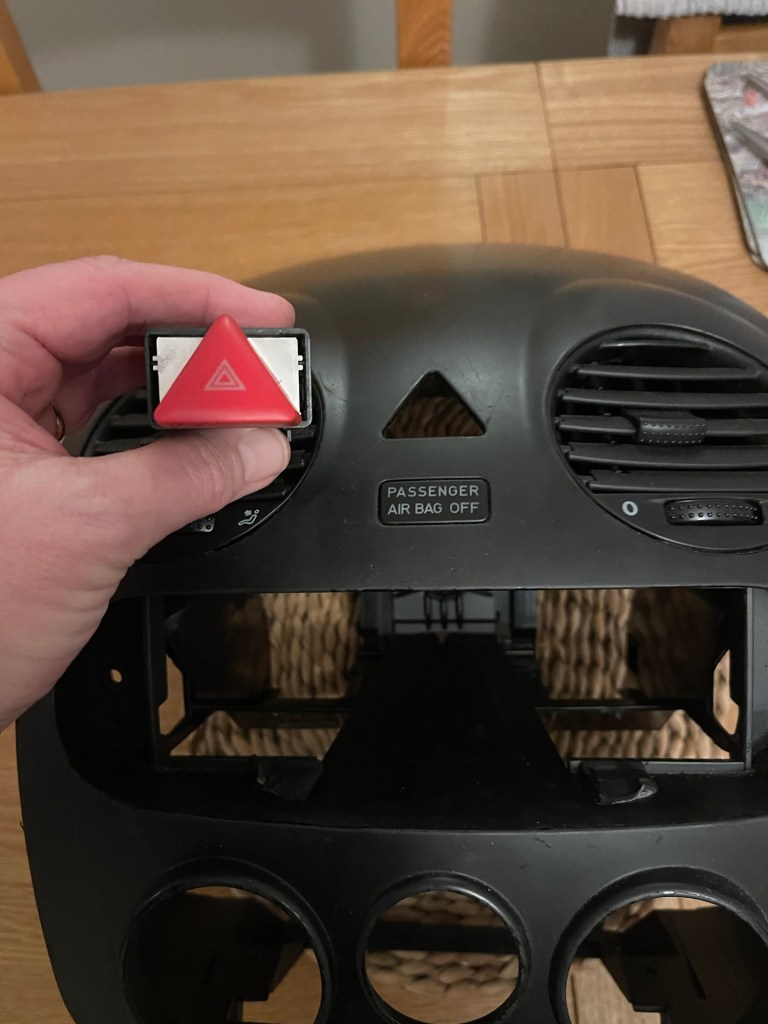
I borrow some long nosed pliers from a friend to free the hazard switch and order a new one online. It will be funny if the new switch doesn’t fix the clicky indicators….! (An internet search diagnosed this as the problem).
Watch this space!


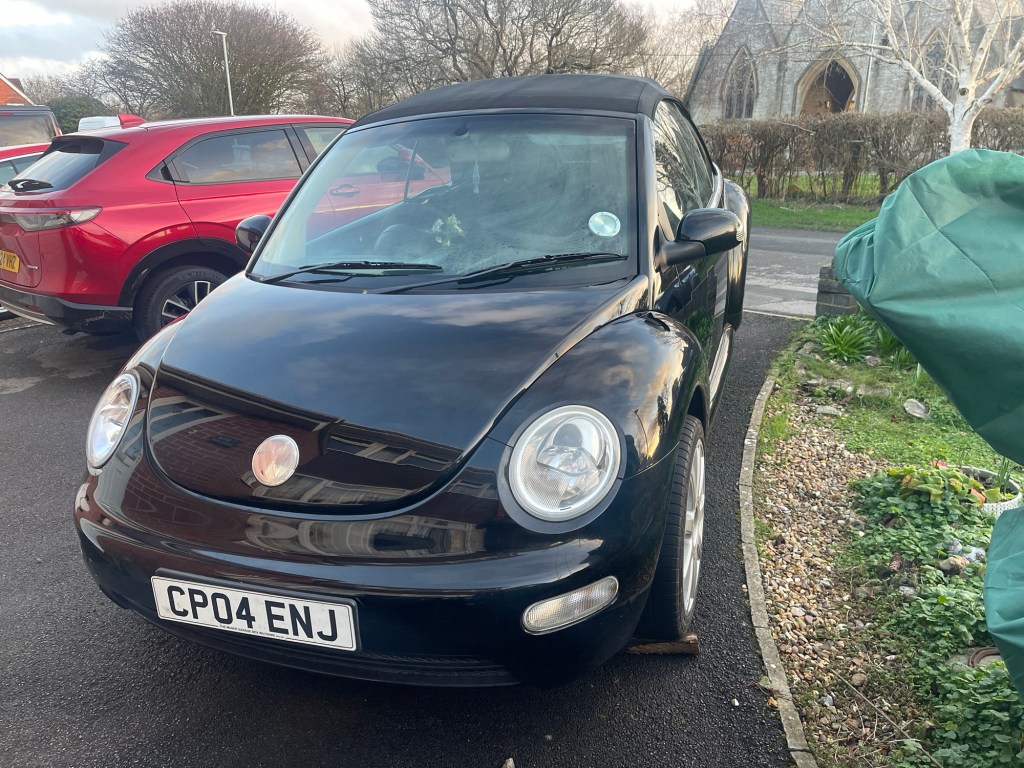
I had literally one hour spare to give the Beetle a quick spritz. Since I’ve been keeping it, I’ve not given the exterior a base clean. With fair weather it was too good an opportunity to pass up.
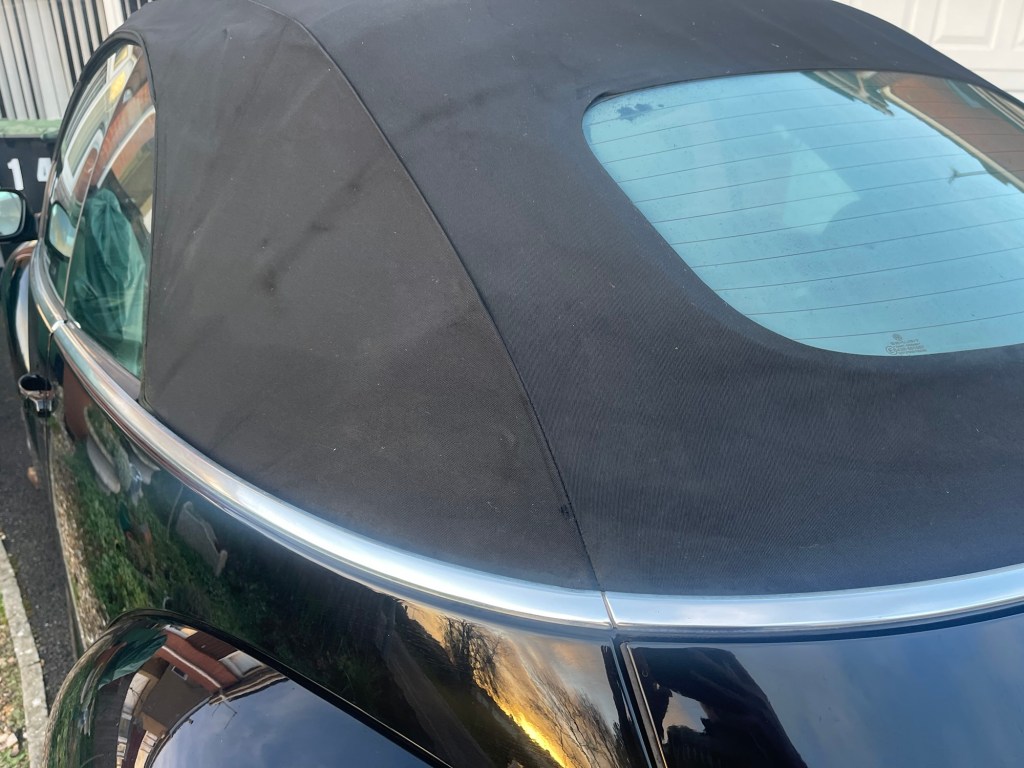
I sprayed the bodywork and the algae on the hood with Demon Clean muck shifter and while that was sitting I got out the Karcher pressure washer and layered some snow foam.
I then gave it all a good rinsing off with the pressure washer which took a while because the suds were so thick, but it did shift the road grime off pretty well.
I towel dried the paintwork and quickly sprayed on some Turtlewax Ceramic polish which goes on damp. I was fairly liberal as I was looking to add some protection rather than obtaining the best finish. It buffed off alright with a bit of smudging, so I moved onto the hood, applying some Autoglym Hood Protector which goes on with a damp sponge. It’s a runny product so not an easy application and it has low coverage so it took a bit of doing but I got a good amount soaked into the damp hood.
So not a bad hour’s work and a degree of protection on some key areas. It does look great when it’s clean like all black cars although there are loads of small corrections to be done over time. For the moment this will have to do while I focus on priorities such as refurbishing the two rear wheels
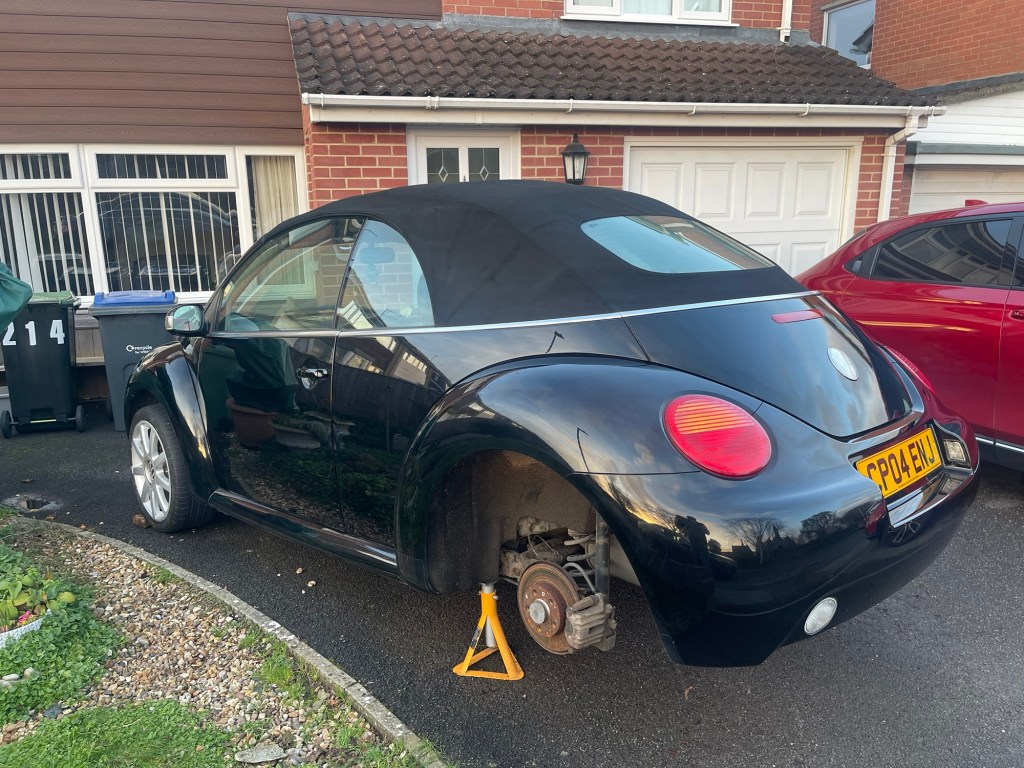

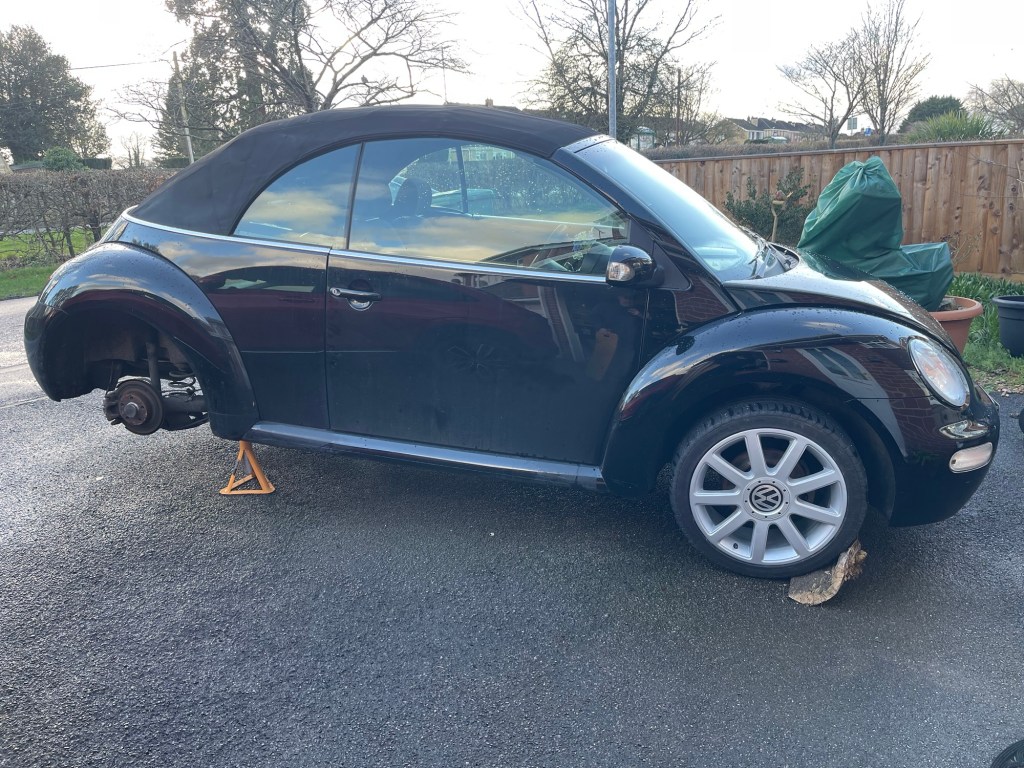
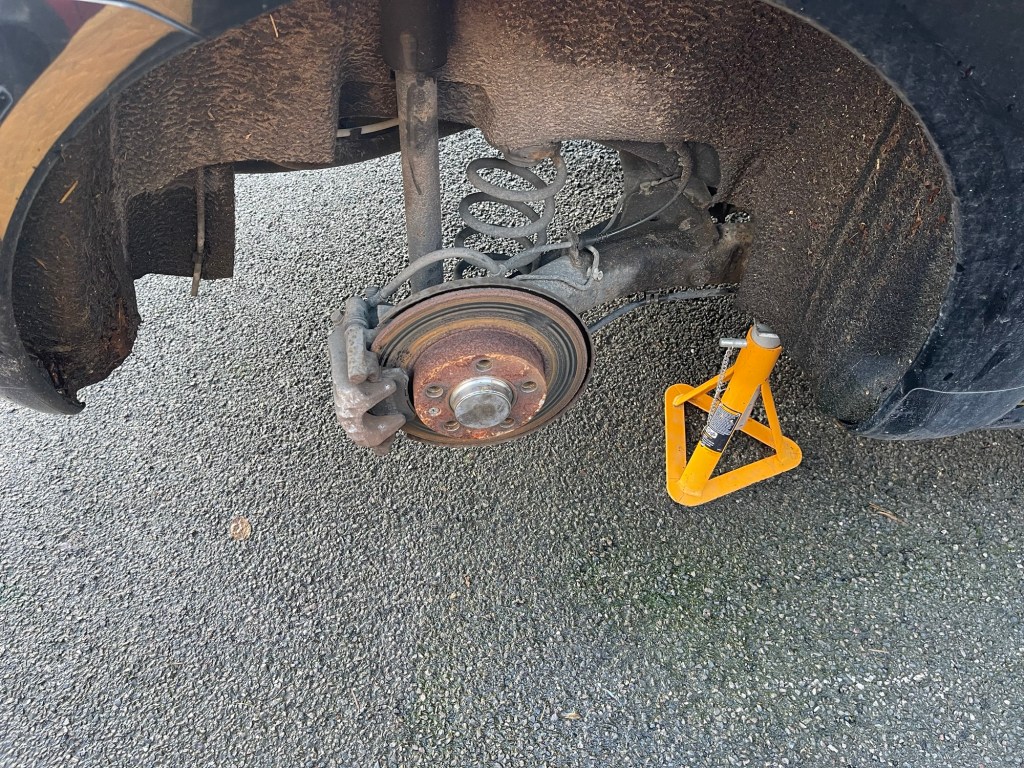
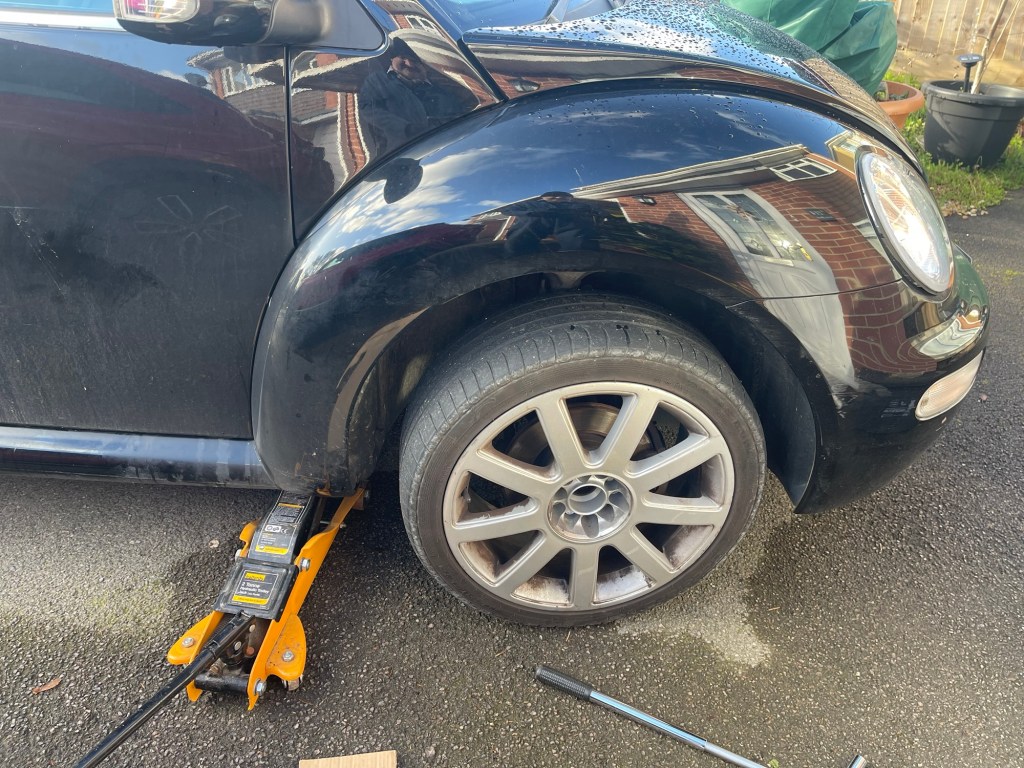
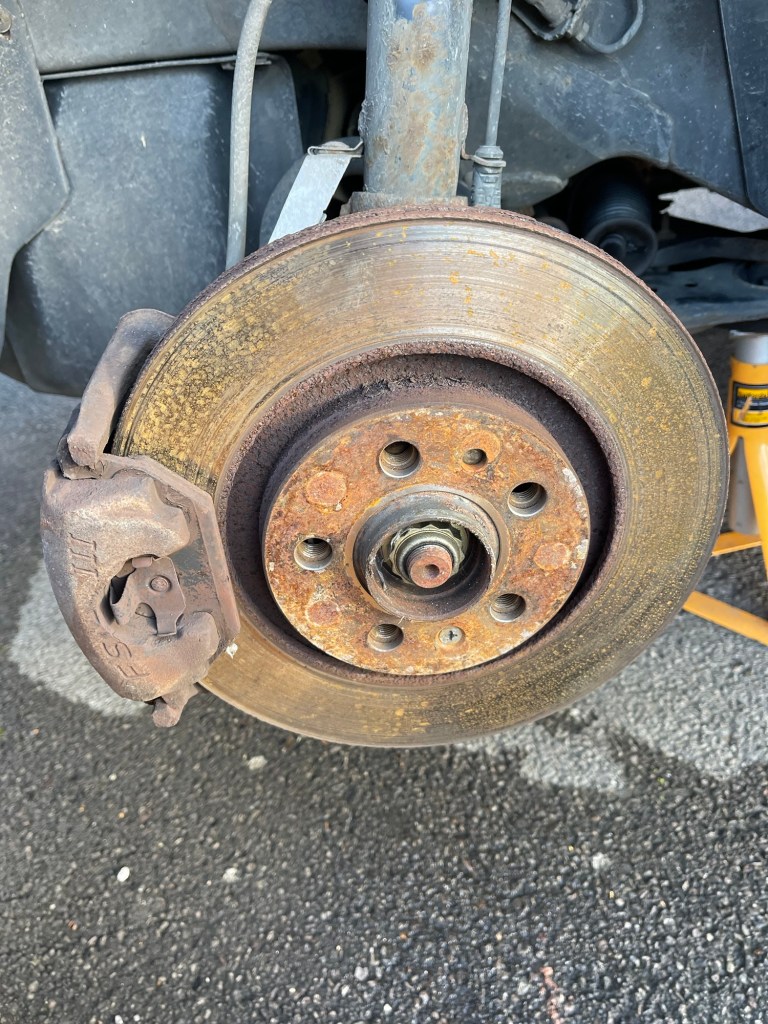
A brief easing of the relentless rain and a spare hour or two gave me the opportunity to pay some attention to the Beetle. First job was to inflate the two front tyres which had been deflated for repainting and torque the studs, duly completed with my trusty torque wrench. There followed a brief test drive around the estate during which nothing fell off.
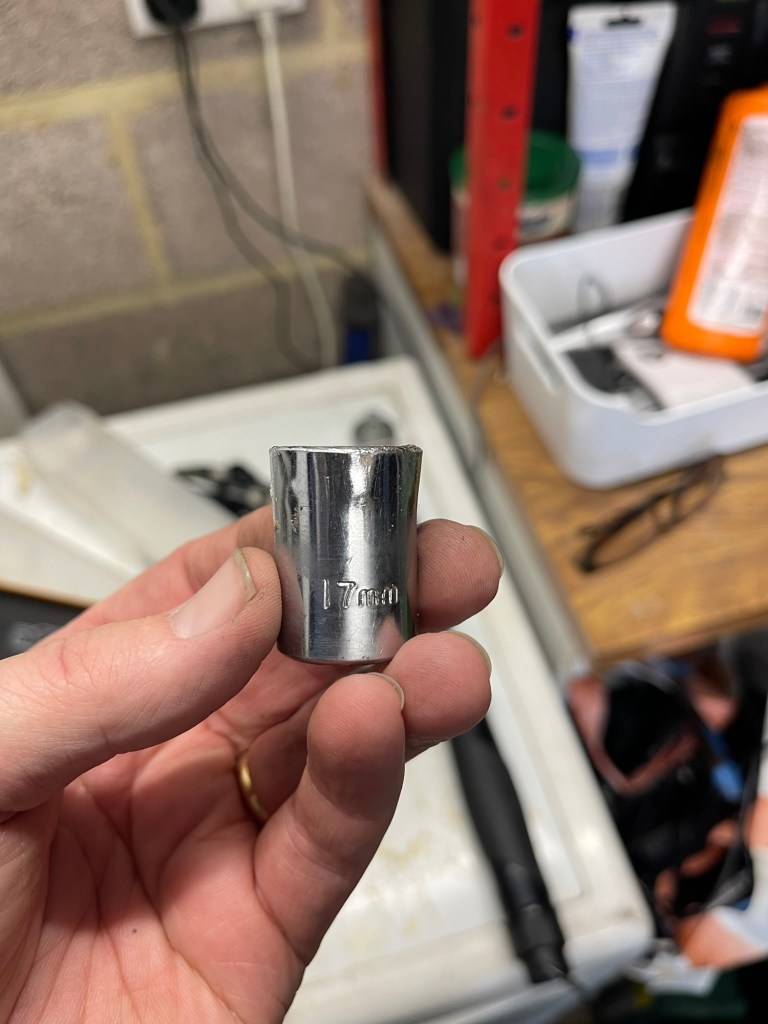
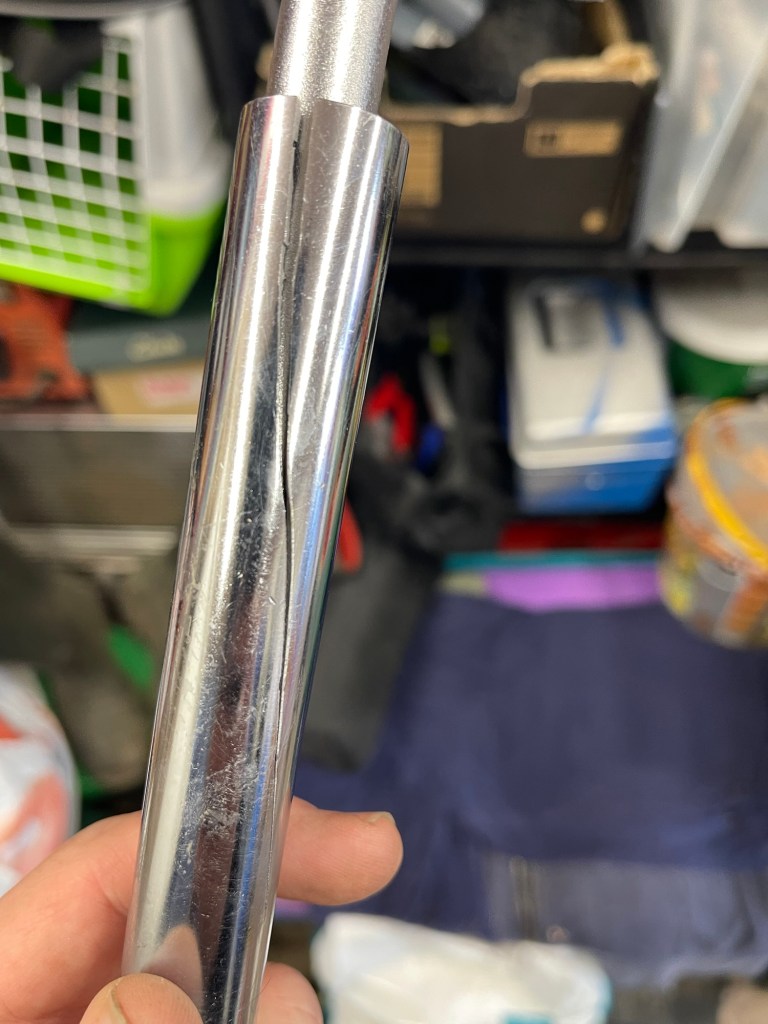
Giddy with excitement I went to loosen the rear wheel studs which had apparently been put on by an ape. Hmmm. I was using my old wheel nut wrench with its useful extension which usually has the upper hand, but after loosening each nut by standing on it (approx 98kg) and breaking the bond with a rifle like crack the poor old wrench was split. Damn. As was my 17mm socket which was pretty stretched. Damn. Fortunately not my best 17mm socket.
Anyway the rear wheels are off and ready to refurbishment in the garage, then I will have a matching set!
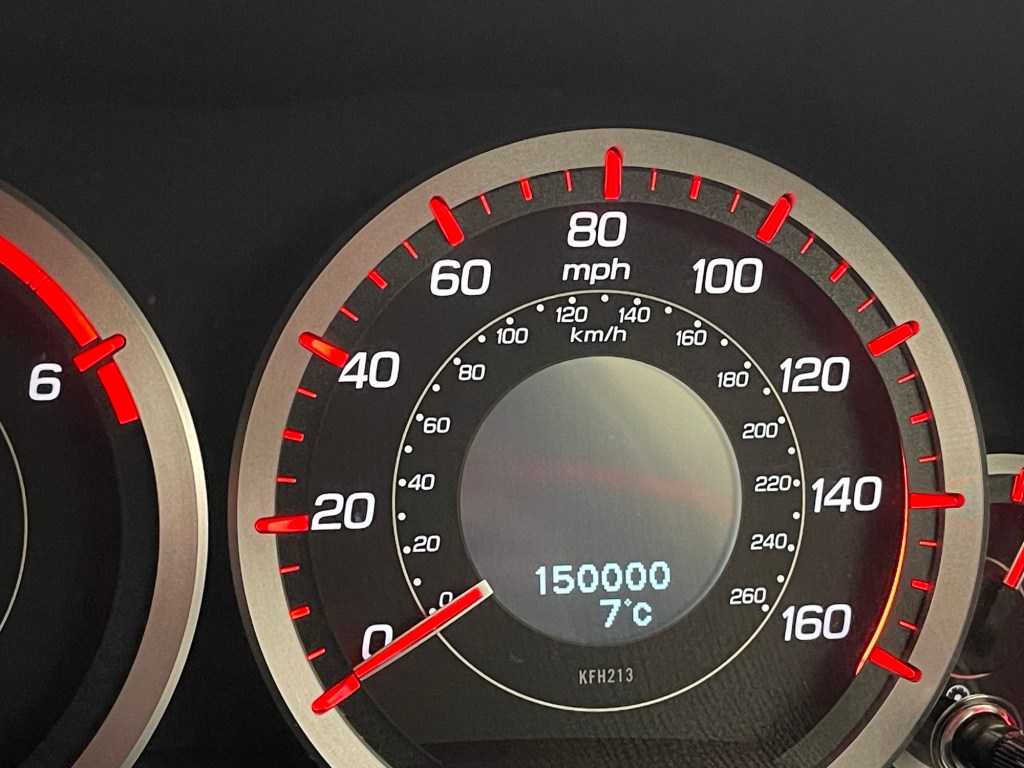
My old Honda Accord 2.2 diesel rolled over its 150,000th mile this week. I had kept my eye on the mileage readout since my last fill up when it was clear it was coming up. As I planned a trip to Cambridge for work I had a rough idea the magic 150k would occur on my return journey.
As the readout ticked to 149995 I turned off the radio and counted it down to 149,999 where I pulled into a lay-by to take a photo. I then drove tentatively along the A4 in Wiltshire with my eye fixed on the mileage. When it finally flickered up at 150,000 I frantically looked for somewhere to pull in. Fortunately there was a long empty pedestrian pavement, an odd feature on a rural A-road but I was able to gently bump up the kerb and make a photographic record.
I’ve had the car for three years (nearly to the month) and have done about 55,000 miles. Average fuel consumption is around 50 mpg. I get services done at my local independent garage and have recently closed up the interval to 10,000 from the factory 12,000 miles.
Wear and tear in this period has included a new battery because it had been stood for a long time when I bought it. new disks and pads front and rear, one rear wheel bearing, wipers and 2 x front pair of tyres and 1 x rear pair. I now have Michelin Cross Climate 2 tyres all round and they are excellent. The rear pair did 15,000 miles on the front first before being swapped to the rear.
Failures are limited to a seized brake calliper which was patched up by Green Flag and got me home (arguably wear and tear) and a non- start which was caused by a loose battery terminal.
So a reliable motor and apparently (according to other posts on Facebook) is good for another 100,000.
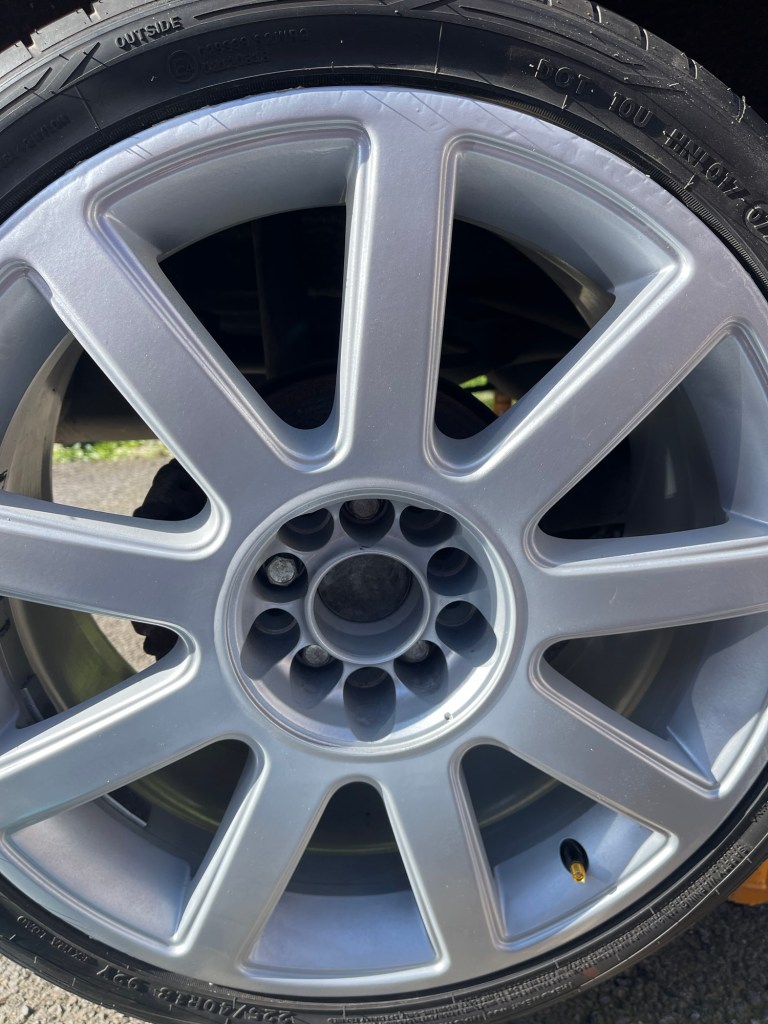
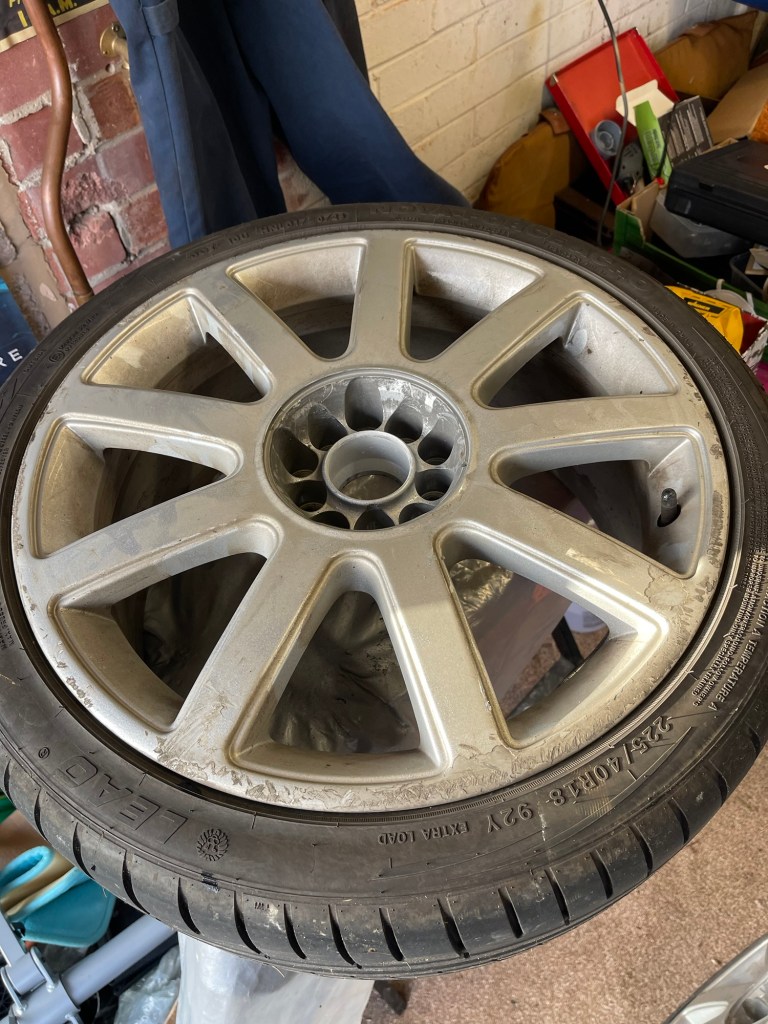
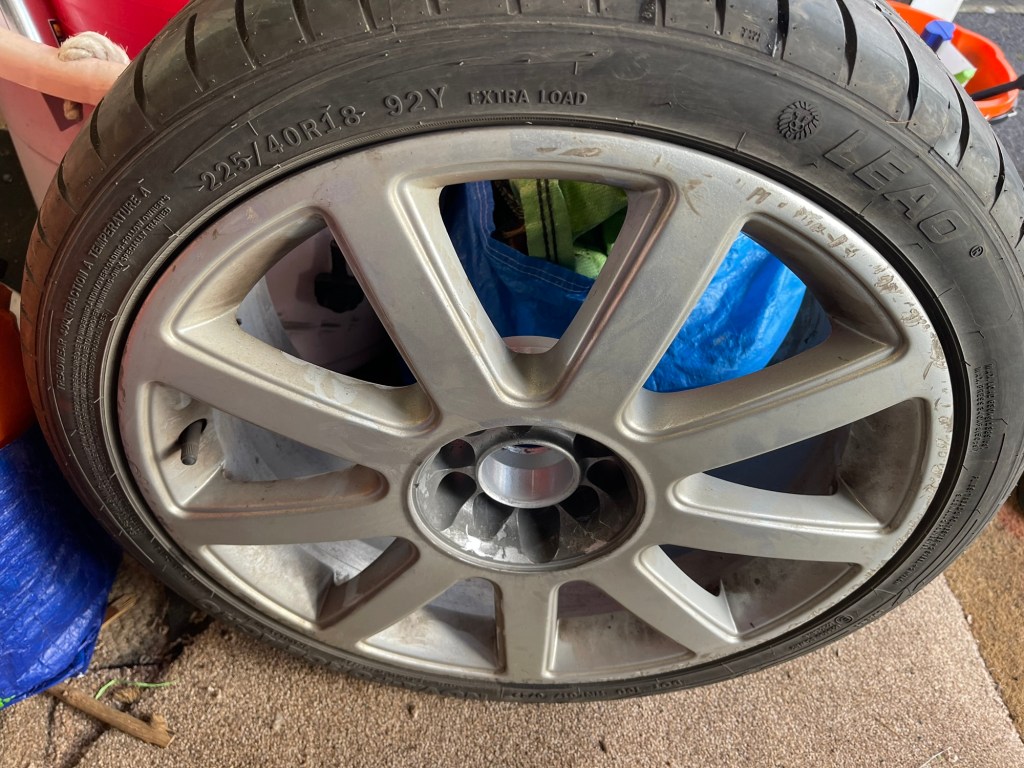
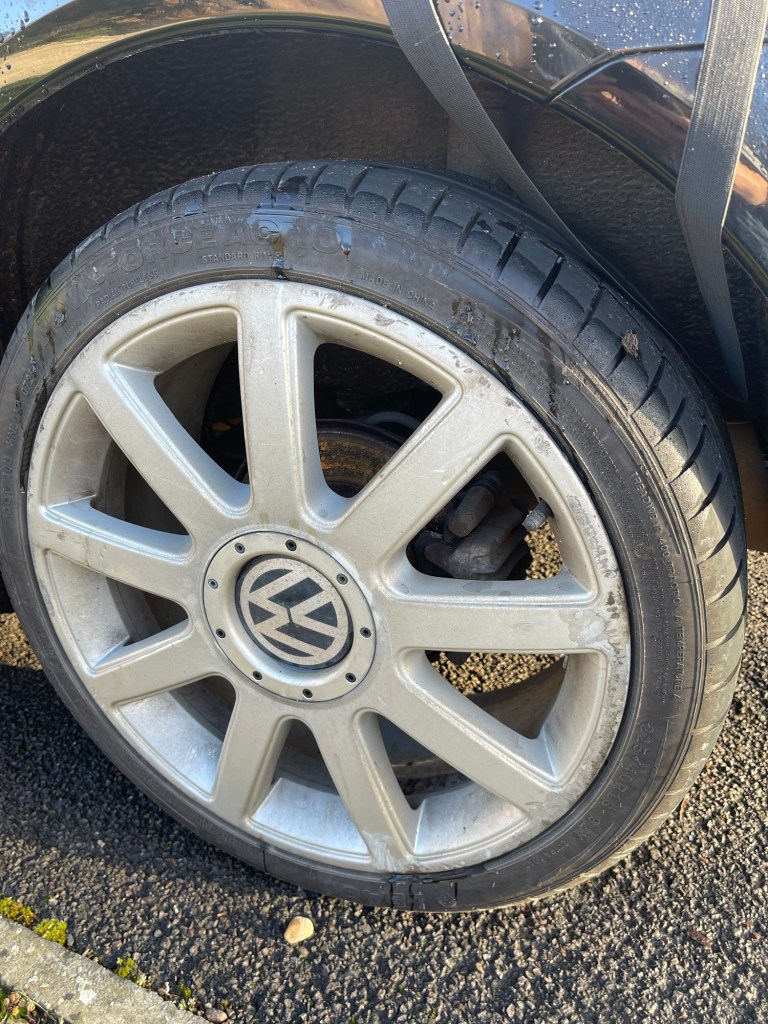
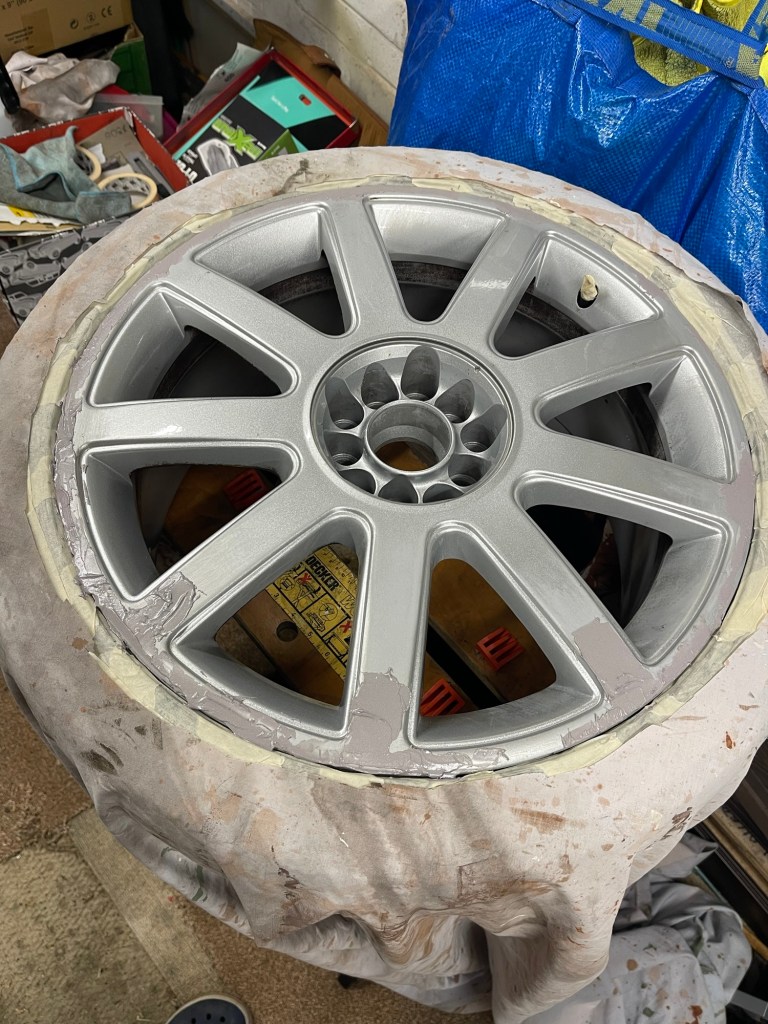
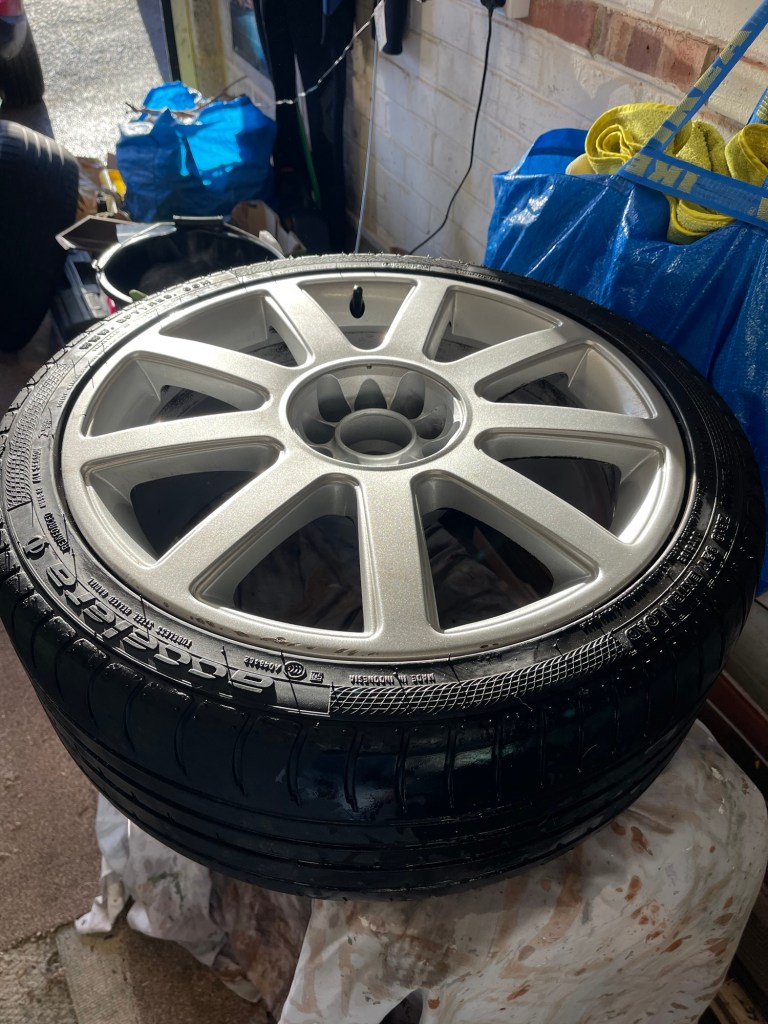
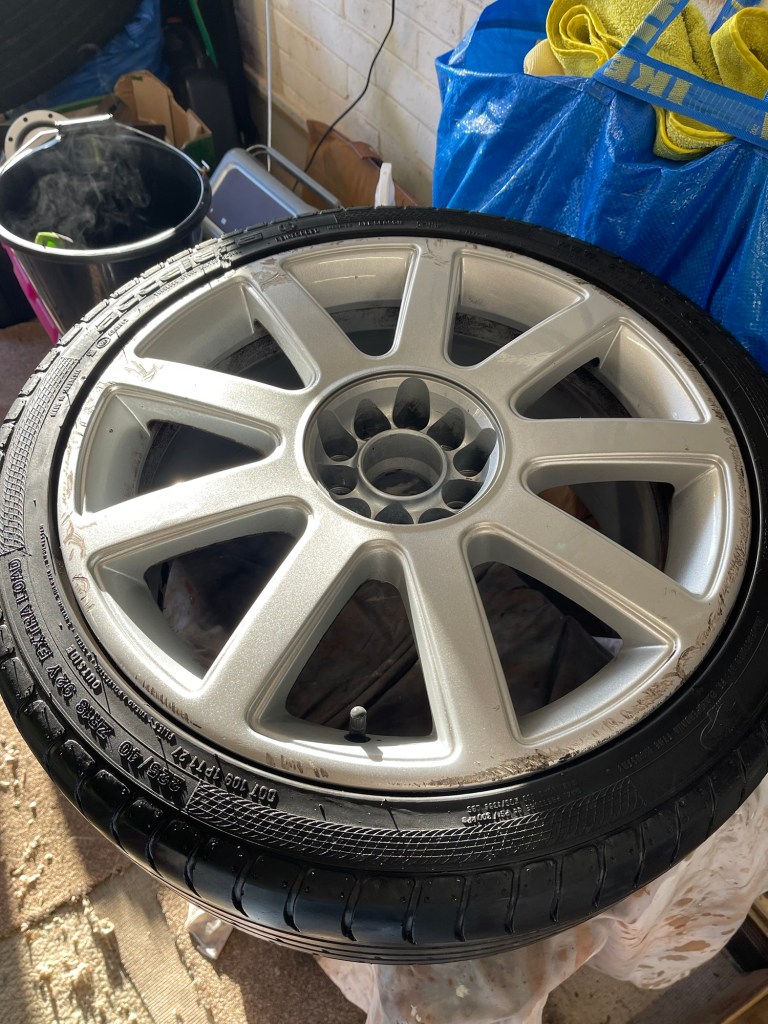
Here’s a record of my first experience of refurbishing an alloy wheel. The alloys on Lou’s VW Beetle were pretty beaten up, despite having been professionally refurbished three years ago. A combination of factors – a low profile (40 section) tyre and difficult visibility of the car’s extremities meant that they had extensive scuffs. There are lots of companies offering wheel refurbishment (I have had previous cars done in this way) but something made me want to have a go at these wheels myself and see what sort of standard could be achieved using hand tools and spray cans.
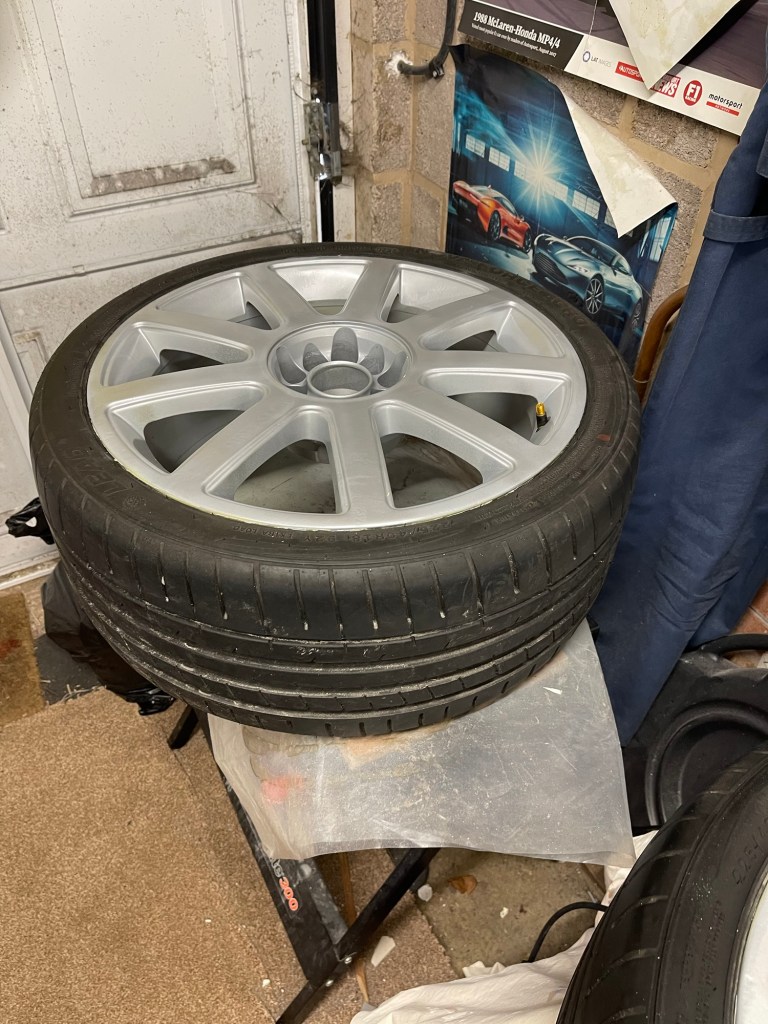
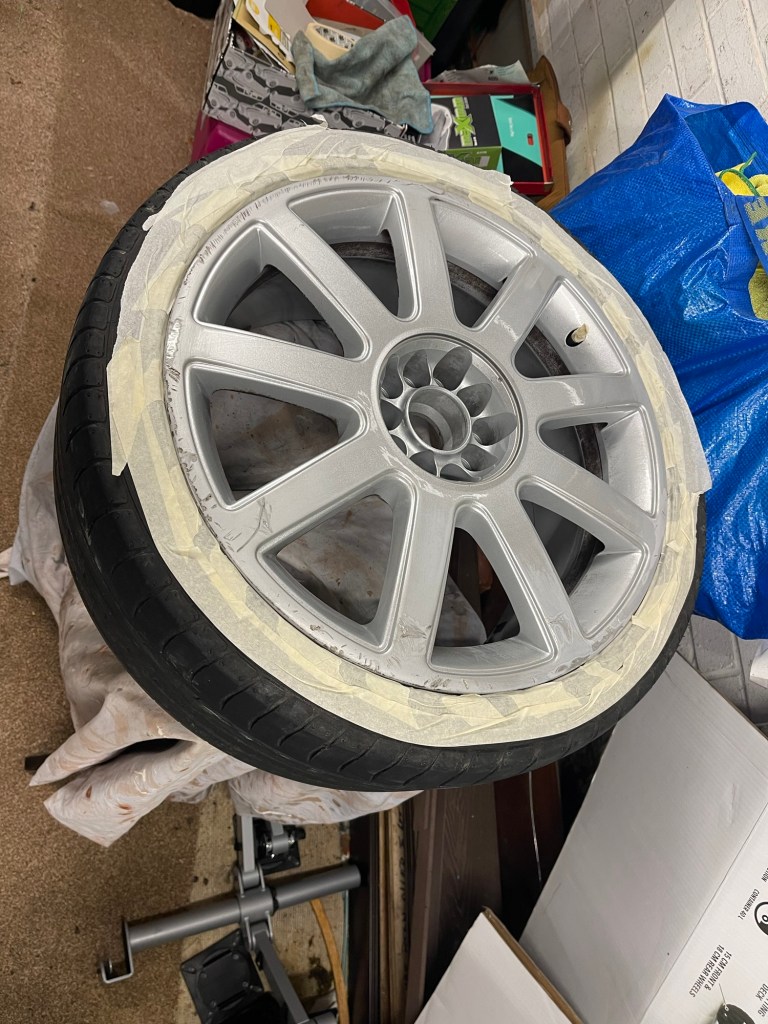
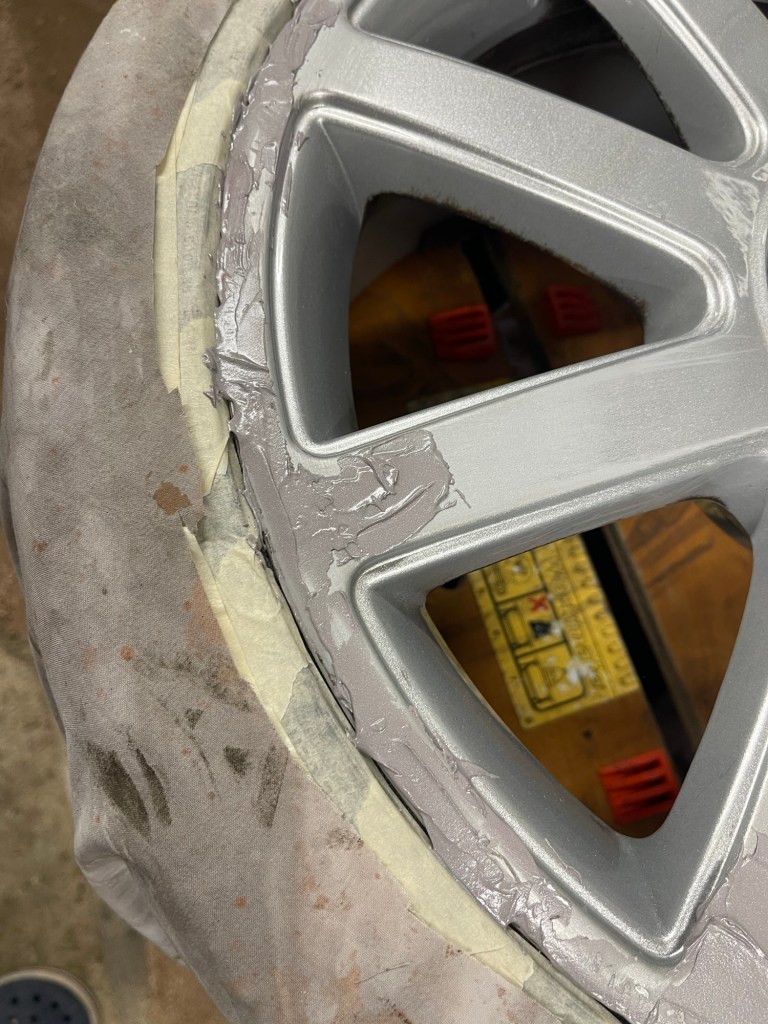
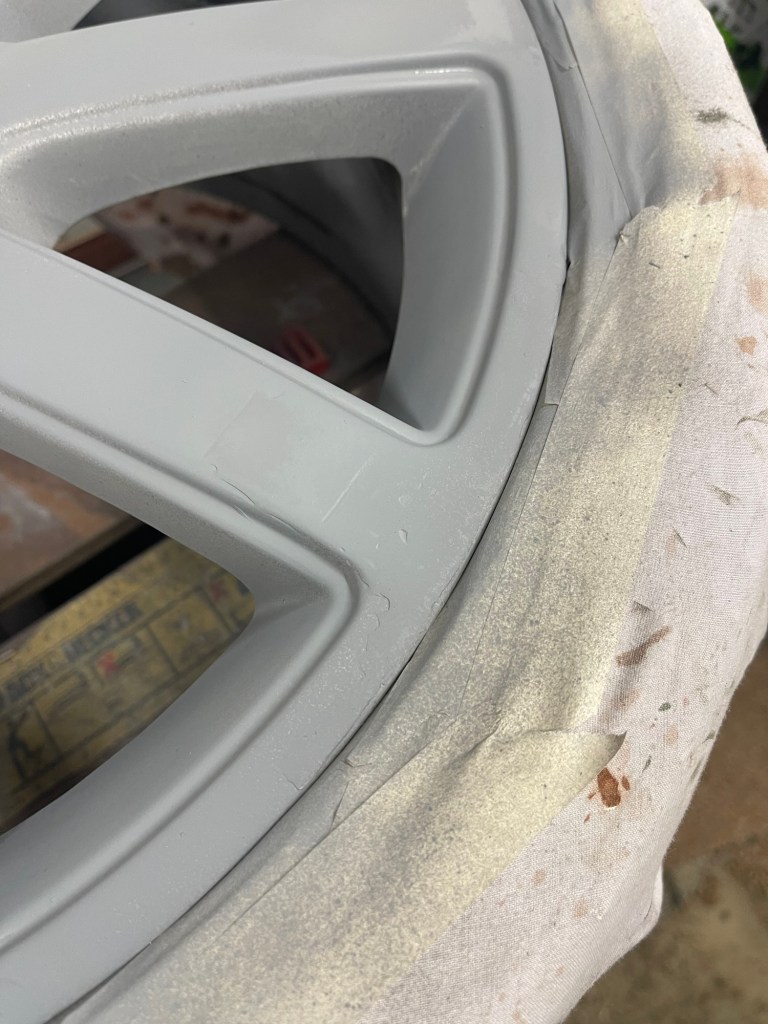
The photographs below first show the wheel in-situ. The rim is scuffed as well as some of the spokes so the initial rubbing down had to be quite extensive, although it was interesting how thin the previous finish was and I wondered how good a job that had been. I masked off the tyre with tape and then covered the rest with an old bed sheet with a round hole cut out of it. I mounted the wheel on a black and decker workmate so it was a good height to work on.
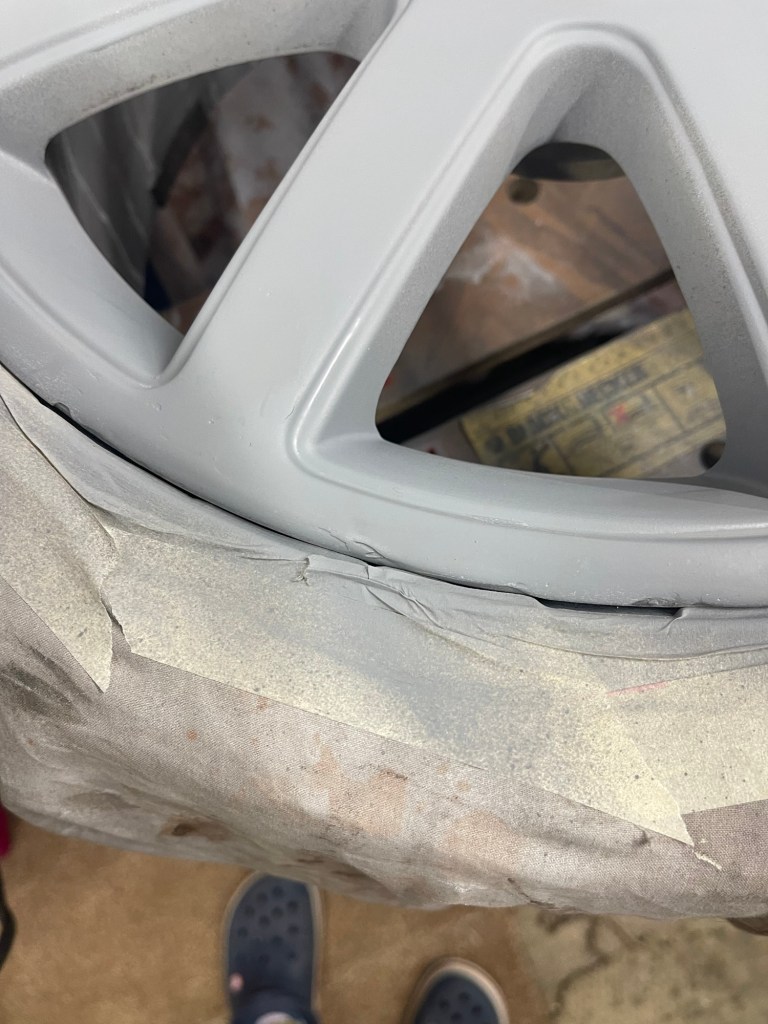
I used some alloy wheel filler to fill in the deeper scuffs and then used grades of sandpaper to rub them smooth. This was the most time consuming part of the exercise as the filler cures extremely hard – there is a careful balance to strike between rubbing the filler down to nothing with course paper and seemingly having no effect with the finer stuff. This is really not my forte and I regretted those areas where ‘put plenty in’ had been my approach, creating me a lot of avoidable work. Further, it is very hard to accurately replicate the profile of the alloy wheel which has subtle curves and radiuses. Also, I had decided to keep the tyre in place and just deflate it and this caused a problem trying to get a good edge to the rim. For a wheel in bad condition I think it would be better to remove the tyre.
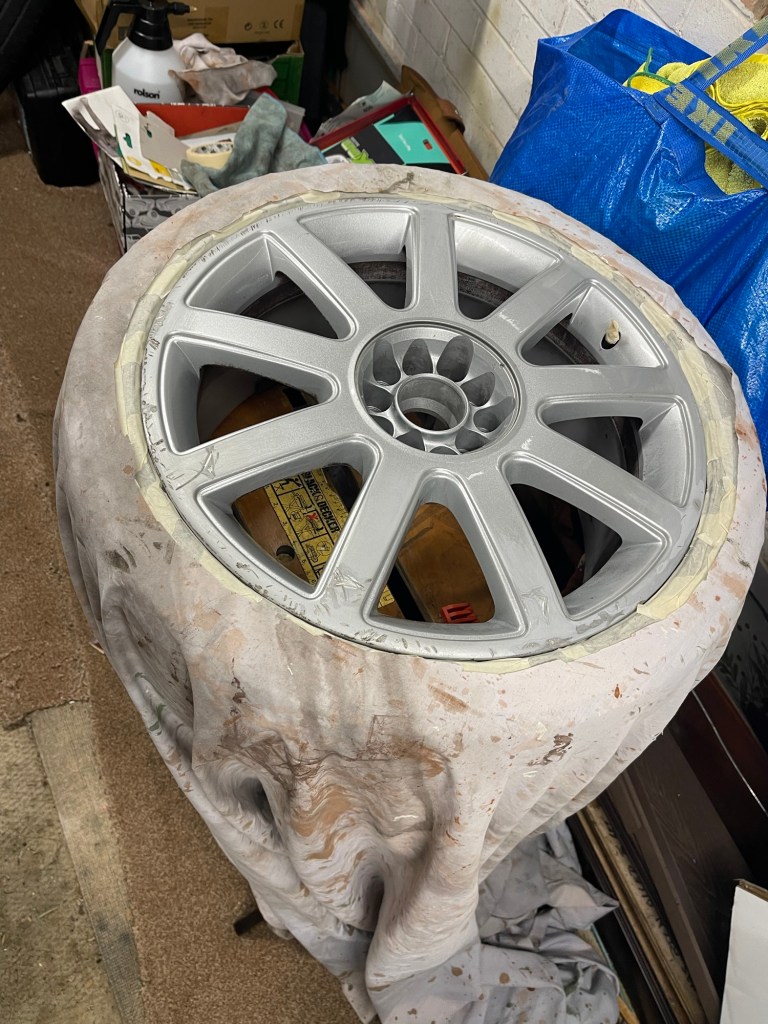
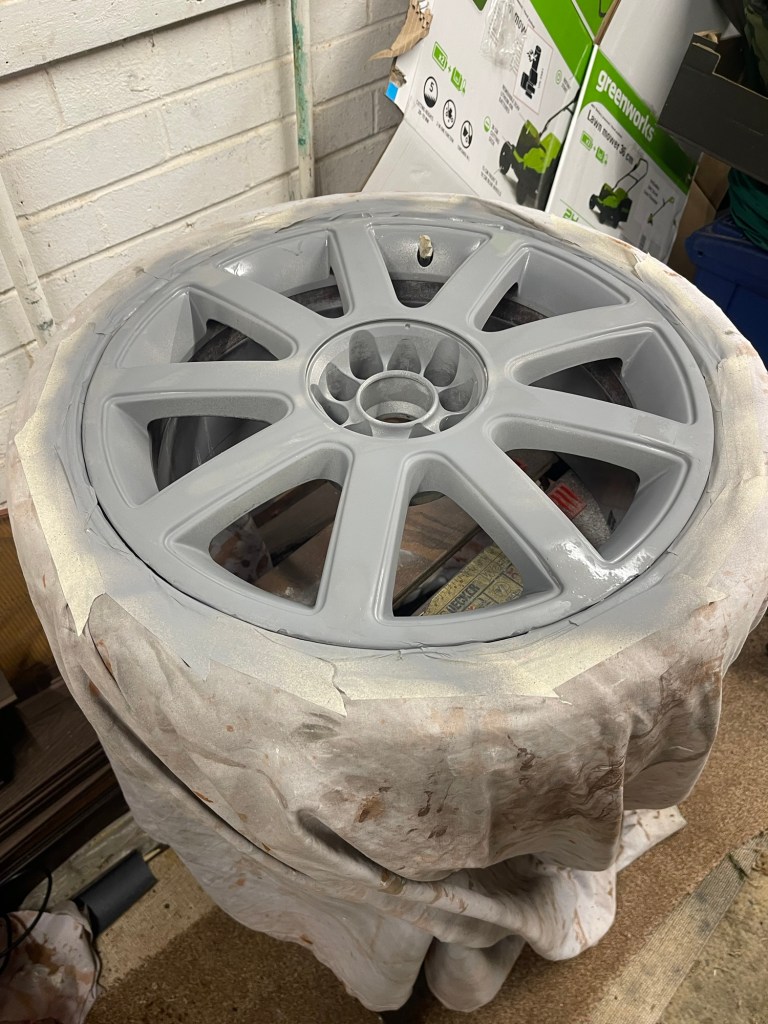
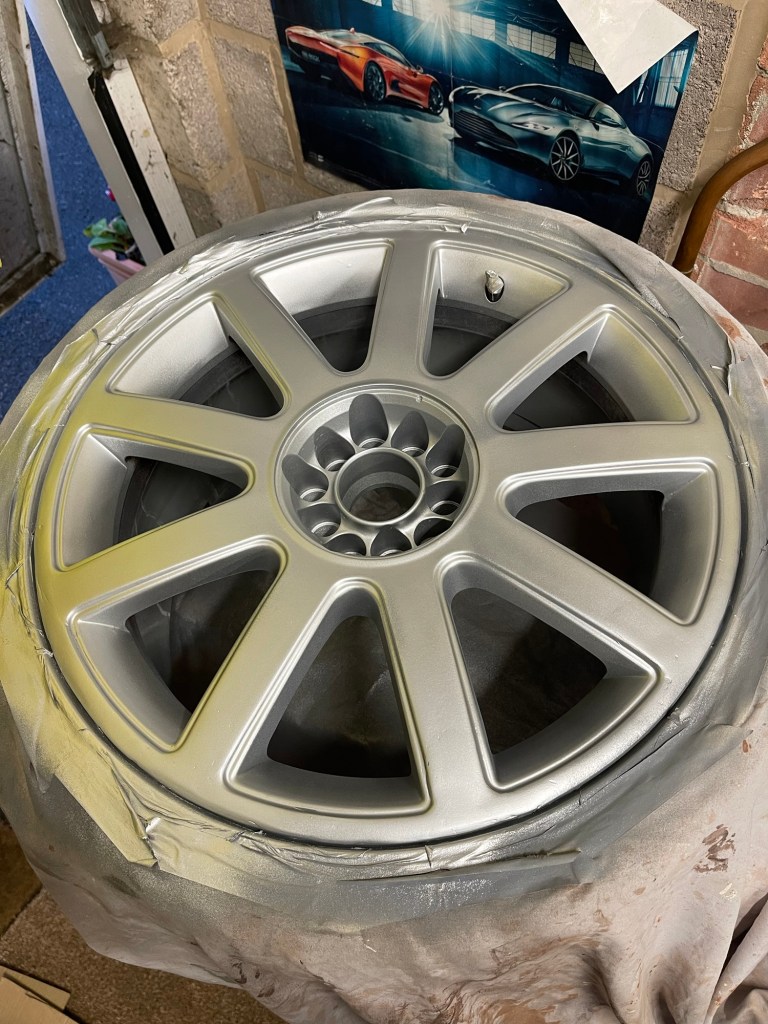
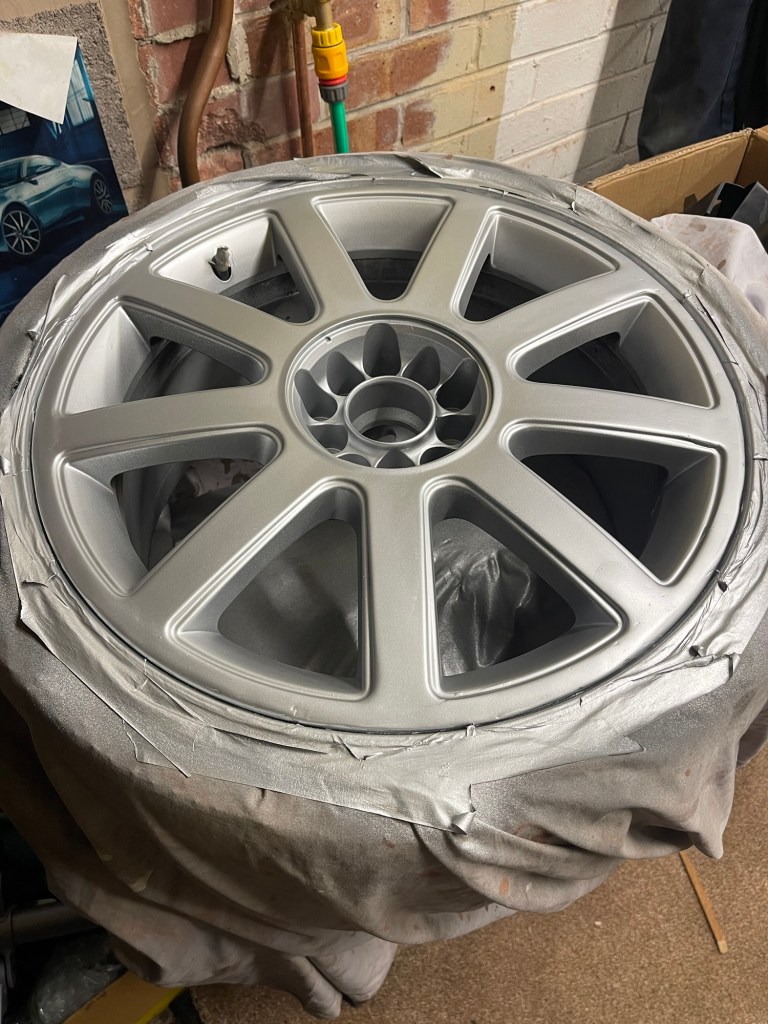
After several evenings sanding the filler I got to the point of just wanting to get some paint on it. I applied about four coats each of primer, colour and lacquer. I used a heat gun to gently warm the wheel as the ambient temperature in the garage was in single figures and after each coat I used the gun again to encourage the drying process. I was reasonably happy with the overall result which is less sparkly metallic than the professional finish from a paint gun, but not bad from a rattle can.
I wonder now whether I should have started with the ‘best’ wheel and aimed to improve technique as I move through the set, but I chose the worst instead. The next wheel I have lined up is a partial respray so I will need to learn how to blend the new with the old or just commit to a complete respray. Watch this space…
Wish me luck!

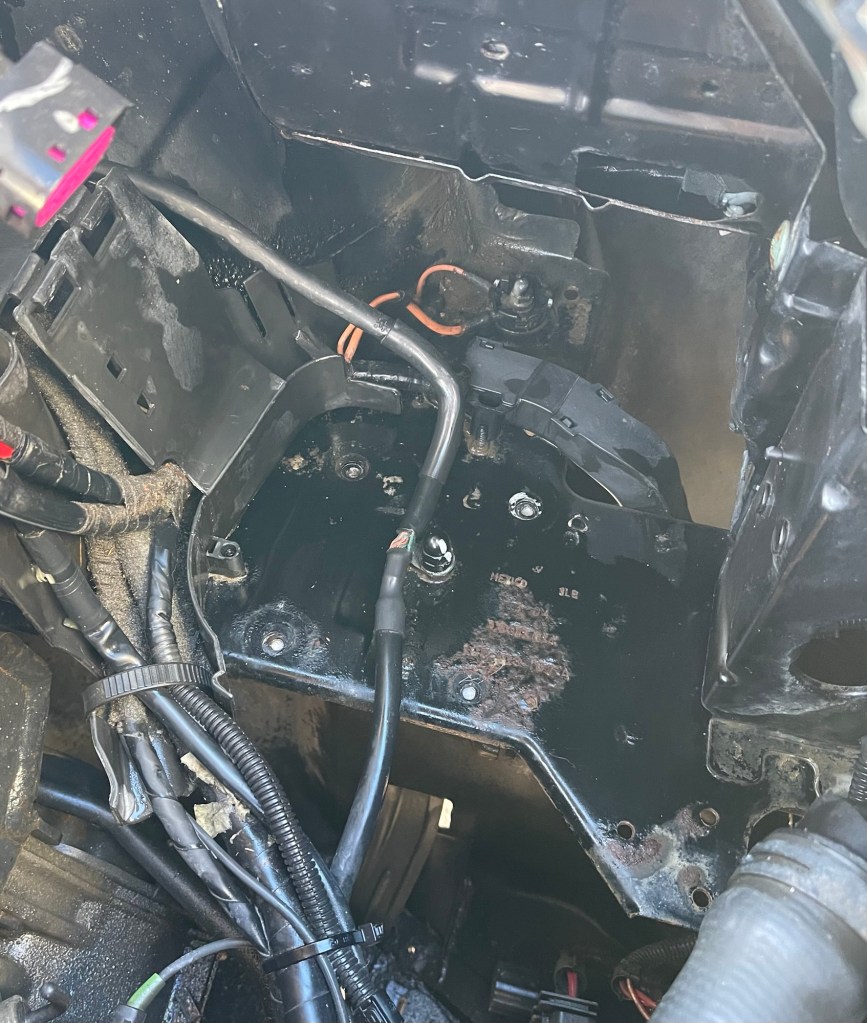
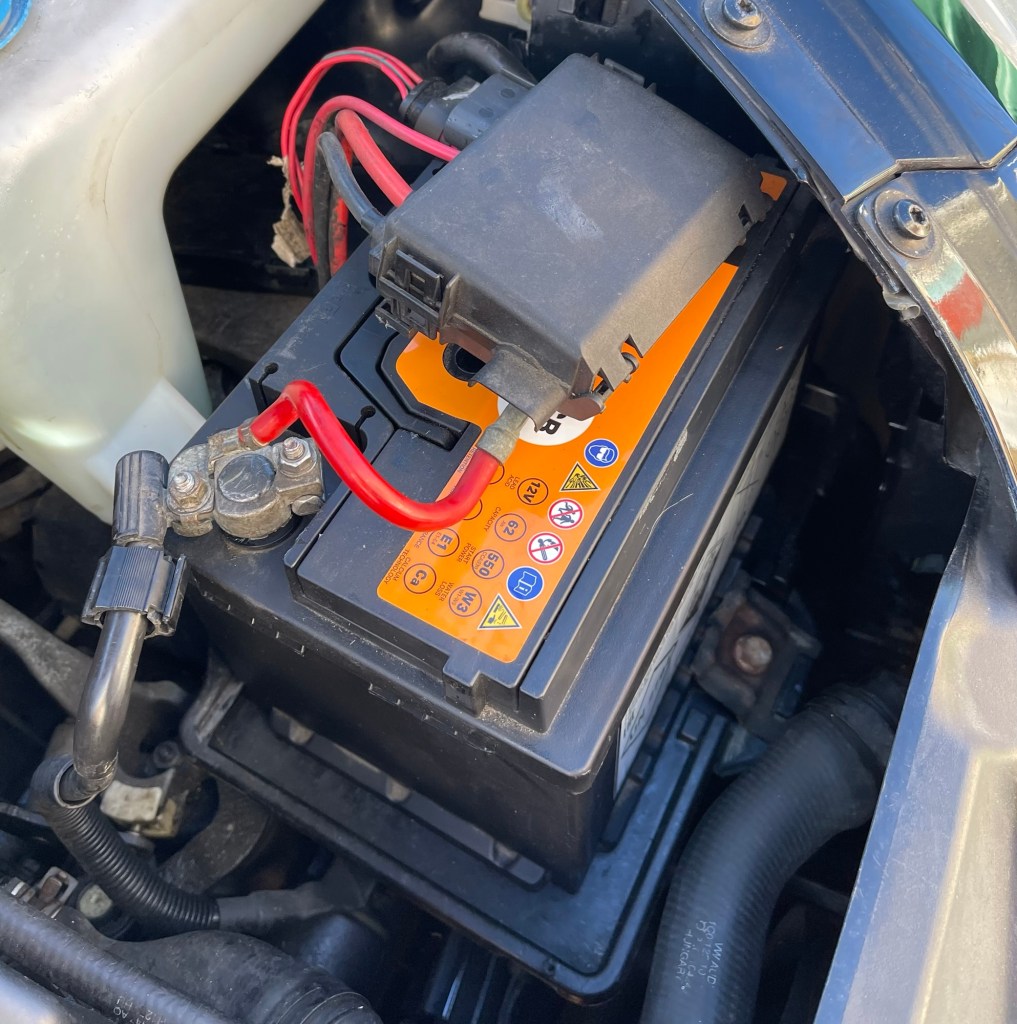
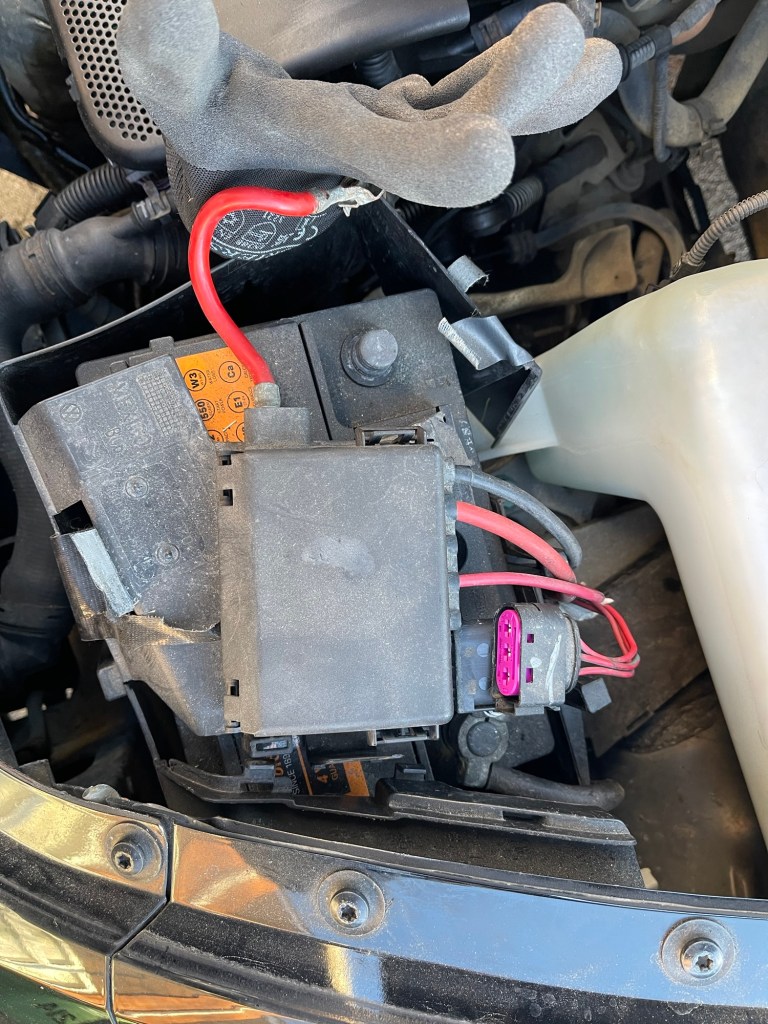
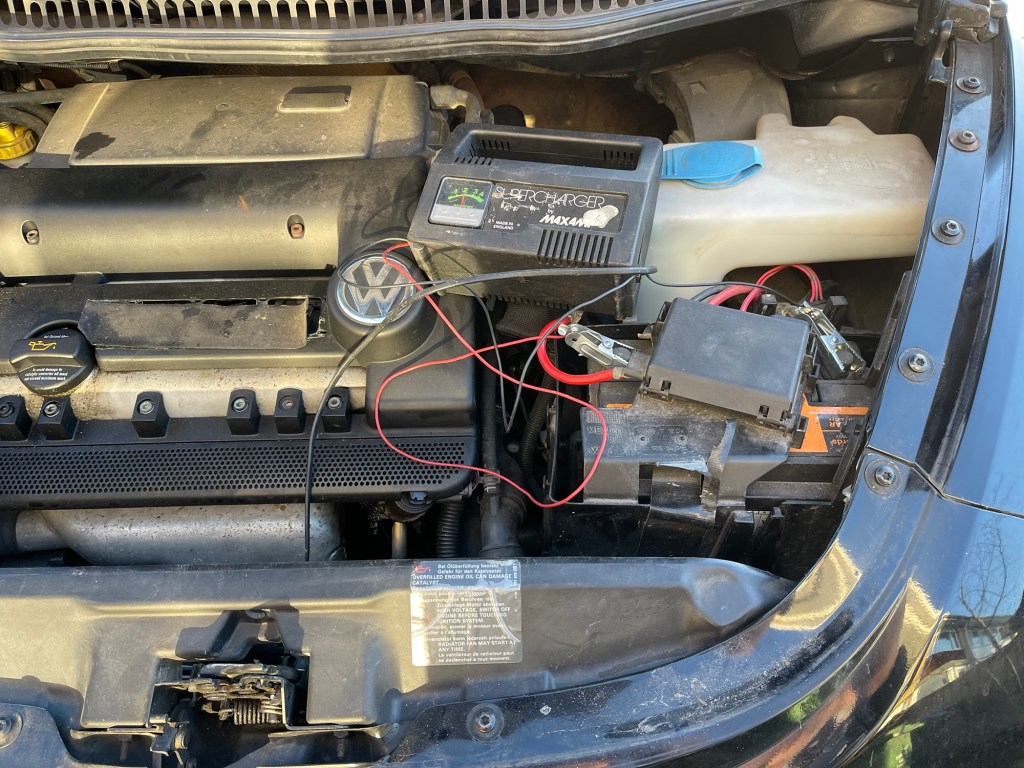
I had put the flat battery on to charge for a few hours and had tested it at 12v so I chose to clean up the battery tray while the battery was out.
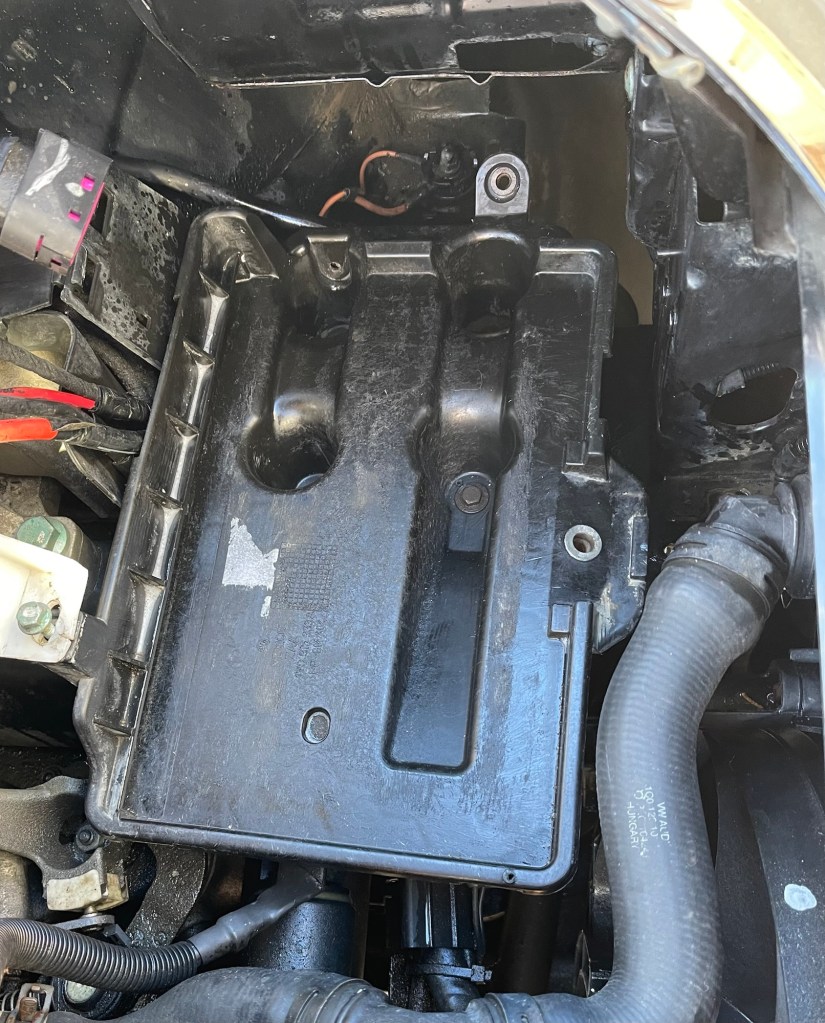
The battery box splintered on removal. I wasn’t that careful to be honest as it was already held together with gaffer tape and was brittle with age. However the tray (also plastic) was in good shape, although grubby. I removed it (four screws, one bolt ed bracket), and gave it a thorough wash before treating it liberally with plastic cleaner.
I used some Dirt Devil Muck Shifter to clean up the area under the battery tray, rinsed it, wiped it and sprayed it with WD40, then refitted the tray and battery. I wiped the battery over first and applied grease to the terminals.
The battery looks perfectly alright without the box am the cleaned up area looks much better. Unfortunately the remote control is still not working which was the whole idea of recharging the battery so I am still loving manually.
Think I will need to replace the remote battery or look up how to repeat the pairing process.


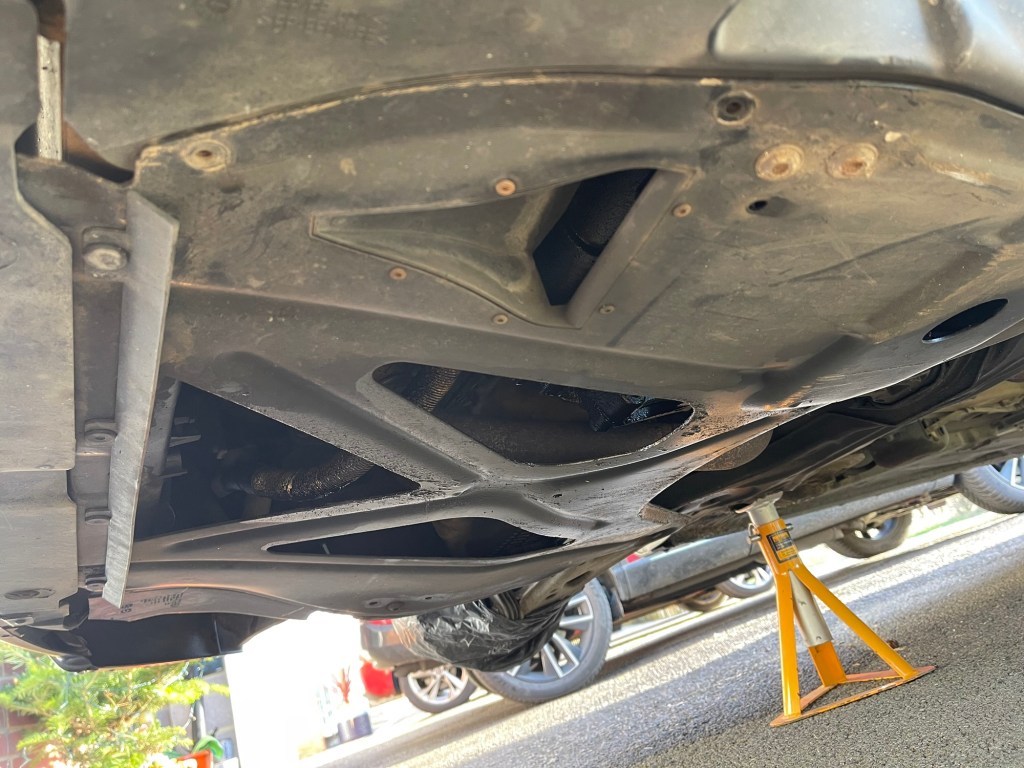
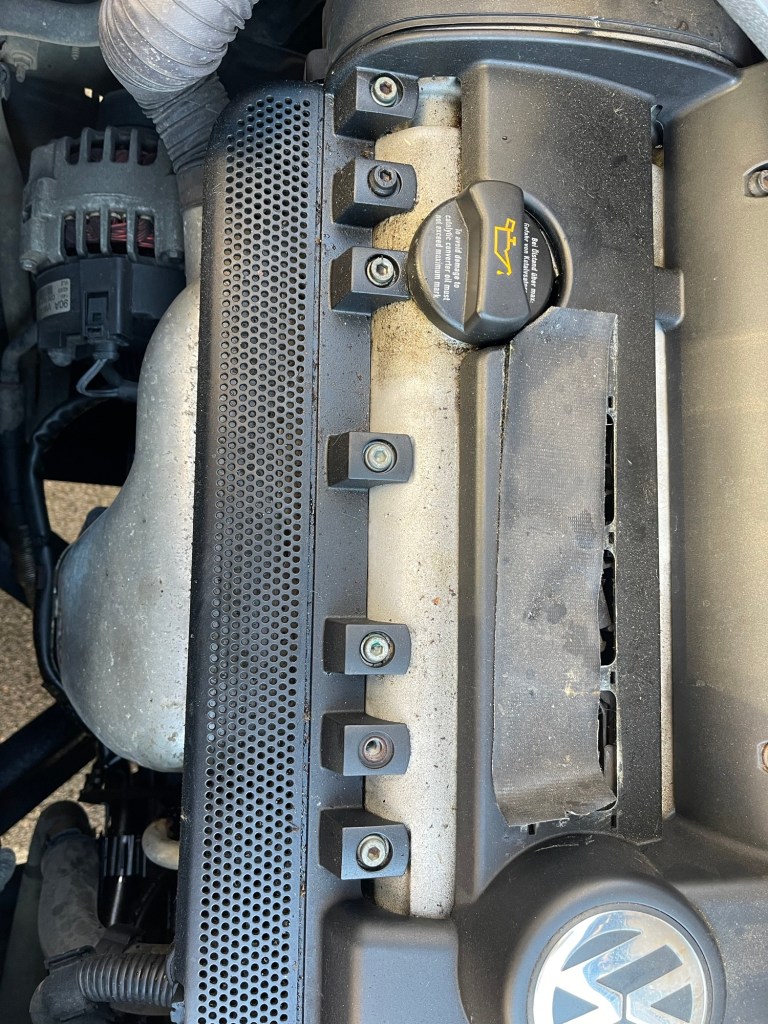
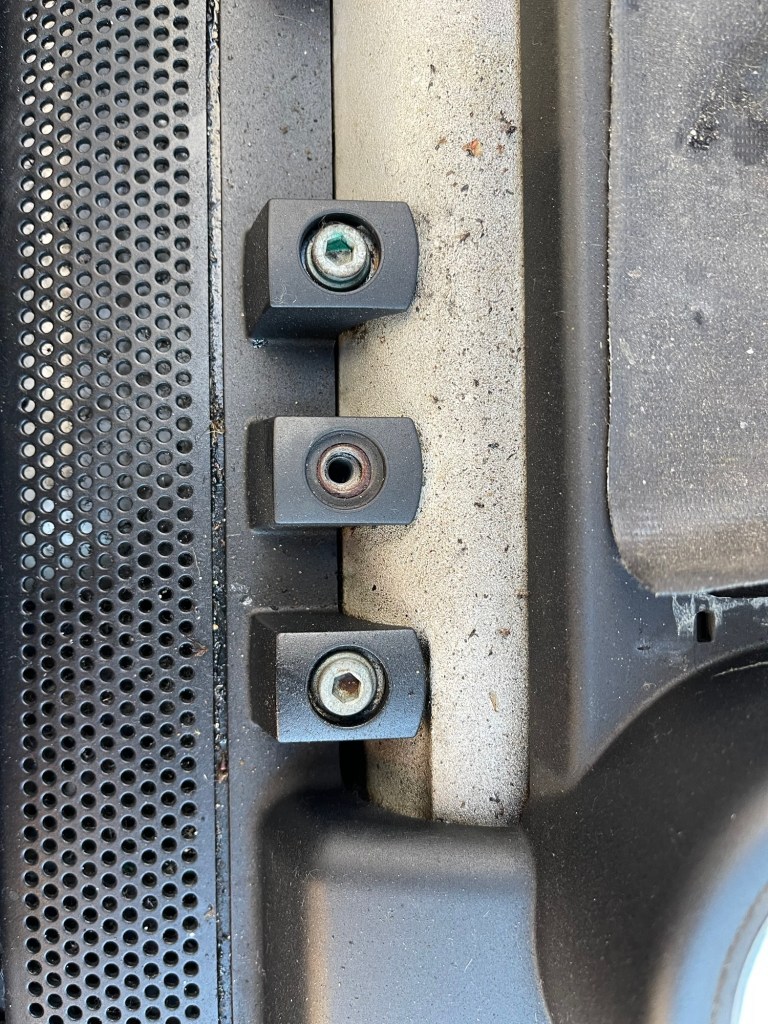
Under the car I tried and failed to remove the engine tray. On the face of it, a simple job. There are four large bolts and 9 small Torx screws. Two of the large bolts came out nice and easy. The other two at the back just spun around. An internet tip showed how you could grip the shank with long nosed pliers but this didn’t work for me. Four of the Torx screws came out easily but the remaining ones wouldn’t budge at all, they were rock solid. As I attempted to turn each one there was that unmistakable ‘give’ of a rusty screw head rounding off. Damn! I squirted some WD40 but I’m going to have to use every trick in the book to get these off, including freeze spray which was effective on the MG.

Engine – investigate oil leak, investigate coolant loss, sort out battery box, replace missing engine cover bolt, check timing belt condition
Paintwork – wash, clay bar, polish, repair paint chip on drivers A-post, repaint n/s sills in crackle finish
Hood – clean and treat, repair stitching, re-fix head lining to rear window
Badges – replace front and rear
Wheels – rub down and re-paint
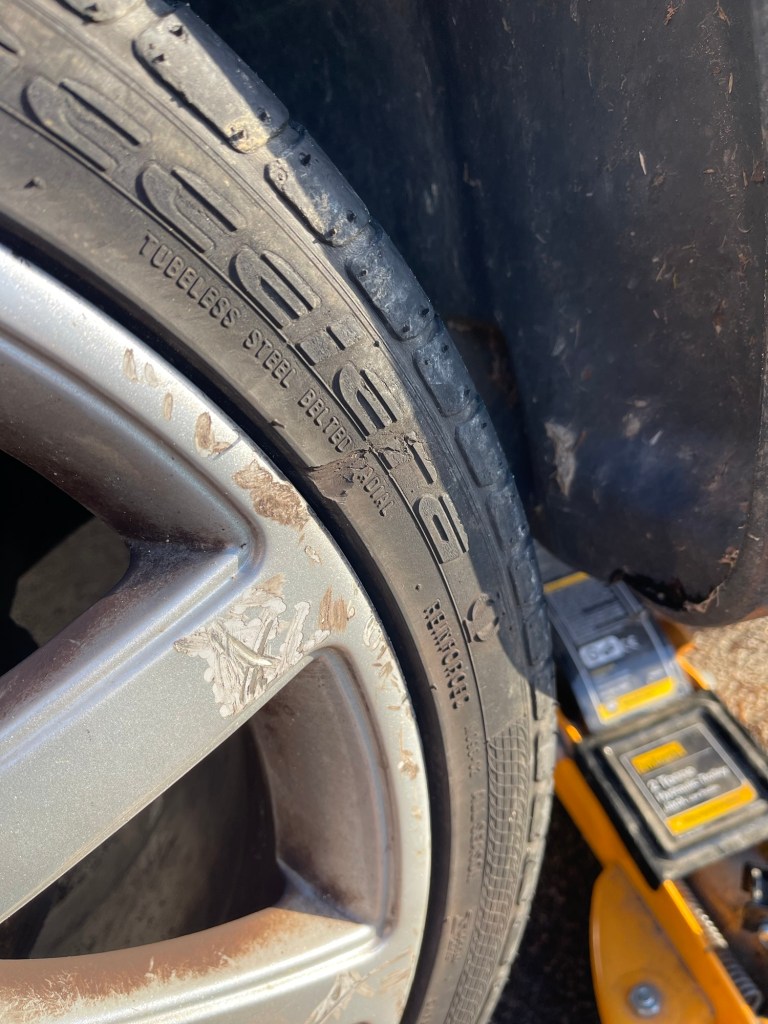
Tyres – replace any that are worn or damaged. One has a gouge in the sidewall.
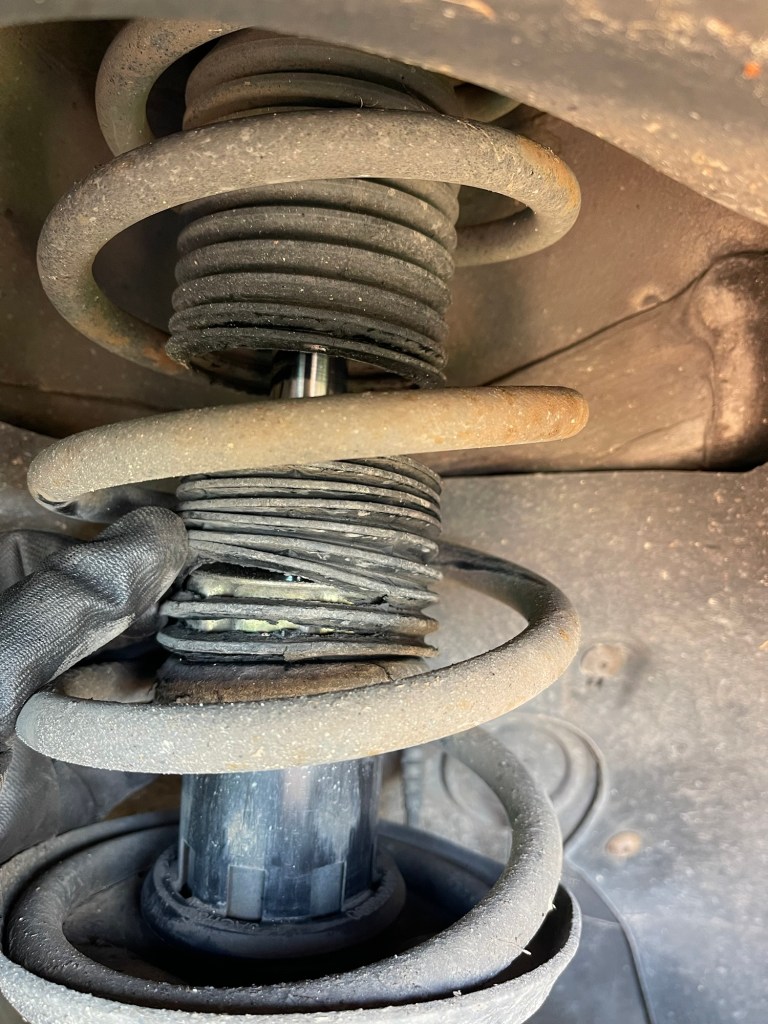
Suspension – replace suspension gaiter on both front mounts
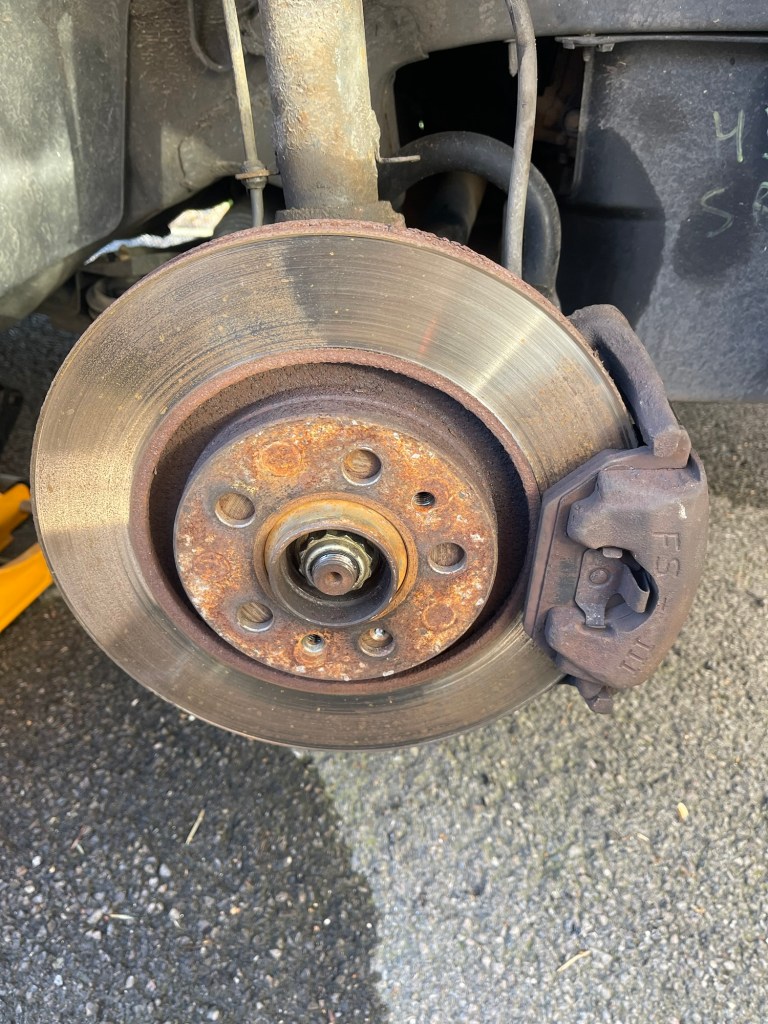
Brakes – replace front disks due to corrosion, replace missing retaining screws
Interior – clean down
Heater – strip out to resolve only one face vent working
Remove front seats and check for any fault in air bag wiring
Under bonnet needs a good clean


Tucked around the back of the Pistonhead’s Annual Service event was a beautiful example of the most understated Ferrari, the exquisite 365 GTC/4. I got to know of this model in a copy of Sportscar and Classic magazine where the writer waxed lyrical of this often overlooked Ferrari via a road test in Wales.
This real life example was no disappointment, the perfect bodywork was painted a subtle maroon and the trim was in black (or should I say Nero…). The styling is extremely neat, the front end a little generic, leads to a long bonnet and an airy glasshouse with thin pillars possible in the period before crash testing got to define critical dimensions. The roof slopes down to a neat booted tail with triple tail lights and quad exhausts as befits the marque.
I wasn’t lucky enough to hear it start up but will remind myself that under the elegant bonnet is an aristocratic V12 with four cams fed by carburettors which would have made an incredibly evocative sound as it burbled up the road.
Someone is very lucky indeed.


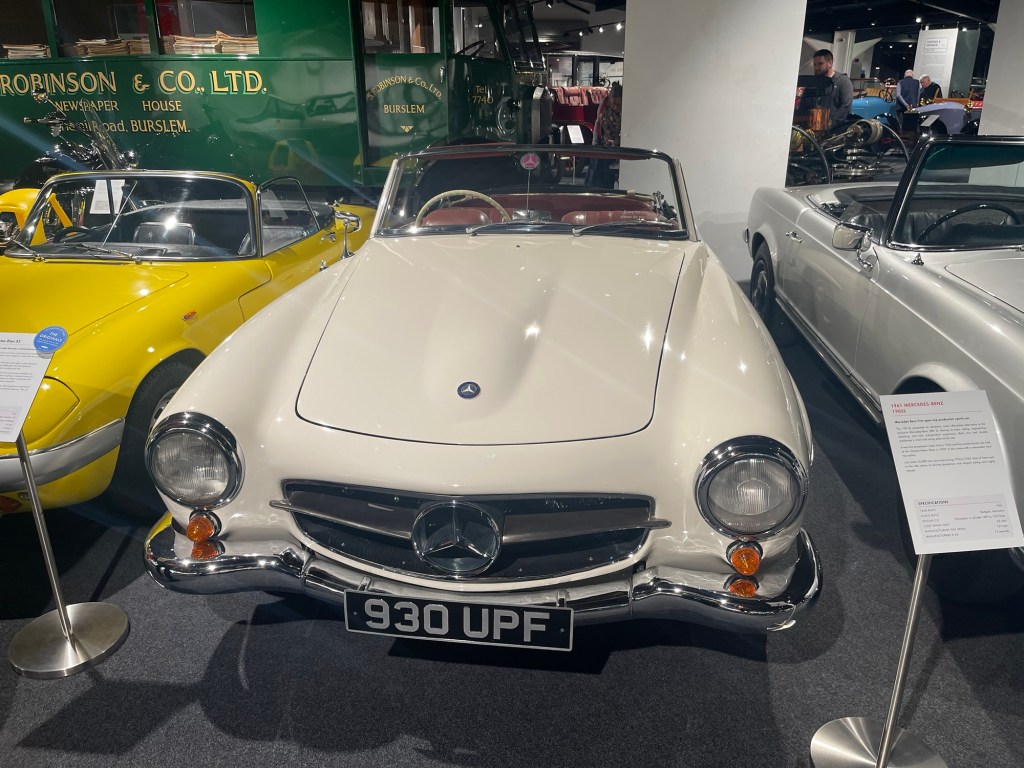
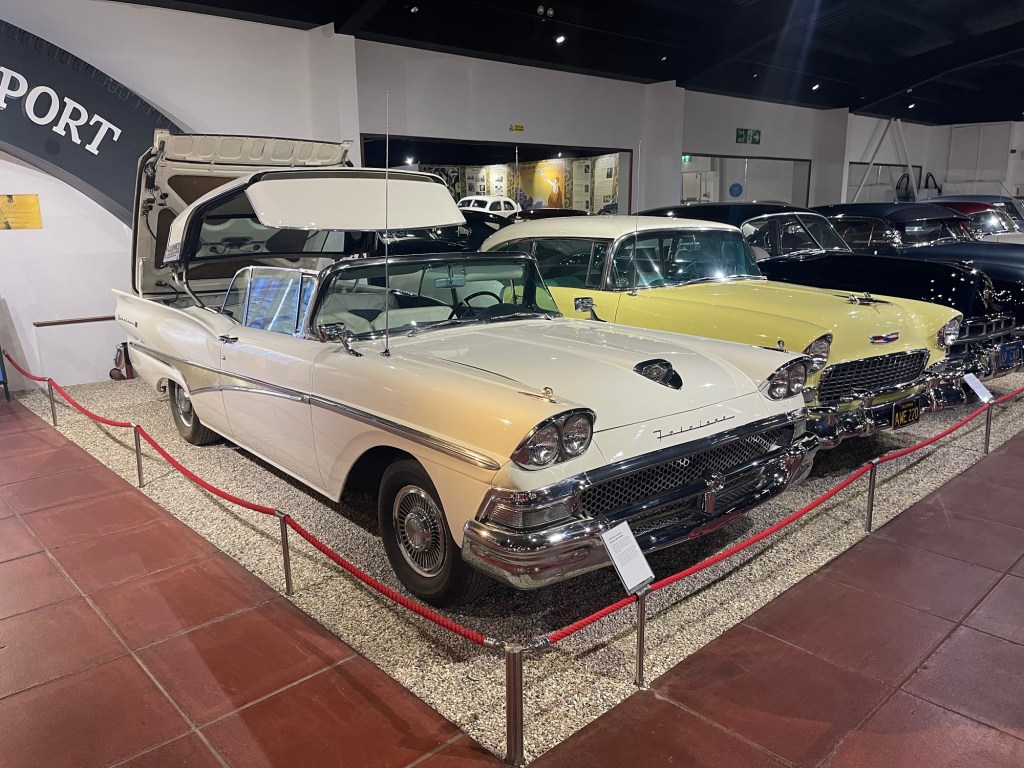
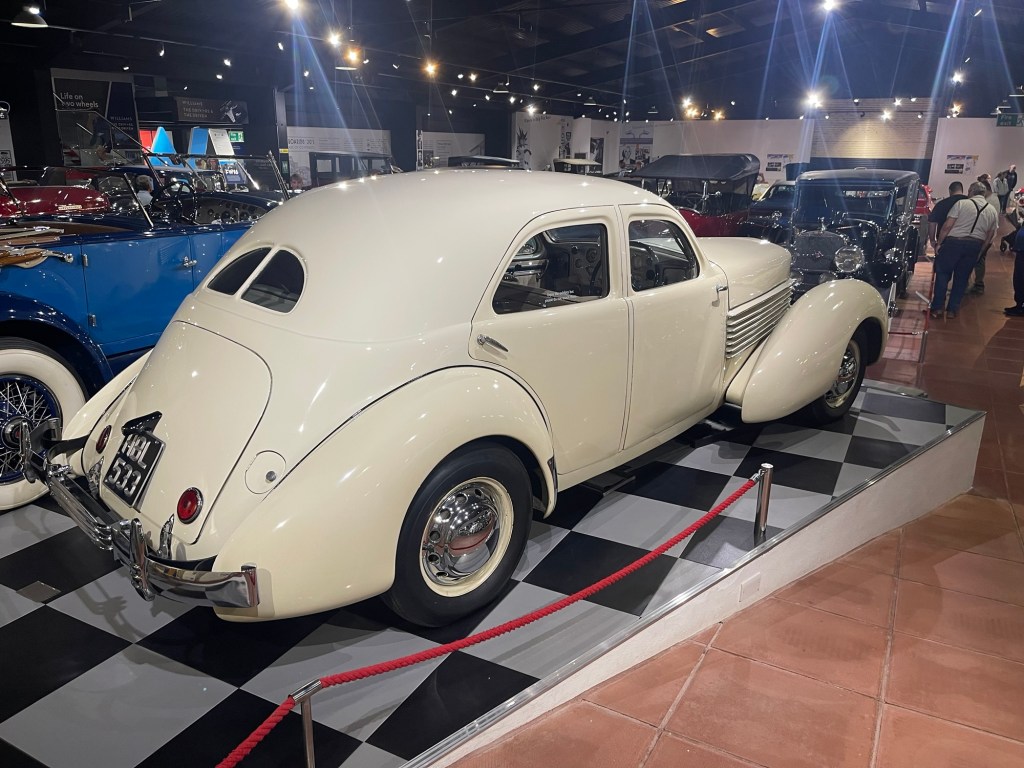
A really enjoyable visit to the Haynes Museum with my friend John. The collection is very well laid out and it is easy to get close to the exhibits. I did break the rule of no touching once as I tweaked the throttle linkage of a V12 Ferrari and it was mesmerising to see all the rods moving in unison. If you don’t do that, are you really a petrolhead? (I blame my Dad as he would have done the same, although he would probably have adjusted them to work better!). Friendly staff, a good café and a well stocked shop, I am not sure how it could be improved.


Difficult to identify a take home car. If we had a rule that the monetary value was irrelevant and it was just the driving pleasure, I’d take the Austin Allegro…only joking, it would be the Jaguar D-Type
