Tucked around the back of the Pistonhead’s Annual Service event was a beautiful example of the most understated Ferrari, the exquisite 365 GTC/4. I got to know of this model in a copy of Sportscar and Classic magazine where the writer waxed lyrical of this often overlooked Ferrari via a road test in Wales.
This real life example was no disappointment, the perfect bodywork was painted a subtle maroon and the trim was in black (or should I say Nero…). The styling is extremely neat, the front end a little generic, leads to a long bonnet and an airy glasshouse with thin pillars possible in the period before crash testing got to define critical dimensions. The roof slopes down to a neat booted tail with triple tail lights and quad exhausts as befits the marque.
I wasn’t lucky enough to hear it start up but will remind myself that under the elegant bonnet is an aristocratic V12 with four cams fed by carburettors which would have made an incredibly evocative sound as it burbled up the road.
Oh how time flies – no blog entry since September! anyone would have thought I was busy [sigh]. Some progress since the last blog – I have the bills to prove it! A couple of significant garage spells have seen some overdue tasks now completed. These include such delights as wiping wipers, a heater which blows and heats, washing washers, a rear hatch with all the right seals, working indicators and correct mixture in both carburettors.
Today, as well as recording the above progress, I can report a couple of minor jobs squeezed in between studying for an upcoming exam and visiting a local National Trust property (not in the MG, too much salt on the road).
Job 1 – SU Dashpots: I am chasing down a fast running issue, and following a suggestion from Dad, decided to check and clean up the SU dashpots to ensure they can slide up and down nicely. I wasn’t at all sure this would make any difference, but it was worth a try so Matt (future son-in-law) used some metal polish to clean these up while I did another job.
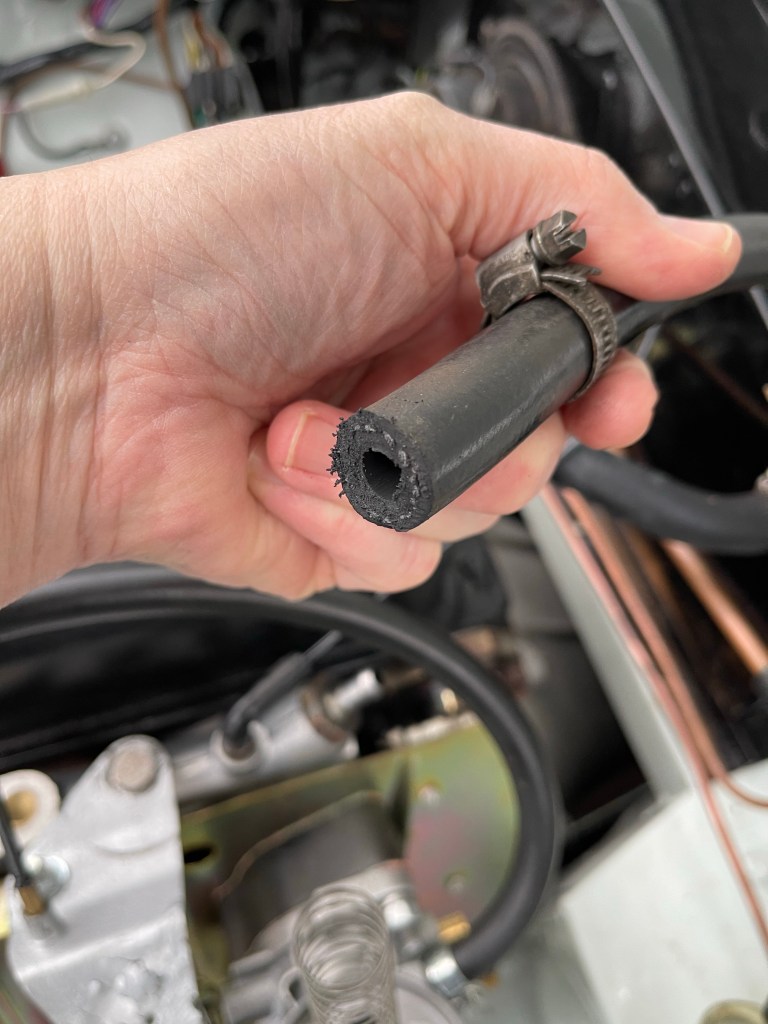
Job 2 – Repair servo hose: In chasing down the fast running issue, I decided to improve the seal where the servo pipe fits to the servo manifold. The pipe end (pictured below) was very ropey and I wondered if air was leaking through there and messing up how the carbs operated. So I used a junior hacksaw to saw a length off the pipe and then refixed it to the inlet manifold.
Road Test – Matt assisted to put on the air filters and we took the MG for a spin up the road to see if we had seen to the fast running issue. Straight away we found a problem, but we are now reflecting that we may have solved one issue, but caused another. In short, we now had a pinking issue under load. We cut the road test short and slowly returned to base. I am now wondering whether with a good seal on the servo manifold, we now to adjust everything to suit that new condition. Certainly the MG was not pinking when I picked it up from Clive and we haven’t made any other changes. What do you think?
Job 3 – Wipers: Clive had ordered me some replacement wipers which were on a delayed delivery, so I had picked these up from his garage the other week. As the car was out of the garage it seemed sensible to pop these on. The wiper blades were a little reluctant to come off- they have a dainty little clip which is supposed to release them, but having been fitted approximately ten years ago (conservative estimate) they were very attached to one another. With Matt pulling and me operating the long nosed pliers (surely everyone’s favourite tool) we got them apart and new blades slid nicely into place, immediately making the chrome arms look decidedly second hand. It was getting late, so no time to clean up the arms, that will go onto the list of jobs for another day.
Before putting the MG away, Matt and I dug out the sound proofing material I recently purchased. It was a bit difficult to work out what goes well, but it was clear that this would be an all-day job with the major issue being having to remove the seats to fit the acoustic matting and carpets (not yet fitted under the seats), so that will need a good dry day and a helper on hand. An interesting afternoon all round and it was good to see signs of Spring. I need to crack on with the MG (goodness knows when) as it is required for wedding duty in November!
Stiff steering resolved, although not by me. I am striking up a good relationship with our local MG specialist and after a couple of disruptions I was able to get the MG down to him today and he resolved the stiff steering. The problem was with the column itself which had become misshapen and was catching on the mounting bracket. I don’t have full details on the fix as I wasn’t there but it involved reshaping it with some tubing. Anyway, the steering is now bang on and the car drove back from the garage a lot more nicely than it drove down! A major hurdle overcome. He also spotted a few other issues around the car such as the bonnet alignment and non cancelling indicators which are on my list but it was good to discuss possible solutions. The bonnet catch cable has unfortunately also failed, stripping its fitting at the dashboard end which is annoying so that will need a replacement. This evening I reviewed my Completion Schedule, updating jobs done and adding on the new jobs. Its nearly at one page now and with the car basically driveable I can get out and about to get things done. Finally, spotted a rear light out so another job for the list!
A final reflection, it was good to watch Clive drive the MG up the road as I could listen to the exhaust note from the outside – sounded good!
Can’t beat a Beatles quote, but it sort of sums up the last couple of weeks on the MGB. In the my previous post I was expressing my disappointment at missing the local car show. Shortly after this I managed to make contact with a local specialist who is literally down the road from where I live and he was able to sort out the troublesome radiator hose and diagnose an alignment issue with the steering which should explain the stiff steering. the MG is booked back in with him but I’m in a queue so I’m being patient about it.
To today which is my 52nd Birthday and what a lovely day, nice array of gifts, morning Church service with the family, a light bite at the local farm shop and a free afternoon with the MG, although a bit too hot for anything too energetic.
First priority today was to commit to driving to the local Tesco to half full the tank with Ultimatum E5 which was the longest journey I’ve done yet and a test of me as much as the car. I kept a close eye on the oil pressure and temperature gauges but all was well although the idle speed dramatically rose until it was a very noisy 3,000 rpm which was all a bit embarrassing. I filled up regardless and tootled off home, revving like mad at every junction.
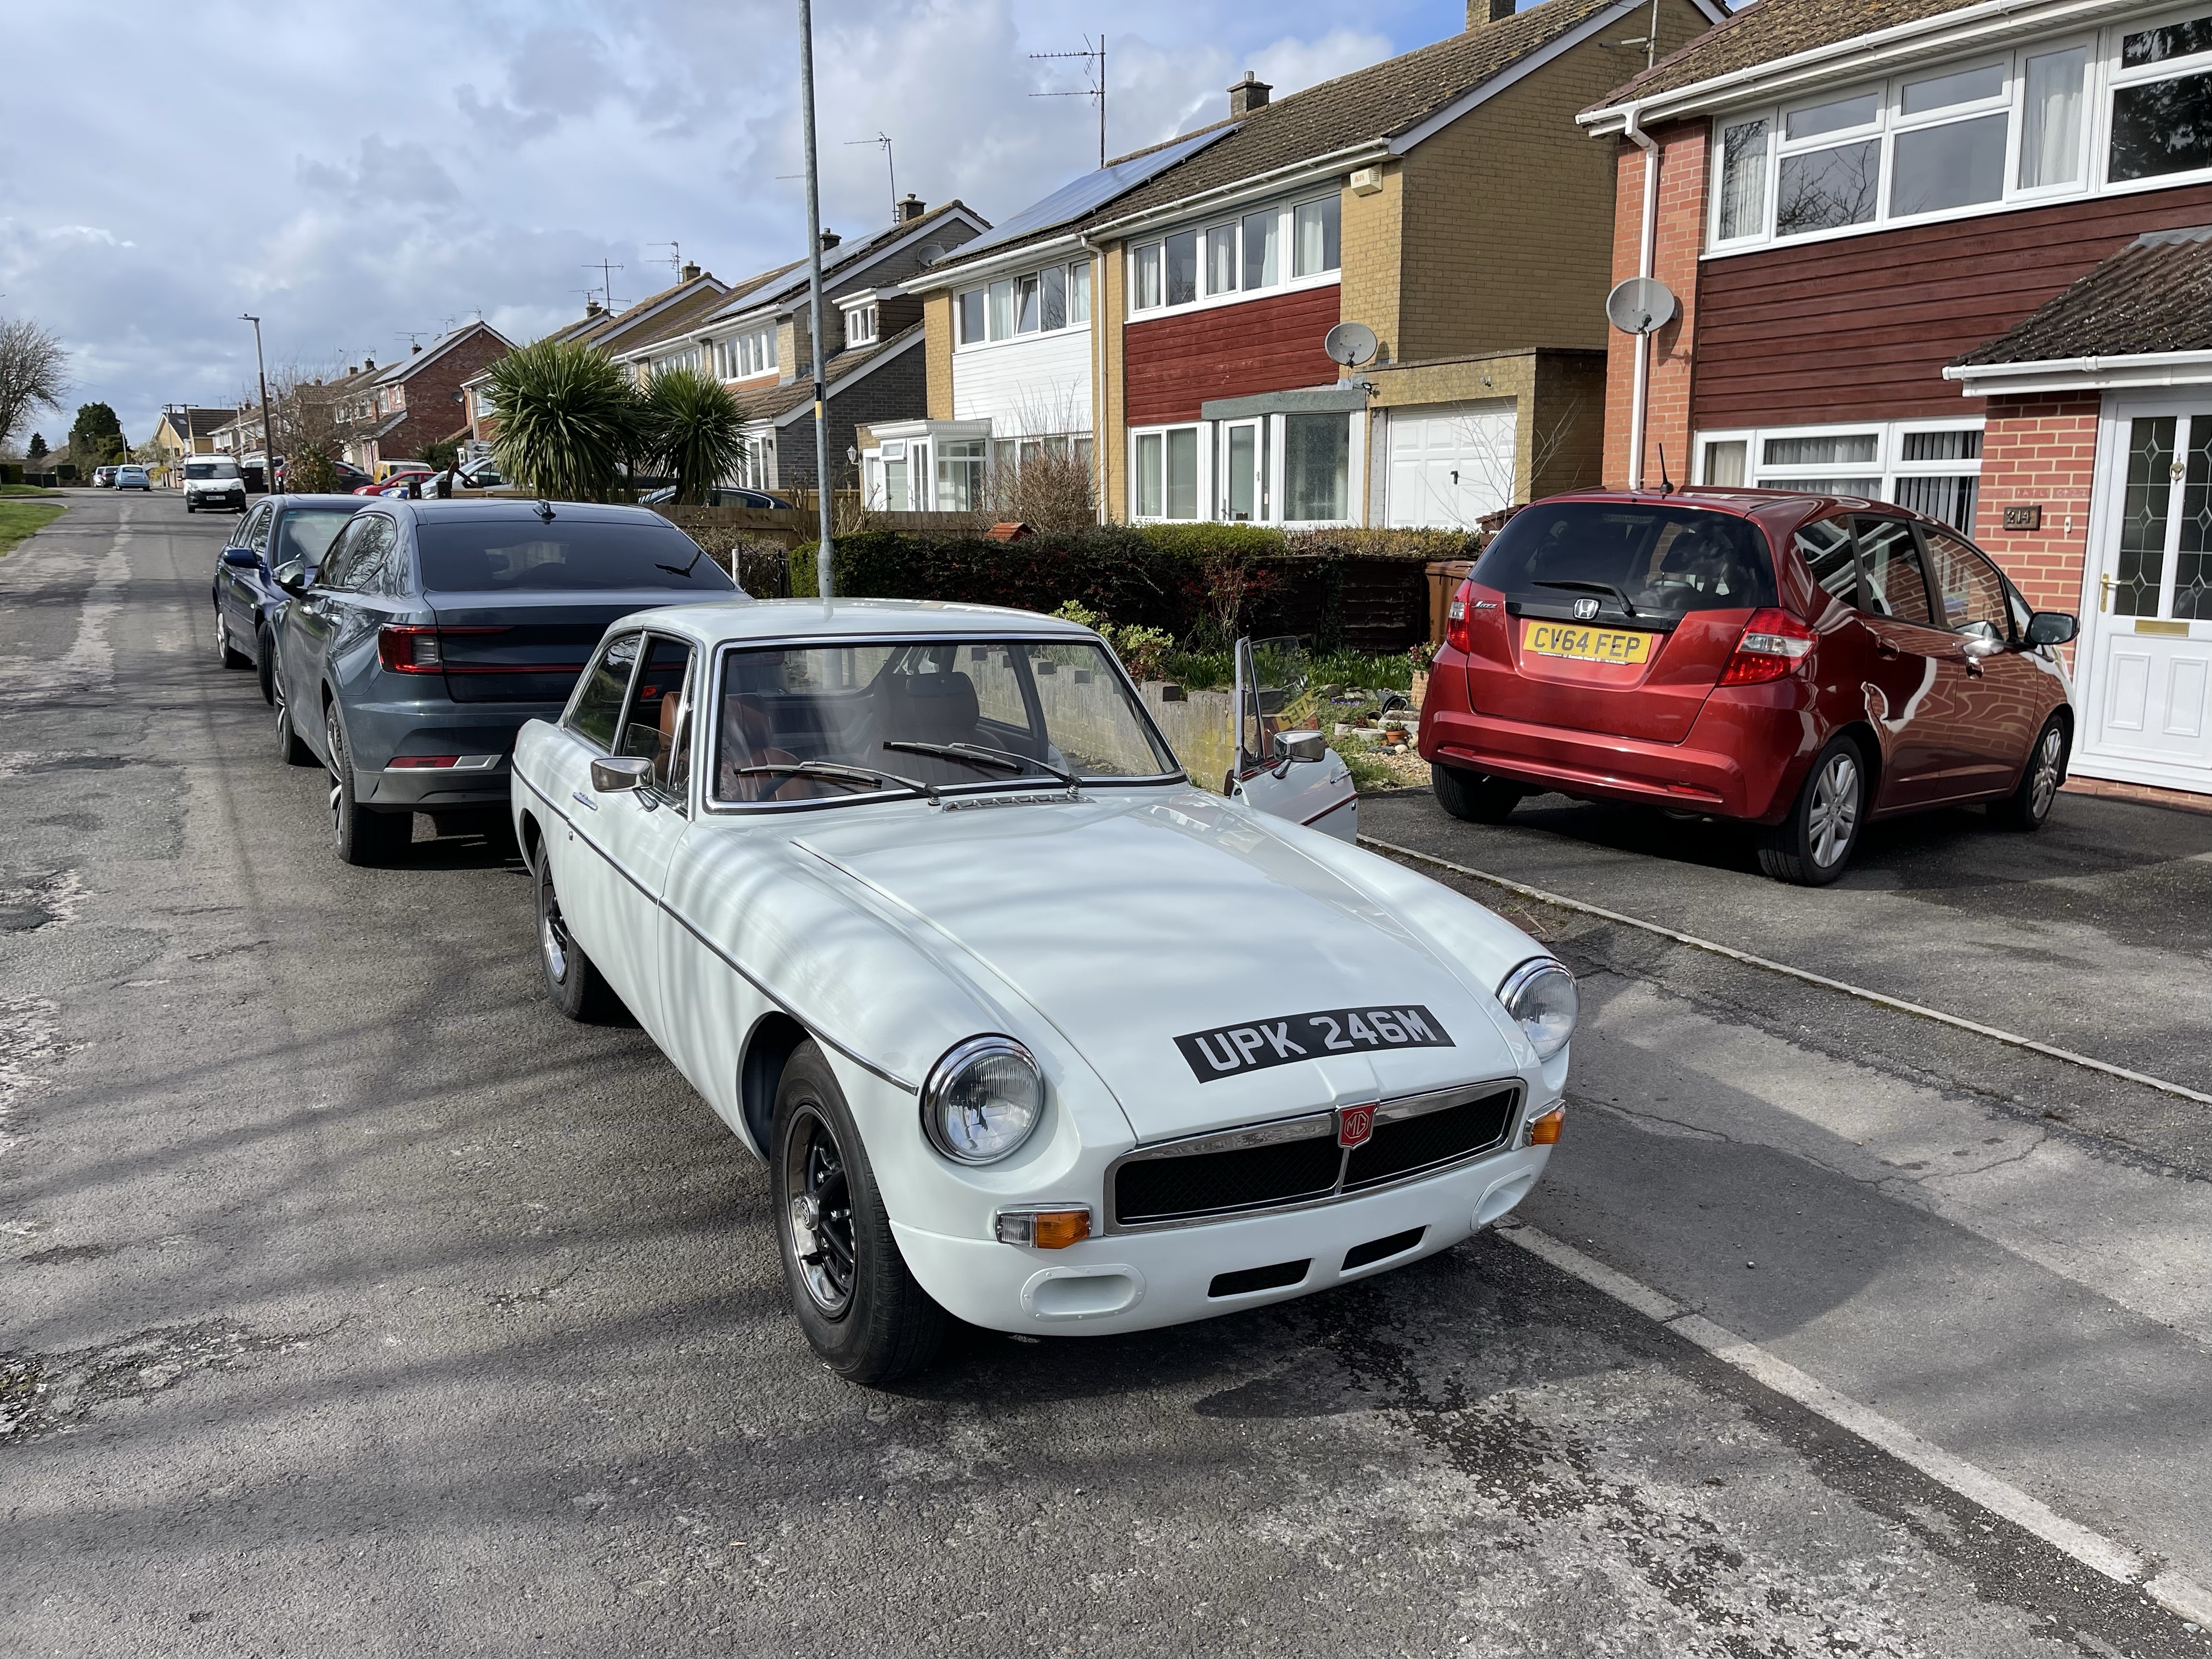
She scrubs up well!
Back home I realised that the fast idle screw locking nut was loose and so however I set it was going out of true as I drove along with the throttle open. I took out my tiniest spanner and nipped it up so hopefully that’s done.
The fast idle screw in on the left sideClose up of the fast idle screw
The MG was a bit sluggish on the way to Tesco so I advanced the ignition a fraction afterwards and took it for a test drive which showed a big improvement with the MG pulling eagerly without any pinking.
Other minor developments were the installation of various grommets under the bonnet to reduce the oily smells entering the cabin.
I’m writing all this with the benefit of editor’s prerogative so this is a slightly tidied up version of events but the resulting improvement is a matter of record.
I’ve decided not to take the MG to the show tomorrow. This afternoon, a sweltering day in Southern England (Wiltshire to be precise), I undertook some show preparation, but sadly with one issue unresolved, I’ve reluctantly contacted the show organiser and withdrawn my entry. Sheer stubbornness could have won the day, but a breakdown on what is predicted to be a hot day is not sensible.
The specific issue which tipped my decision is a seeping leak from the hose which connects to the bottom of the radiator. This hose is a three-way unit with a smaller hose heading off towards the heater, and other end connecting to the thermostat at the top of the engine. The space at the bottom is devilishly tight, even for my skinny arms and when I fitted it, I couldn’t get the hose to slide nicely over the spigot (I’m going to call it a spigot). Hence, this poor fit leaks when the engine is running. What I need to do is to remove it and refit it, but in the heat of the day and with my puny office muscles (optimised for typing), I couldn’t get the fit any better, despite trying. A short road test proved the MG is running alright on the whole but with a steady drip from the seeping hose, a 10 mile drive, even with planned top ups just seemed too risky.
I did sort out a couple of other nagging issues.
Front disk brake shields. The front disks have a steel shield on the back (presumably to keep out road muck) and when I pushed the car in after nipping up the track rod ends recently there was a scraping noise. I reckoned this was the brake shield rubbing the disk. So I jacked up the front end, removed the o/s wheel and spun the hub to trace where the scraping was coming from. The track rod end was actually resting against the shield, so I loosened it off and retightened it so it was clear of the shield. It was then simply a matter of easing the shield away from the disk until it turned freely. Sorted.
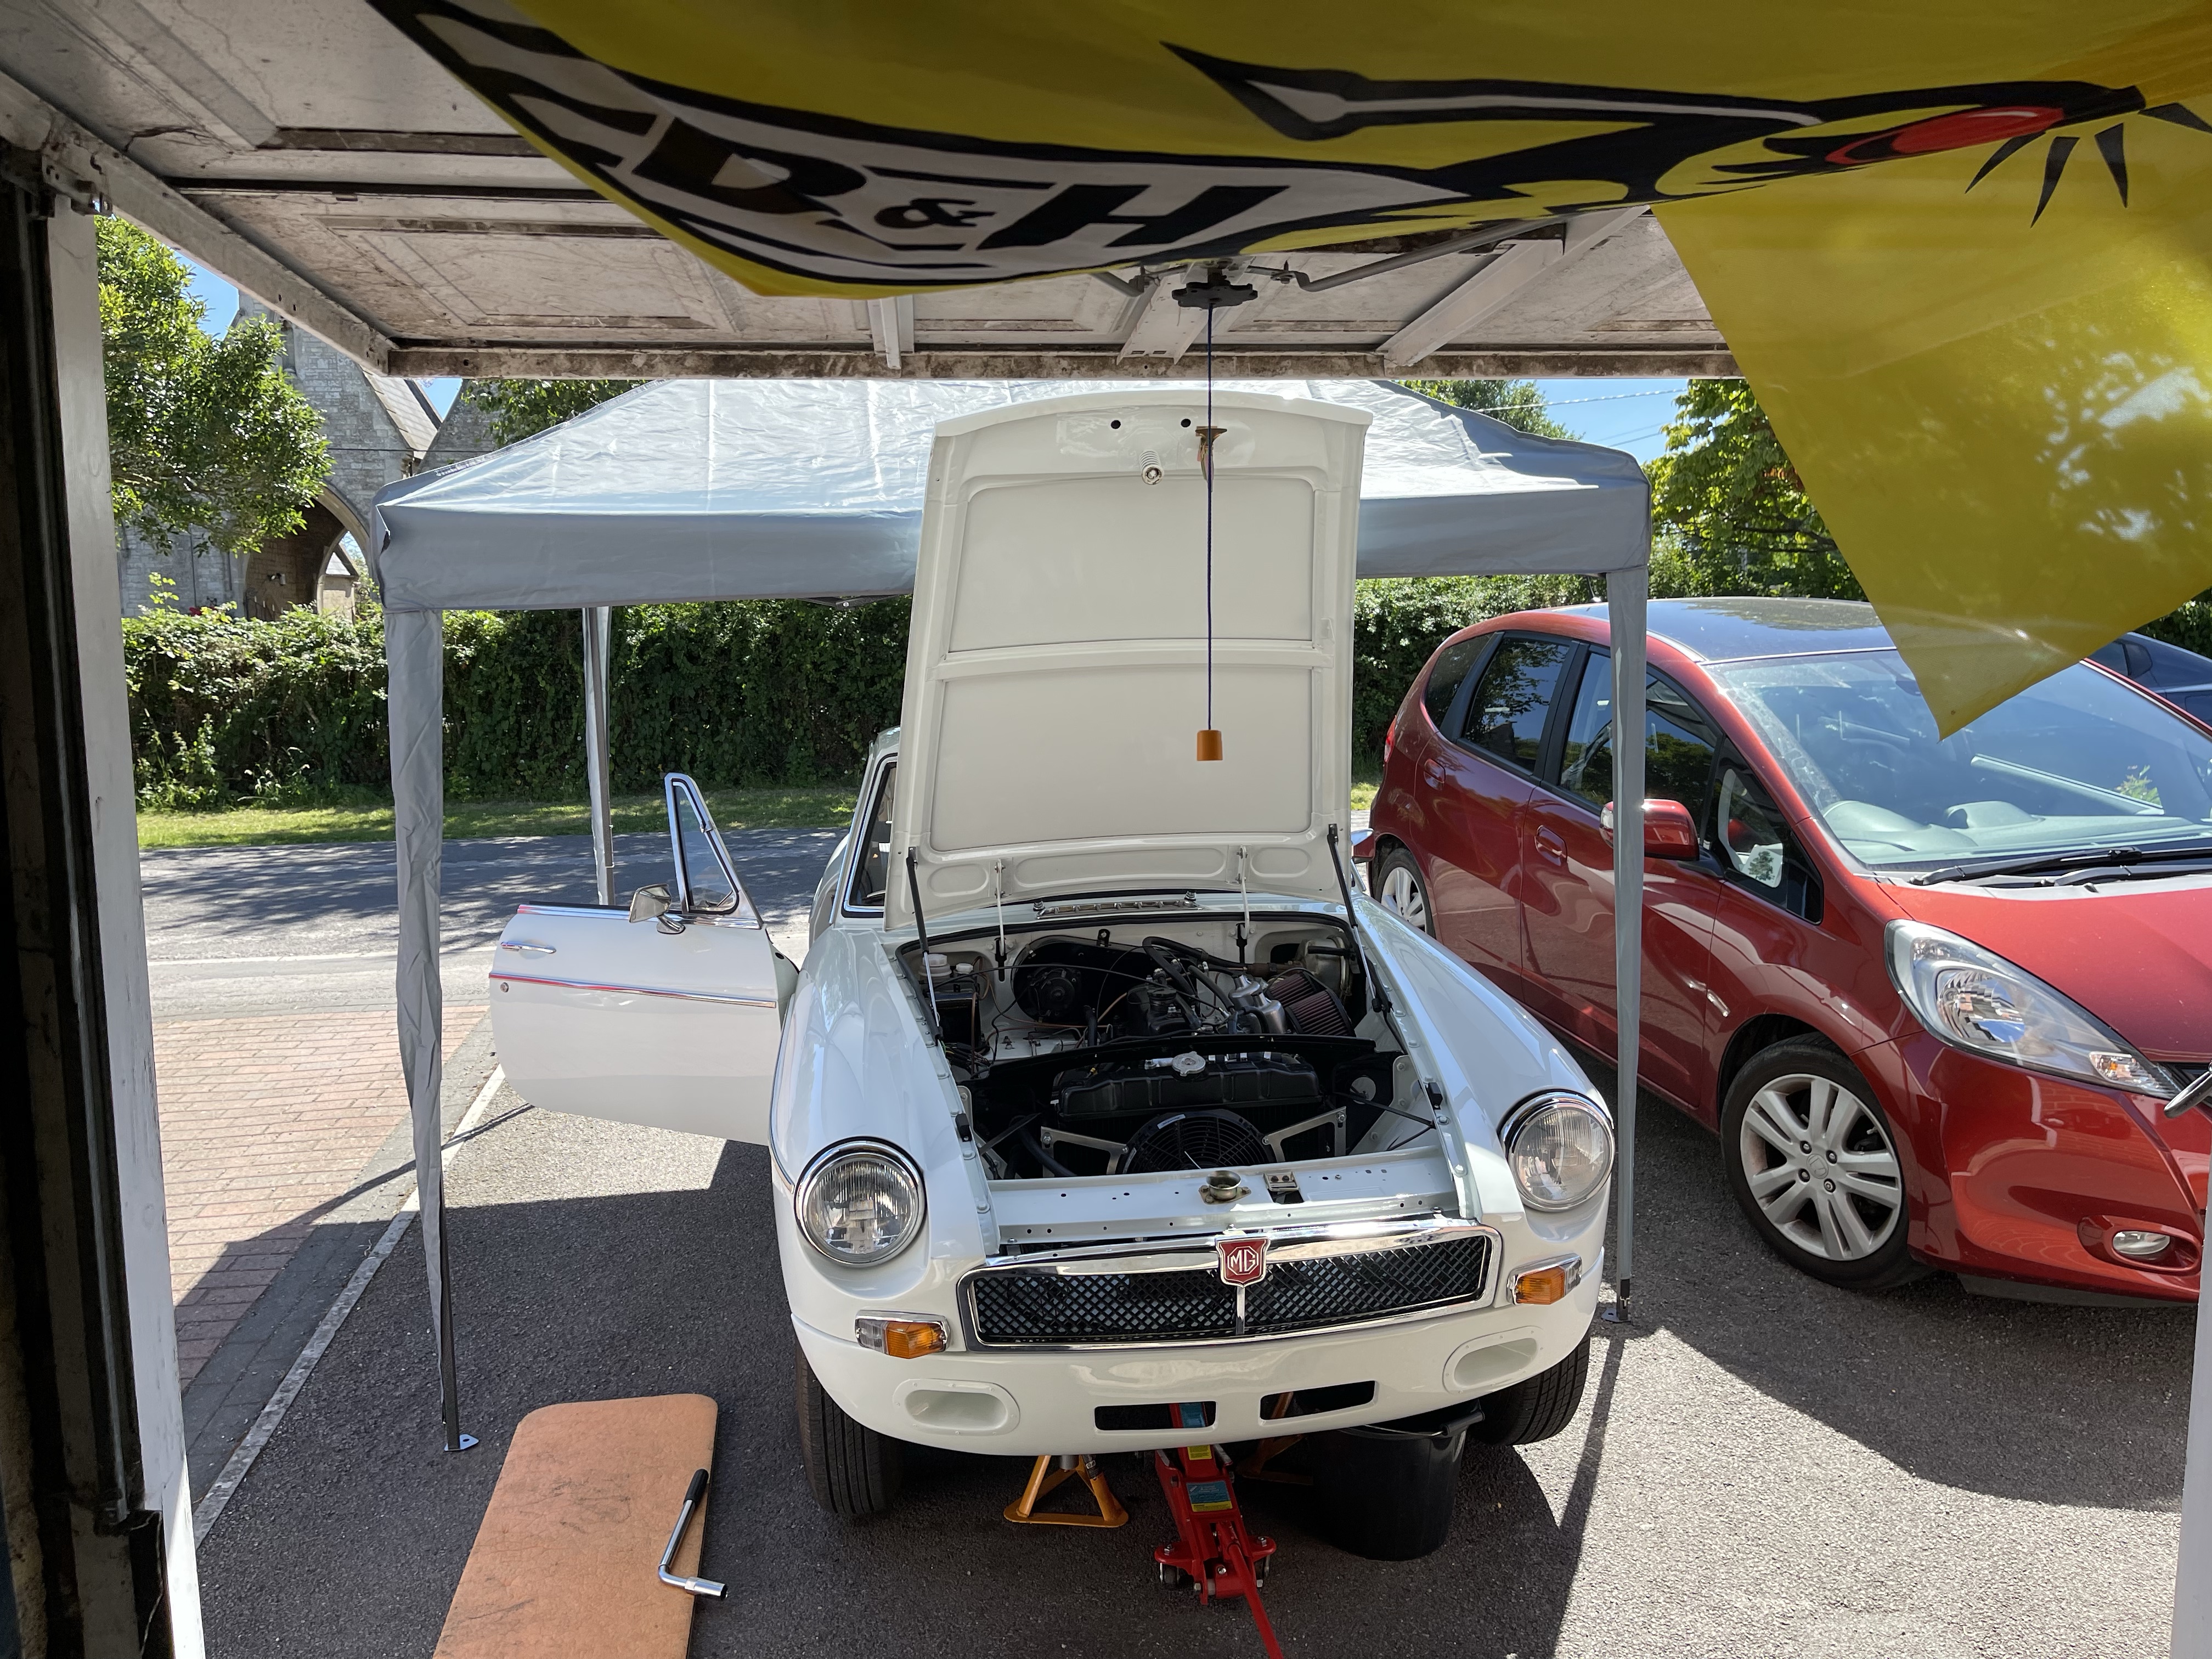
This gazebo works really wellSorting out the front disk shields. Should have replaced with new when I changed the disks really…Looking out from the garageThen it was time for tea
Fuel Pipe. I replaced all the fuel lines on the MG early in the build and had somewhat cobbled the filter to carburettor length under the bonnet which consisted of two short lengths of rubber tubing and a straight bit of copper. This seemed to offend my Dad’s eye as he comments on whenever the opportunity arises. Sorting through a box of bits, I found a length of surplus rubber tubing and wouldn’t you know it was the right length (some may say that this was the correct piece all along, but we will never know). Anyway, it was a relatively straightforward job to remove the existing contraption which is like something off Chitty Chitty Bang Bang, and replace with an elegant single length of tubing. Sorted x 2.
All this work was carried out under a new Gazebo we bought off Amazon for £99. It was destined for the back garden, where it has since been erected, but it was first pressed into service to cover up the MG (with the blessing of Mrs Relentless Duck) and what a fine job it did in the hot hot sun.
Happy Summer everyone, I’ll get to a show one of these days.
[Post blog note – just had invite to join friends who are racing at Castle Combe Circuit next week, so maybe the MG will ‘break her duck’ in the near future if I can get that hose seen to.]
A clear, bright, cold April morning was rapidly warming up as I pushed the MGB out onto the driveway. Today I was intent on changing the float chamber gaskets (more on that later) and there was half a chance I would get some help from my friend John to sort out the horn button which would in turn allow me to finalise the steering wheel installation. While poking around under the bonnet I decided to fit the metal cover over the pedal box as just one more job to do. It fitted nice and snug and is another step towards finishing things off.
I was just finishing removing the air filters when I had a call from John confirming he was free to come down and help. So I halted work on the carbs and John and I worked on the horn button. This was more challenging than it should really be. Because I am using a non-standard wheel (wooden), with a non standard boss, we couldn’t just stick it all together. Instead we had to measure everything to get the indicator stalk, horn ‘pogo stick’ switch, and cowl all to work together. Unfortunately, there was no obvious way to fix the ‘pogo stick’ so John ingeniously modified the indicator stalk bracket to mount it. This was going well until we realised with a dry fit that we had not taken the indicator cancelling cam into account. Drat. John persevered and as I write this the whole assembly is mounted, but pending the araldite hardening off before we finish it off. So a really awkward job which is now nearly done thanks to John.
The pogo stick switch mounted on the modified bracket. Note steering column now at correct height
While this was going on, I investigated the stiff steering by removing the inspection plate on the steering column and taking a look. The plate came off easily enough and the shims that came with it too although the surface rust on them suggested little oil was in the rack itself. So, pleased with myself I started merrily pumping gearbox (the correct) oil into the rack and it was taking a lot as it was so thirsty. Or so I thought until John spotted a pool of oil appearing on the drive, which we traced to a split gaiter. Drat again, but entirely my fault, although it does explain why the steering rack was dry. So, parts to order before I can completely resolve the stiff steering.
With the plate removed I could pump oil into the steering rack
A final bit of fun was discovering that the steering column could be raised from where it was mounted by loosening the bolts and sliding the column on its slotted mounts. I had not spotted this when I fixed the steering column and I had been finding the wheel uncomfortably low. Now sorted in about 5 minutes – easier than selling the car because I couldn’t fit in!
And away she goes back into the garage pending new steering rack gaiters
Oil is vital stuff, finding its way between all those rapidly moving metal bits that make the engine go vroom and preventing them from welding themselves together. However, sometimes it escapes from where its supposed to be and then it makes a big mess. Well this evening I was able to look under the bonnet of the MGB to check on some oil misting that has been present since recent start ups. It’s nothing severe, but clearly not right and I wanted to see how bad it was since my first drive a couple of weeks ago. On opening the bonnet there was a tell-tale mark, running transversely across the underside of the bonnet originating from the front of the engine. It wasn’t as severe as the other day, but there is enough to make a mark and not something to ignore. However, I quickly realised that this particular evening I wasn’t going to be able to get under the car to see where the oil was coming from, having checked all possible locations accessible from above where it might be coming from. The pattern of the misting point towards it being linked to the main pulley which as it goes round and round is I think throwing up the leaked oil. Everything points towards the sump, pulley seal or timing chain cover. So a fairly big weekend job there to work through these areas and resolve.
While I was looking, I did a general look around for any other leaks. In the near side chassis rail was some petrol. Not a lot, but a recognisable quantity. Oh dear. I felt around the fuel pipes which were nice and dry and then under the carbs. Aha. Under the front carb (the float chamber) it was damp, so this points towards a seeping seal. Darn. I have had these carbs apart when I was troubleshooting them, so its going to be my fault, but I suspect the float chamber cover seals are not, well, sealing. They were a pig to refit, so I’ll have the carbs off and look/replace the seals as they may well be mangled. Seals are £1.46 from SU (plus £5 for postage!). I am pleased to have spotted this at least before the leak got too bad!
Petrol leaking onto this chassis rail
While looking at the carbs I took a good look at the throttle mechanism as at present the car does not idle nicely all the time. The cable is a little slack but the the spindle returns to the stops so that is not sticking. It could be the mixture as I have fiddled with this in trying to set the carbs up. When I can grab an expert for the day (Hi Dad!) I’ll set these up from scratch, but in the meantime, I took the spark plugs out to see if they would give me any clues as to the mixture. The photos are below in front to back order. I’m going to leave this to the experts to comment, however I think its fair to say the carbs are not set up right!
Plug 1 front carbPlug 2 front carbPlug 3 rear carbPlug 4 rear carb
The off-side chassis rail was also not pristine, having oil spotting around it. I wiped this up and looked for a possible culprit. Feeling under the oil filter, my fingers felt oil around the bottom of the union with the oil cooler pipe. This union is a beast of a with a 15/16th fitting. It a double nut thingy where you have to hold one nut while doing up the other so I had my 15/16th spanner on the oil pipe fitting and an adjustable on the filter end and was able to tighten it by a good quarter turn. I am hopeful that this will stop that leak, but it will need to be checked next time I run the engine.
I tightened up this joint
Finally, one of the grill stays had a loose fitting. No idea why, the grille hasn’t been off for ages, but I might as well fix it while I am here. The threaded screw was a bit second hand looking, so I looked for a replacement. I found a bolt the same thread which was a bit long so I shortened it with the hacksaw and along with a couple of washers it fitted nice and snug and that was one less rattly thing on the car!
Tightened up this grille stay
A busy half hour on the car, but some steps forward which is always good!
I’ve had a fuel leak / seep from the petrol tank for a long old time and today I got it sorted. I suspected the seam where the sender unit goes in, but to be honest, I wasn’t sure I had the sender in properly or the filler spout. I had obtained a replacement tank from the supplier which was a larger ‘touring’ unit so a swap was on the cards in any case. I was on my own today so not the easiest operation. I began with jacking up the rear and putting it on axle stands which enabled me to remove the end section of the exhaust which bolts on about midway along the car and is then attached to a rubber hanger at the other end. Then I detached the fuel line and with the tank propped up on a couple of boxes I undid the bolts and nuts on a diagonal pattern which sort of allowed it drop in a controlled manner.
Now to fit the new tank, but learning from previous experience I took great care to fit the sender, the rubber seal and sealing ring to the tank, and to slop some petrol in and check for leaks before it went anywhere near the car. Miraculously the new tank could hold petrol and I had confidence the sender was properly seated in place. Now for the awkward job of offering up the tank to the receiving bolts (fixed to the chassis) and simultaneously dropping the bolts from the boot floor through the brackets and lining up the threaded connectors. I needed to have a couple of extra hands, but with none being available I did my best octopus impression and managed to have all the nuts, bolts, washers and connections properly done up. The fuel line was easily fitted, so it was onto the exhaust. This was another job which was fiddly to undertake solo. It took me a while to get this done – the bolt up connection at the midpoint is easy enough, but the rubber hanger where the exhaust exits is seriously fiddly. The bolts just did not want to bite and the rubber hanger was pulling the bracket away from where they needed to be. Furthermore, the sun was streaming in my eyes making it difficult to see the holes. I had to drape a throw over the back of the car and crawl underneath just to see! Helen came home from popping out to see my feet sticking out from under the car with a cloth draped over it. She must have wondered what on earth I was doing. I refused to be beaten and just persevered until eventually I got one bolt and then the other started. Then it was just a case of tightening everything up which was tedious as the threads were long and the bolts were tucked up between the fuel tank and the exhaust (I did say a little prayer – so, thanks God). There followed some very tedious petrol movements while I harvested the petrol I had only recently put in the old new tank, but finally I had a working fuel system.
Looking up at the tank fittings
A long time ago I realised that I was missing some chrome trims from the B-post of the MGB and last week they literally fell out of a box at me which saved me from fretting about where to get new ones from. I was looking for a different profile of trim, but these turned out to be the right ones. I fitted these relatively easily earlier today, giving them a brief polish before fitting them with self-tapping screws. I had intended to rivet them on, however the space was a bit tight, so screws it is. This has finished off another aspect of the MGB nicely.
Without the missing trims…now fitted on both sides
Last job of the day was to fit the wooden wheel which my friend John had lent me ‘on approval’. I had established that this would fit (with a new boss) and the smaller diameter would give me more space for my legs which are wedged up against the steering wheel in the standard configuration. I popped it on the splines and tightened up the nut. I still have to install the horn switch, but that was enough for today.
I finished off the day with a quick test drive of about 2 miles (brave!) with Mrs T on board. This was Helen’s first time in the car and the first time I had driven it out of our estate in the three years I have had it. It was also the first time the car has driven more than about quarter of a miles in around ten years. I had already warmed up the engine and done some checks looking for leaks and we were good to go. Its quite intimidating driving a car that you’ve restored for the first time, being conscious of everything that can go wrong I suppose and also nervous of other traffic. However all was well and were were able to go through the gears into fourth and to cruise very briefly up to 50mph. The drive illustrated a few things, firstly that the hatch needs to be finished off with the rubber seal I have bought and the catch adjusted to stop it banging up and down, and the carburettors need tuning as the car is not pulling cleanly through the revs. The gearbox was a pleasant surprise, being nice and slick to shift although I dig get a ‘box full of neutrals’ at one roundabout while I grounds the gears. Fortunately, the MGB is torquey enough to pull out of the roundabout in third, although this coincided with the flat spot I mentioned so we sat at 32 mph with a BMW following curiously behind on our 50mph limit bypass. Helen commented favourably on the comfort of the seat, but noted the loud exhaust. With the car only partly trimmed and with a lot of grommets still to locate, I think I can tone down the noise a bit, and also I need to check the exhaust it properly done up. have to say, it does sound good and was turning heads. A good day!
Warmed up and ready to goThe lovely Mrs T ready for the offI’m concentrating so hard at this point!
Another big gap in posting due to other life distractions. Recently I had an electrician (Phil James) booked in to do some jobs on the MG. He did a cracking job, fitting the electric fan, switches in the dash and centre console and the heating rear window. Of course we needed to fire up the MG to commission the fan and this is where things began to go wrong.
The week before Phil came I had done a few little jobs including tidying up the brake, fuel and loom lines which run under the car as well as fitting the air filters. A good job done. Annoyingly the MG then refused to start and was the same when Phil and I needed it to.
Poor Phil, he tried everything and in the process sorted out the carbs which had overfilled dashpots and the rear carb where the piston was not moving freely. So we had to admit defeat on the day.
Meanwhile my Dad had said ‘it will be something simple’ and today I got to the bottom of the issue. I tried a simple test which was to remove the fuel pipe to the front carb, stick it in a bottle, turn on the ignition and see what happened. In short nothing. So I removed the rear wheel to get a good view of the fuel pump. I confirmed the connections were all good so it was a mystery until I noticed that a rubber pipe which connects to the main fuel line under the car was going through a tight curve and looked kinked. And so it turned out to be. I adjusted the curve switched the ignition on and hey presto click, click, click and fuel at the carb. Woohoo! So problem solved and another step along the way. The MG fired up and ran smoothly. I then spent some time sorting out the wiper mechanism which I had incorrectly installed. Still work in progress, but it’s on the right lines now, just blooming fiddly work. A good day’s work.
Me looking happy and relieved that I’ve got the MG going again. Onwards and upwards!
Crikey, its been a while since my last post. What can I say, I’ve been busy.
Anyway, today was a good day. Recently I’ve been trying to resolve a misfire and due to my low level of competence, I had unsuccessfully tried to change the points in the distributor and managed to convert the misfire into a non-starting issue. So I left things alone for a few weeks while other events took precedence such as work, volunteering at Church, Gardening and walking with Helen. Of course Dad had been saying why not just fit the Electronic Distributor that I had bought originally but I had got it in my head that it was a horrendous, virtually impossible job. Then Thursday of this week, later in the evening instead of slumping in front of the TV, I popped into the garage and stared at the distributor. Then I reached for a 7/16th spanner and sort of offered it up to the bolts. It’s really fiddly, but I got some movement going and then the bolts were getting slack. I reached down to the distributor and just like that it came out. I was that surprised I just stared at it in my hands. How did that happen?
Buoyed up by this, today I slotted in the electronic distributor pretty easily and then just wondered if it would start. It did! I was really chuffed, and the misfire had gone, so success all round. I did have a bit of fun with tweaking the timing and having to adjust the carbs but before too long I had it idling nicely and cleanly revving, so this was a big step forward.
I spend the rest of my time pottering around. I fitted the twin horns, discovering as I connected them to the loom that the switch was live. That made me jump alright. With both units connected, they make a pleasing ‘honk’. I did give the heating controls a good check over and discovered that I need to buy one new one. I stripped the cables and connections off the old units ready for re-fitting. Completing the heater installation is going to be quite a project in itself I reckon. I then spent some time stripping the spare door that I recently bought in readiness for installing the glass from that door into my car. Finally, Helen and I sat out the front of the house with a cup of tea and a piece of cake in the sunshine. I had the usual couple of nice chats with passing neighbours and the postie who all admired the MG which was looking very bright in the sun.
Actually it was yesterday. Another sunny February day and it was time to fill up the brake system for the first time since I had replaced all the brake lines and the entire front brake assembly, disks, pads and callipers. I had a Gunson kit to help and my friend John was on hand to direct me from a suitable distance on the driveway. The Gunson kit uses pressure from the spare tyre via a rubber tube which goes into a bottle filled with brake fluid with an outlet which fits to the master cylinder. Had to inflate the spare first, which was flat obviously. We also jacked up the rear, removed the rear wheels and verified that the bleed nipples were okay. With the kit connected up, the fluid started to go down as the brake pipes were filled. I was watching at the back of the car, and the level was going down but no fluid. Then we spotted the rapidly growing pool under the engine bay. We had a leak at the four-way junction with one of the joints leaking fairly well. There followed some rapid reaction work with me in charge of sluicing the spilt fluid before the nice new paint melted while John disconnected the four way junction for inspection. I should mention that we did first just try nipping it up but to no avail.
The four way junction nor the line had no catastrophic issues, but John’s keen eye had spotted a little gunk in the fitting and on the threads. So we conducted a clean with some WD40 and a rag, blowing it out with an aerosol air canister. After some careful reassembly and re-tightening of the four lines to the junction, we recommenced filling operations. No leaks this time. For each brake in turn, we connected a length of plastic tubing to the bleed nipple and opened it up. I watched the flow and when the bubbles had cleared, I nipped up the bleed nipple. So far so good.
Moving to the front of the car, we again jacked it up and removed the wheels. The n/s side went smoothly enough, all new components, so it was a dream really. On the o/s, a little fluid was weeping from the connector between flexible and hard pipes but this was nipped up promptly enough. A prod of the brakes confirmed we did indeed have a brake pedal. As it was now getting on in the day, we decided to call a halt there. Further testing has identified that it is soft on the first push, then firm, which I think means there is still some air in the system. A quick browse around the internet suggests that the pipes into and out of the servo need to be bled and possibly also the junction connection at the rear which splits the fluid to left and right. This will be sorted out soon. However, all in all, excellent progress and a milestone reached. The car now starts and stops!
So to today, Sunday, and I was on my own, so a little pottering was in order. First job was to investigate the misfire which has been plaguing the MG lately when running it up. The carbs are not in tune, I have a plan in mind for the that, but it has definitely been running worse and worse. Taking a look around the engine bay, I discovered that the vacuum advance pipe was looking very sad. Being rather on the long side, it had drooped onto the exhaust manifold and basically melted. So I snipped off the mangled bit and fortunately there was plenty of length to make a nice route to the inlet manifold. Next I investigated the distributer, and as a non-expert, the one job I could do myself was to swap the distributer cap which on inspection was a bit rough looking with the contacts worn. So I popped in the new one which came with the electronic distributer and this saw an immediate improvement. I was tempted to just pop the new distributer in but as this is quite is quite fiddly, I put it off for when I have a longer go and have taken some advice. Instead, I did a couple more jobs on the dash. First, I fitted the rev counter properly. I had lost one of the knurled wheels that fit to the studs and hold the two brackets. Miraculously, I found it on the driveway yesterday! That saved a £5 order to a specialist (apologies to the parts market, I need plenty more bits honest!). Then I moved to the n/s to fix the dash properly. Having done the o/s earlier in the week, I knew how this went and it was straightforward to fit this. With the centre nut also fastened up tight, the dash is now looking right, albeit I still have a few switches and the vents to install. As I had to lie on my back in the footwell to do this, and with a mind to future required jobs, I got out the new carpet set and lobbed the footwell carpets in and the boot carpet while I was at it. I am not quite ready to commit to carpeting the MG, but it was good to see the set and acquaint myself with the different parts.
The dash now correctly fitted
Melted vacuum pipe
I have now removed the legendary ‘no fluids’ tape’
I took back a day that work owed me today and had a whole day on the MG outside in the warm February sunshine (yes, really!). Here is a quick synopsis of the jobs I completed.
Fitted new bolts to the n/s brake caliper replacing the ones that got mangled when removing the old calipers. Fitted the tab washer while I was there
Fitted interior light to the centre console ready for wiring up.
Scavenged the heated rear window warning light from the old loom and old centre console
Connected up the speedometer cable to the back of the gauge. To do this I dropped the dash off its single bolt to get access to the back of the gauges
Fixed the ignition switch to the steering column. No more fishing around in the footwell for the ignition switch.
Fixed the o/s corner of the dash which enabled me to hoist the dash up to its correct alignment and therefore to be able to slip a temporary bolt across to mount the steering column to the dash for the first time is a couple of years! To do this I lay on my back with my head in the footwell and my feet sticking up into the boot. The things we do!
Fixed the o/s door light switch and discovered that the n/s looks a bit mangled (hence why Phil had not wired this before)
Removed the rear wheels, rubbed them down, sprayed them with primer then a top coat of satin black. They turned our better than the brushed hammerite on the front wheels! This now completes the set of wheels, which are now a lot tidier than they were, understanding that this is temporary cosmetic fix-up pending a more permanent selection of wheels for the project. And because Dad kept pestering about their shabby appearance
Cleared out the interior of rubbish, tools, nuts, washers and grit!
Fitted grommits to the footwell aperatures
Found the rear bumper brackets, but sadly discovered they are very rusty and one had a seized and sheared off bolt. I had considered fitting the rear bumper and had given it a once over and reckoned it would do as a temporary solution. I think now I have discovered this, I will keep it bumper free at the back as originally planned. Need to figure out how to light up the rear number plate without having the over-riders on the bumper to mount them on (I might just not bother…)
Tidied up the garage and sorted through the spares.
Being a lovely sunny day I had quite a lot of interaction with passers by with most people saying something encouraging. One older lady remarked that an old boyfriend of hers had one in the 1970s – cute! Another family walked past when I had the engine running to put the car away. As we know the engine is not in a good state of tune at the moment and I had cranked up the slow running to be too fast and was on choke, so it was revving at about 2750 rpm and popping and banging. As I glanced behind, the lady had her hands over her ears. Sorry about the sports exhaust