A whole day opportunity to progress the MG presented itself on this gloomy January Saturday. Helen was off to meet a friend but was kind enough to help push the MG up the drive before she left. Although I had jobs to do, I had ordered parts the previous Monday and as they hadn’t arrived, was hoping they would turn up during the day.
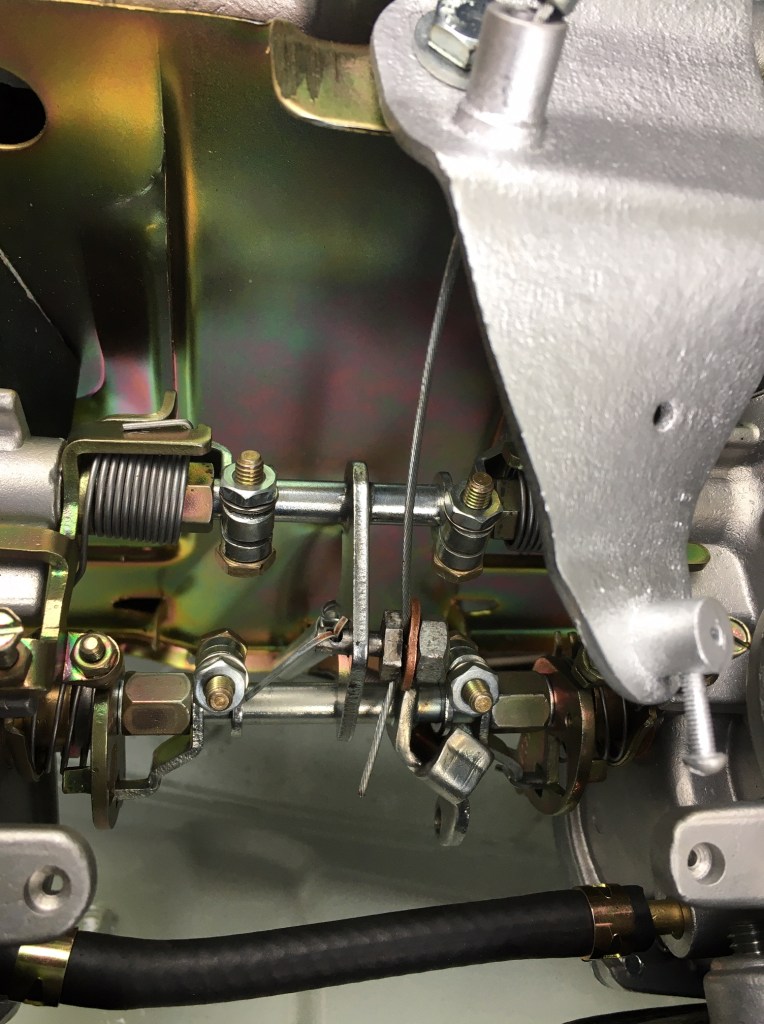
First job of the day was to fix the throttle cable to the Carbs using the original parts which I had sorted from the strip down. I did give the cable bracket a coat of silver paint just to cheer it up a bit before I fitted it. I used some leftover paint I had and warmed the bracket up first with a heat gun to speed up the drying process. That seemed to work well. Fitting the cable was a fiddly job and I haven’t got the tension right yet nor a return spring on the throttle pedal as it turned out. I think I need a second person to help with this, one being at the pedal end and one at the carbs. Anyone free…?
Next job was to complete the fuel line to the carbs. This has been vexing me for a while as I couldn’t work out from the parts I had left how the pipes connected. From studying the old fuel pipe I worked out that I had to cut a new rubber pipe in two, making one short length and one longer piece. Using these two pieces of rubber pipe and the final length of copper pipe I was able to work from the filter down and around the carbs and into the the fuel inlet on the front carb. I was pleased to have solved it, but it’s a bit weird that the kit claims to have all the parts whereas you actually need to cut the pipe. A mini-milestone this as it now represents the achievement of a line all the way from the fuel tank to the carbs, so a nice step forward towards engine start.
As the parts I had ordered had still not shown up I had to find something else to do. Mindful that the loom was still looking a bit unfinished under the bonnet, I turned my attention to seeing if there was anything there that could be connected. Last week I had pulled the rear loom into the engine bay (via the underneath) and tied it up with bailer twine. Taking a look at this, there was an obvious bundle of wiring to which the rear loom connects and I thought it woud be easy to just match the colours and connect it up. However, while one or two connections went in nicely, others did not want to play ball and rather than force them, I left it and will research on how they are supposed to connect (maybe a question for the MG Facebook group). What I did dig out a bit more successfully was the fuse box which I gave a good clean in the parts washer (Dishwasher), mounted in the engine bay and then connected up using a diagram from an MG forum. I’ll need to replace the fuses, as they all looked a bit ancient (and one was blown).
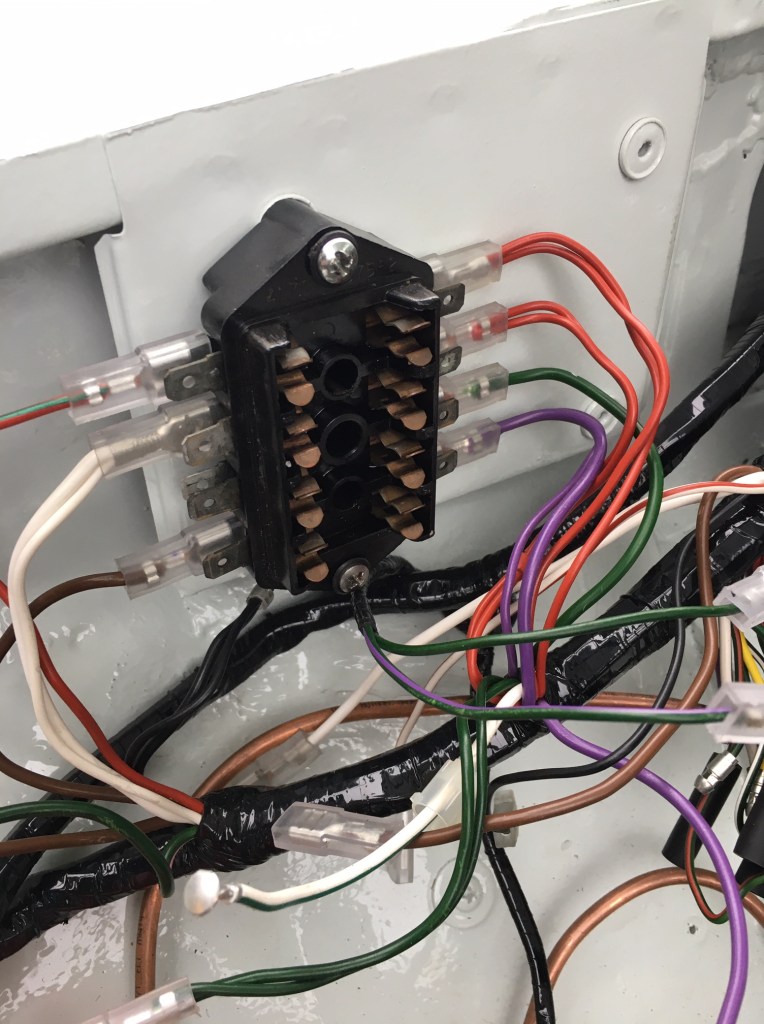
The fuse box fitted and connected 
Back side of the fuse box 
With Helen out, I was able to use the dishwasher as a parts washer
Still no sign of the parts so I was content to just potter around doing little jobs, so I repainted the steel heater pipe which runs across the rocker cover and the radiator stays. I then tackled a horrible job, but a neccessary evil. This was fitting the rubber grommits to the oil cooler pipe around the radiator shroud. I had to cut them to get them on (yes, Dad!) as I am sorry but they just do not fit over the ends of the pipes. This was a tedious job of having to push a little at a time through the very tight gap. Anyone who can work these over the pipe ends, I salute you sir/madam.

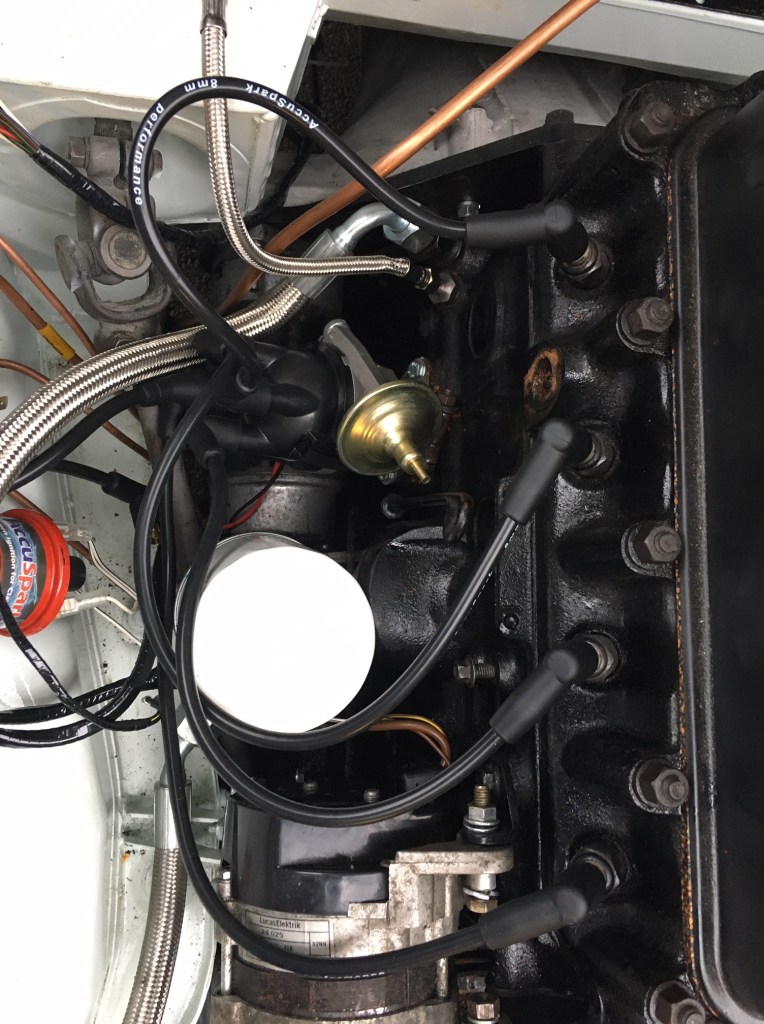
With the parts still not arrived, and with enthusiasm still in abundance, I decided to have a look at the distributor installation. I set the engine to Top Dead Centre (TDC) and then trying to interpret the distributor instructions (which were not clear), I proceeded to fit the HT leads in the firing order, starting with number one lead being the one where the rotor was facing. As previously posted, the HT leads clash with the oil cooler pipes on the MGB – or at least until I find a magic solution to this, so it was a fiddly job. I managed to plug all the leads in including the one to the coil, but I suspect it will all need to be rechecked before I risk spinning the engine over. I took a photo as a record of the first attempt.
Helen had sent a text saying she was on her way home, so as we had a few other things to do, I started to put stuff away after what was becoming a useful day of chipping away at the list of jobs. When she arrived back and asked how I had got on, I said not that well as I was waiting for parts to arrive. ‘What, these?’ she said, pointing to a fat looking envelope from MG Hive buried in our filing pile. Hmmm. In fairness, this was only the breather hoses and not the main parts delivery, but it did spur me on to fit these before I packed up for the day.
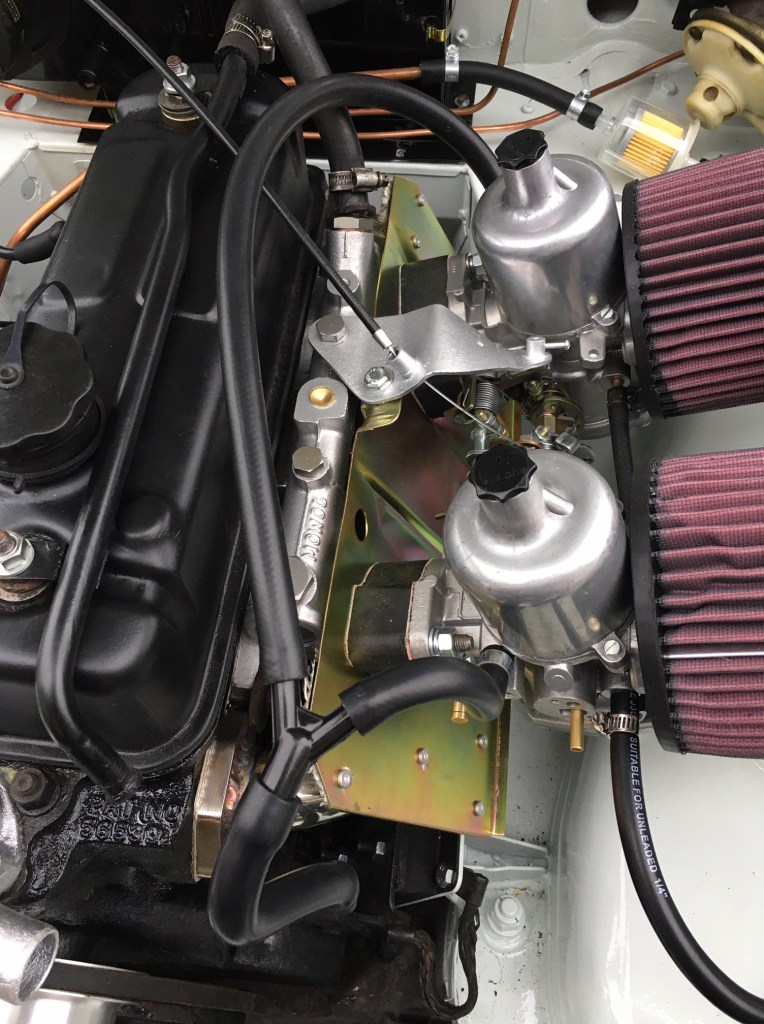
So the carbs are now connected to a nice new fuel line and breather pipes

Just for laughts I had my parcel directed to ‘Relentless Duck Restorations’ 
No idea how I did this 
Tucked up in the garage

🤣 I hope Helen doesnt read your posts, if she didn’t know you used the dishwasher for car parts she does now. I suspenct there might be more than hand injuries to come. Great post.
LikeLiked by 1 person
all part of the fun…!
LikeLike
Never thought of using the dishwasher for cleaning engine parts – great idea – next time she’s out.
Been playing about with pipework today – added to my blog at https://mgb.tips/2020/01/29/mgb-oil-cooler-pipework-unions/
LikeLiked by 1 person