I have organised myself around something I am going to call a ‘sprint’. I am borrowing from the Agile Project Manager handbook and have set myself a short term goal to get the engine started. I am therefore focussing all attention on this milestone and ignoring everything else. This is probably a mis-use of the term ‘sprint’, but if it works as a way of completing this rebuild as a series of goal-based mini-plans, then I am going to do it like this. We will see. This sprint started earlier in the week when I made a list of all the things I needed to do to get the engine started. I ran this past my friend and historic racer, Rob. I say historic not because he’s old, although he is, but because he campaigns historic racing cars. Perhaps classic would be a better description. Anyway, he practically rebuilds his car each weekend, so I checked the list with him over dinner and got it signed-off so to speak. Thanks Rob!
So this Saturday, finding myself with some time, and although officially off-sick with a cough/cold, I opened up the garage and pushed the MG out into the watery December sunshine. I started by fitting the newly purchased pulley from Moss. I had been struggling to get the first pulley I had bought to fit, but taking a close look at the catalogue, I realised I had ordered the wrong type of pulley. Straightaway it was obvious that this was the correct part, as the pulley lined up with the main one at the front of the crank. I fitted it with new bolts and anti-rattle washers. With the pulley in place, it was logical to fit the alternator as this would then allow me to pop the fan belt on. The alternator went on easily enough – to begin with… I had cleaned this up when I stripped the car, and had kept all the bolts and washers, so it really was a case of reversing the removal process to get it fitted. All good, until I went to fit the fan belt. The fan belt went on easily enough. I put the car in gear and rocked it to turn the pulleys and feed the fan belt onto the alternator pulley. All good so far until I went to undo the bolt which allows the alternator to slide along its stay to tighten the fan belt. To be fair I went straight for my full-sized socket set and with the first turn of the ratchet the bolt sheared off. Damn. To be fair, this part had stayed on the car (it wasn’t stripped) so it was being moved for the first time and I didn’t use any release agent. Not having much time, I just photographed it and will ponder on how to remedy this situation. Some good news in that the electrical connections for the alternator fell easily to hand and it only fitted one way, so easy-peasy.
The next job, fitting the oil pressure gauge pipework was a bit challenging too. I couldn’t quite work out the fittings, and the engine-end fitting looked a bit mangled. As I looked closer, I could see the outline of a larger bolt but as I had painted it over when I sprayed the engine it wasn’t very clear. Learning from the earlier sheared bolt incident, I took a bit more care with this fitting and gave it a liberal spray of freeze unlock product, left it a minute and then gently broke the bond with a well-fitted socket. It came out nicely. I had bought the correct fittings from Moss, including the braided hose which feeds up to an adapter, bolted to the bodywork, from where the pipe to the gauge connects. I will fit this pipe when I install the dash which is on my sprint list. All in all, a good job.
Next on the list was to install the coil. Now I had recently identified a clash of the coil bracket with the 4-way brake junction from which I had carelessly routed a new pipe over one of the coil bracket bolt threaded holes. So I loosened the brake junction and with some gently manipulation, I was able to rotate the whole thing enough to clear the bracket hole without tugging the brake lines much out of their alignment. With that cleared I was able to identify the spade connectors from the loom, referencing the wiring diagram and get them connected up to the correct terminals on the coil. With the alternator in place, the oil pipework coming along and the coil fitted, the engine bay is starting to look busy! While the car was out I got the radiator (a new item) out just to see how it fits, but I won’t fit it until I have sorted out the sheared bolt on the alternator bracket.
Last job today was to fit the centre console. It might sound a bit weird, but I had ordered a new one (the existing one was butchered by a previous owner and did not have the correct switch slots). Rather than have it knocking around the garage, I fitted it which will allow me to place the switches where they need to be as I build up the dash.
So a busy and reasonably productive time on the MG today and a break from lying on the sofa in front of the TV feeling sorry for myself and binging on Netflix. Weather was kind too, a mild December day, although we are still at that time of year where by 3:00pm it is starting to grow dimmer. Such a short day!

The alternator electrical connector 
The sheared bolt on the alternator bracketHer 
Installation of the coil, looking down 
Here is the oil pressure gauge pipe – looks smart doesn’t it? 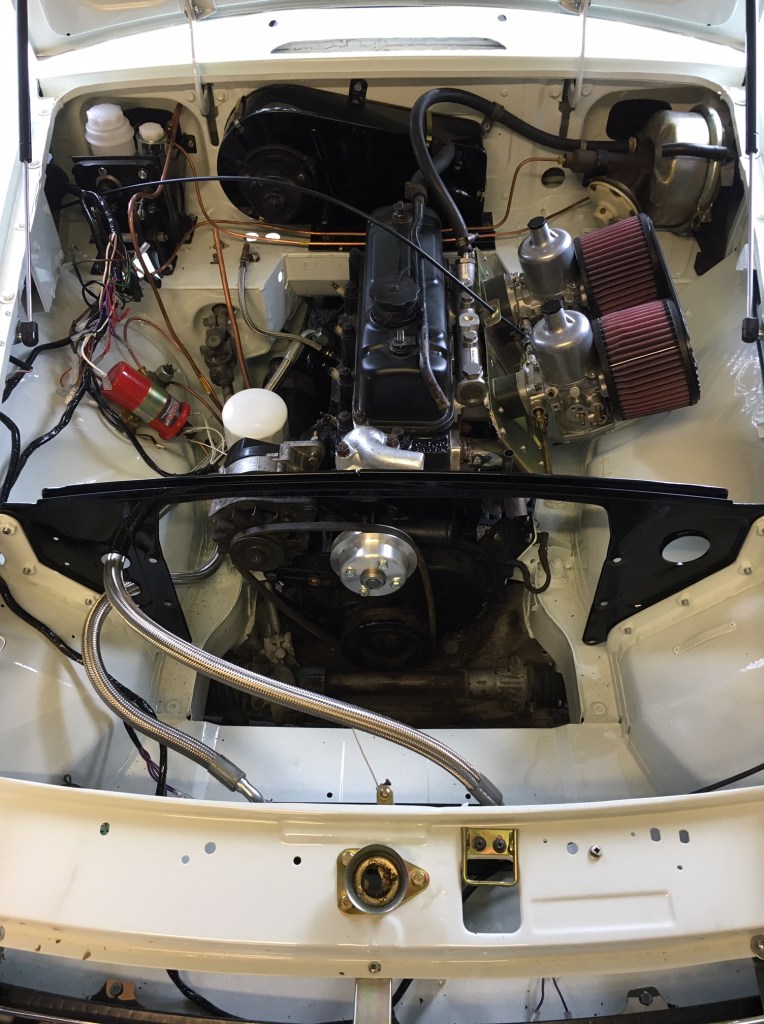
The engine bay is building up nicely with these little steps 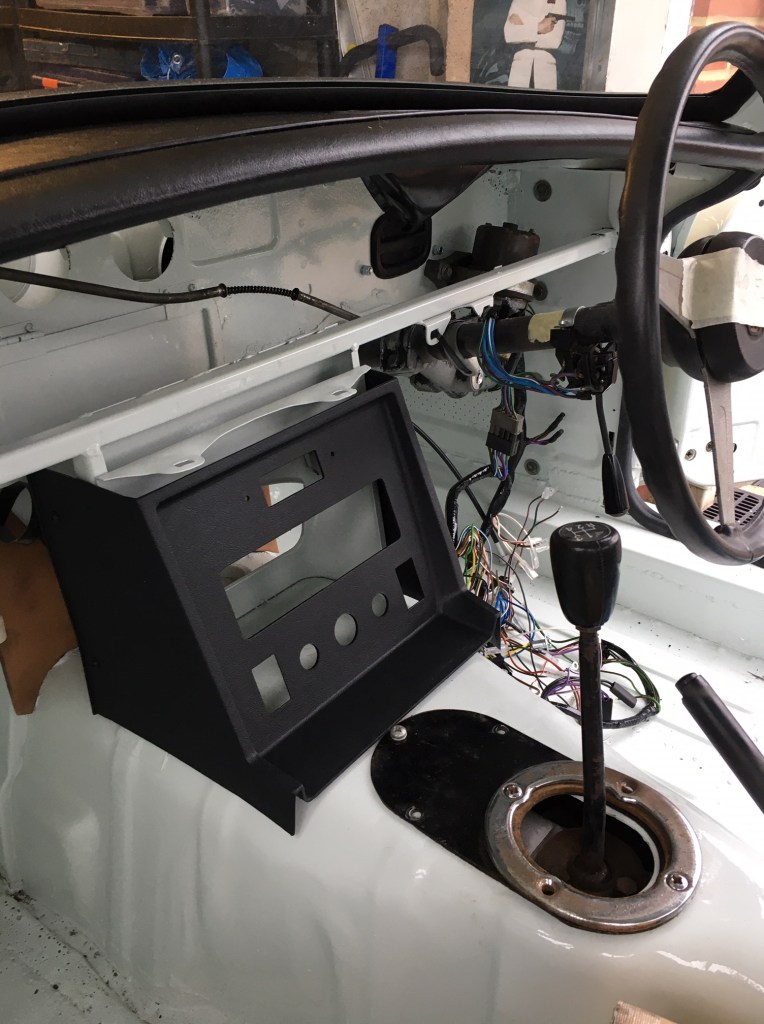
New centre consule installed 
This is my engine start check list – complete with ticked off items, corrections and oil stains. Also a shopping list to the side!
