‘Two hours to do a 15min job’ is how my Dad summarised this Saturday afternoon’s effort. My Dad was a mechanic in his younger days and so when he visited with my Step-Mum Pauline on Saturday it was an opportunity to ask for his help with the MG. His first quip among many was ‘put it on a ramp, Ad’ recongnising that a lot of what I do is made harder by not having a fully equipped garage in which to operate. I remember when as a little boy I would ‘help’ my Dad at the garage where he worked, a British Leyland Dealership with full workshop facilities. When I got into car ownership, Dad would do jobs on my cars and when neccessary we could utilise the ramps to get the car to the right height to work on, not to mention access to air tools and welding equipment. We would also use the PDI bay to polish cars, often bringing tired old paint to life with a bit of elbow grease and cutting paste. Happy days.
A look around my ‘Parts Department’
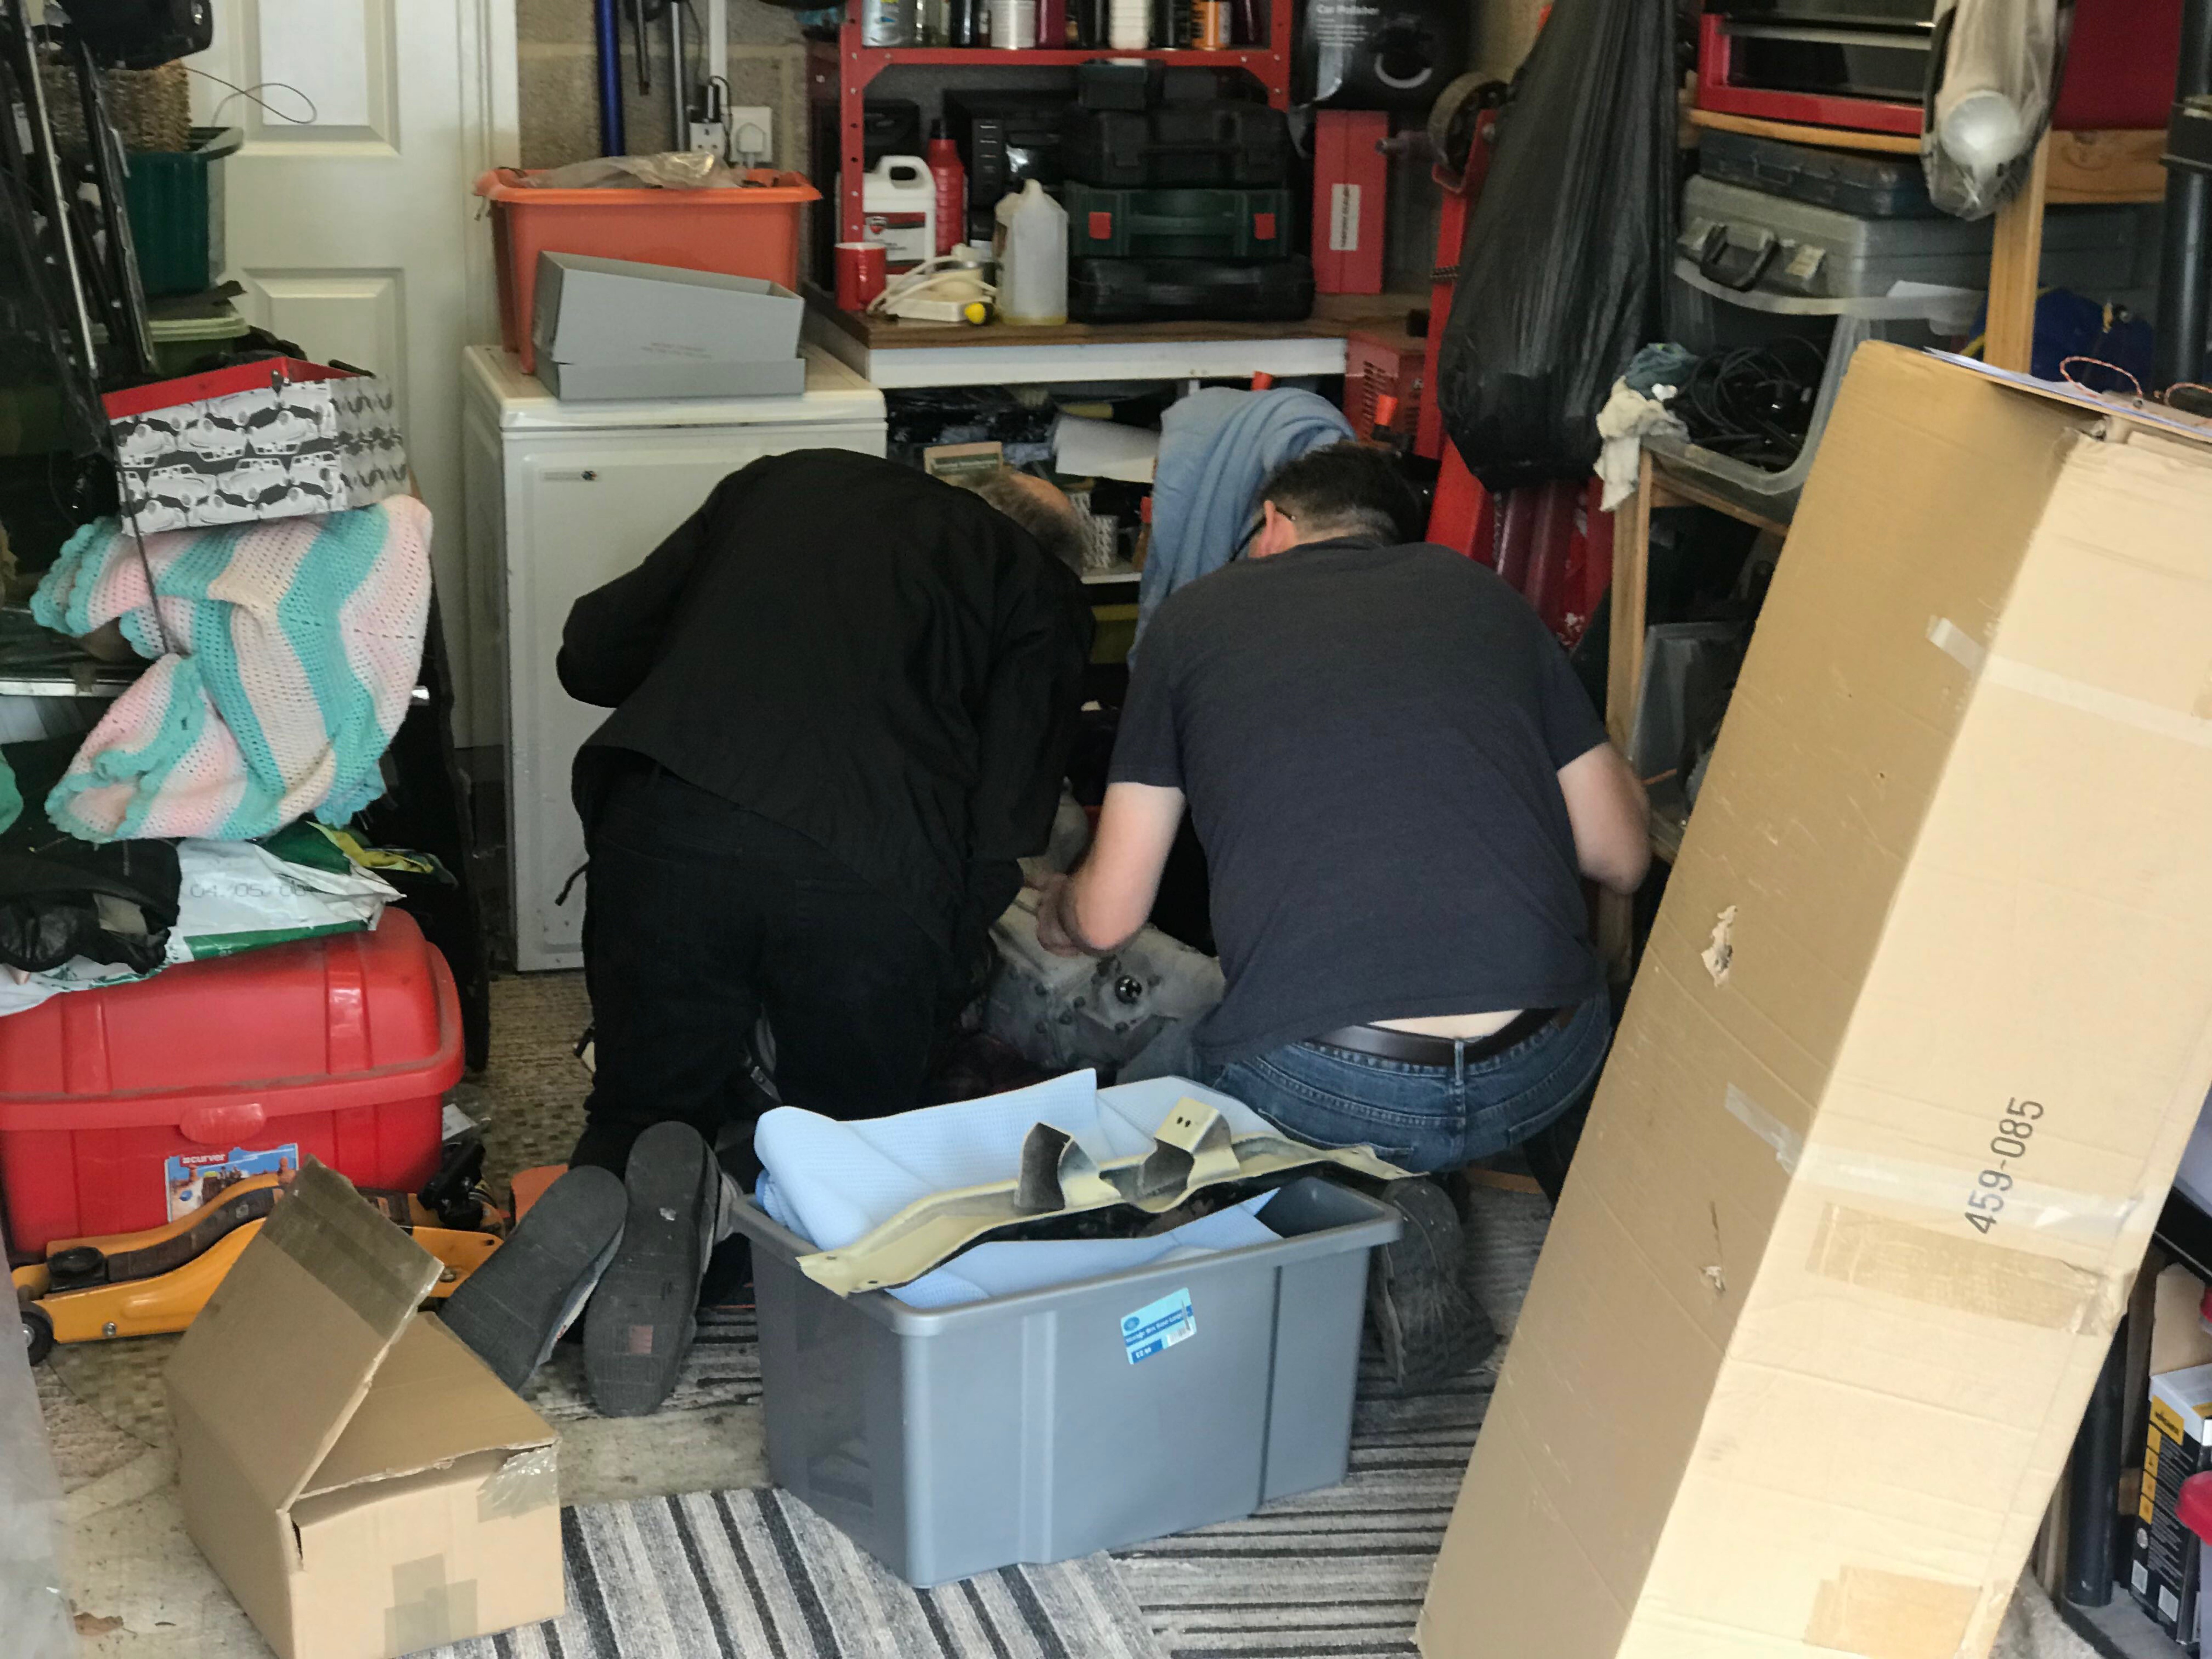
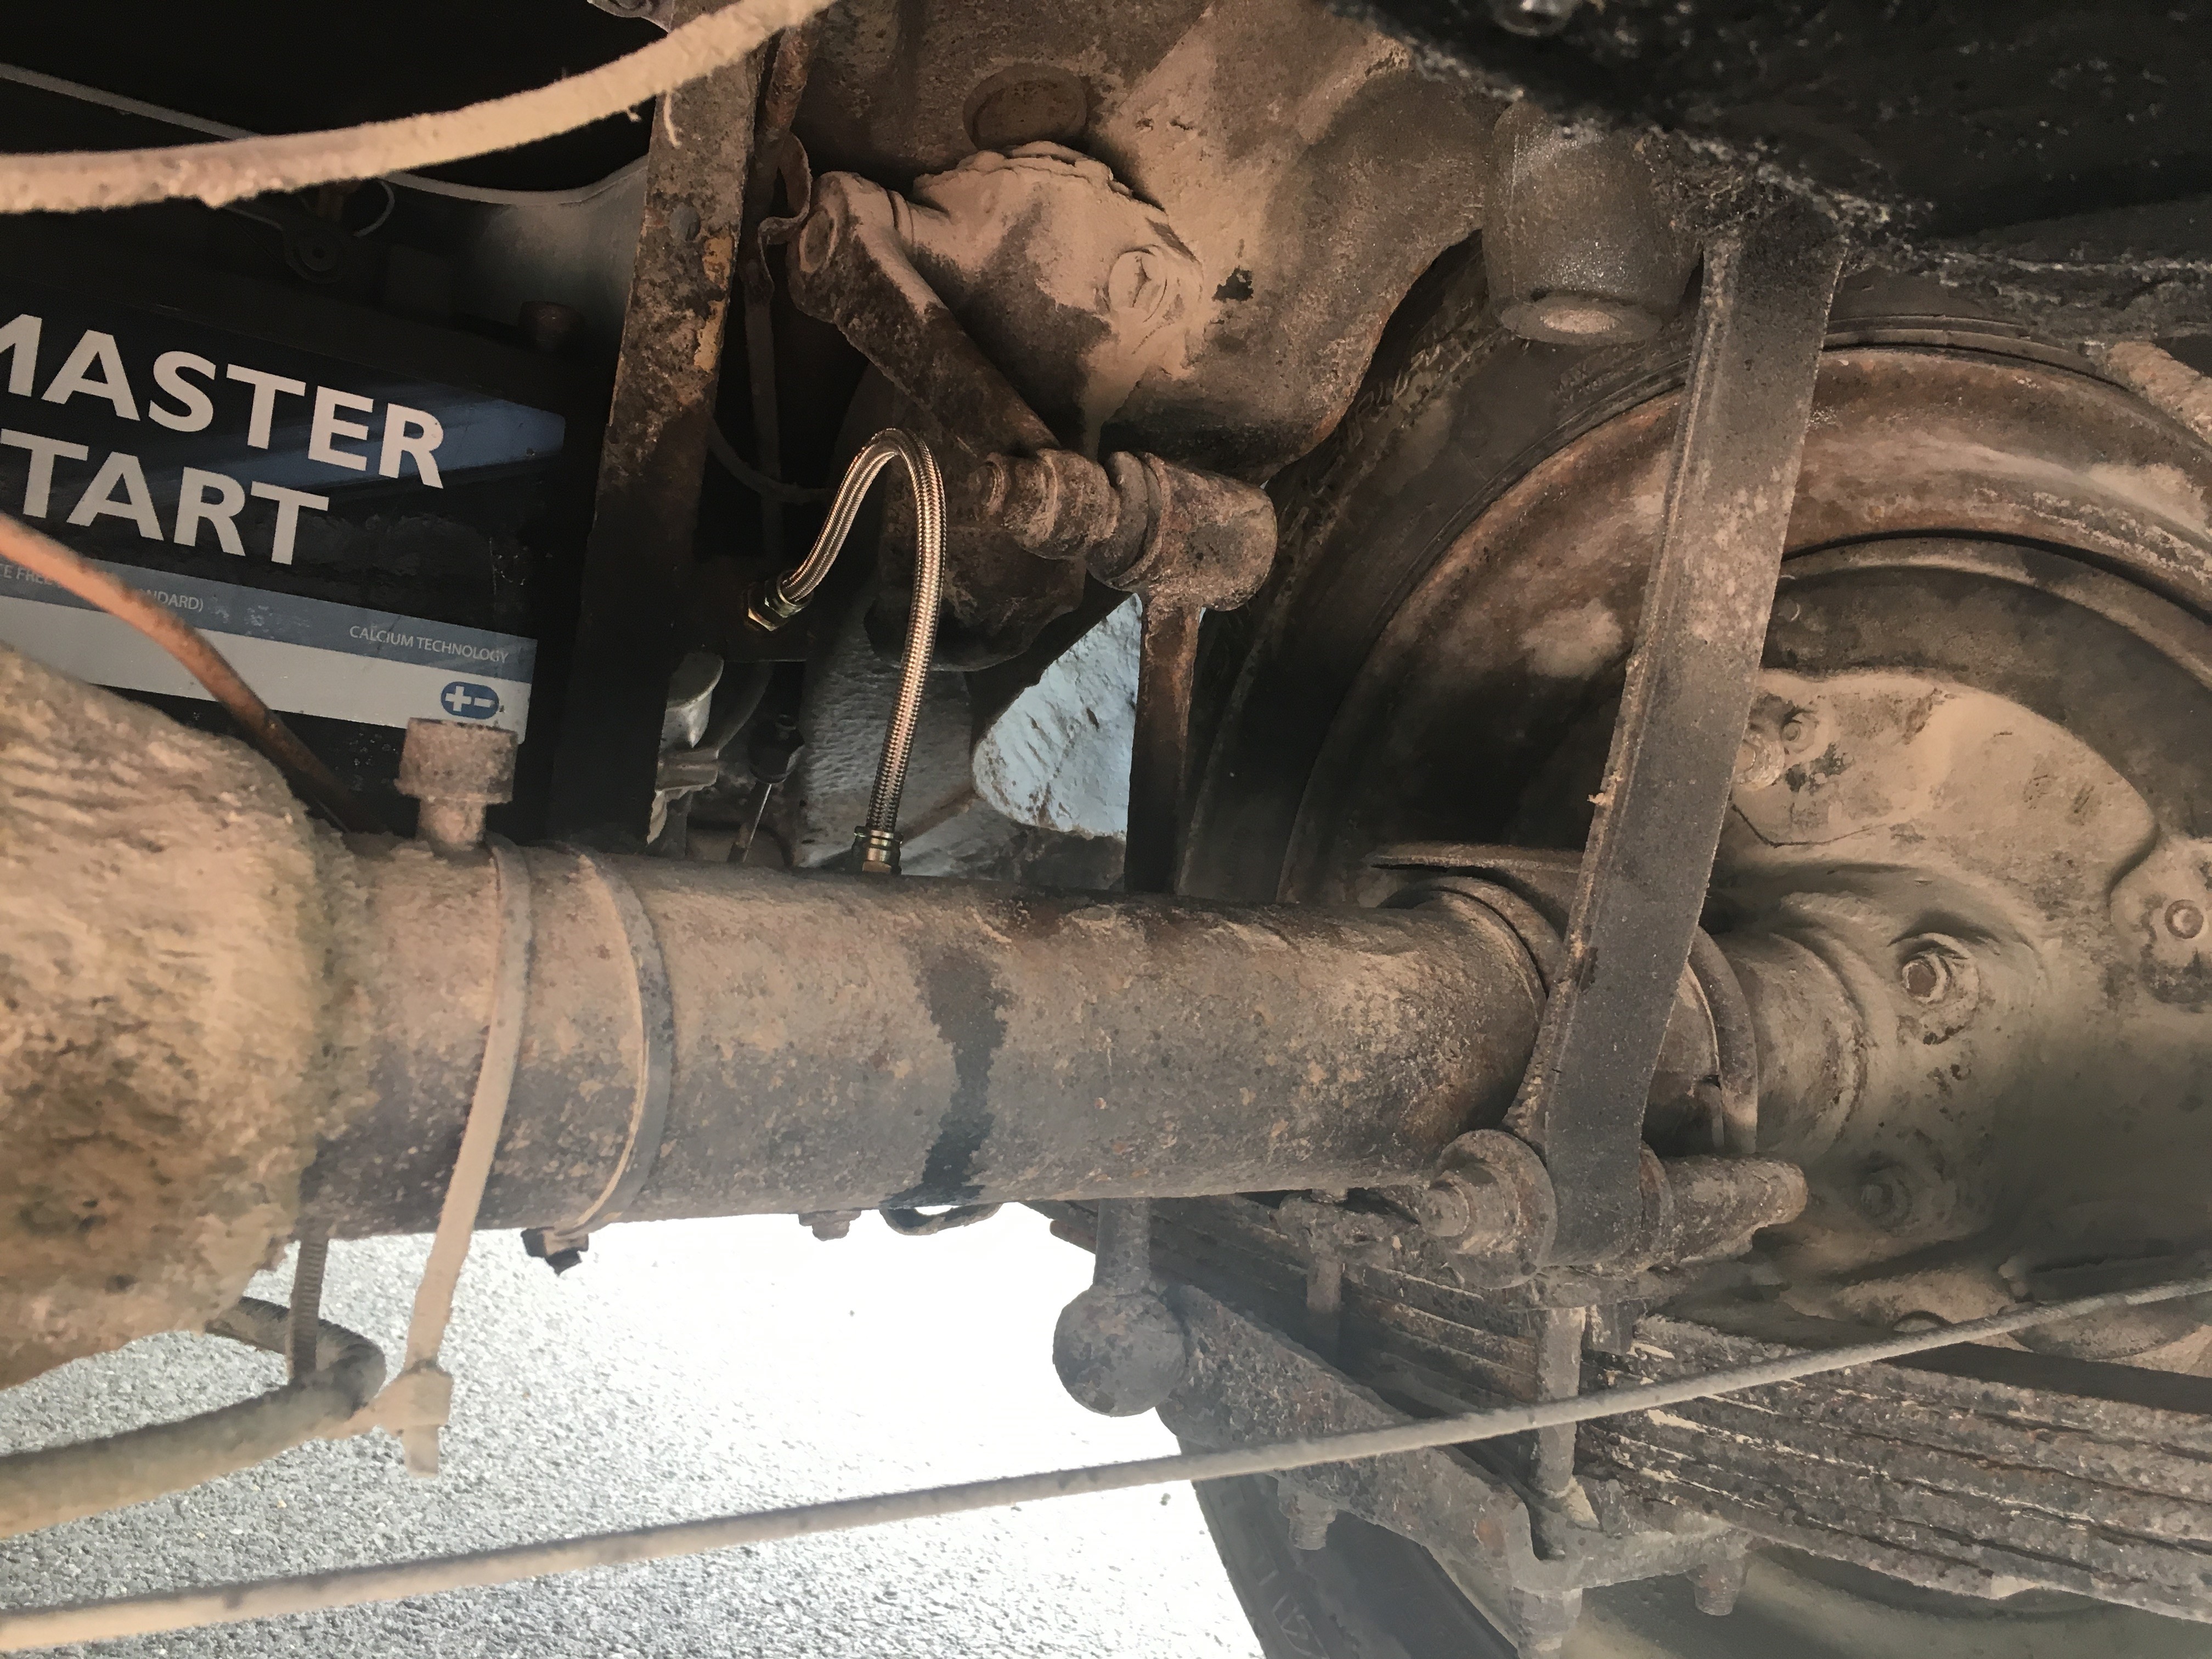
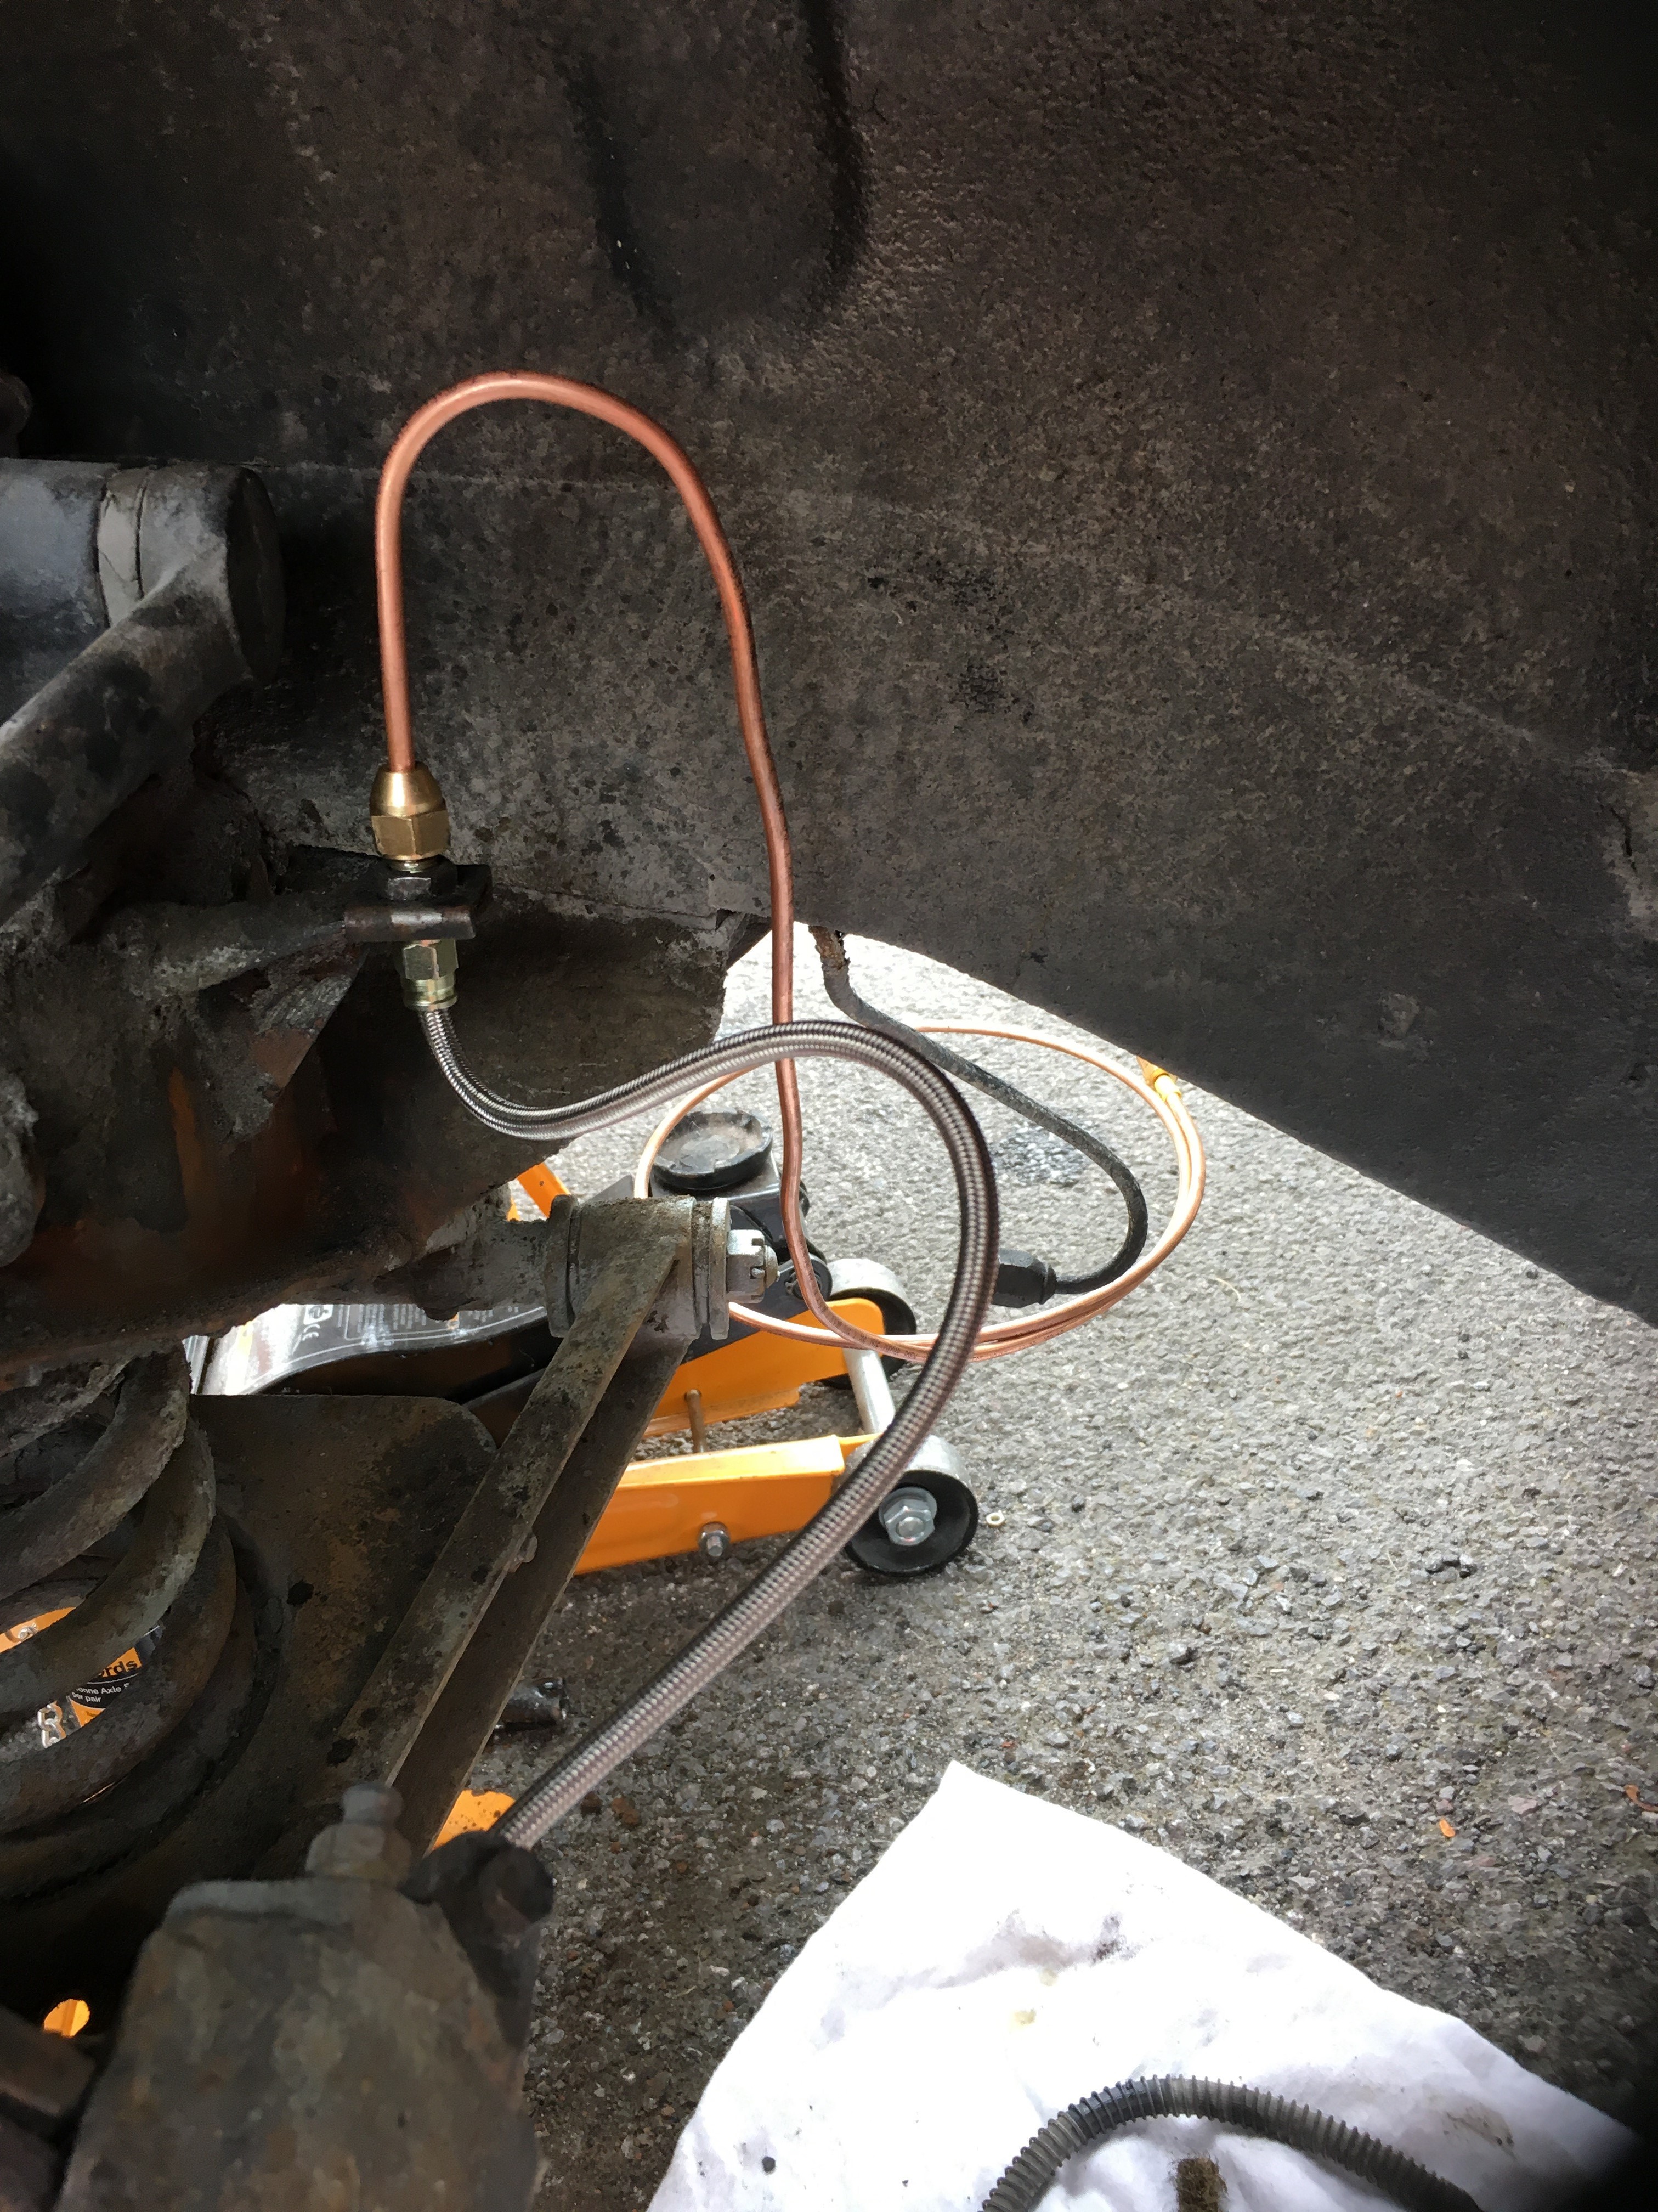
Back to Saturday and we jacked up the rear of the MG, took both wheels off and had a look at the brake pipes. We replaced the flexible hose (on the o/s) and the short copper brake pipe from the three way union to the o/s drum. The copper pipe needed to be bent to shape and we were able to use the old one as a template.
look at the old chap, in his element
view of the new shiny braided hose
Shout out to Dad for his YouTube channel here 257 subscribers and 39,000 views and counting, take a look. What an absolute legend. Thanks for your help Dad – love you.
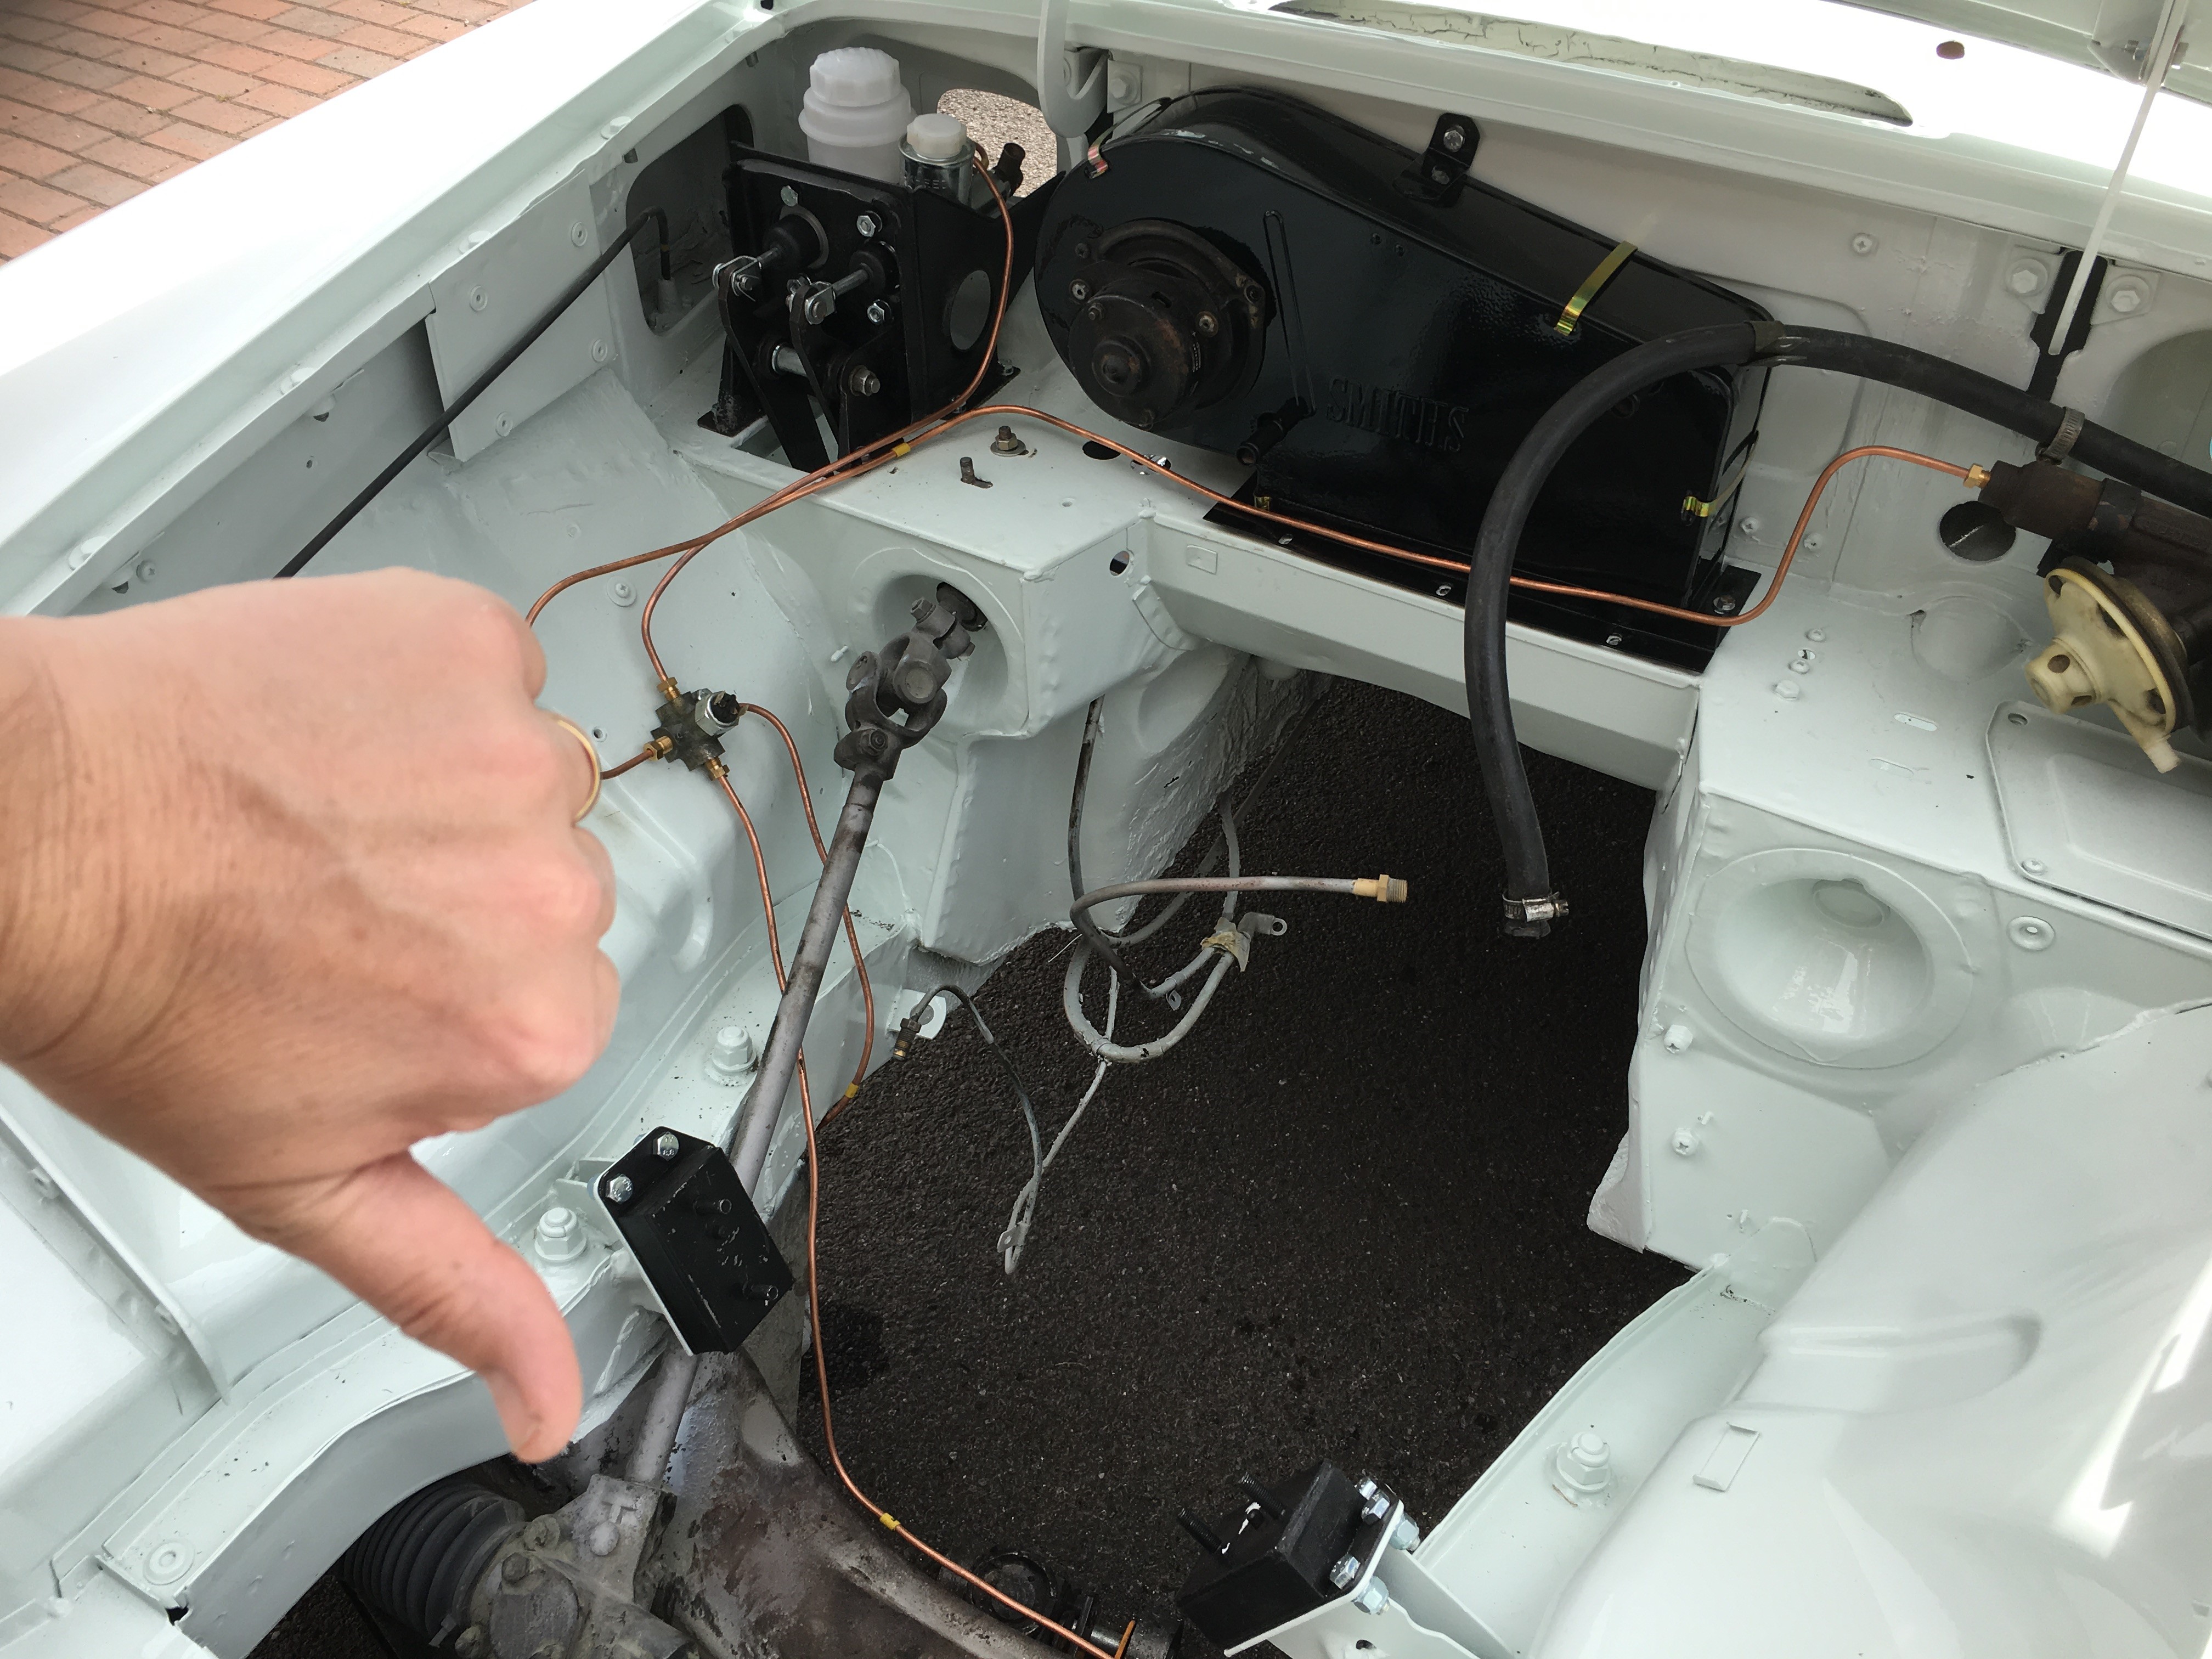
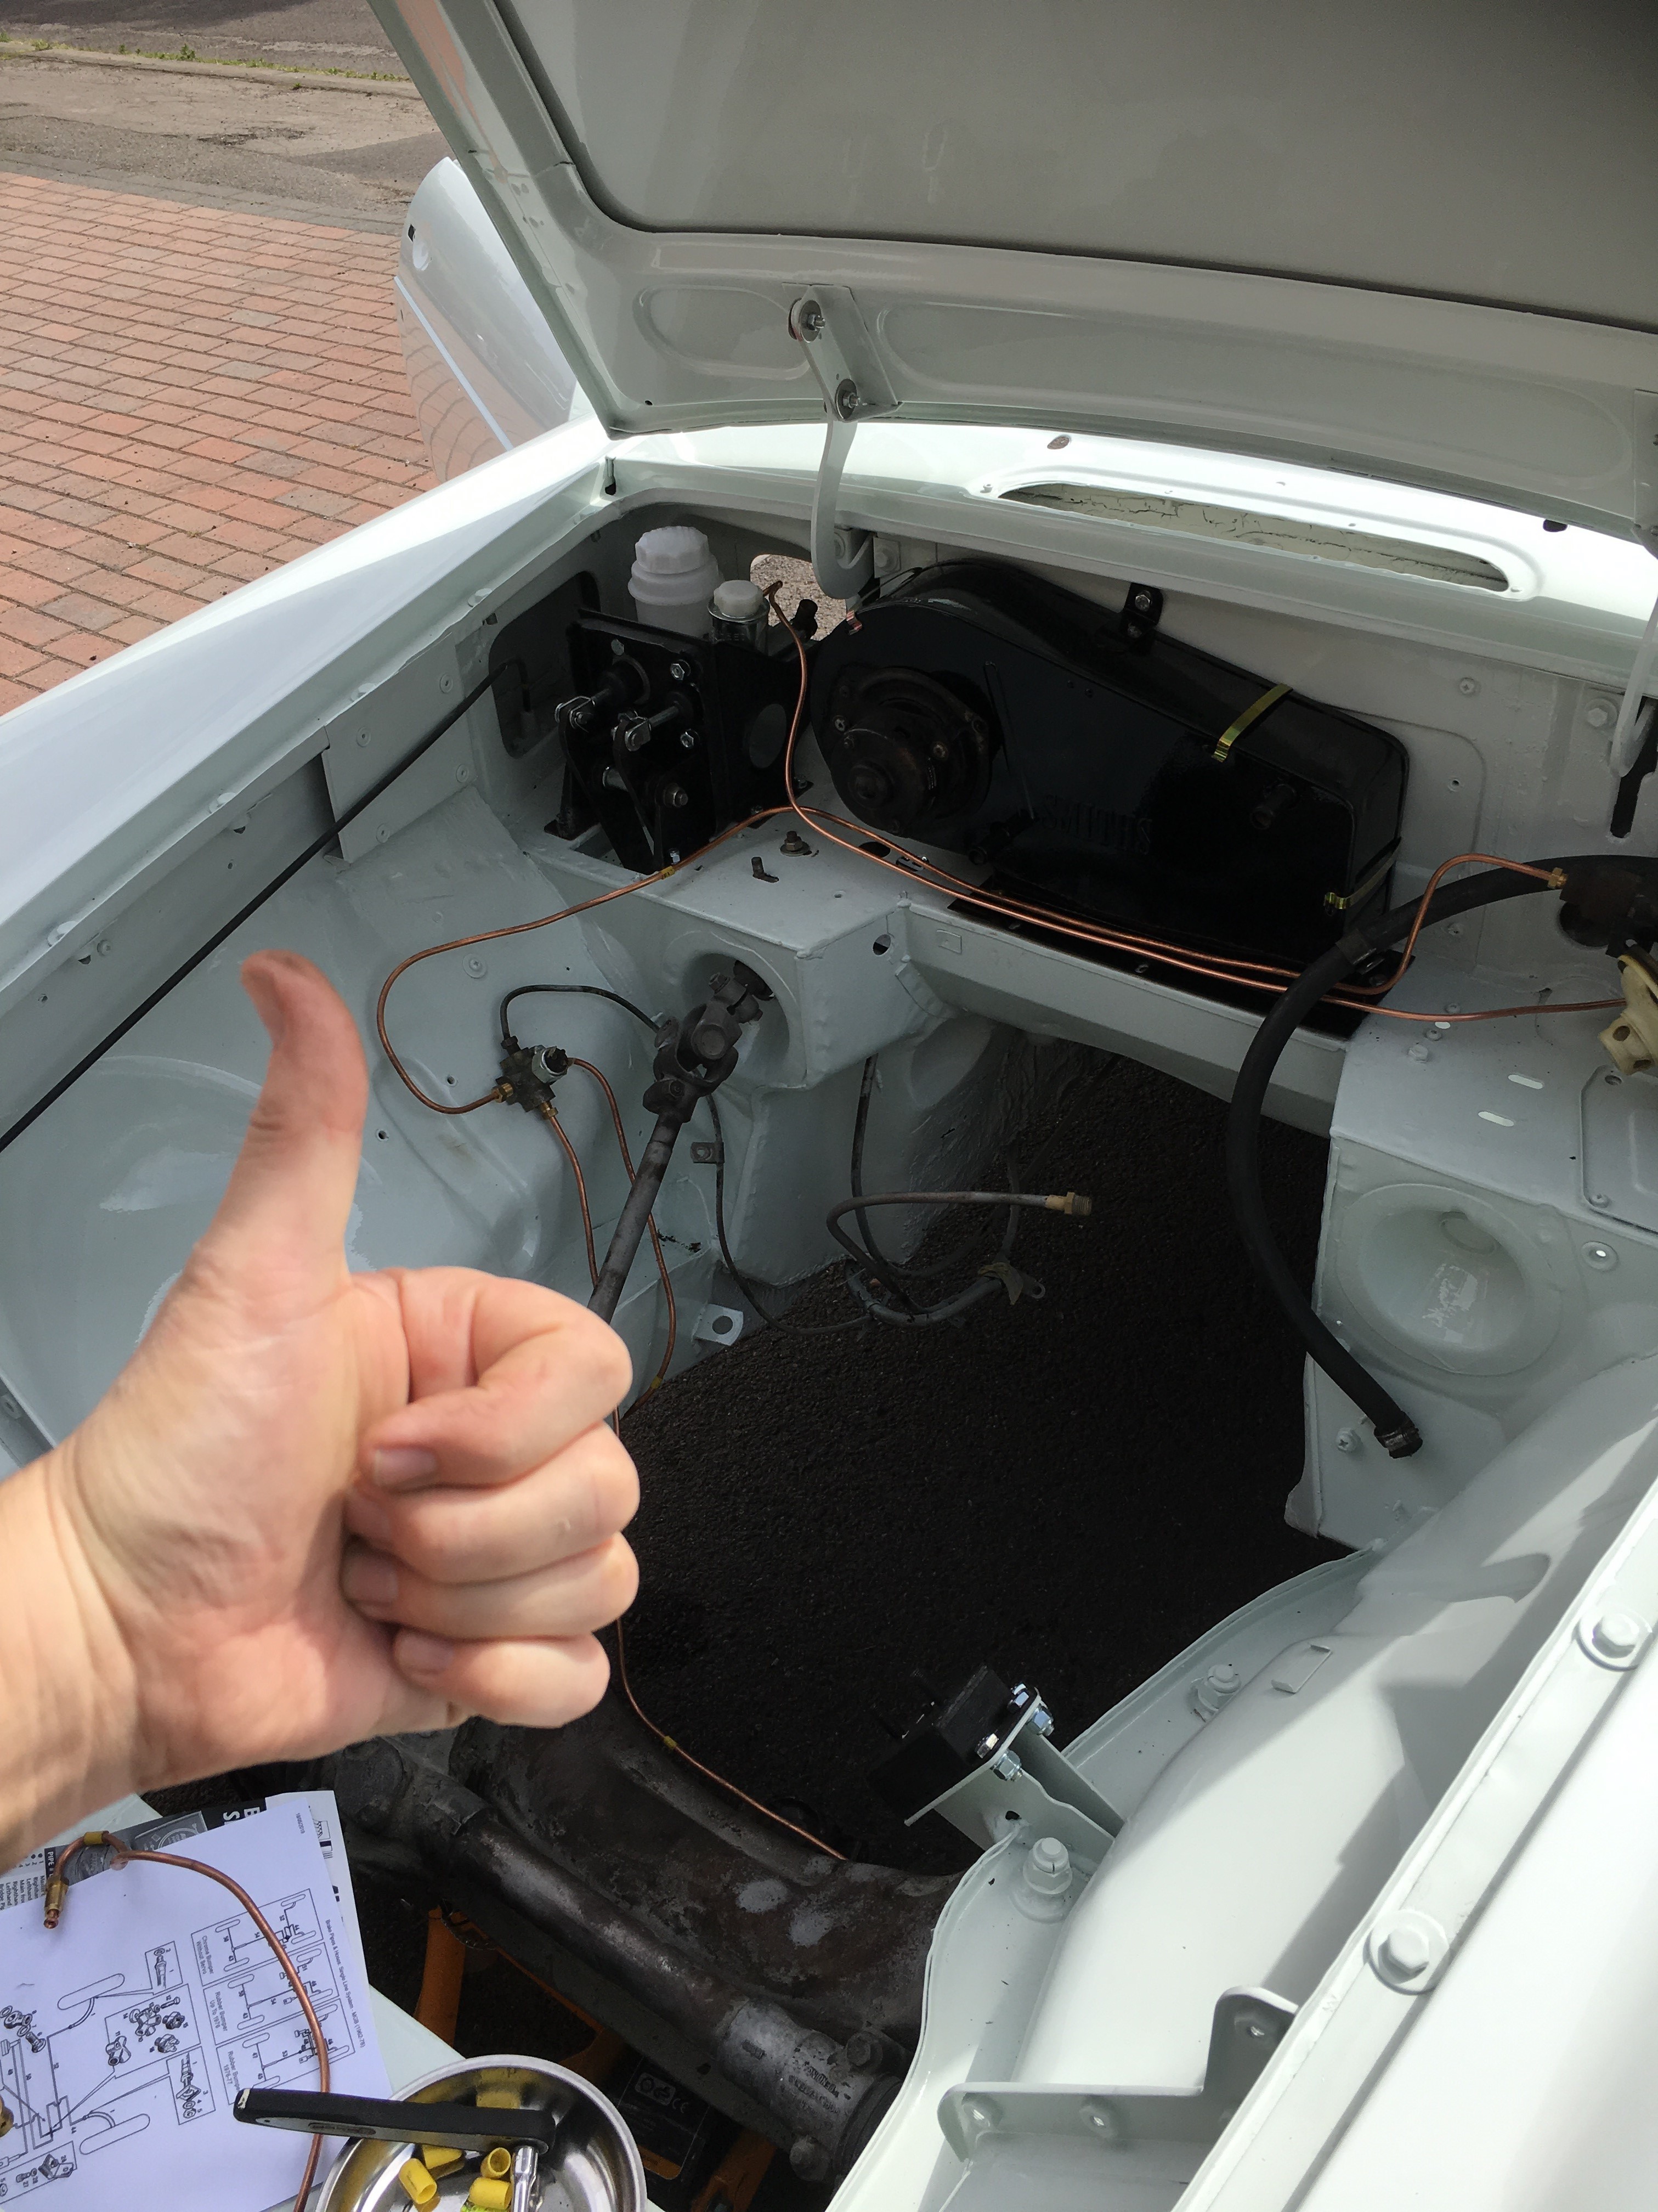
A positive post because today I managed to install the front brakes lines. I have been dreading this job, but actually it went okay. There were a couple of challenges, but that’s all part of the learning curve. Anyway, never mind that, look at the shiny braided hoses – phwoar!
Lovely braided hoses
Okay so it didn’t go all that smoothly, but as always, staying calm and thinking saves the day. First challenge was working from the flexible hoses fixed to the caliper. Removing the hoses was a bit tough and I had to wire brush all the suspension which was still filthy with paint-booth muck so that took a while. Once I have built the car, I will go back and refurbish the suspension, including refreshing the paint, but I want to be up and rolling by that stage. When putting it back I forgot the nut so got in a bit of a pickle – one of the those situations where it didn’t feel right, so it couldn’t be right . After I stepped back to think, I discovered the forgotten nut and then it went back nicely. I fitted the flexible hoses and the new copper pipes and then worked my way into the engine bay, even getting some help from Helen who had to hold a pipe under the bonnet while I accessed the master cylinder from the inside of the car (through the firewall). Feeling smug, I finished up under the bonnet with the remaining brakes and stepped back to admire my work. At this point I realised that having mis-installed one pipe I effectively had created the world’s first MGB with only front brakes. Cue much concerned consultation of the manual and internet searching before I realised my mistake. I had missed the second servo brake pipe, but it was a relatively easy fix to re-pipe what I had done and correct my mistake.
So it was all sorted out in the end. I still have to install the pipes under the car to the rear, but I am now much more confident about this work.
As I still had some time left in the day, I decided to take on a simple job, but one which would remove some more clutter from my shelves. Installing the rear quarter windows was relatively simple but first I cleaned them up using some kitchen spray and a ball of kitchen cooking (aluminium) foil which I had been told (by Rob) was good for refurbishing chrome and it did prove to effective. They went back in nice and simply with all the fixing intact and available. There are a lot of trims to go these windows as well as new rubbers, so they may have to come on and off, but it just felt like a useful thing to do and the car seemed to appreciate it (as mad as that sounds)
So a positive day and I was pleased with progress. It was an inspired decision to work from the calipers into the engine bay, but I am not sure who to thank – either God, or some long passed-away relative was looking down and saying ‘do it this way’. In either case, thanks!
A lovely sunny day and some free time provided the perfect opportunity to start on the brake lines install. But it wasn’t going to be that simple, eh? I had previously checked that the kit from Autotec was complete so today was just a case of choosing what to do first. Chickening out of tackling the master cylinders first, which will require some intricate bending (of the pipes, and perhaps me) I decided to start with the pipe from the servo to the four way union on the flitch plate. This required me to mount the servo which has been sat in a box since I removed it sometime last year. First I gave the servo a bit of a clean up using degreaser and some 1200 grade wet and dry sandpaper. Having made it look half respectable, I then turned it every up to work out how it mounted and once I had worked that out, spent a while trying to find a pair of nuts to fit the mounting bolts. With a bit of fiddling, the servo was reinstalled.
Now to the pipe which needed two 90 degree bends added for it to drop from the servo to run across the face of the heater. I formed the bends using my new bending pliers and I was reasonably pleased with how it turned out, this being my first attempt at bending. The copper is very malleable – I found this out as I had first to straighten the pipe from the coil in which they formed in the box.
At this point I decided to sort out the heater mounting since it would be behind the pipe and should be secure. I won’t detail all the frustrations but suffice to say that a legacy of the strip down was that I left some ruined mountings unresolved and so tried to sort these today involving a drill, a dremel and no real success. I then also mistakenly mis-installed the heater so having just finished it, had to take it out again. Fortunately, it was one of those days that was too nice to get annoyed, so I just put it down to experience.
I took care all day to protect the bodywork, including when I had to hop into the engine bay frequently to take care of the heater. I also harvested the bango fittings from the old brake pipes which I had completely forgotten about. I mounted them on the master cylinders at a 45 degree angle to make fitting the pipes easier. Hope that works out when I get to them. I had found the four way junction which fits on the flitch plate earlier, given that a clean up and checked for fit.
So a bit of a learning day, but progress overall, so that’s positive. It took a while to pack down the tools today, I must have got everything out at some point, but that’s what happens when you encounter old car problems.
Nice environment to work in!
My first attempt at pipe bending – a few more to go!
So today I fitted the brake and clutch master cylinders into their assembly and then fitted that to the car, including the pedals. Sounds easy doesn’t it, but it took a while believe me. First I had rashly mounted the pedals to the assembly and then when I took it to the car realised that the pedals wouldn’t fit down the hole. So I took it apart again and mounted the assembly sans pedals. This went quite well although at one point I had to lie upside down in the footwell to do up the nuts and that involved some interesting contortions, hence the MG yoga title above.
With the master cylinders in place I can now imagine the first job involved in replacing the brake lines which is to fit the first two lines which come from the master cylinder. This involves them coming out of the cylinder and then performing a 180 degree turn so that is going to test my pipe bending skills. Might get some help for that bit! I did have Mark on hand today to help me fit the bonnet gas struts but with it being a windy day (Storm Hannah), we thought better of doing a delicate drilling job in a gale and instead had a good look at the brake kit which seems quite organised.
After a pleasant meal out with colleagues I returned to my chalet (I’m working away at present) and got the carbs out on the table to do some more work on the cold start enrichment mechanism on the rear carb, which I will call the choke from now onwards. Despite some earlier efforts to clean this up, the mechanism was still so stiff that the return spring couldn’t well, return it.
So I stripped it down again and sanded the surfaces with some 1200 grade sand-paper. On reassembling it still wasn’t very free, so I took it apart and used some 800 grade sand-paper and concentrated on what appeared to be some corrosion within the body of the carb which I think was causing the friction. The frustration is that when loosely inserted it moves freely and only tightens up when fully assembled. Sigh. End result, moving better, but still not enough, so another strip down and sand is due, but not tonight because I don’t want to be doing this all night!
On the plus side, I am cleaning more bits as I strip them and I am getting to know how it all fits together, which can only be a good thing for the future.
First opportunity this morning, since the respray, to push the MG out of the garage and look to see what jobs could be done. Noting that I haven’t got the harness yet or the brake pipes I can’t get started on the critical path items, however I am able to put components back on the car which need to be done sometime and which don’t affect anything else.
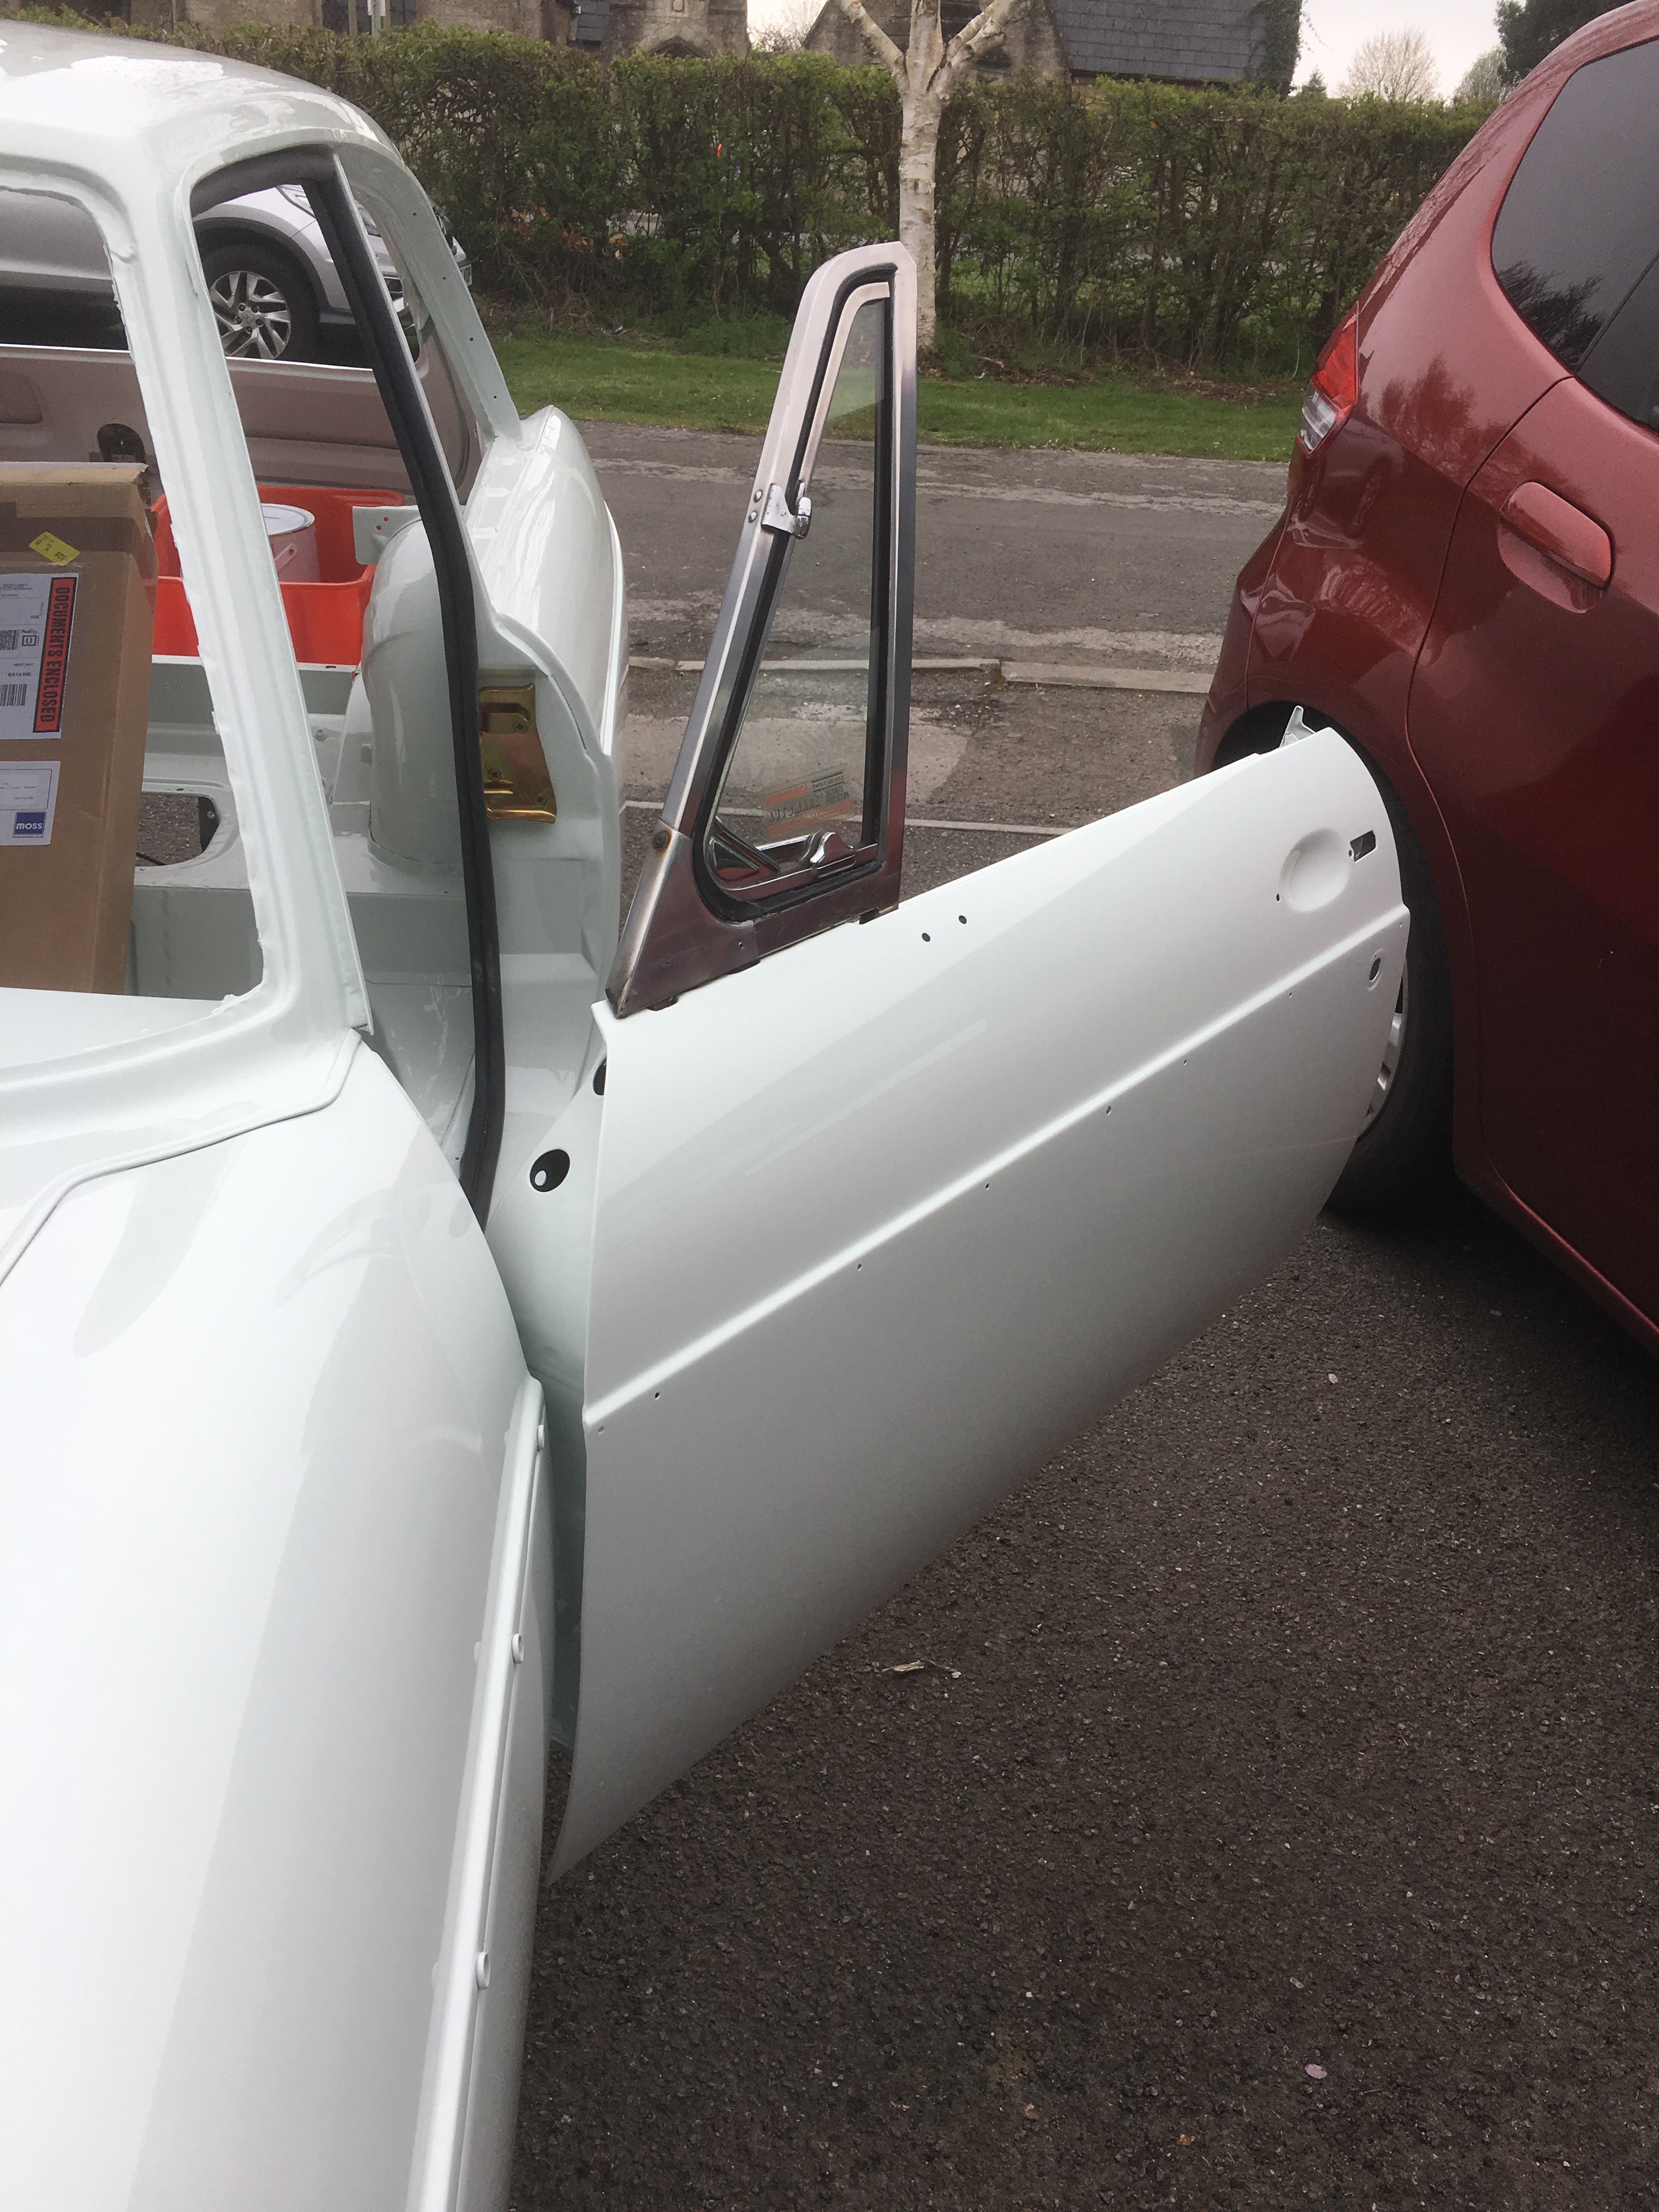
So I bolted the quarter lights back on to the doors, easy enough as I could remember how they came off. It was a bit awkward feeding the leg through the narrow slot at the top of the door without scratching the new paint, so I wrapped the end in a cloth bag and eased it through the gap at the middle of the door where I could make a bit more room. After this I was reacquainted with the very long threads on the bolts and the restricted access to them.
Just to be make room in the garage I also put the spare wheel into its recess, laid the cover over it, put the battery into its cradle and put the loose rear seat base in place. Well why not.
I also put the heater into its place to try to reacquaint myself with this unit which is an early fit item as the brake lines run past it under the bonnet. Nothing screwed down, just getting a feel for it really.
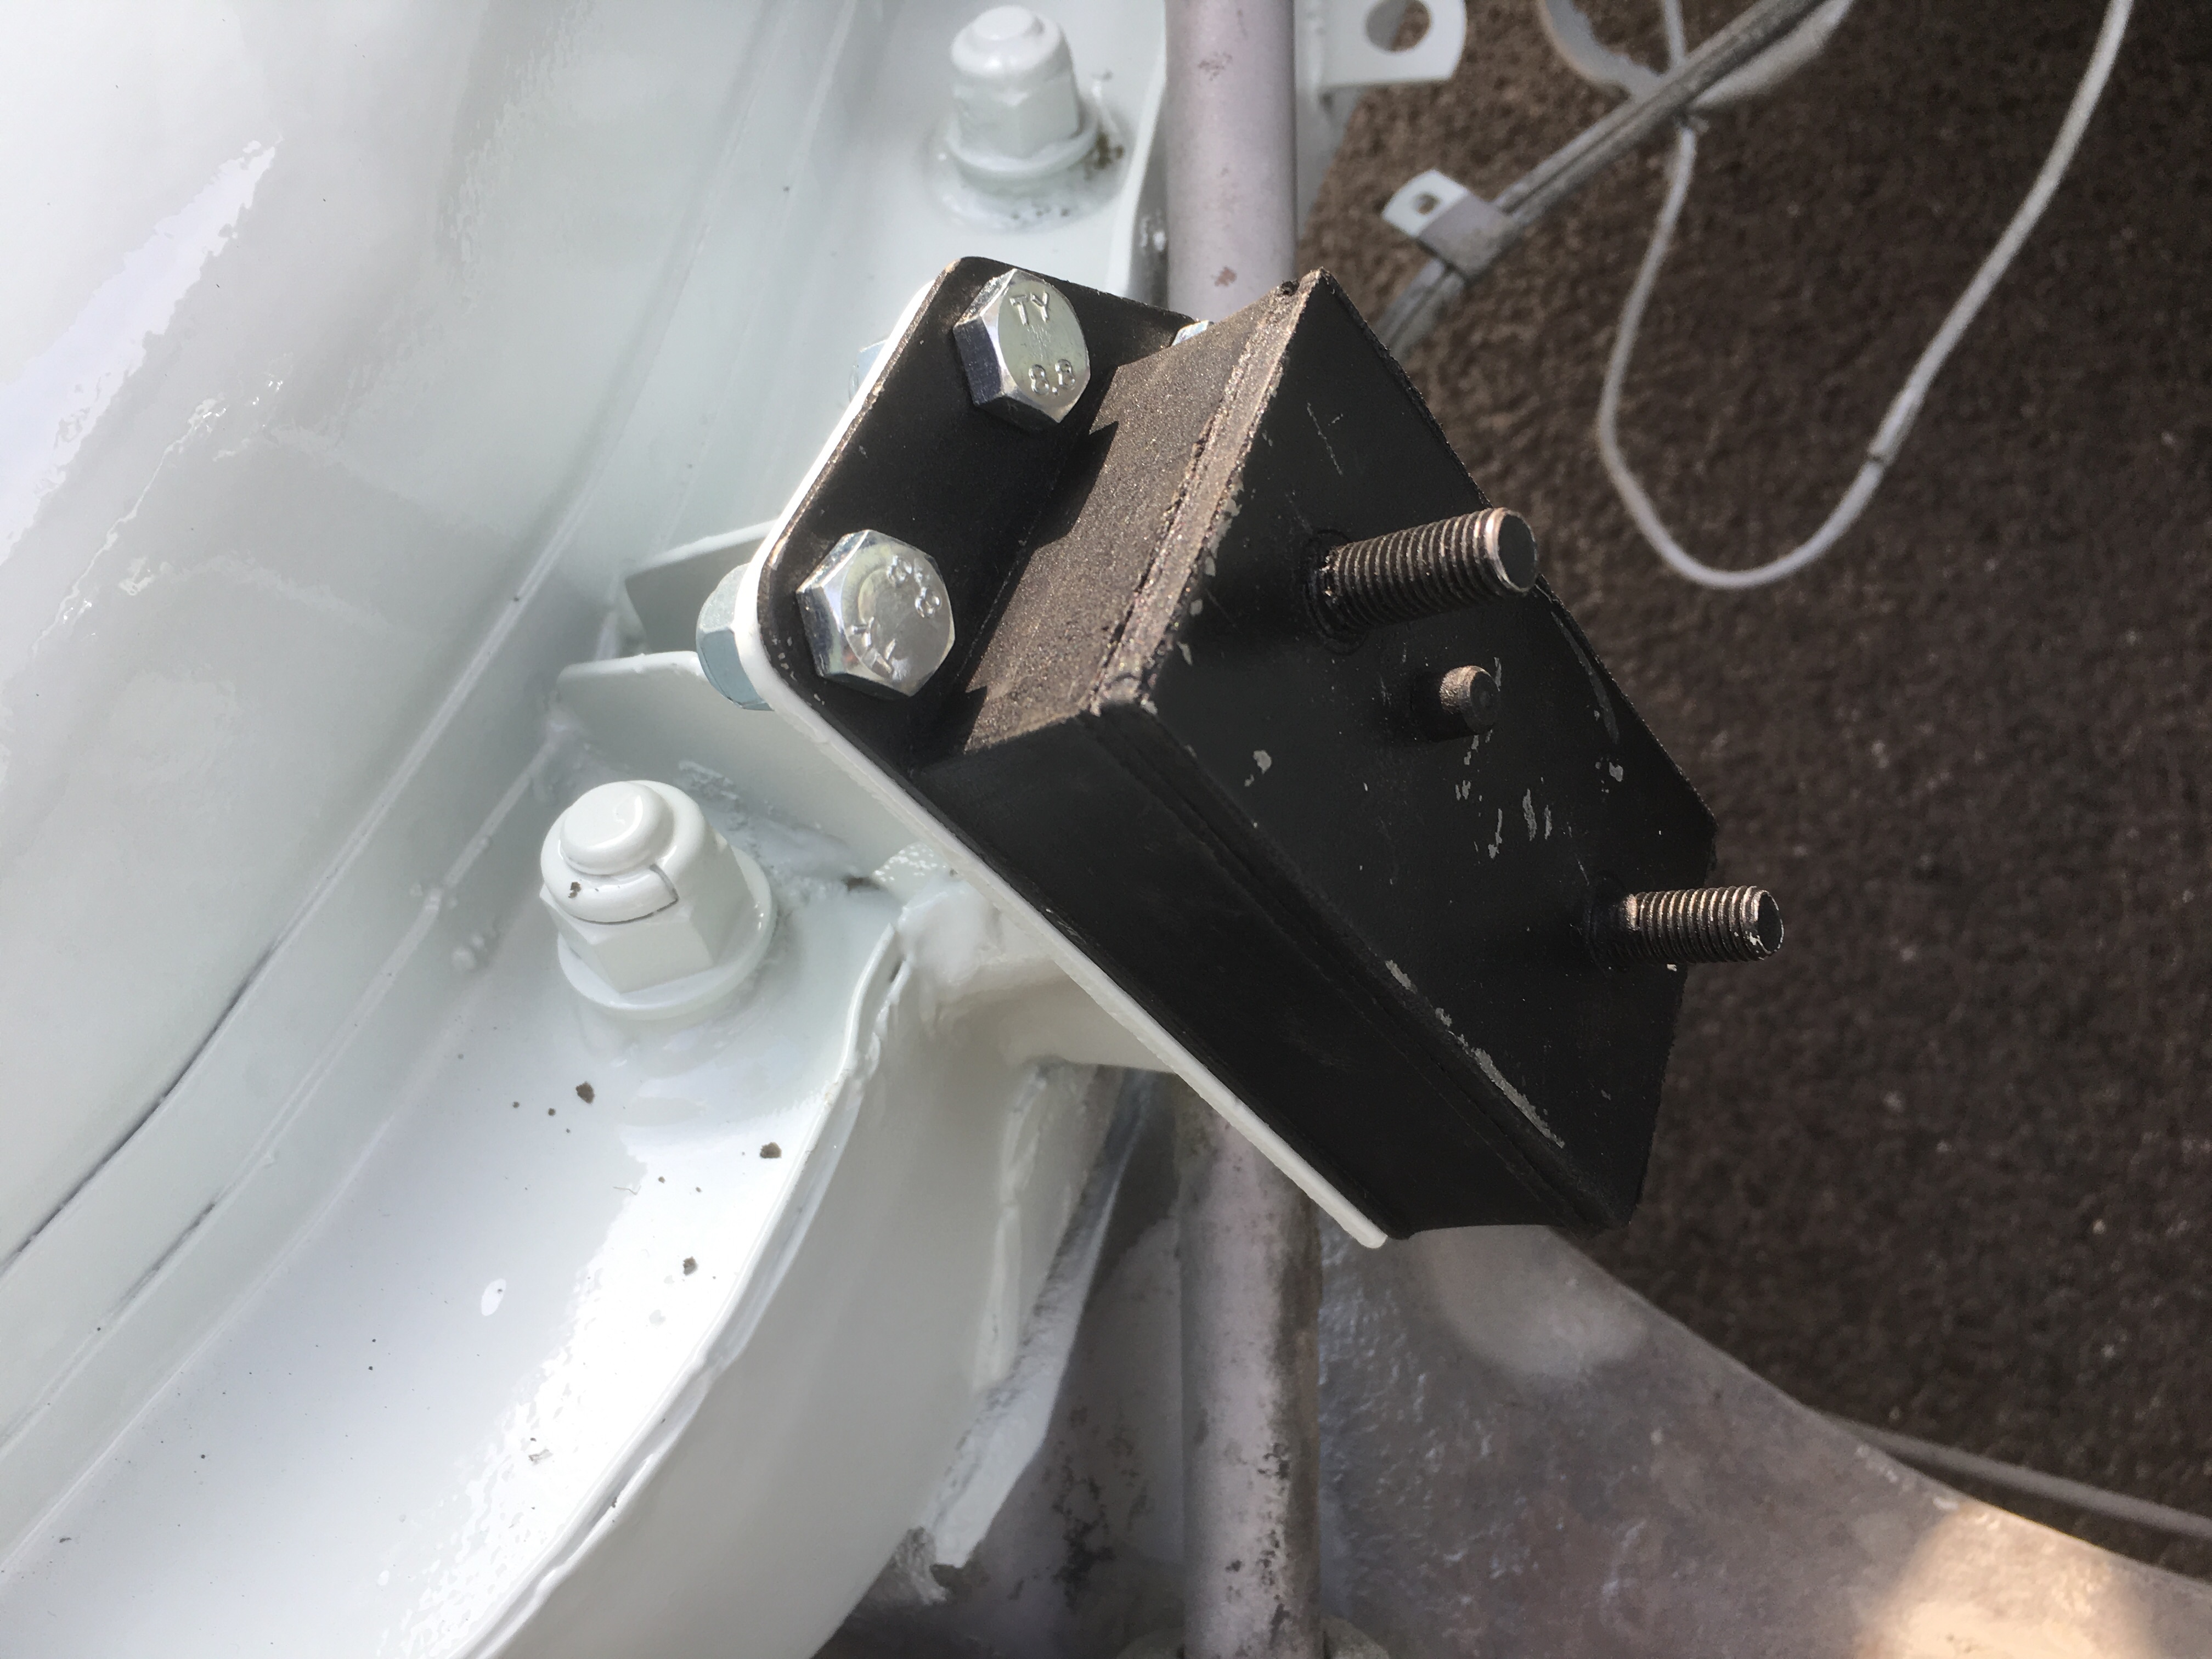
One annoyance was when I went to bolt in the engine mounts to find that at the MG spares day I had bought two o/s mounts instead of a pair of each. What a dummy.Still, not an expensive item, just need to buy the right one now.
Had some passing interest as I was working on the MG including a dog walker who came up to say hello and tell me about that he had built a Westfield 21 years ago. We had a nice chat and as I’ve said before, this project is about the experience and the people I meet as much as the end product. A nice morning’s work.
Treated myself to some easy time in the garage today. I had a grub through a few boxes and made a pile of parts which are not going back on – water pump, distributor, oil cooler and hoses. I haven’t decided whether to hoard these in the long term or just toss them. I think once I have rebuilt the MG I will cart them off to the recycling centre. It helped to thin out the piles a bit. I also sorted a few of the boxes a bit better – all the heater components in one place, that sort of thing because it didn’t all come off at the same time. I can then concentrate on one system at a time when I rebuild, that’s the idea.
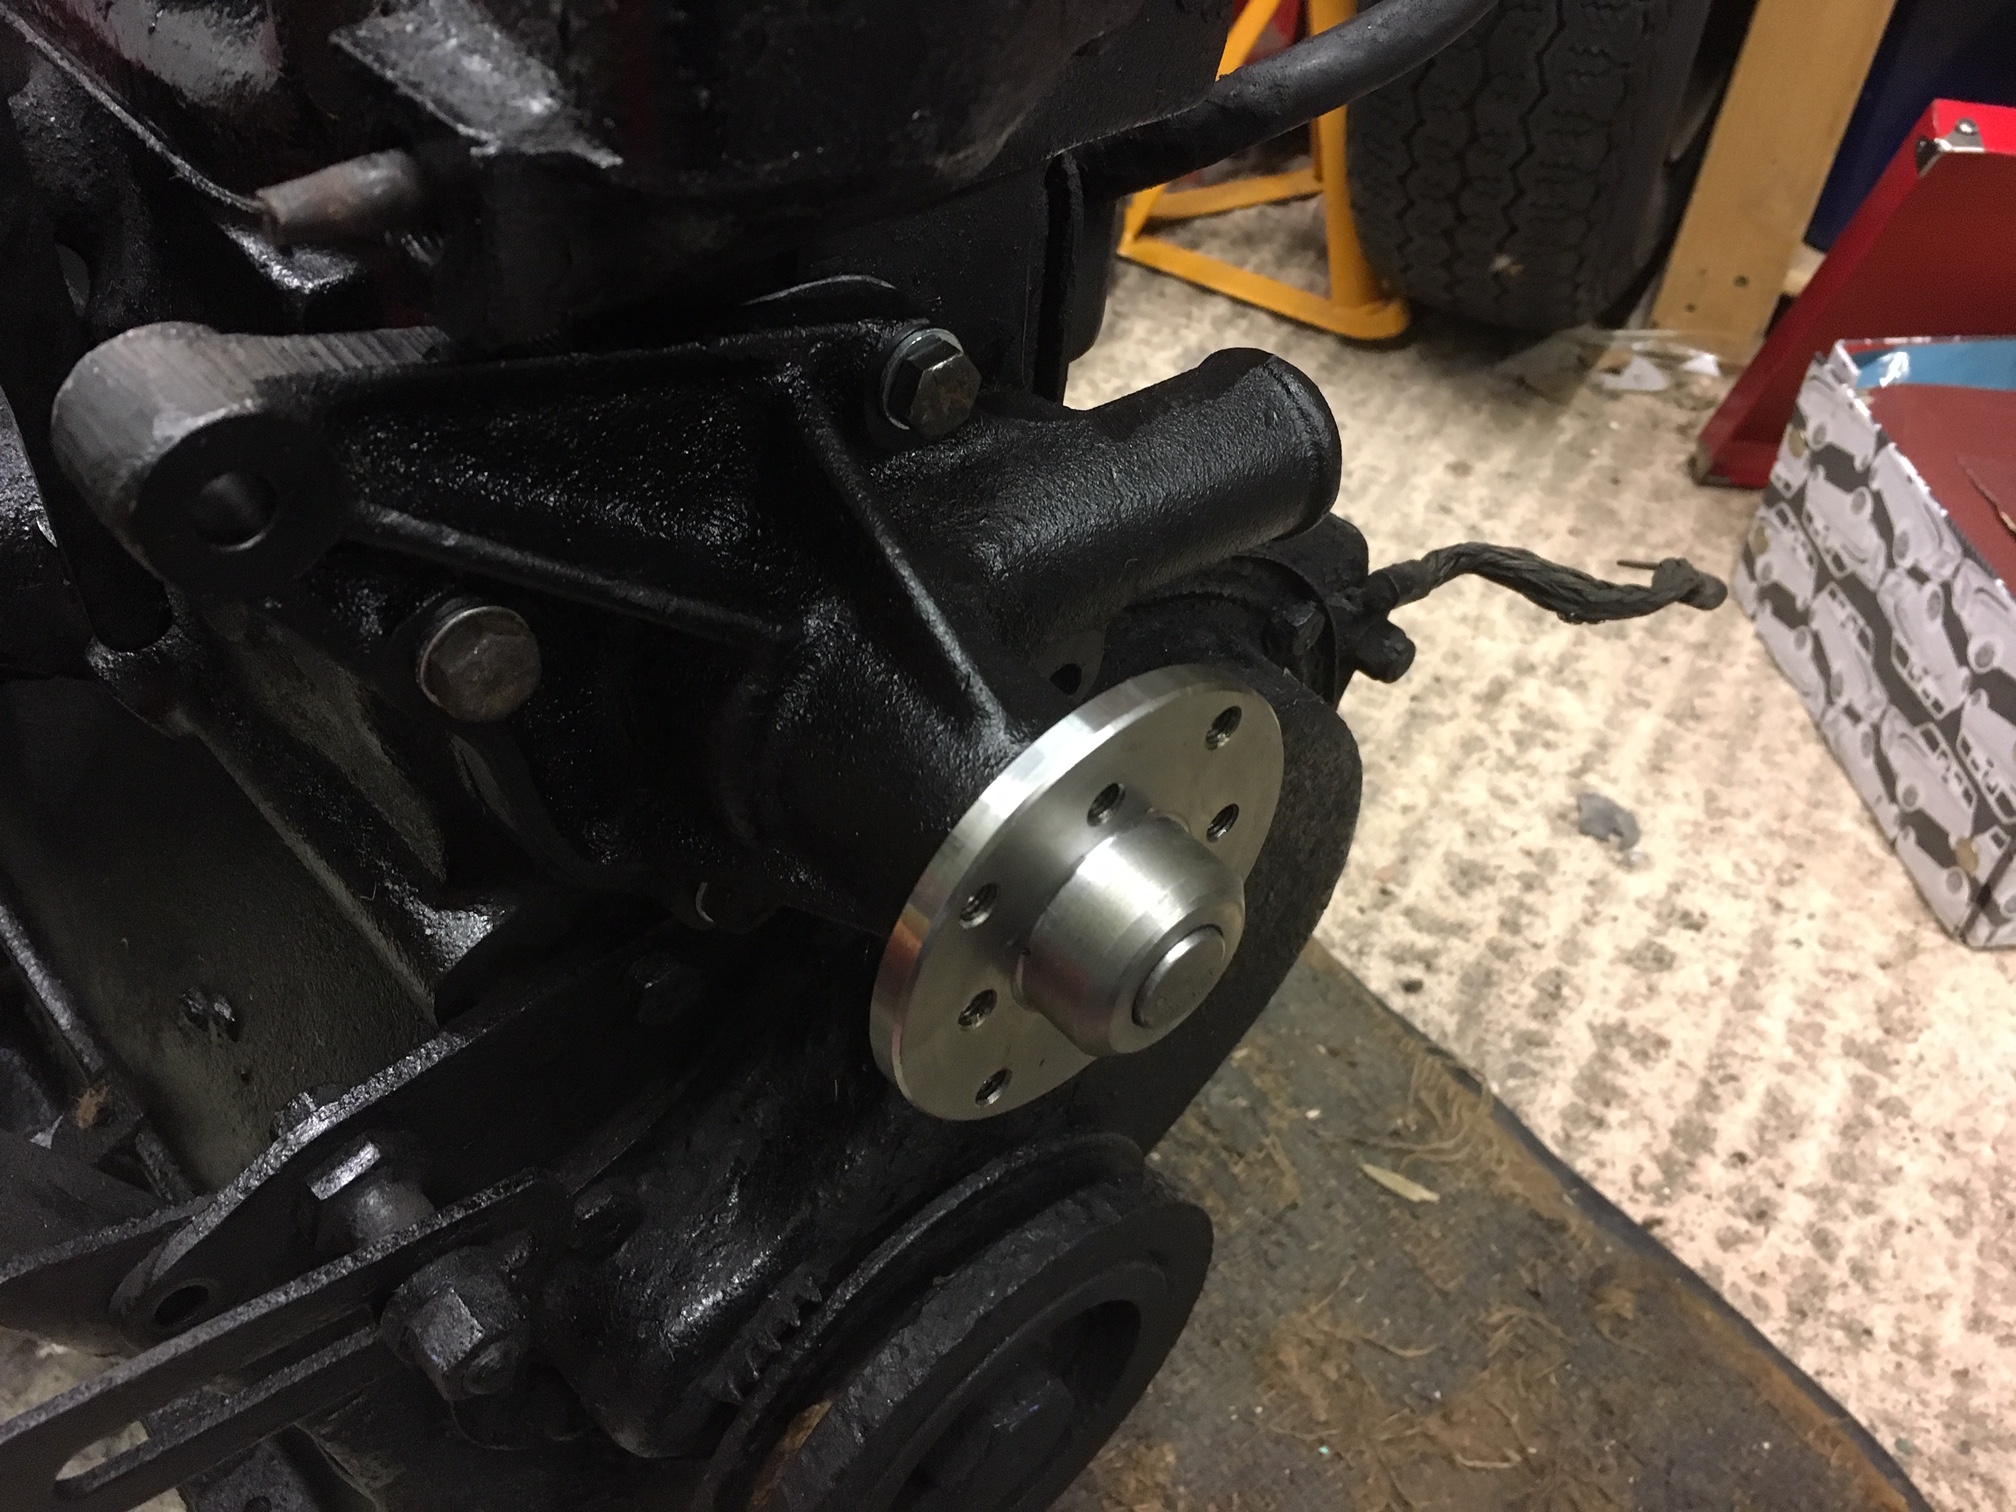
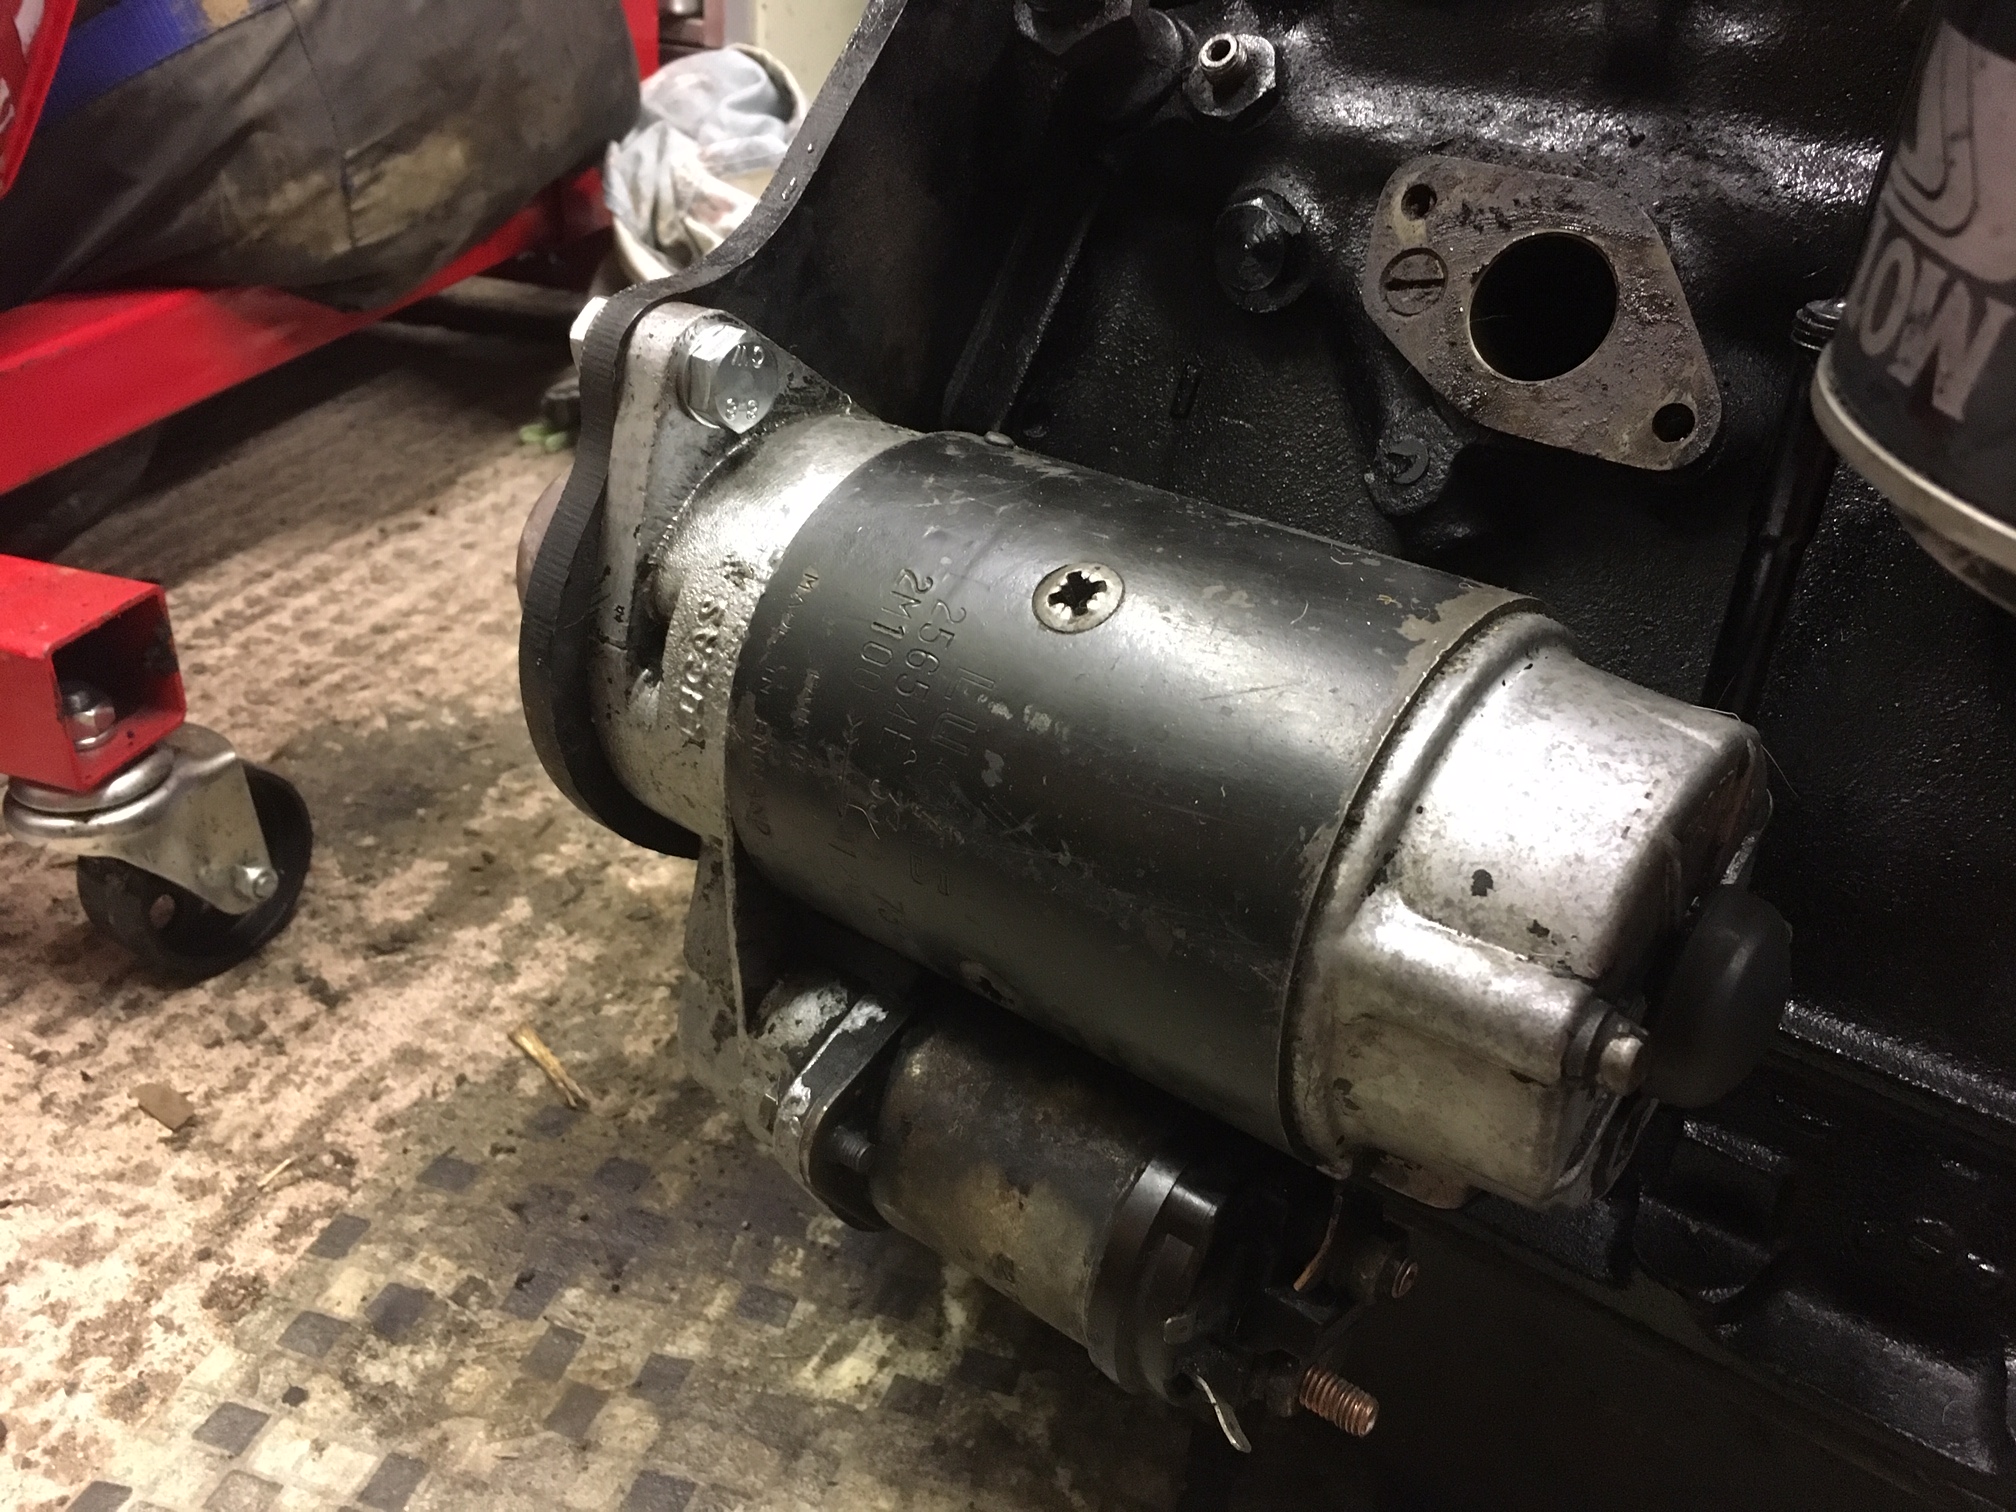
I did take a couple of steps forward though. I trial fitted the starter motor which goes back in place very easily and I fitted the new water pump in its place, together with its new gasket. I realised in doing this, that I needed to get the pulley off the old water pump (I presume it comes off). The pulley appeared to be held in place with four bolts, which I did manage to get off, but they were extremely tight. As it was a 7/8 fitting, I was using my mini-socket set, which is great but it doesn’t get much leverage. I did manage to get them all off without rounding them off or snapping them, so maybe I am learning something here. However, this effort was not rewarded with the pulley separating from the water pump, so I will need to investigate further or consider buying new.
Attempting to remove the pulley from the old water pumpThe new water pump in positionThe Starter motor bolted back onto the engine
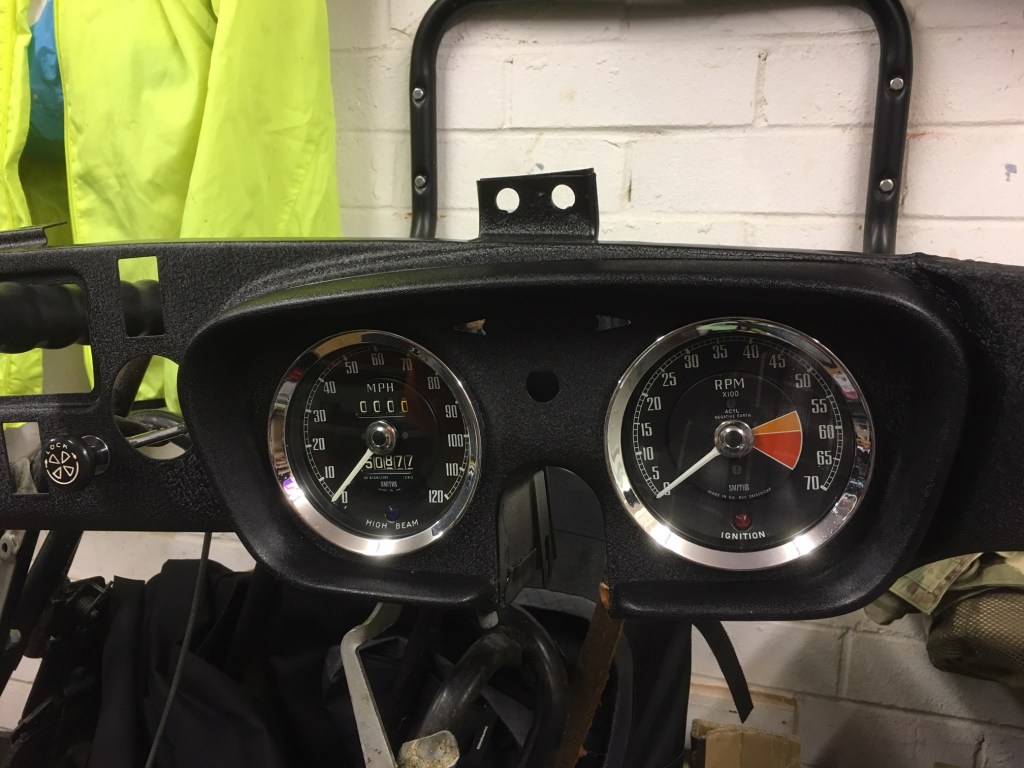
I also trial fitted the rev counter, speedometer and choke knob to the dashboard just for fun. First I dug out the dashboard cowl (a plastic item on this MGB) which needed a good clean and then treatment with an Autoglym trim product which feeds the plastic and makes it all black and shiny. I fixed the cowl back in place with the original screws which I HAD CAREFULLY stored when I removed it. It amused me that the cowl had been such a pig to remove when I had done this in the summer with the dash in place, so needing me to feed my hands through behind the dash. What a muppet I was attempting that, anyway, lesson learned and that all part of the fun. The grazes to the back of my hands have healed up anyway so no harm done!
Trial fitting the gauges
So that’s it, barely an hour’s work in total, but it was nice to just take my time and the rebuild is all about putting back new, or at least cleaned up stuff, rather than the strip down which was about penetrating years of grime. Working for the rest of the week, so no progress on the MG although I’ve got some researching to do and purchases to ensure the paintshop can continue to progress.
I popped over to Gavin’s paintshop to deliver the front grille which he wanted so he could do a trial fit. Things are never simple, I found the grille brackets but as I had needed to cut bolts off, they weren’t in good shape so I had to order them new, along with door rubbers (I was going to buy new anyway) and the little rubber pads which go on top of the wings to support the bonnet. All these parts are needed so that the guys can check for panel fit before they commit to paint. I ordered the parts from a supplier new to me, who seemed okay, but they were unwilling to deliver straight to the paintshop (unlike Moss), so I will have to make another delivery drop next week. Nuisance.
Anyway, that was just the start of the worries since Gavin wanted to discuss a few challenges he was facing with the MG at the moment. Lets break them down into topics:
Valance fit
Passenger door fit
Rear lamp fit
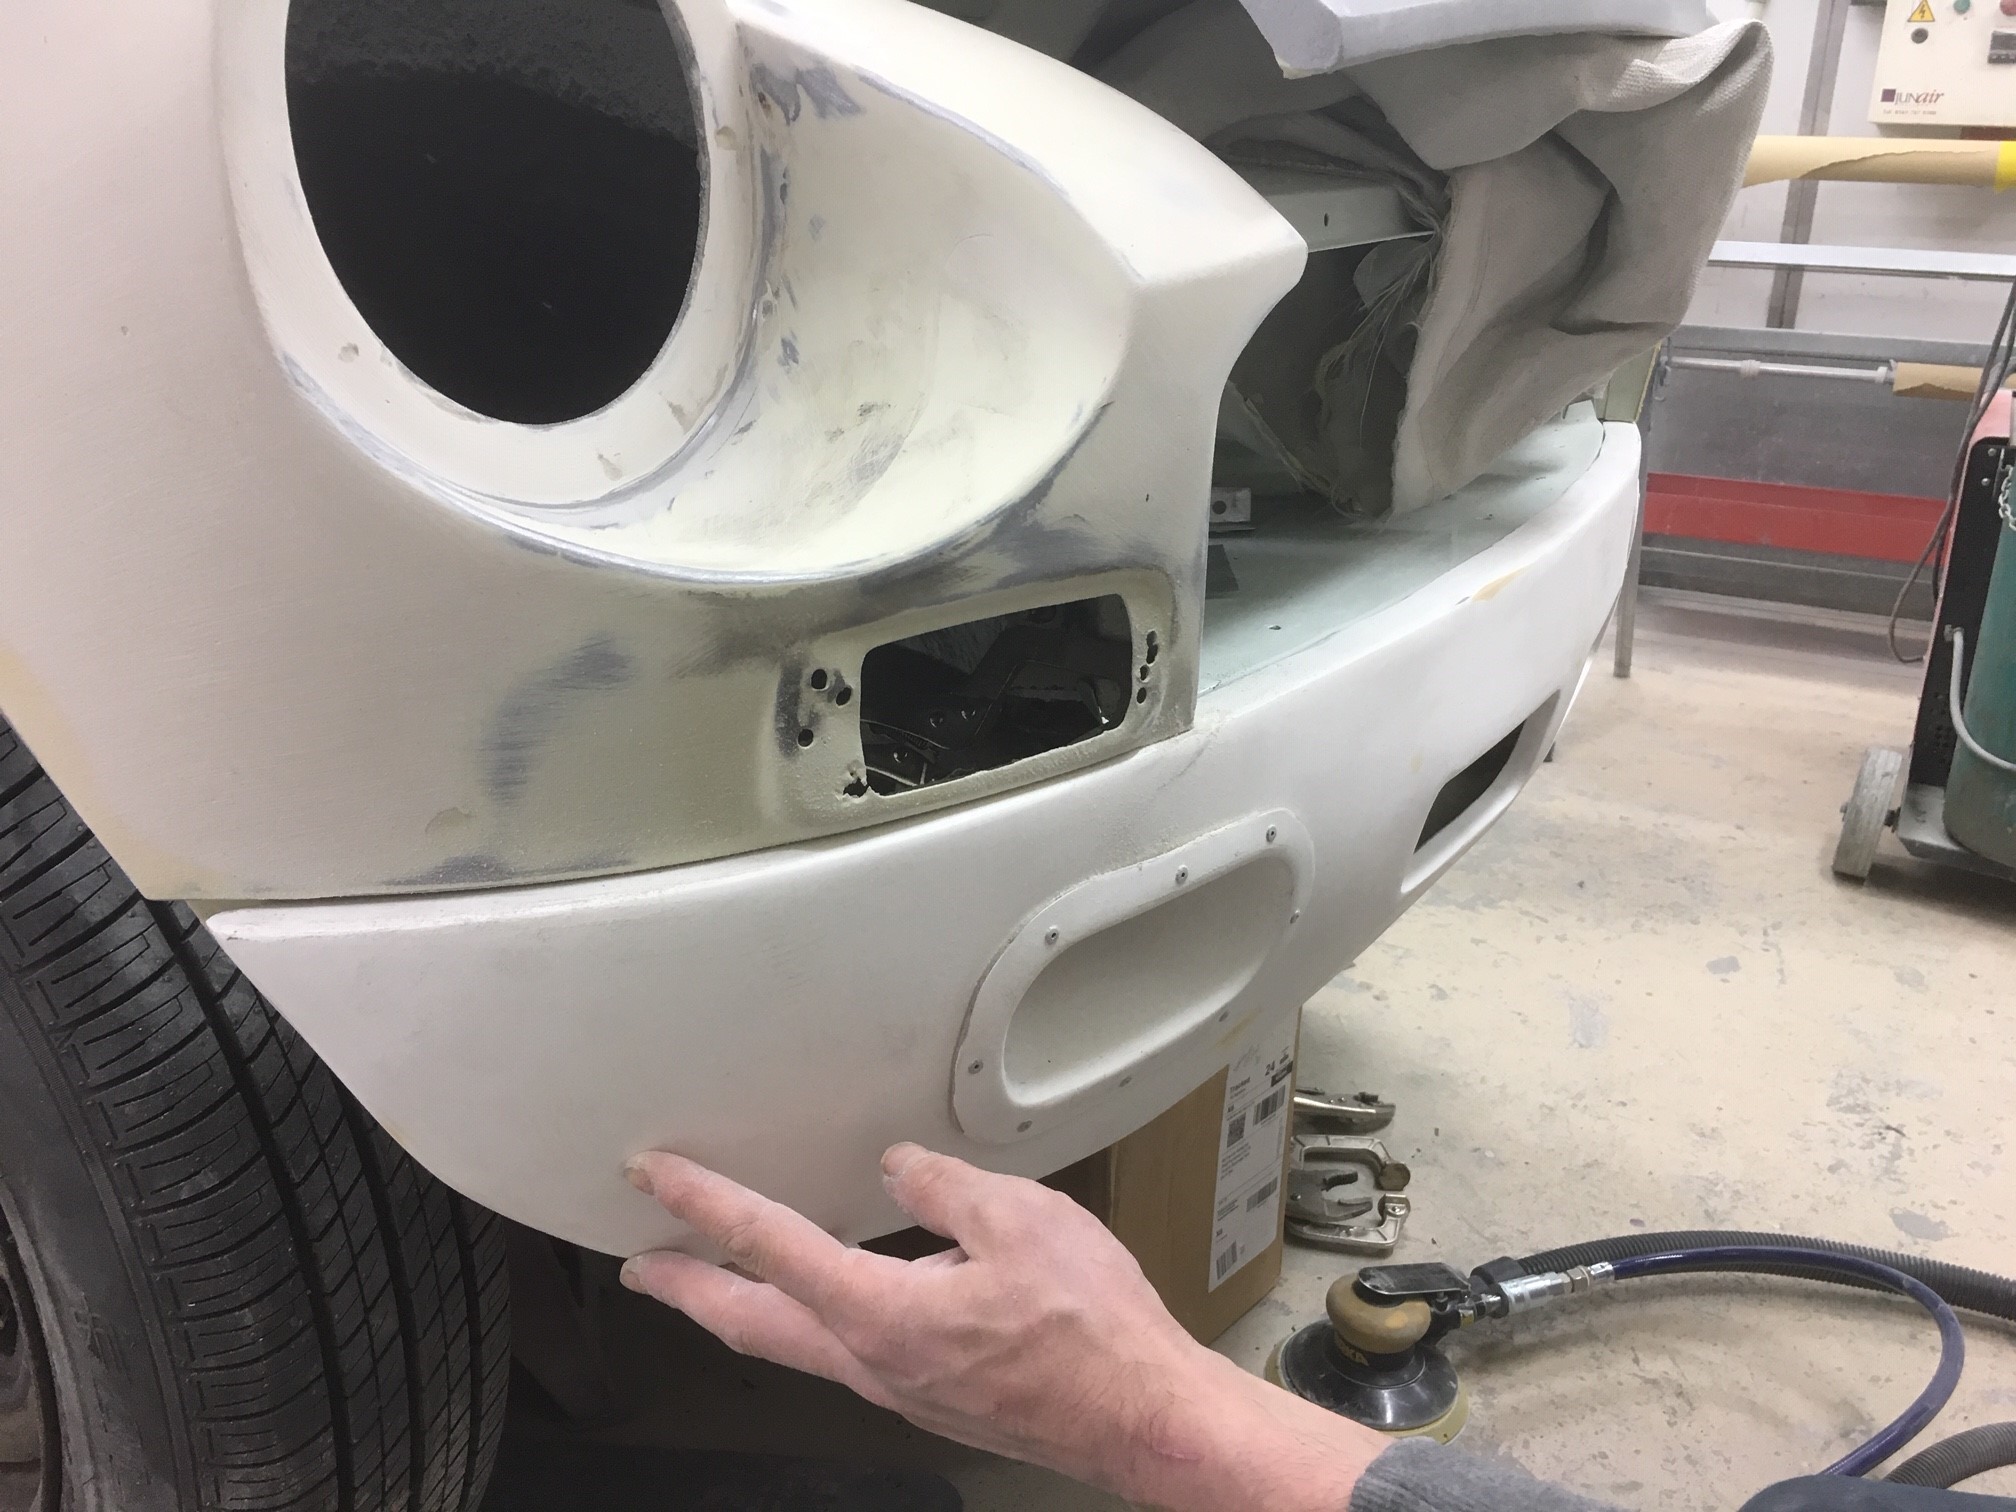
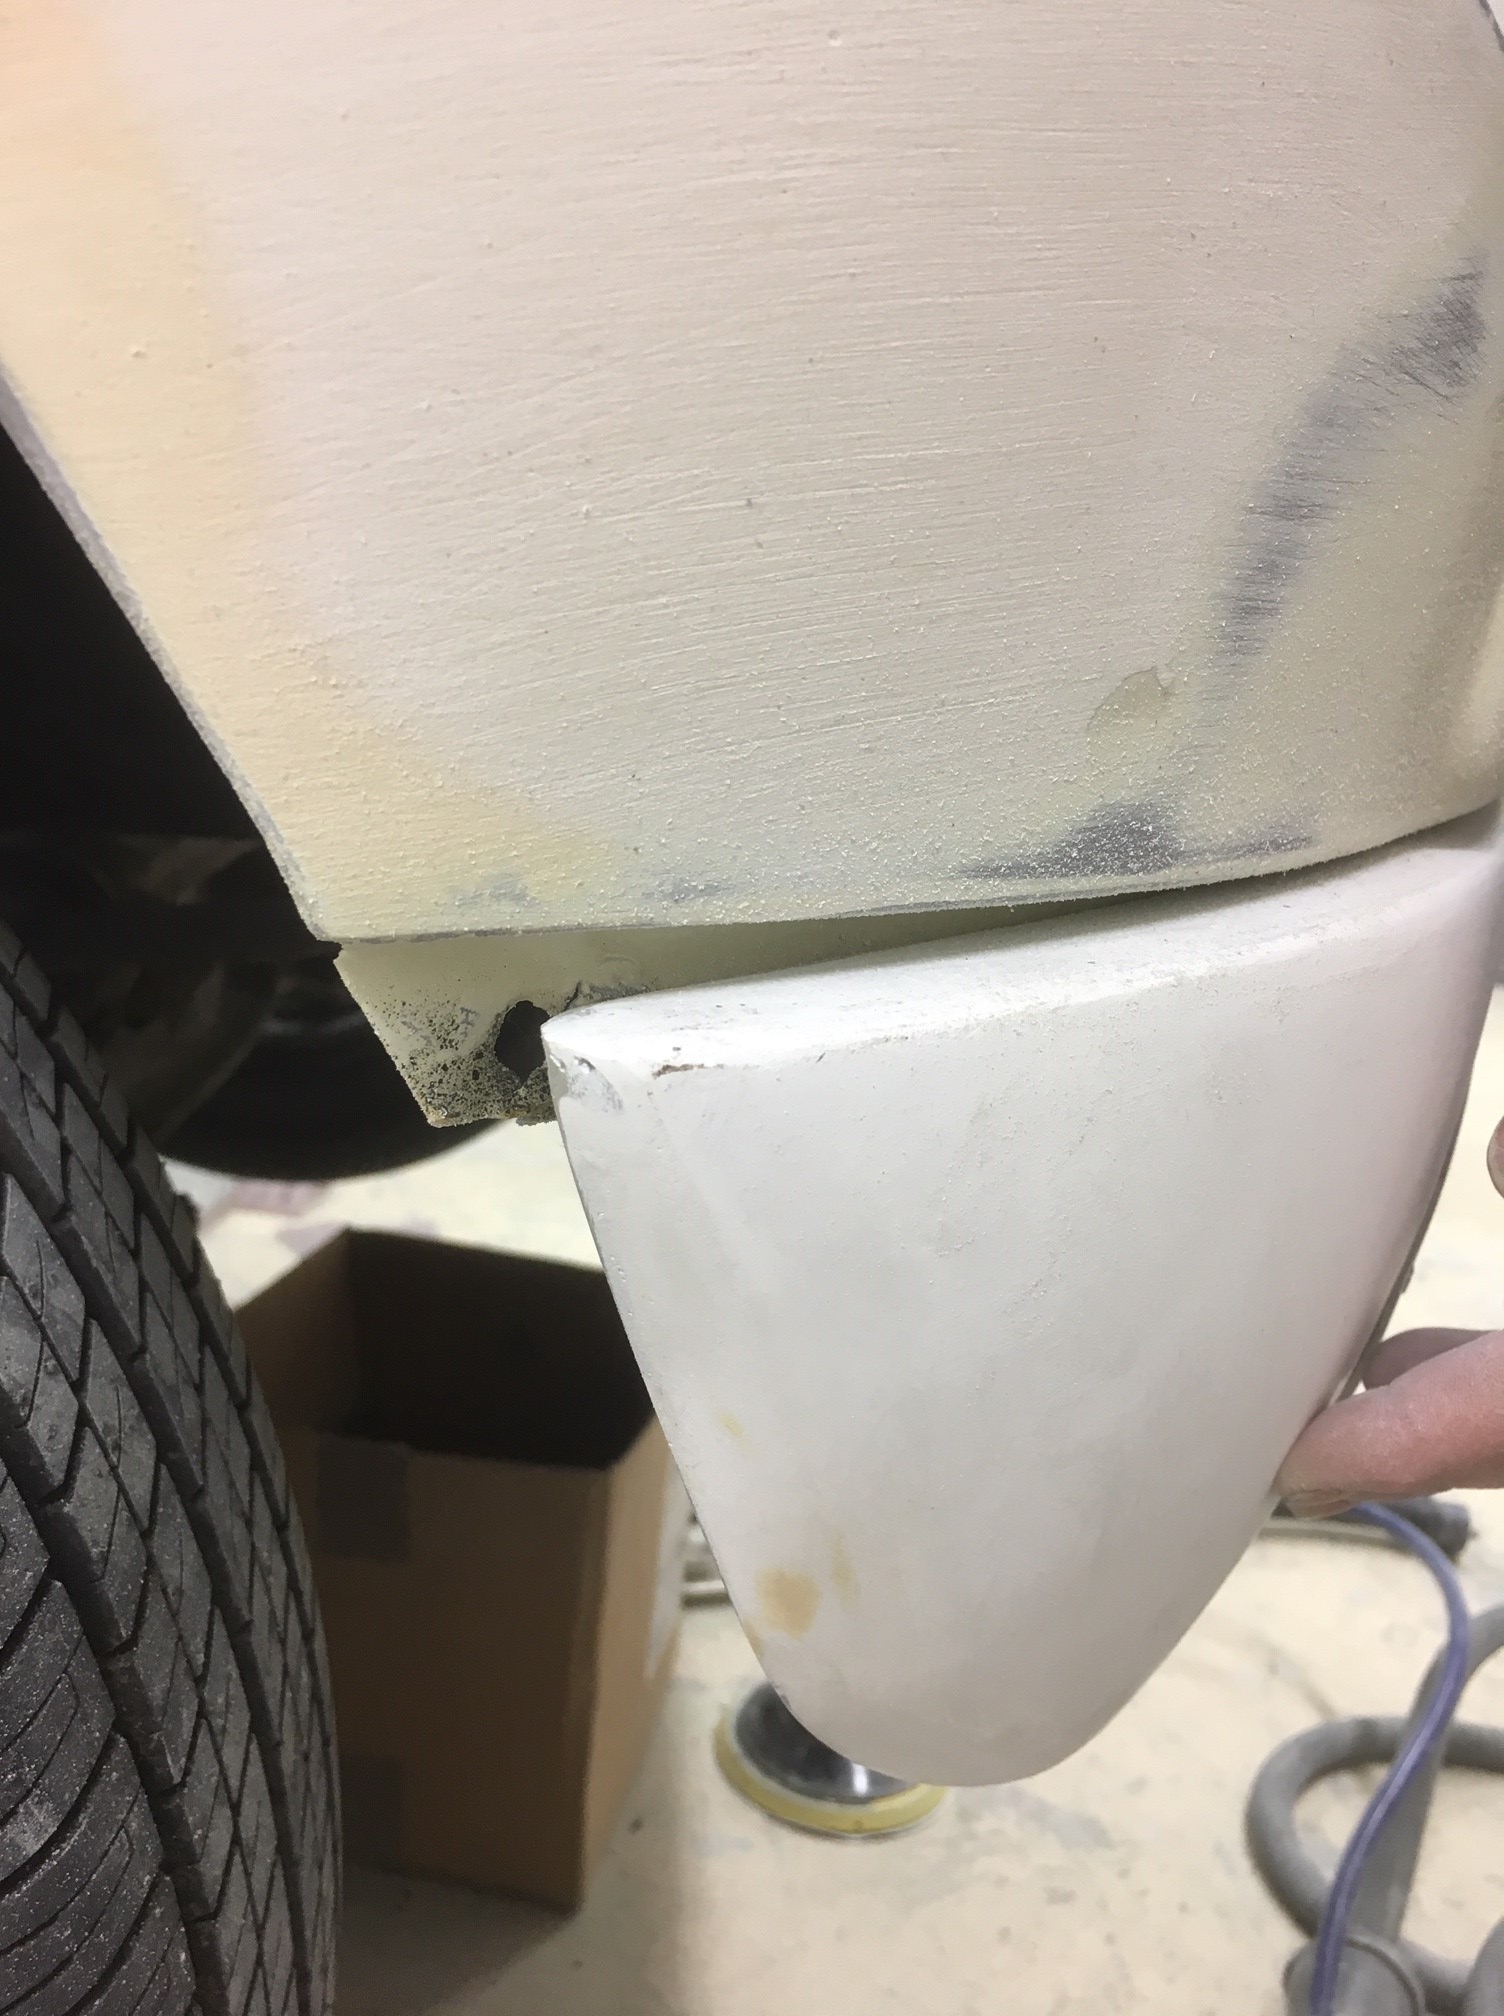
Valance – I had ordered a fibreglass ‘Sebring style’ valance from Moss and this has proven to be a difficult fit. See the pictures below which show that when offered up to the MG its short on one side by about 1 inch.
The valance is properly centred and fits well to the n/s, but is short on the o/s
Close up of the valance
I agreed to ring Moss and to give them their due they have offered to refund the part (subject to Management confirmation) on return. This however has left me in a dilemma – do I buy another Sebring style valance from another Supplier (they are available)? Do I buy the posh product from Frontline which you would hope would fit, or do we modify the Moss one to fit? On the FB group there was a suggestion that you can chop it in half, make each end fit, and then fill any gap with fibreglass. Or do I even just put the bumpers on with a standard valance? (but I did always want the bumperless look…)
Passenger Door Fit. Now that the doors and wings have been on and off, Gavin was finding that the passenger door gaps were tight even with everything at maximum adjustment. On measuring the gap between the A and B post he found there was a 5mm difference from n/s to the o/s. After some speculation about BL build quality (but surely they were right from the factory), we guessed that perhaps the body wasn’t perfectly straight when the new floors were welded in prior to my ownership. Anyway, Gavin is going to try to work with what he has got and make it as good as possible.
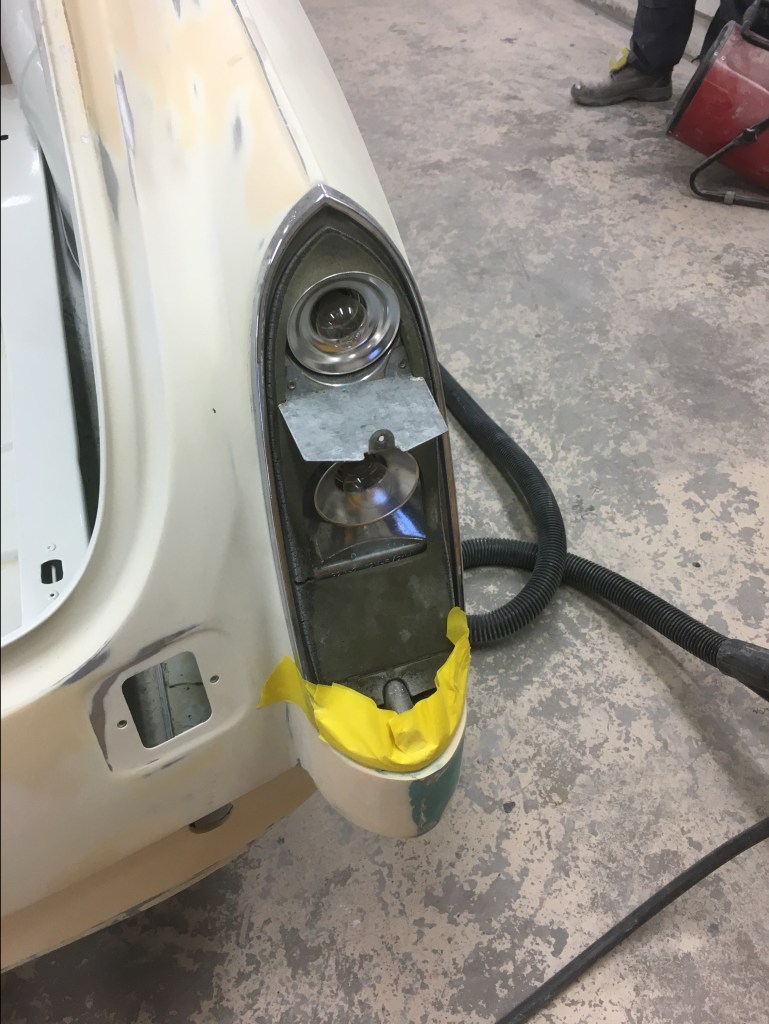
Rear Lamp Fit. This is an annoying one. The back of the rear wing curves nicely around the rear lamp on the MGB. Its a nice detail on what is a elegant car. Unfortunately, on my MGB, there is a lip on the o/s and the lamp is flush on the n/s. Another poor repair. I’ve agreed with Gavin that it needs to be right and the rectification isn’t too difficult, just some cutting folding and re-welding.
The value of trial fitting – the lip around the rear light shouldn’t be there and wouldn’t have been known without checks
So this is not as straightforward as I thought, but then who ever said a car restoration was easy. I think the end result from Reef Paintshop is going to be superb, so a great basis for the remainder of the build.
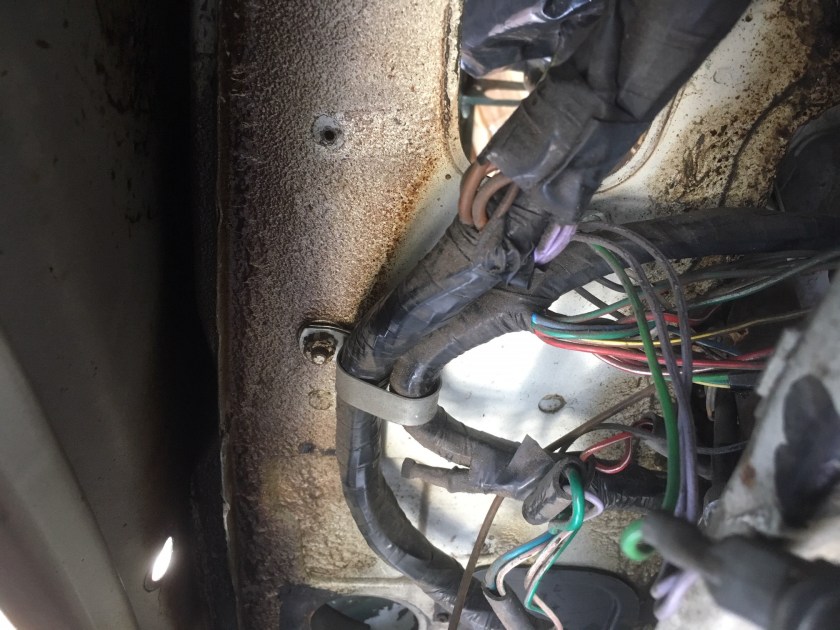
Gavin from Reef visited to inspect the MG and to agree details for the respray. The bad news is that his schedule means we have to put the respray back until the first week of January, not mid December as I was planning. The good news is that gives me a bit longer for some final preparation. First job is to remove the wiring loom. Gavin advised this because no matter how well you protect the loom, there is always dust that gets into the connections and there is a danger this may affect systems during the rebuild. The advantage of removing the loom is that you can inspect it and deal with any defects in the garage before refitting. Second job is to remove the front wings. This is to ensure there are no nasty surprises under them (e.g. rust) and also to make it easier for panel removal at the spray shop. Anything to make the job easier is to my advantage, especially as I have asked Gavin for the sand-blasting company to blast a few loose components at the same time. The wings are bolted on, so removal is relatively simple, although I can expect some fun and games with the odd rusty one I am sure. Before I had the car, repairs were made to the front wings, so they have come off relatively recently (in the last five years or so), its not as if we are going back to production in 1974! That’s the main jobs, I also need to arrange transport, order a front valance and do any final tidying up of sheared bolts and so on.
Gavin was really positive as always and it is exciting to now have a date to work to for the respray.
Today I rolled the MG out onto the drive and loosened a couple of bolts, one of which clipped the loom to the under-dash and the other which was an earth for something or other. I didn’t really have much time, but I had a good look where the loom from under the bonnet enters the car through the firewall – there is an intact grommet which I will have to remove and I have heard that its a tight fit to feed the cables through, just a matter of being patient I think.
I also took the Suzuki Cappuccino out for a spin. The Cappuccino is stored under a cover for the winter, but as it was a dry day and with recent rain meaning any salt had been washed from the road, I took the opportunity to exercise the car and check everything was okay. The Cappo started first time, as usual, with a little more screeching from the pulleys which is normal when it has been left inactive. The rear brakes stuck on a little, but otherwise she warmed up nicely and drove fine. The disks had some rust but this cleared with a couple of pushes of the brake and otherwise everything was working. It was really good fun to have half an hour in the Cappo, it’s such a nice car to drive with great handling at moderate speeds, light and direct steering and that revvy little three-pot engine singing away up front. I filled up with fuel as I have heard this can prevent corrosion in the fuel tank and then put her back to bed again under her cover after a cooling down period.


 With the master cylinders in place I can now imagine the first job involved in replacing the brake lines which is to fit the first two lines which come from the master cylinder. This involves them coming out of the cylinder and then performing a 180 degree turn so that is going to test my pipe bending skills. Might get some help for that bit! I did have Mark on hand today to help me fit the bonnet gas struts but with it being a windy day (Storm Hannah), we thought better of doing a delicate drilling job in a gale and instead had a good look at the brake kit which seems quite organised.
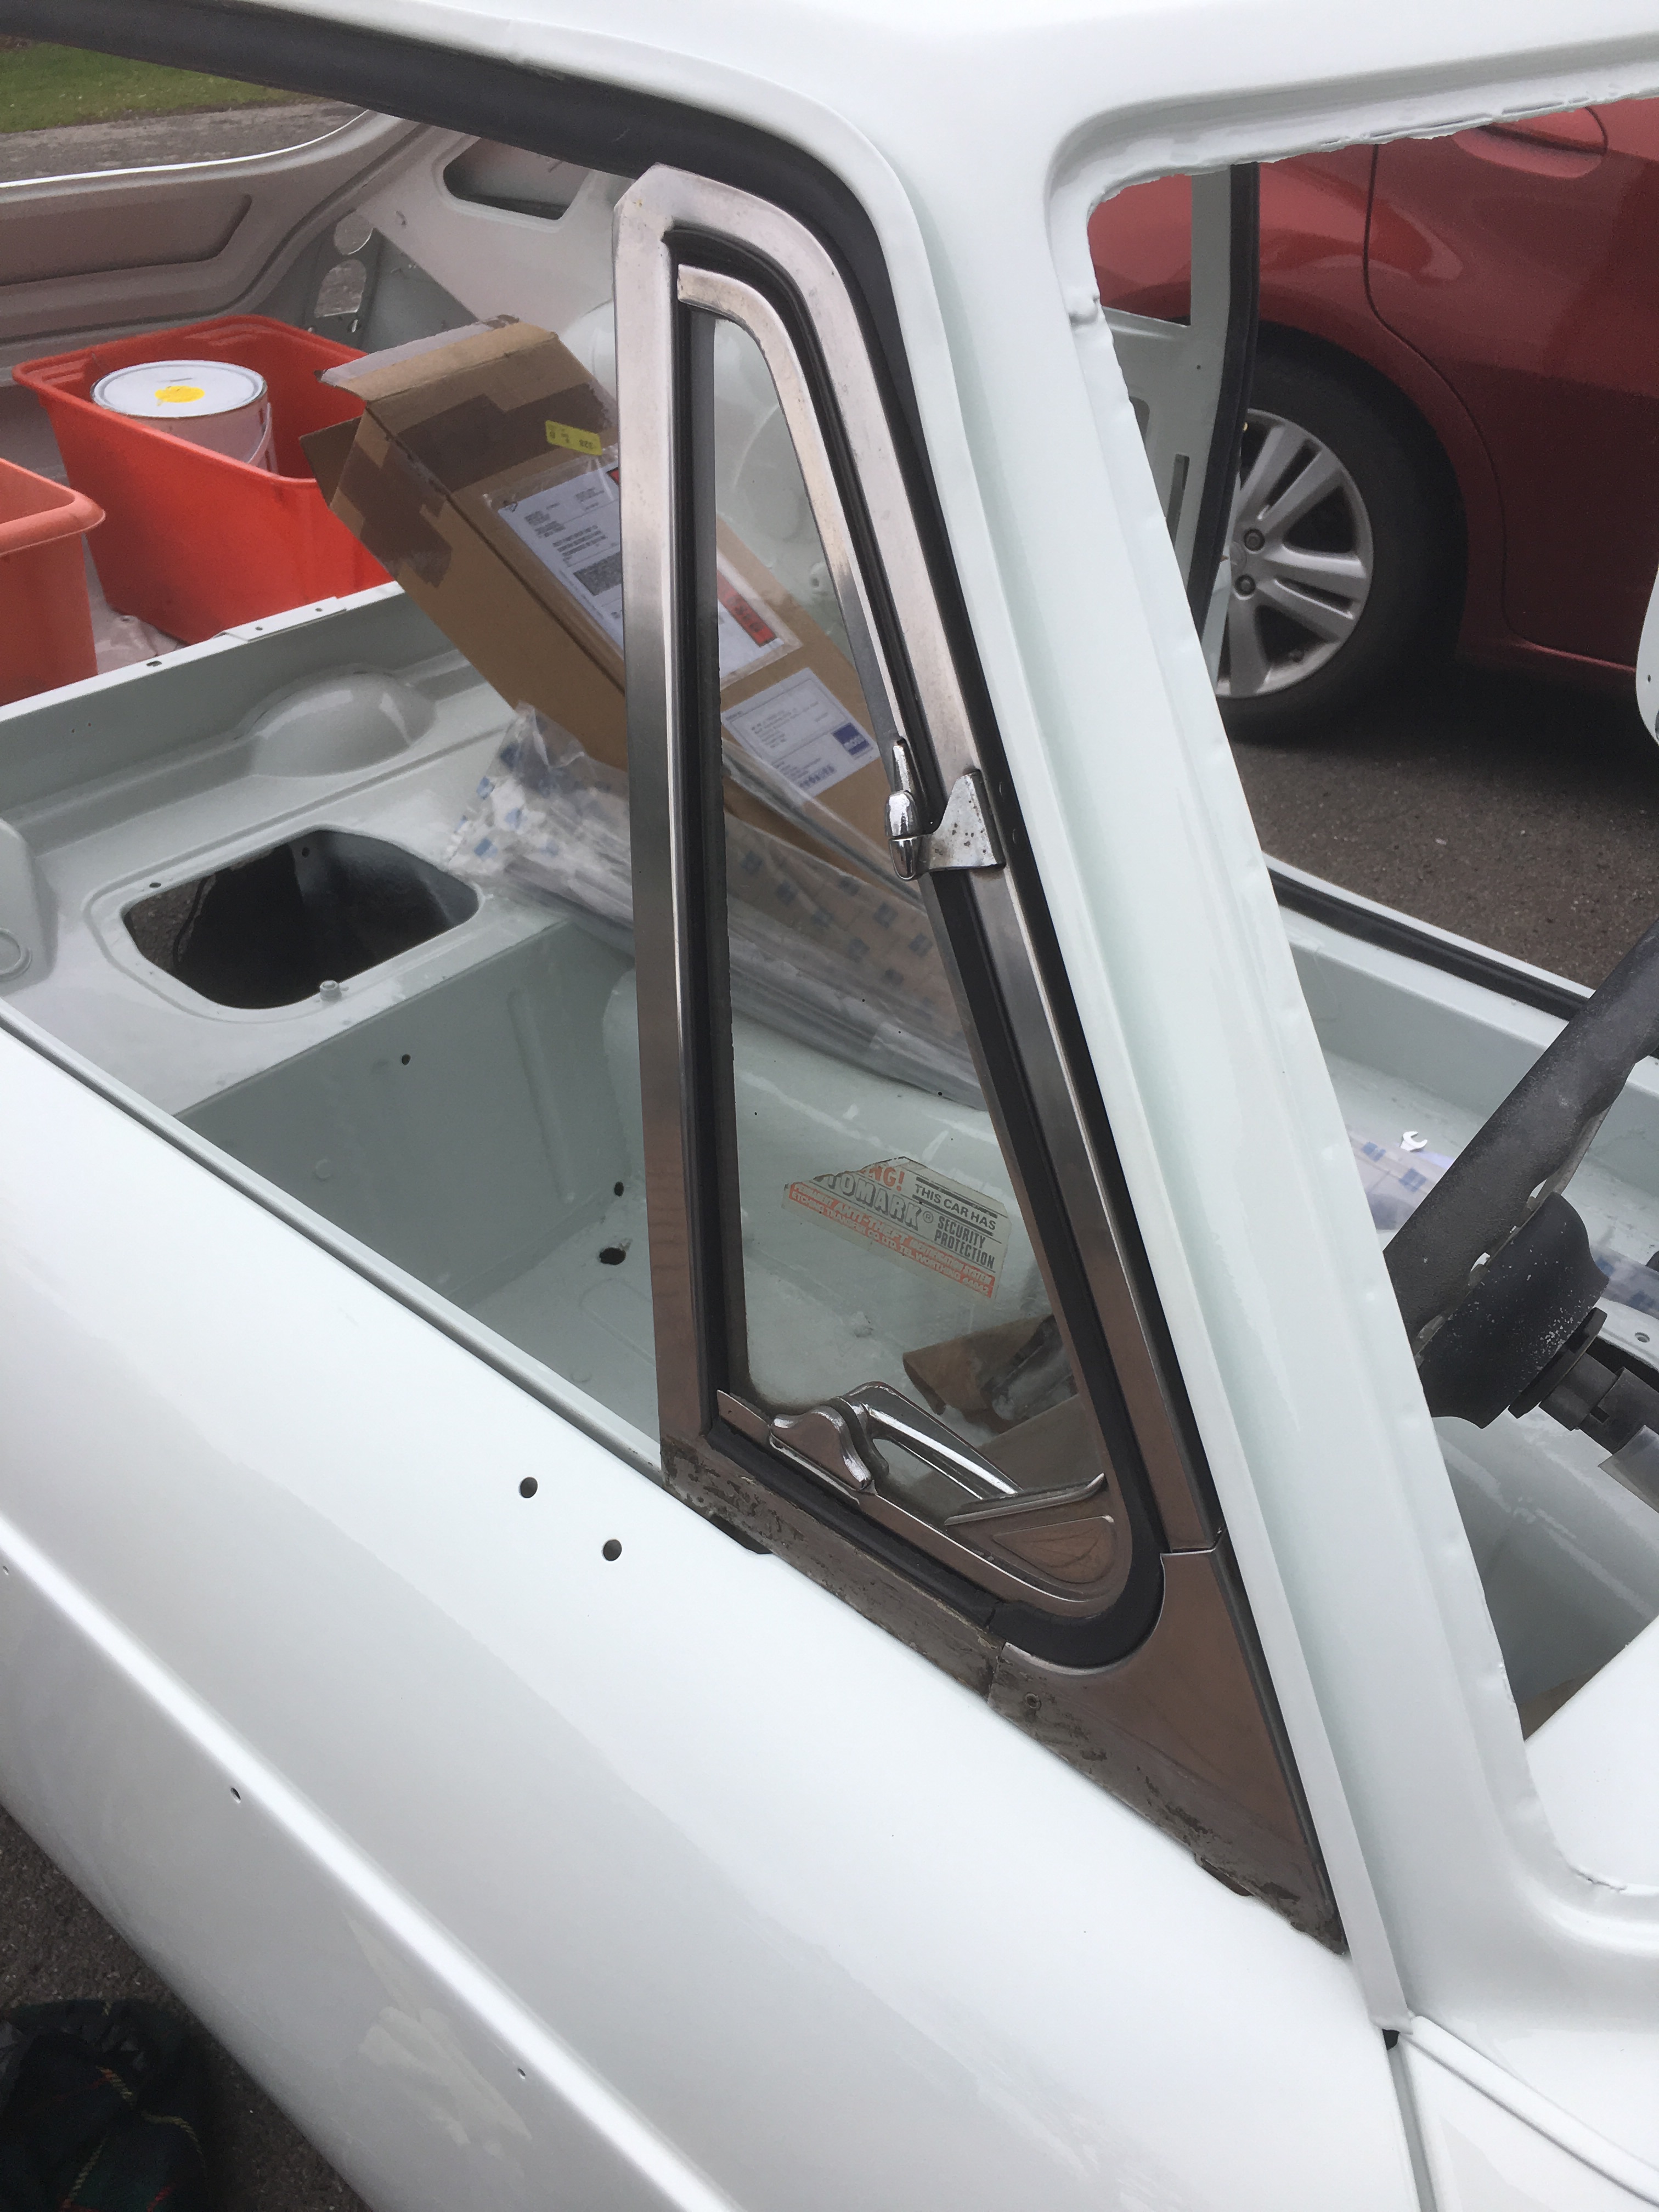
 Just to be make room in the garage I also put the spare wheel into its recess, laid the cover over it, put the battery into its cradle and put the loose rear seat base in place. Well why not.
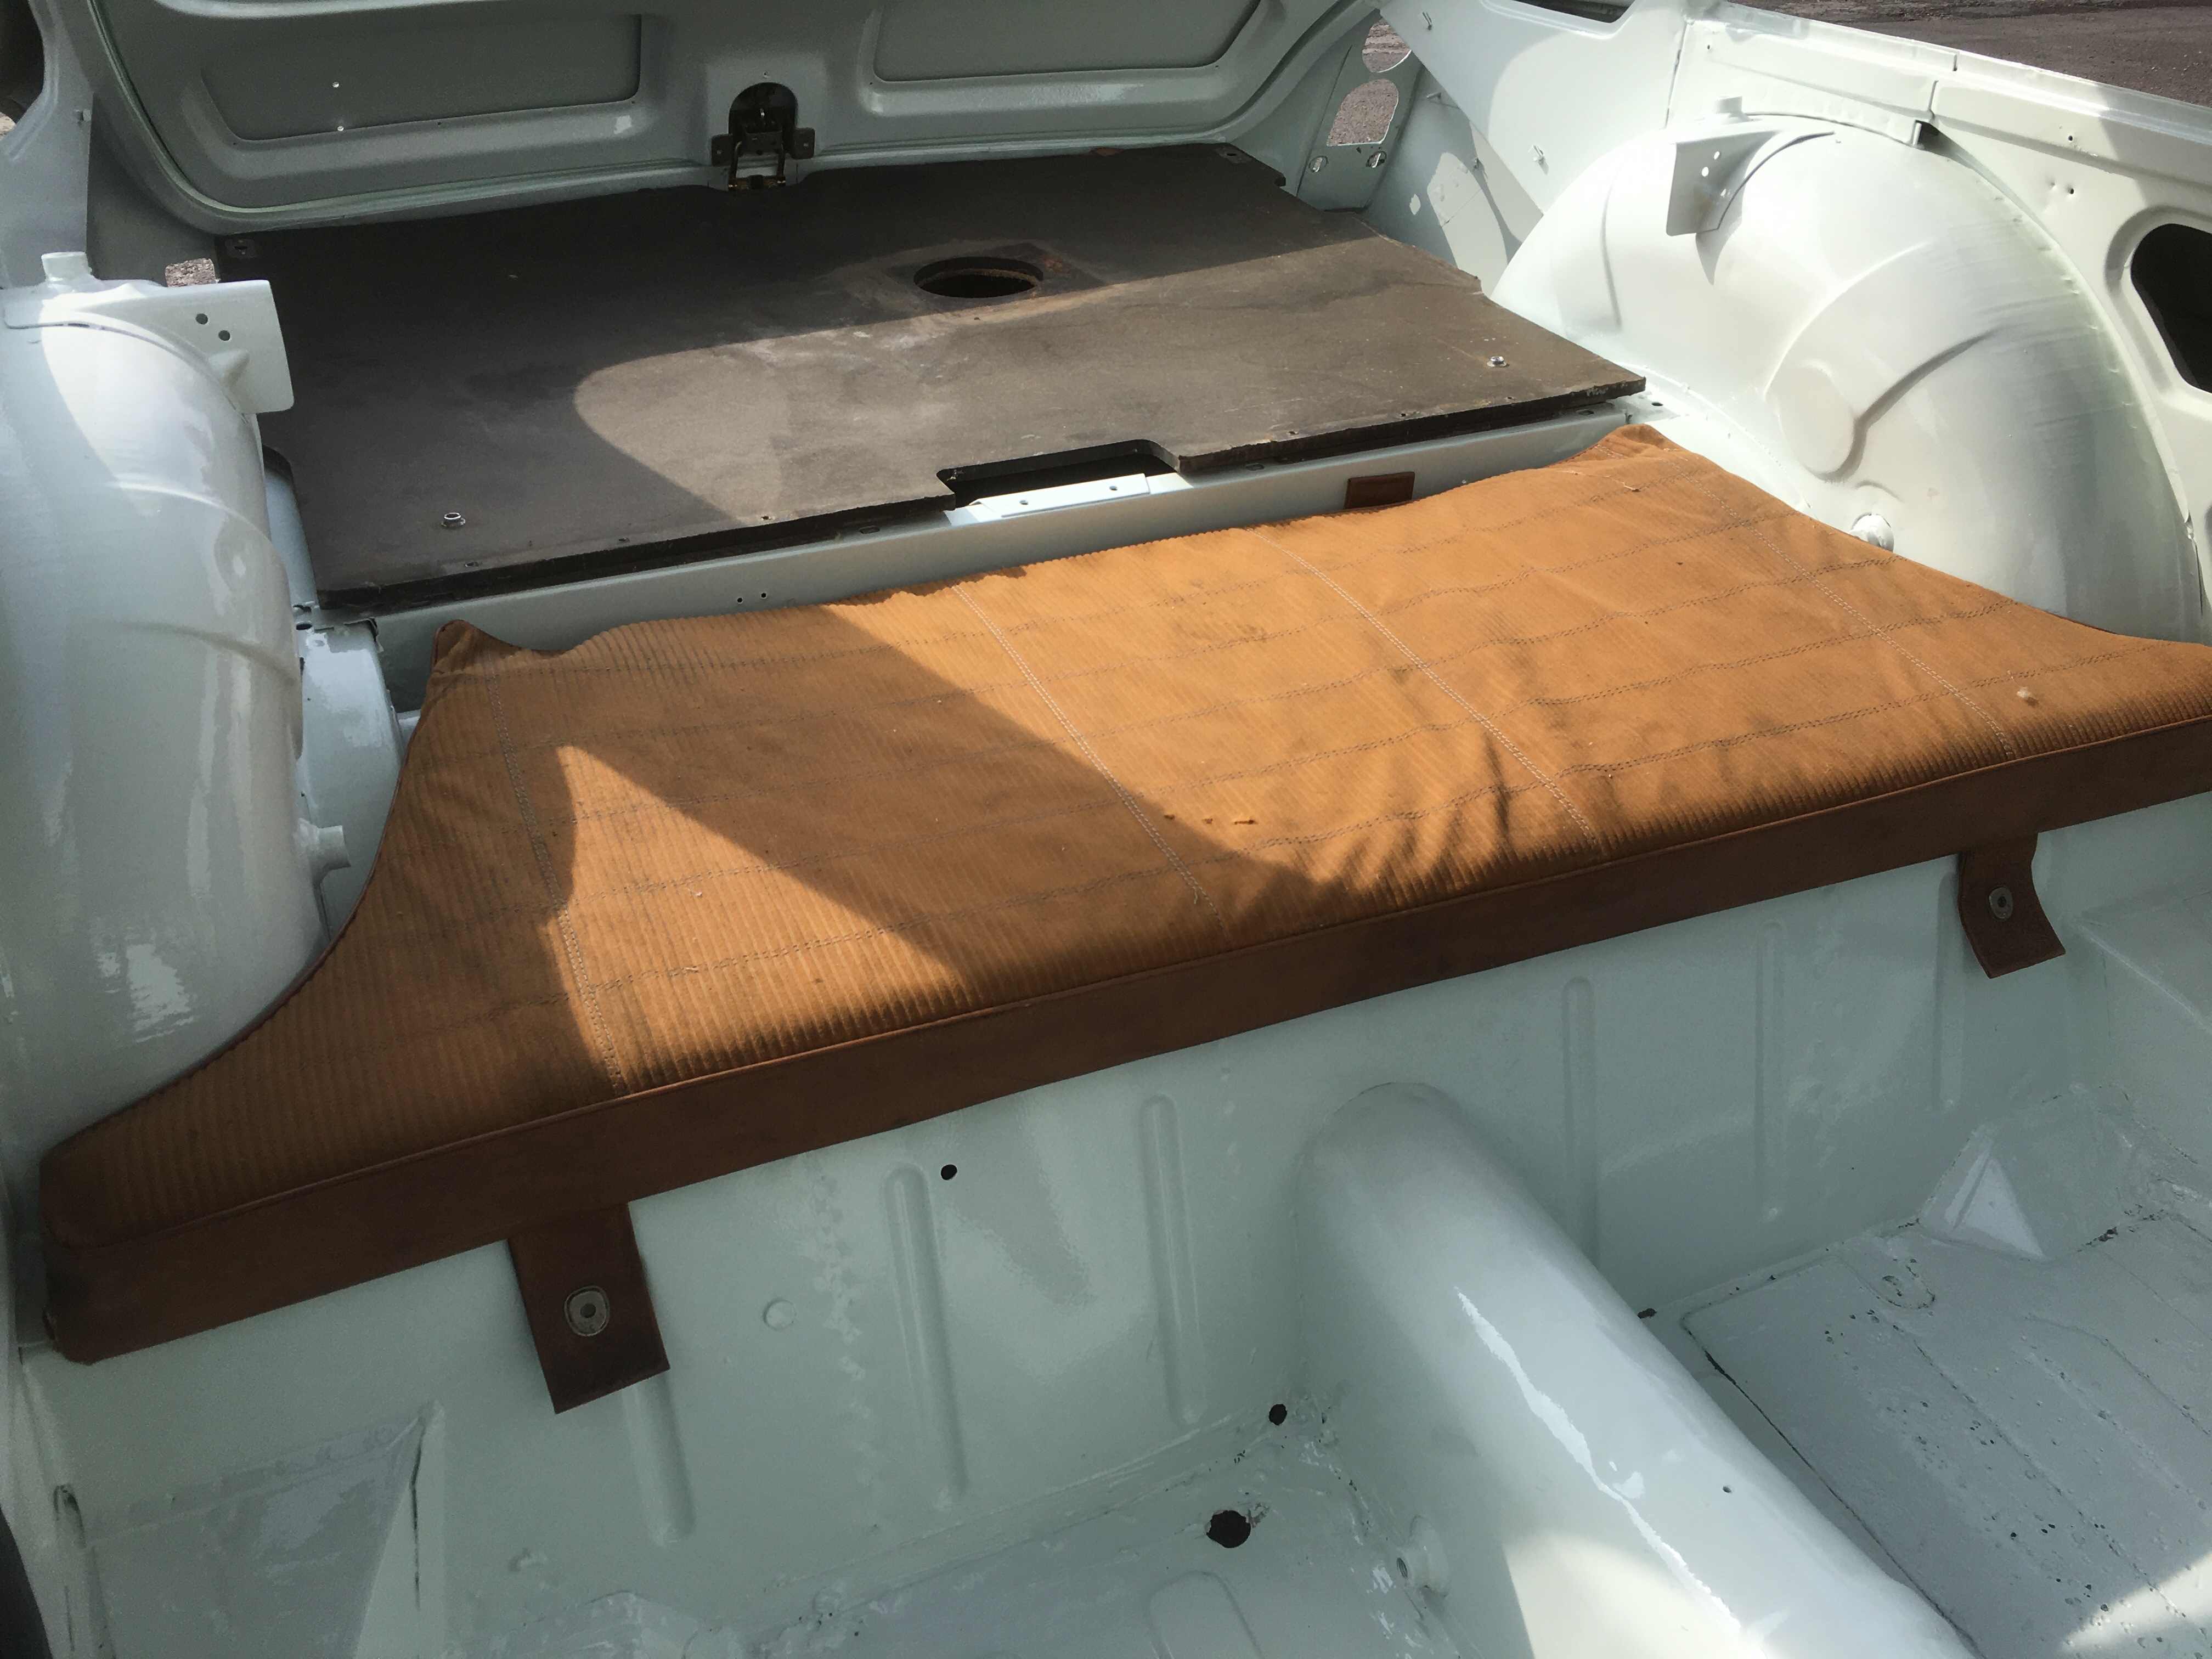
 Still, not an expensive item, just need to buy the right one now.