First job on this hot Saturday was to refit the door pull which Helen pulled off recently when I picked her up from Tesco. To be fair, it wasn’t fixed properly in the first place so this time I used a decent nut and bolt combination on the dodgy fixing so this should now hold.
Fixings don’t match but they work…!
Second job was to replace the bonnet release cable because the reproduction one I fitted probably two years ago recently gave up the ghost and was beyond repair. I did toy with the idea of using the original but as it had a big old kink I decided to replace it with another brand of reproduction. This unit was of better quality and more closely resembled the original factory item. It’s a fiddly thing to fit and with my limited know-how I had to think hard about how it went together. Eventually I figured it out but it did involve threading the cable down the fitting and trying to find the hole in the cable sheath which I reckon is like trying to crack a safe. Managed it though! 😀
New bonnet pull fitted after some fiddlingThis end of the cable was easy to fit up
Just to also mention a recent Garage tidy up and selling off of a couple of surplus parts which went easily enough on Facebook marketplace. More to sell off where that came from
Oil is vital stuff, finding its way between all those rapidly moving metal bits that make the engine go vroom and preventing them from welding themselves together. However, sometimes it escapes from where its supposed to be and then it makes a big mess. Well this evening I was able to look under the bonnet of the MGB to check on some oil misting that has been present since recent start ups. It’s nothing severe, but clearly not right and I wanted to see how bad it was since my first drive a couple of weeks ago. On opening the bonnet there was a tell-tale mark, running transversely across the underside of the bonnet originating from the front of the engine. It wasn’t as severe as the other day, but there is enough to make a mark and not something to ignore. However, I quickly realised that this particular evening I wasn’t going to be able to get under the car to see where the oil was coming from, having checked all possible locations accessible from above where it might be coming from. The pattern of the misting point towards it being linked to the main pulley which as it goes round and round is I think throwing up the leaked oil. Everything points towards the sump, pulley seal or timing chain cover. So a fairly big weekend job there to work through these areas and resolve.
While I was looking, I did a general look around for any other leaks. In the near side chassis rail was some petrol. Not a lot, but a recognisable quantity. Oh dear. I felt around the fuel pipes which were nice and dry and then under the carbs. Aha. Under the front carb (the float chamber) it was damp, so this points towards a seeping seal. Darn. I have had these carbs apart when I was troubleshooting them, so its going to be my fault, but I suspect the float chamber cover seals are not, well, sealing. They were a pig to refit, so I’ll have the carbs off and look/replace the seals as they may well be mangled. Seals are £1.46 from SU (plus £5 for postage!). I am pleased to have spotted this at least before the leak got too bad!
Petrol leaking onto this chassis rail
While looking at the carbs I took a good look at the throttle mechanism as at present the car does not idle nicely all the time. The cable is a little slack but the the spindle returns to the stops so that is not sticking. It could be the mixture as I have fiddled with this in trying to set the carbs up. When I can grab an expert for the day (Hi Dad!) I’ll set these up from scratch, but in the meantime, I took the spark plugs out to see if they would give me any clues as to the mixture. The photos are below in front to back order. I’m going to leave this to the experts to comment, however I think its fair to say the carbs are not set up right!
Plug 1 front carbPlug 2 front carbPlug 3 rear carbPlug 4 rear carb
The off-side chassis rail was also not pristine, having oil spotting around it. I wiped this up and looked for a possible culprit. Feeling under the oil filter, my fingers felt oil around the bottom of the union with the oil cooler pipe. This union is a beast of a with a 15/16th fitting. It a double nut thingy where you have to hold one nut while doing up the other so I had my 15/16th spanner on the oil pipe fitting and an adjustable on the filter end and was able to tighten it by a good quarter turn. I am hopeful that this will stop that leak, but it will need to be checked next time I run the engine.
I tightened up this joint
Finally, one of the grill stays had a loose fitting. No idea why, the grille hasn’t been off for ages, but I might as well fix it while I am here. The threaded screw was a bit second hand looking, so I looked for a replacement. I found a bolt the same thread which was a bit long so I shortened it with the hacksaw and along with a couple of washers it fitted nice and snug and that was one less rattly thing on the car!
Tightened up this grille stay
A busy half hour on the car, but some steps forward which is always good!
I’ve had a fuel leak / seep from the petrol tank for a long old time and today I got it sorted. I suspected the seam where the sender unit goes in, but to be honest, I wasn’t sure I had the sender in properly or the filler spout. I had obtained a replacement tank from the supplier which was a larger ‘touring’ unit so a swap was on the cards in any case. I was on my own today so not the easiest operation. I began with jacking up the rear and putting it on axle stands which enabled me to remove the end section of the exhaust which bolts on about midway along the car and is then attached to a rubber hanger at the other end. Then I detached the fuel line and with the tank propped up on a couple of boxes I undid the bolts and nuts on a diagonal pattern which sort of allowed it drop in a controlled manner.
Now to fit the new tank, but learning from previous experience I took great care to fit the sender, the rubber seal and sealing ring to the tank, and to slop some petrol in and check for leaks before it went anywhere near the car. Miraculously the new tank could hold petrol and I had confidence the sender was properly seated in place. Now for the awkward job of offering up the tank to the receiving bolts (fixed to the chassis) and simultaneously dropping the bolts from the boot floor through the brackets and lining up the threaded connectors. I needed to have a couple of extra hands, but with none being available I did my best octopus impression and managed to have all the nuts, bolts, washers and connections properly done up. The fuel line was easily fitted, so it was onto the exhaust. This was another job which was fiddly to undertake solo. It took me a while to get this done – the bolt up connection at the midpoint is easy enough, but the rubber hanger where the exhaust exits is seriously fiddly. The bolts just did not want to bite and the rubber hanger was pulling the bracket away from where they needed to be. Furthermore, the sun was streaming in my eyes making it difficult to see the holes. I had to drape a throw over the back of the car and crawl underneath just to see! Helen came home from popping out to see my feet sticking out from under the car with a cloth draped over it. She must have wondered what on earth I was doing. I refused to be beaten and just persevered until eventually I got one bolt and then the other started. Then it was just a case of tightening everything up which was tedious as the threads were long and the bolts were tucked up between the fuel tank and the exhaust (I did say a little prayer – so, thanks God). There followed some very tedious petrol movements while I harvested the petrol I had only recently put in the old new tank, but finally I had a working fuel system.
Looking up at the tank fittings
A long time ago I realised that I was missing some chrome trims from the B-post of the MGB and last week they literally fell out of a box at me which saved me from fretting about where to get new ones from. I was looking for a different profile of trim, but these turned out to be the right ones. I fitted these relatively easily earlier today, giving them a brief polish before fitting them with self-tapping screws. I had intended to rivet them on, however the space was a bit tight, so screws it is. This has finished off another aspect of the MGB nicely.
Without the missing trims…now fitted on both sides
Last job of the day was to fit the wooden wheel which my friend John had lent me ‘on approval’. I had established that this would fit (with a new boss) and the smaller diameter would give me more space for my legs which are wedged up against the steering wheel in the standard configuration. I popped it on the splines and tightened up the nut. I still have to install the horn switch, but that was enough for today.
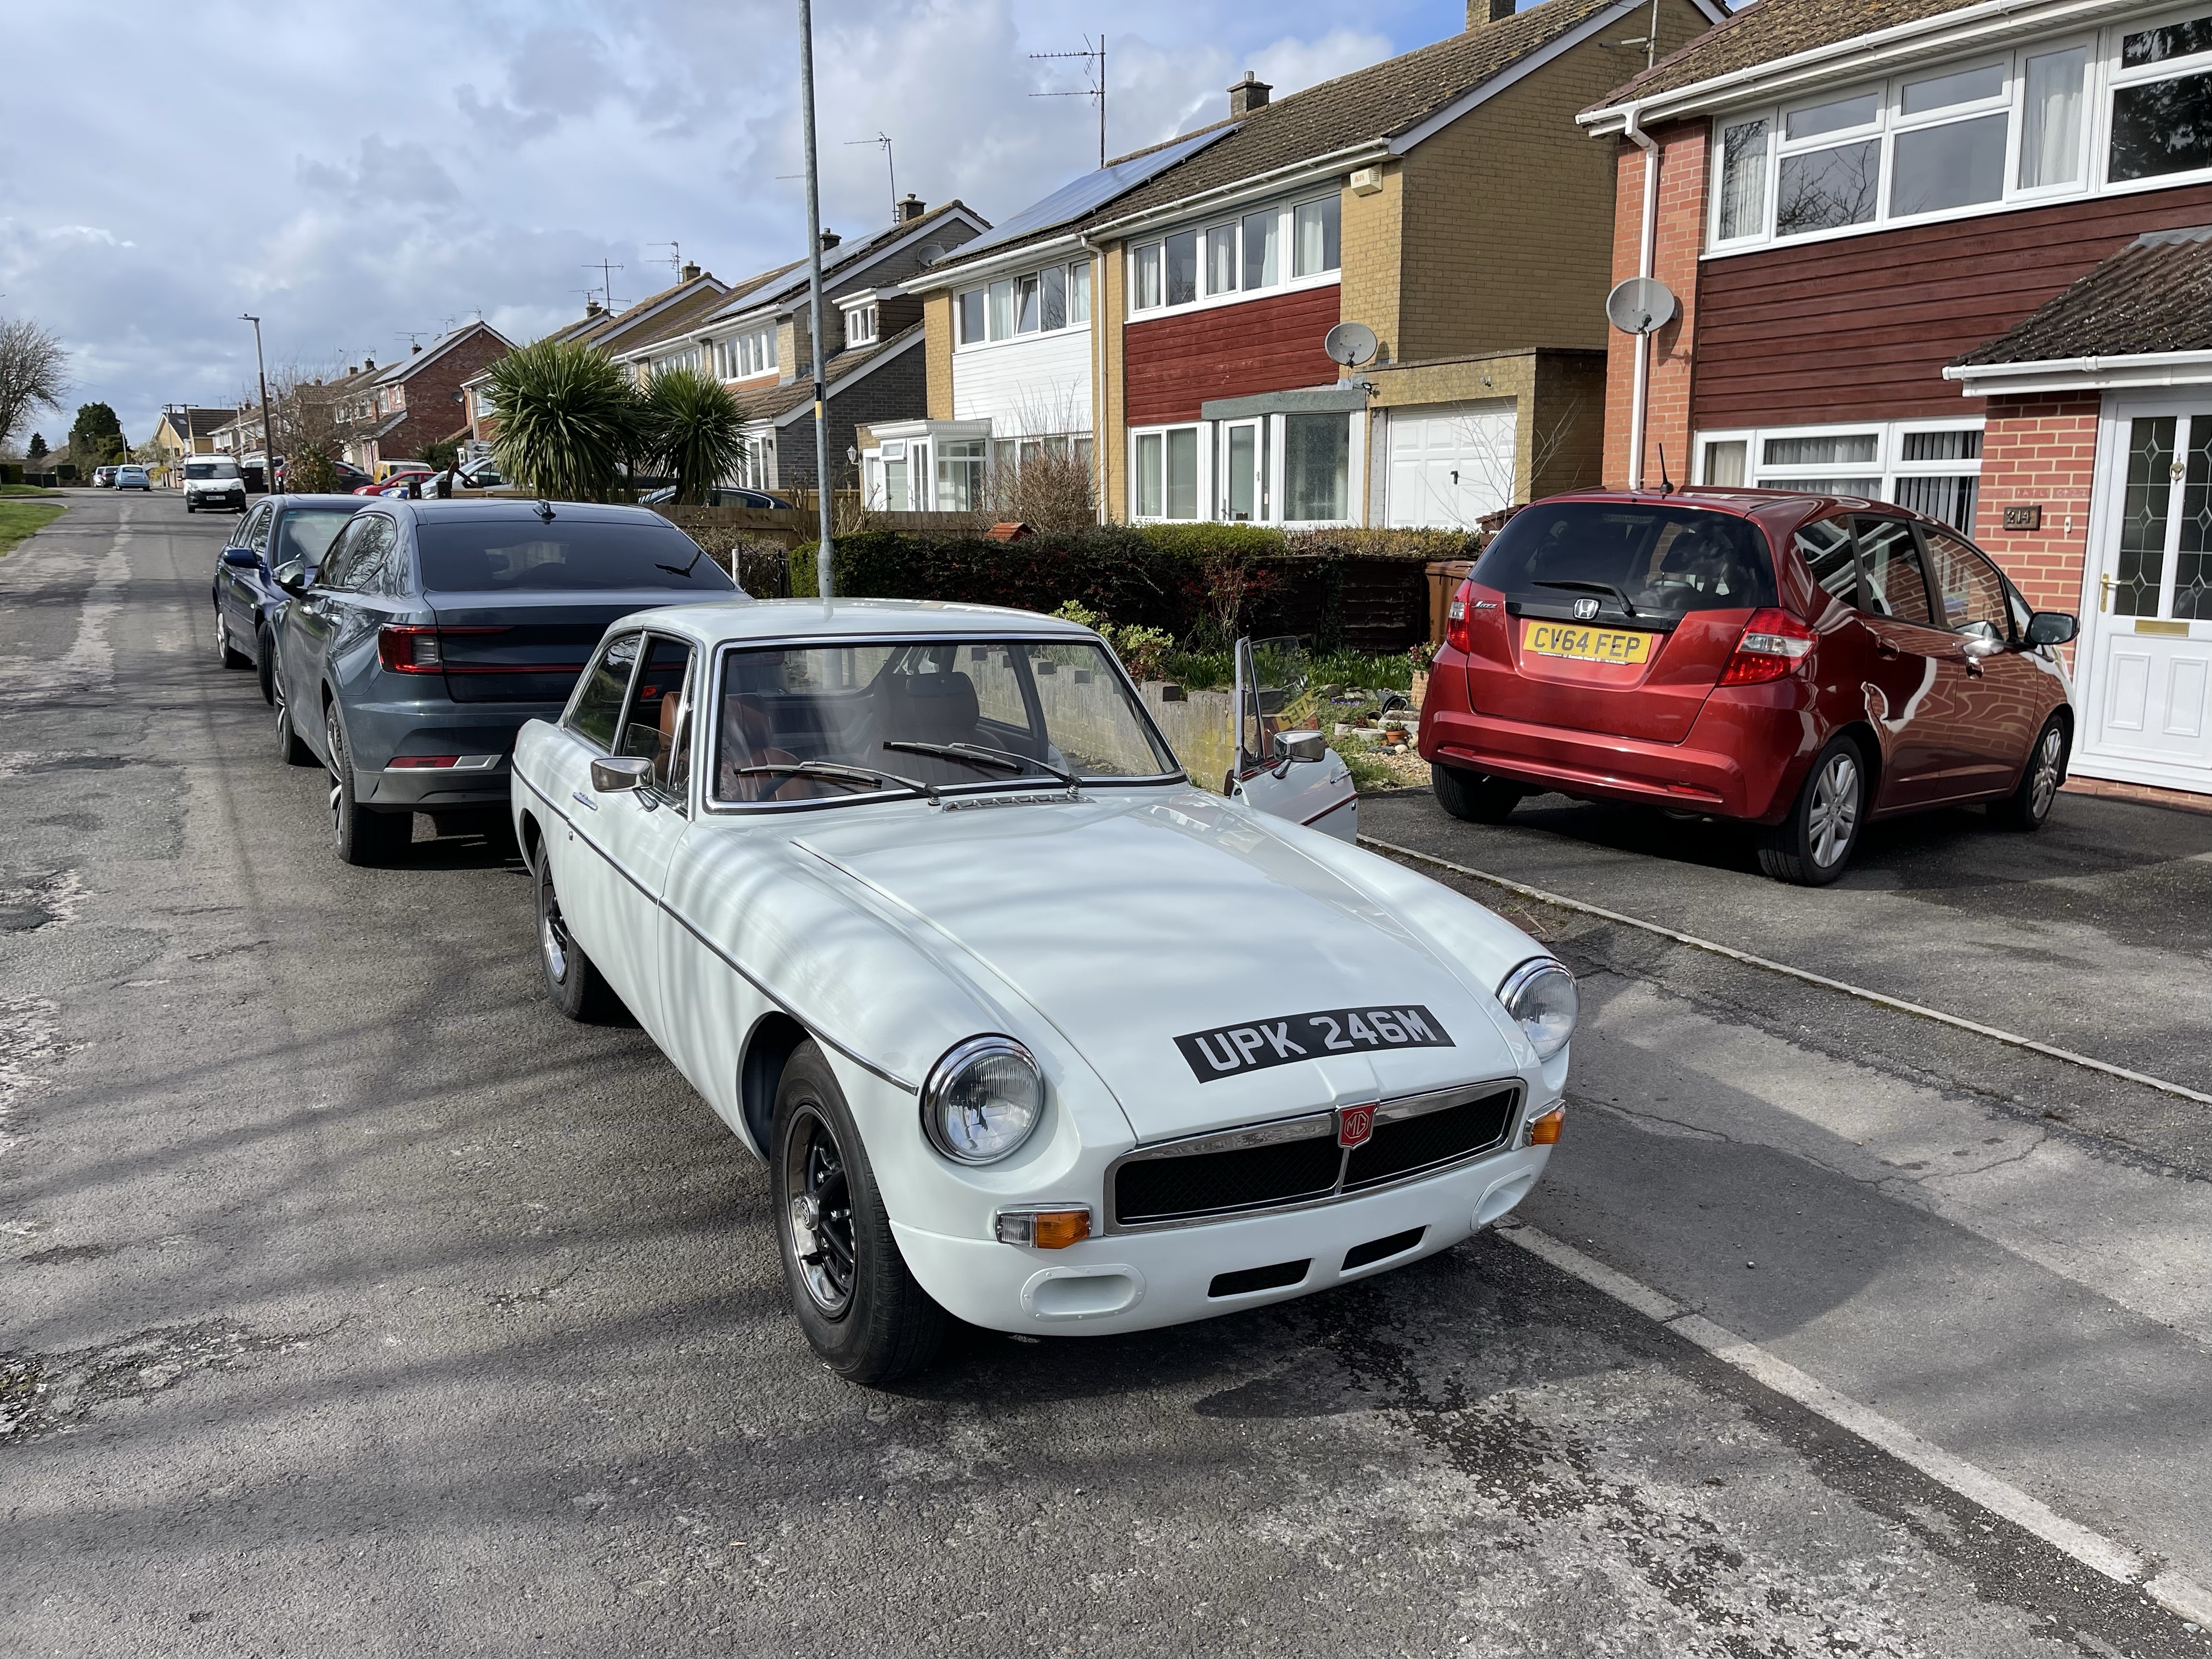
I finished off the day with a quick test drive of about 2 miles (brave!) with Mrs T on board. This was Helen’s first time in the car and the first time I had driven it out of our estate in the three years I have had it. It was also the first time the car has driven more than about quarter of a miles in around ten years. I had already warmed up the engine and done some checks looking for leaks and we were good to go. Its quite intimidating driving a car that you’ve restored for the first time, being conscious of everything that can go wrong I suppose and also nervous of other traffic. However all was well and were were able to go through the gears into fourth and to cruise very briefly up to 50mph. The drive illustrated a few things, firstly that the hatch needs to be finished off with the rubber seal I have bought and the catch adjusted to stop it banging up and down, and the carburettors need tuning as the car is not pulling cleanly through the revs. The gearbox was a pleasant surprise, being nice and slick to shift although I dig get a ‘box full of neutrals’ at one roundabout while I grounds the gears. Fortunately, the MGB is torquey enough to pull out of the roundabout in third, although this coincided with the flat spot I mentioned so we sat at 32 mph with a BMW following curiously behind on our 50mph limit bypass. Helen commented favourably on the comfort of the seat, but noted the loud exhaust. With the car only partly trimmed and with a lot of grommets still to locate, I think I can tone down the noise a bit, and also I need to check the exhaust it properly done up. have to say, it does sound good and was turning heads. A good day!
Warmed up and ready to goThe lovely Mrs T ready for the offI’m concentrating so hard at this point!
Crikey, its been a while since my last post. What can I say, I’ve been busy.
Anyway, today was a good day. Recently I’ve been trying to resolve a misfire and due to my low level of competence, I had unsuccessfully tried to change the points in the distributor and managed to convert the misfire into a non-starting issue. So I left things alone for a few weeks while other events took precedence such as work, volunteering at Church, Gardening and walking with Helen. Of course Dad had been saying why not just fit the Electronic Distributor that I had bought originally but I had got it in my head that it was a horrendous, virtually impossible job. Then Thursday of this week, later in the evening instead of slumping in front of the TV, I popped into the garage and stared at the distributor. Then I reached for a 7/16th spanner and sort of offered it up to the bolts. It’s really fiddly, but I got some movement going and then the bolts were getting slack. I reached down to the distributor and just like that it came out. I was that surprised I just stared at it in my hands. How did that happen?
Buoyed up by this, today I slotted in the electronic distributor pretty easily and then just wondered if it would start. It did! I was really chuffed, and the misfire had gone, so success all round. I did have a bit of fun with tweaking the timing and having to adjust the carbs but before too long I had it idling nicely and cleanly revving, so this was a big step forward.
I spend the rest of my time pottering around. I fitted the twin horns, discovering as I connected them to the loom that the switch was live. That made me jump alright. With both units connected, they make a pleasing ‘honk’. I did give the heating controls a good check over and discovered that I need to buy one new one. I stripped the cables and connections off the old units ready for re-fitting. Completing the heater installation is going to be quite a project in itself I reckon. I then spent some time stripping the spare door that I recently bought in readiness for installing the glass from that door into my car. Finally, Helen and I sat out the front of the house with a cup of tea and a piece of cake in the sunshine. I had the usual couple of nice chats with passing neighbours and the postie who all admired the MG which was looking very bright in the sun.
Actually it was yesterday. Another sunny February day and it was time to fill up the brake system for the first time since I had replaced all the brake lines and the entire front brake assembly, disks, pads and callipers. I had a Gunson kit to help and my friend John was on hand to direct me from a suitable distance on the driveway. The Gunson kit uses pressure from the spare tyre via a rubber tube which goes into a bottle filled with brake fluid with an outlet which fits to the master cylinder. Had to inflate the spare first, which was flat obviously. We also jacked up the rear, removed the rear wheels and verified that the bleed nipples were okay. With the kit connected up, the fluid started to go down as the brake pipes were filled. I was watching at the back of the car, and the level was going down but no fluid. Then we spotted the rapidly growing pool under the engine bay. We had a leak at the four-way junction with one of the joints leaking fairly well. There followed some rapid reaction work with me in charge of sluicing the spilt fluid before the nice new paint melted while John disconnected the four way junction for inspection. I should mention that we did first just try nipping it up but to no avail.
The four way junction nor the line had no catastrophic issues, but John’s keen eye had spotted a little gunk in the fitting and on the threads. So we conducted a clean with some WD40 and a rag, blowing it out with an aerosol air canister. After some careful reassembly and re-tightening of the four lines to the junction, we recommenced filling operations. No leaks this time. For each brake in turn, we connected a length of plastic tubing to the bleed nipple and opened it up. I watched the flow and when the bubbles had cleared, I nipped up the bleed nipple. So far so good.
Moving to the front of the car, we again jacked it up and removed the wheels. The n/s side went smoothly enough, all new components, so it was a dream really. On the o/s, a little fluid was weeping from the connector between flexible and hard pipes but this was nipped up promptly enough. A prod of the brakes confirmed we did indeed have a brake pedal. As it was now getting on in the day, we decided to call a halt there. Further testing has identified that it is soft on the first push, then firm, which I think means there is still some air in the system. A quick browse around the internet suggests that the pipes into and out of the servo need to be bled and possibly also the junction connection at the rear which splits the fluid to left and right. This will be sorted out soon. However, all in all, excellent progress and a milestone reached. The car now starts and stops!
So to today, Sunday, and I was on my own, so a little pottering was in order. First job was to investigate the misfire which has been plaguing the MG lately when running it up. The carbs are not in tune, I have a plan in mind for the that, but it has definitely been running worse and worse. Taking a look around the engine bay, I discovered that the vacuum advance pipe was looking very sad. Being rather on the long side, it had drooped onto the exhaust manifold and basically melted. So I snipped off the mangled bit and fortunately there was plenty of length to make a nice route to the inlet manifold. Next I investigated the distributer, and as a non-expert, the one job I could do myself was to swap the distributer cap which on inspection was a bit rough looking with the contacts worn. So I popped in the new one which came with the electronic distributer and this saw an immediate improvement. I was tempted to just pop the new distributer in but as this is quite is quite fiddly, I put it off for when I have a longer go and have taken some advice. Instead, I did a couple more jobs on the dash. First, I fitted the rev counter properly. I had lost one of the knurled wheels that fit to the studs and hold the two brackets. Miraculously, I found it on the driveway yesterday! That saved a £5 order to a specialist (apologies to the parts market, I need plenty more bits honest!). Then I moved to the n/s to fix the dash properly. Having done the o/s earlier in the week, I knew how this went and it was straightforward to fit this. With the centre nut also fastened up tight, the dash is now looking right, albeit I still have a few switches and the vents to install. As I had to lie on my back in the footwell to do this, and with a mind to future required jobs, I got out the new carpet set and lobbed the footwell carpets in and the boot carpet while I was at it. I am not quite ready to commit to carpeting the MG, but it was good to see the set and acquaint myself with the different parts.
The dash now correctly fitted
Melted vacuum pipe
I have now removed the legendary ‘no fluids’ tape’
It’s a story with a happy ending today as I have just witnessed big Mark releasing the two calliper bolts which were preventing me from replacing the front n/s brakes. A few weeks ago I had done the o/s front brakes and it had all gone alright. However, when I came to do the n/s the brake caliper bolts (there are two) I could not remove them. The n/s calliper looks original, so what we have here is something that has been in place for over forty years and did not want to budge. My attempts to undo the bolt had involved using some freeze spray and a socket and bar. The problem I was having was that the bar was just springy and I only have a light domestic hammer so all I was doing was bouncing the steel around. So I called Mark…
To be clear, Mark entered our garage via the front, while I stood well away, so we were Covid secure throughout. On his first visit (yes there were two visits) he tried a spanner and lump hammer to try to get the bolt to budge. All that happened was the spanner (one of mine, and not of best quality), just turned around the bolt. Next he used a chisel to try to rotate the bolt with a couple of thwacks on the edge of one of the flats. Sadly this did not work, so he agreed to come back with some more serious kit.
Visit two, a couple of days later, and Mark arrived with a professional socket set and a G-clamp. He found a good fit with a 15mm socket and fitted the bar. Then he used the G-clamp to hold the socket onto the bolt end as additional security. He gave it a couple of exploratory thwacks, but wasn’t happy with the bar still flexing excessively. So he used a large ring spanner fitted over the end of the bar and put it under tension to reduce the bounce. A couple of more meaningful blows from the hammer and we started to see actual movement and the first indication of progress. And that as they say, was that. The second, lower bolt came off in much the same manner and I am now clear to complete the replacement of the front n/s brakes over the weekend. Thanks to Mark, a local friend who didn’t mind squeezing down the side of our garage to undo the bolts on a rainy February 2021 while I looked on in awe. We all need a friend like Mark.
One advantage, perhaps the only advantage of lockdown is that we are forced to stay at home and not go ‘gadding about’ as we are normally inclined to do. So it was that after a most pleasant stoll in nearby Cirencester Park, Gloucestershire, as part of our permitted exercise, I found myself with a sunny late autumn afternoon to dedicate to the MG.
I decided to sort out the choke spindle on the carburetters (carbs for short) which I had managed to fit the wrong way around. What I haven’t recorded here is that I had previously corrected the throttle spindle which I had also fitted the wrong way around. Such is the lot of first time amateur car restorers such as myself, progress is riddled with little mistakes, however, with each mistake, I try to learn something. So to the choke spindle, which is an assembly comprising a spindle which sits within a cup on each carb (the MG has two). The choke mechanism operates when the choke handle is pulled on the dash. This causes the cable to tighten which, being attached to a lug on the spindle causes it to rotate. This rotation causes the choke mechanisms on both carbs to be operated because the ends of the spindles have lugs which fit onto the cams which themselves are on the end of the choke mechanism. The choke mechanism moves the needle inside each carb to richen the mixture, but also opens the throttle because the cams connect with a screw on the throttle spindle.
The fun begins when you realise that the spindles are not held in place in any way other than sitting in the cups on the carbs so when fitting the carbs you have to align the spindle ends (4 in total, 2 for the throttles, 2 for the chokes) with the cups, and have them aligned to the lugs (again 4 in total) while you are trying to to wriggle the carbs onto the mounting studs (4 in total). I make that around 12 points of contact which you are having to manage and it was certainly easier when I was able to phone a friend. To reverse the wrongly installed spindles, I loosened the carbs, but wanted to avoid taking them off as then you have to do the full accordian player impression as the two carbs writhe in your hands. The carb mounting studs are worth a mention, being located cruelly in the most awkward position and in perilous proximity to the razor sharp edges of the heat shield. It would be good to have three elbows on your arm at this point rather than the inadequate one we have to deal with. I won’t bore you with a blow by blow account, but suffice to say I got it all done in two attempts and only one skinned knuckle. I then fitted the air filters and went for a start up.
I connected the battery (ignition switch solution still pending), heard the familiar ticking of the fuel pump and turned the key. One click and then nothing. Mmm. I tried my spare battery, and it cranked over willingly but wouldn’t fire. Then I remembered to reconnect the coil wire I had disconnected. This time the engine started straight away, with full choke of course, and settled at a fast idle. After it had run for a minute or two I pushed the choke in and tweaked the idle speed to get it to idle correctly. I recorded the sound of the engine in the YouTube clip below. To get the authentic bass – use headphones. For an MGB is does sound rather tasty. Its obviously not set up right just yet, but it’ll do for the moment.
So that was a reasonable afternoon’s accomplishment. Today (Sunday) was a more gloomy day both weather and progress wise. A dull autumn day dawned and after finishing off the chores and watching Church online (another COVID consequence) I pushed the MG onto the drive intending to fit the engine fan I had bought recently. To get access to the pulley I determined it would be neccesssary to loosen the radiator and pull it away from the area. This is relatively simple on the MGB, being six 0.5″ bolts (what else) to remove. Having pulled the radiator back I realised that the fan I had bought was the wrong one – annoying as I thought I had searched it correctly. More catalogue searching required and another item for my MGB parts shop which I will be opening at some stage to sell on all the surplus parts I have amassed over three years. So I had to pointlessly put the radiator back again. It was then I remember that fitting the radiator is more difficult than removing it. The radiator is mounted by the aforementioned six bolts to a steel shroud which is fixed with eight bolts to the inner wings. The challenge is to get this all to align. The shroud in my MGB, despite being resplendant in shiny black from the paint shop, is I believe a bit warped. The off side is particularly difficult and I had to loosen all the bolts on the radiator and shroud on that side to get each bolt to bite on its thread. Having had this difficulty before, I was up to the challenge this time, and a bit of thinking and remembering got the job done in the end. All helped along by my Radio 4 soundtrack in the background, latterly a re run of ‘Just a minute’ with the late Nicholas Parsons.
So today I fitted the brake and clutch master cylinders into their assembly and then fitted that to the car, including the pedals. Sounds easy doesn’t it, but it took a while believe me. First I had rashly mounted the pedals to the assembly and then when I took it to the car realised that the pedals wouldn’t fit down the hole. So I took it apart again and mounted the assembly sans pedals. This went quite well although at one point I had to lie upside down in the footwell to do up the nuts and that involved some interesting contortions, hence the MG yoga title above.
With the master cylinders in place I can now imagine the first job involved in replacing the brake lines which is to fit the first two lines which come from the master cylinder. This involves them coming out of the cylinder and then performing a 180 degree turn so that is going to test my pipe bending skills. Might get some help for that bit! I did have Mark on hand today to help me fit the bonnet gas struts but with it being a windy day (Storm Hannah), we thought better of doing a delicate drilling job in a gale and instead had a good look at the brake kit which seems quite organised.
After a pleasant meal out with colleagues I returned to my chalet (I’m working away at present) and got the carbs out on the table to do some more work on the cold start enrichment mechanism on the rear carb, which I will call the choke from now onwards. Despite some earlier efforts to clean this up, the mechanism was still so stiff that the return spring couldn’t well, return it.
So I stripped it down again and sanded the surfaces with some 1200 grade sand-paper. On reassembling it still wasn’t very free, so I took it apart and used some 800 grade sand-paper and concentrated on what appeared to be some corrosion within the body of the carb which I think was causing the friction. The frustration is that when loosely inserted it moves freely and only tightens up when fully assembled. Sigh. End result, moving better, but still not enough, so another strip down and sand is due, but not tonight because I don’t want to be doing this all night!
On the plus side, I am cleaning more bits as I strip them and I am getting to know how it all fits together, which can only be a good thing for the future.
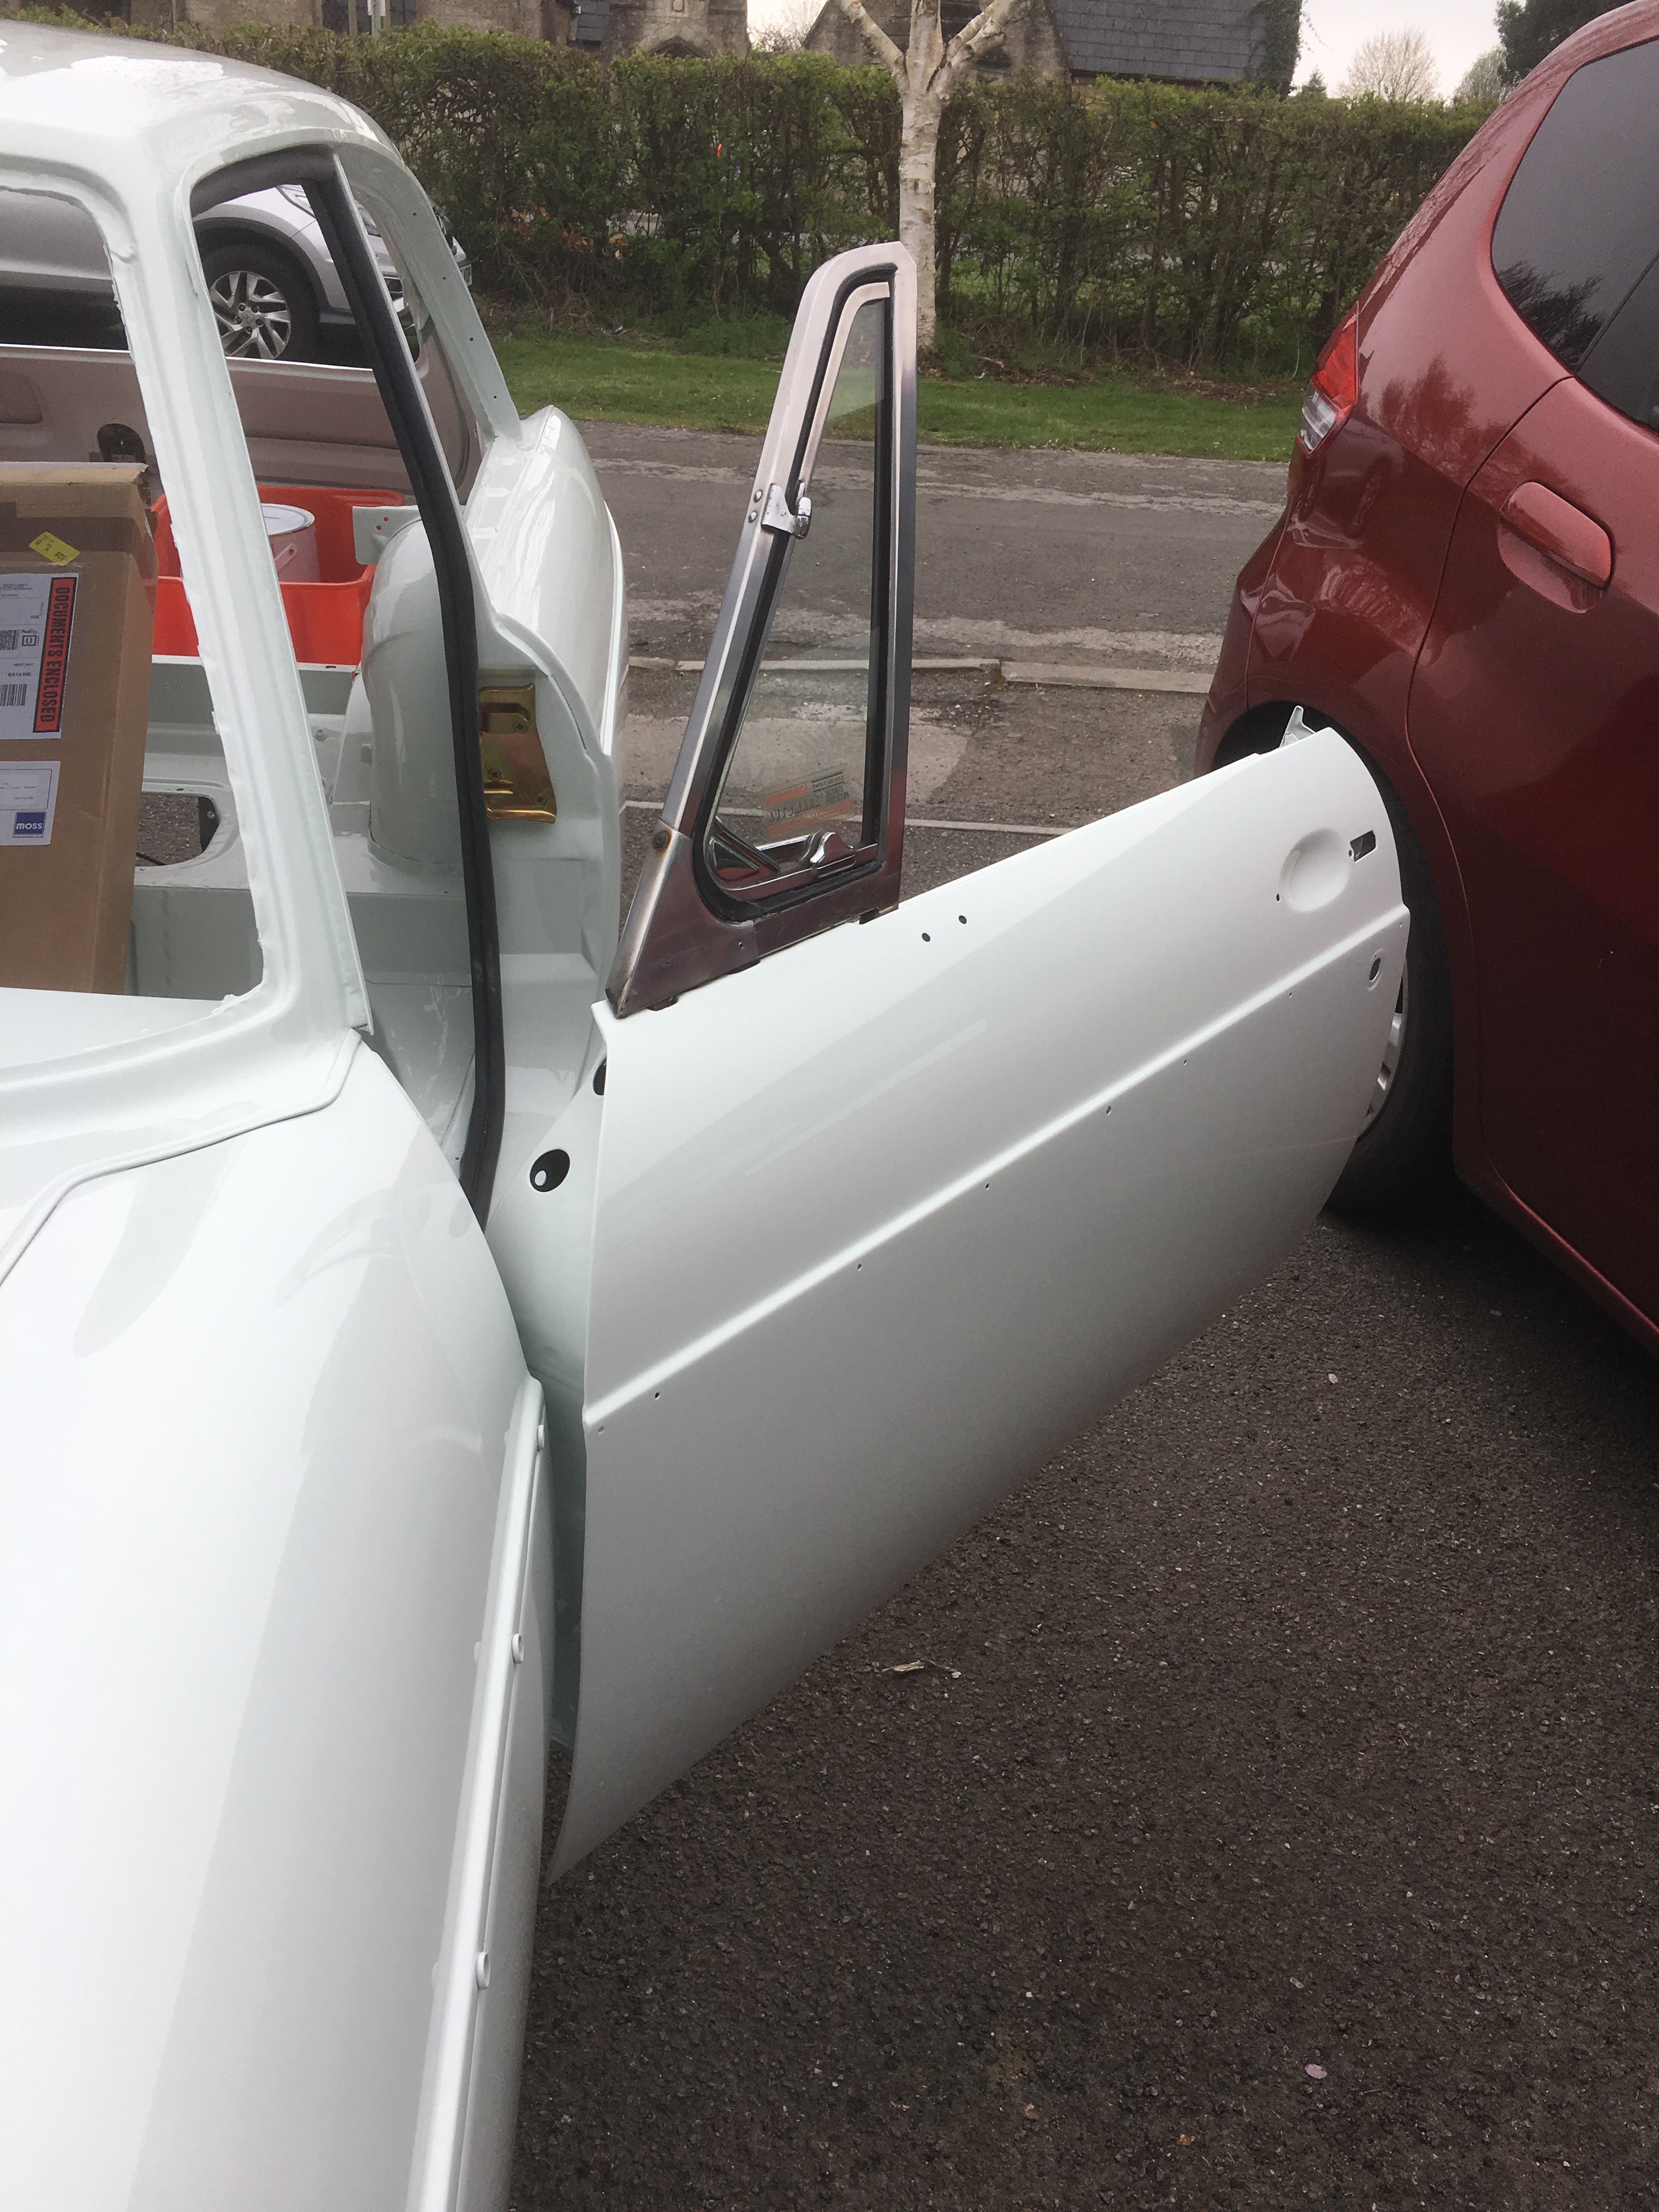
First opportunity this morning, since the respray, to push the MG out of the garage and look to see what jobs could be done. Noting that I haven’t got the harness yet or the brake pipes I can’t get started on the critical path items, however I am able to put components back on the car which need to be done sometime and which don’t affect anything else.
So I bolted the quarter lights back on to the doors, easy enough as I could remember how they came off. It was a bit awkward feeding the leg through the narrow slot at the top of the door without scratching the new paint, so I wrapped the end in a cloth bag and eased it through the gap at the middle of the door where I could make a bit more room. After this I was reacquainted with the very long threads on the bolts and the restricted access to them.
Just to be make room in the garage I also put the spare wheel into its recess, laid the cover over it, put the battery into its cradle and put the loose rear seat base in place. Well why not.
I also put the heater into its place to try to reacquaint myself with this unit which is an early fit item as the brake lines run past it under the bonnet. Nothing screwed down, just getting a feel for it really.
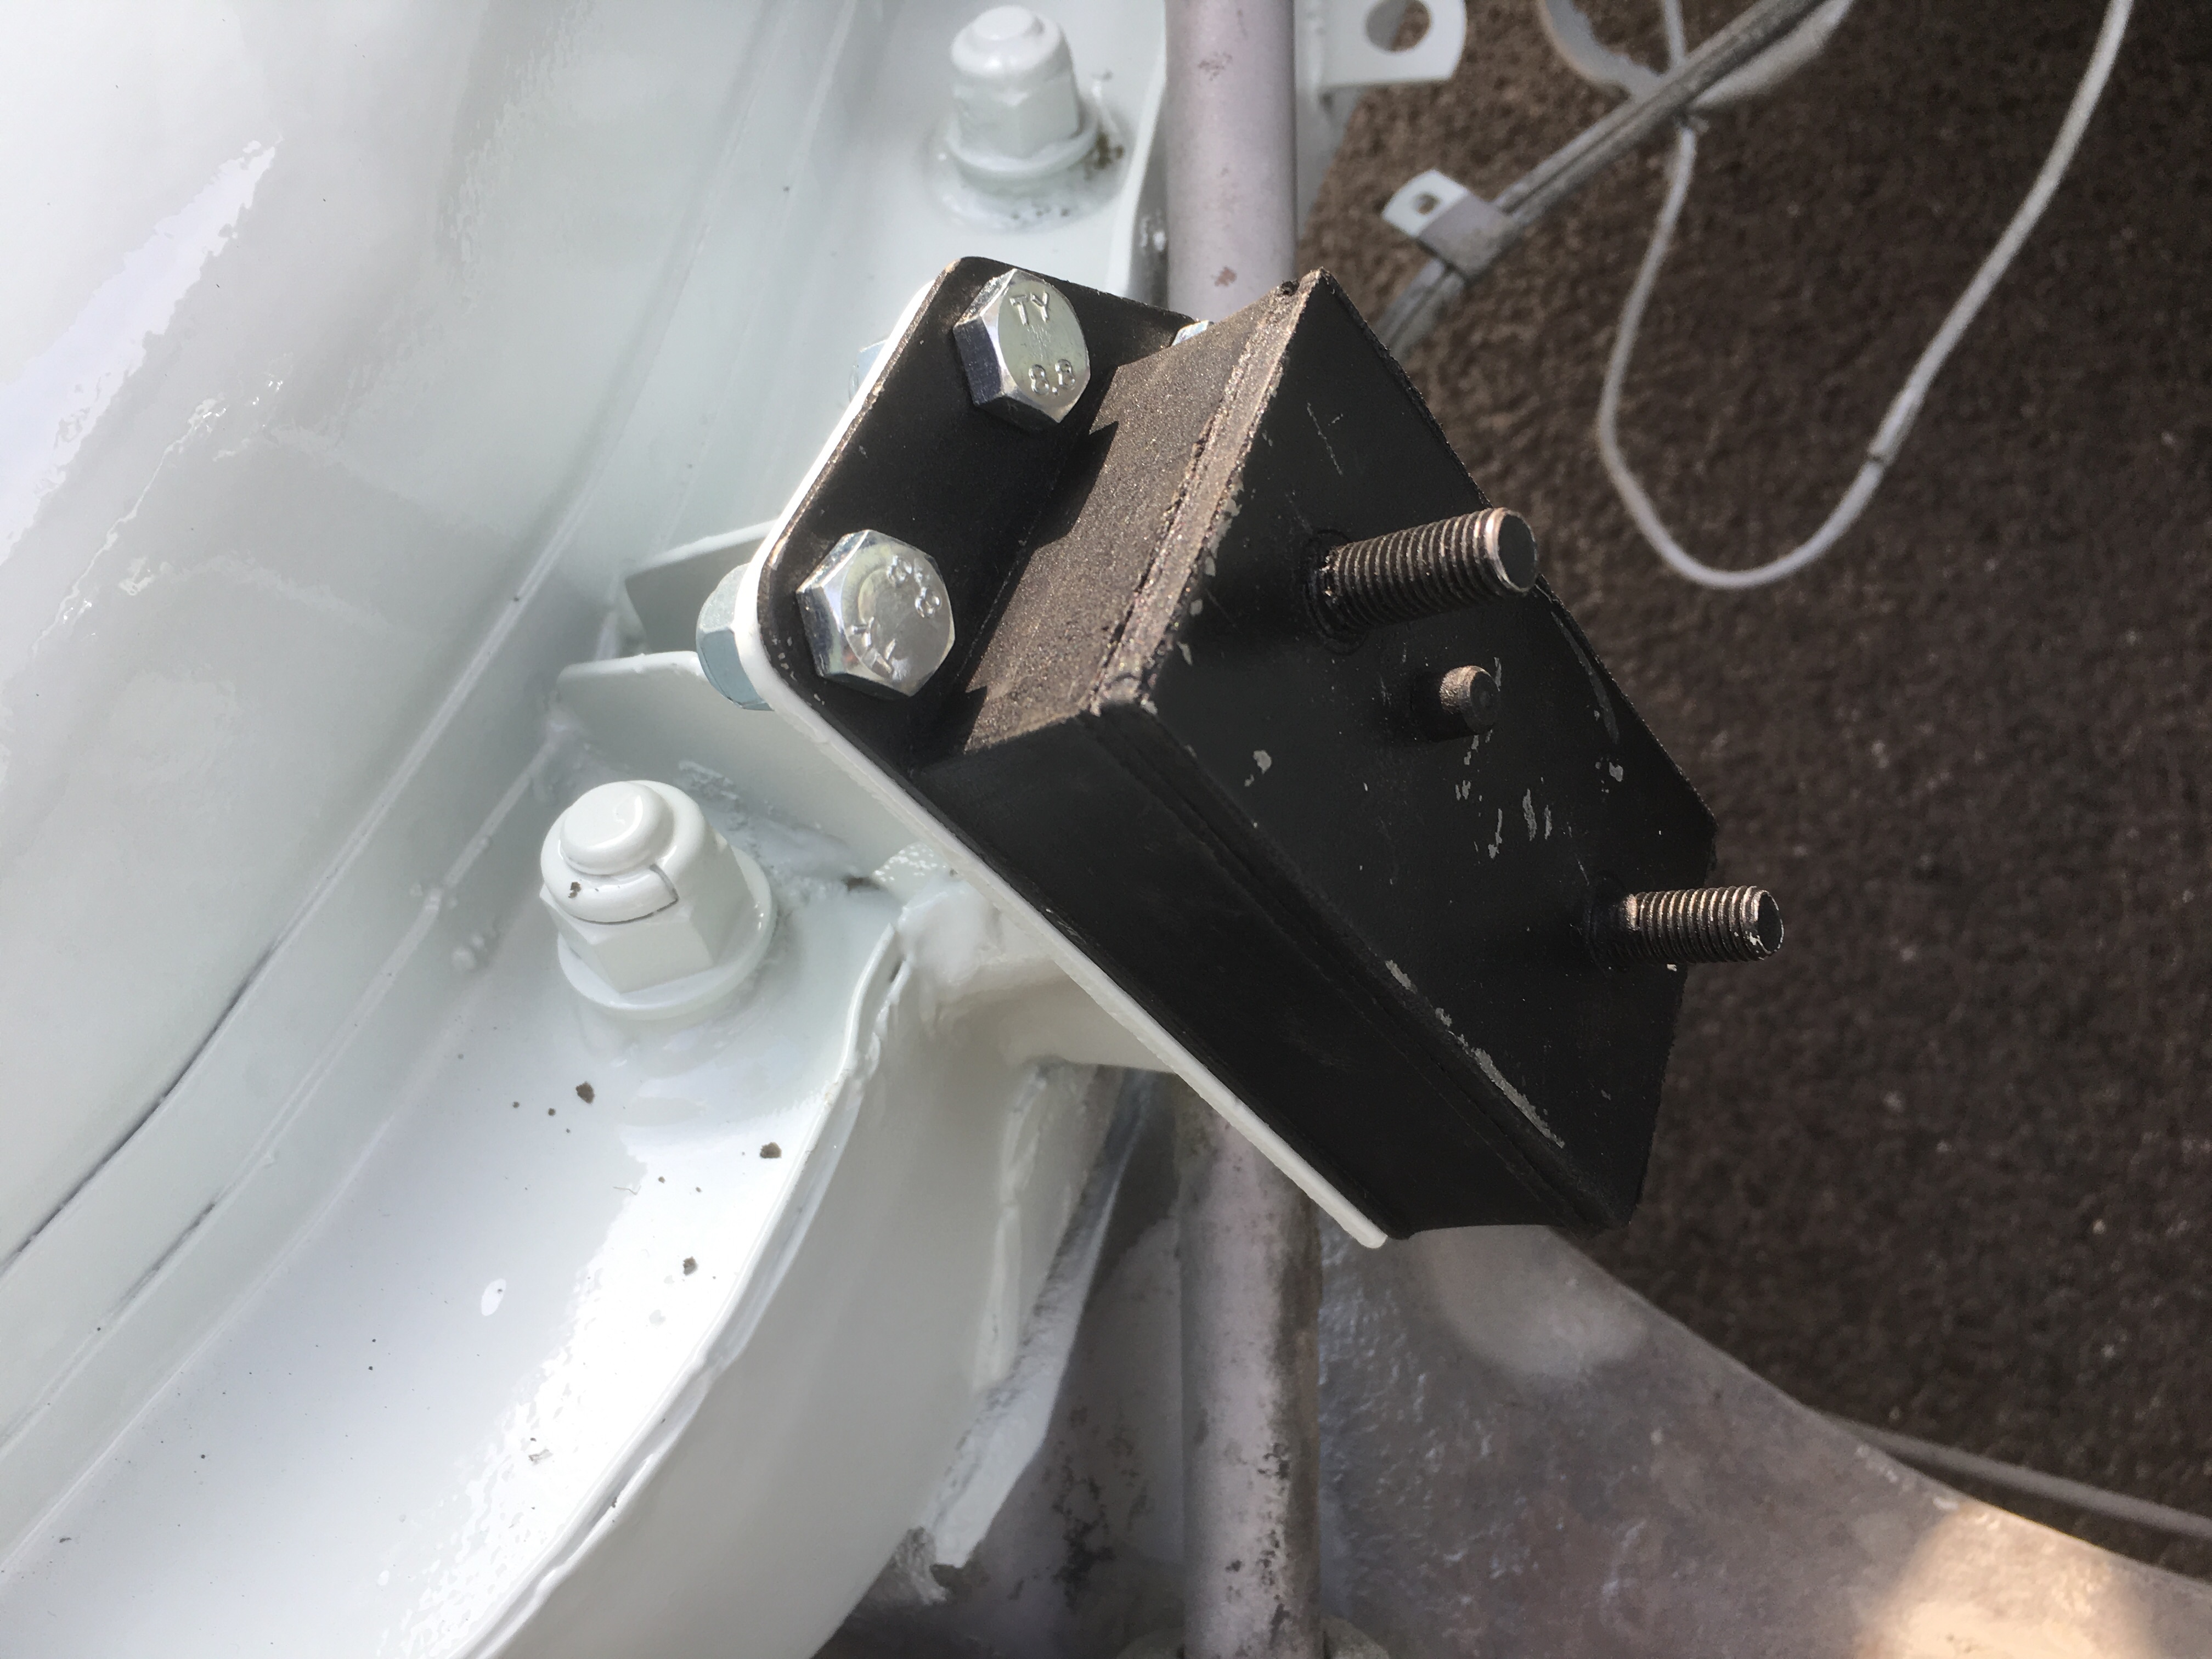
One annoyance was when I went to bolt in the engine mounts to find that at the MG spares day I had bought two o/s mounts instead of a pair of each. What a dummy.Still, not an expensive item, just need to buy the right one now.
Had some passing interest as I was working on the MG including a dog walker who came up to say hello and tell me about that he had built a Westfield 21 years ago. We had a nice chat and as I’ve said before, this project is about the experience and the people I meet as much as the end product. A nice morning’s work.
Earlier this week, working away in Cambridge, I invited Rob (friend and colleague) over to my place for dinner. I was clear about my motives, saying to Rob that I had homework for him to do. After a satisfactory curry, we sat down with the MGOC, Moss and David Manners catalogues and my list of parts required for the initial build of the MG and worked our way down the list comparing prices and working out which parts to order from whom and also what were the peripheral parts required. Helpfully Rob has extensive mechanical experience having raced TR6s for years as well as his back-catalogue of interesting cars. At 10pm we called a halt and were about 3/4 down the list, but it was a really useful session. Thanks Rob. I now have a schedule against which I can place orders, although I need to be sure I’ve got space for it all as it arrives.
I nipped over to see Gavin and Dean at the paintshop when I got back from Cambridge, to deliver door rubbers and to collect the faulty front valance. I also took over some donuts which went down well. I had ordered a new valance from Smith & Deakin, a specialist fibreglass company who do Motorsport parts. Hopefully this will fit better than the other item which I hope to return to Moss in due course for a refund. On Friday, Gavin posted updates photos on FB and it was good to see the progress that had been made.
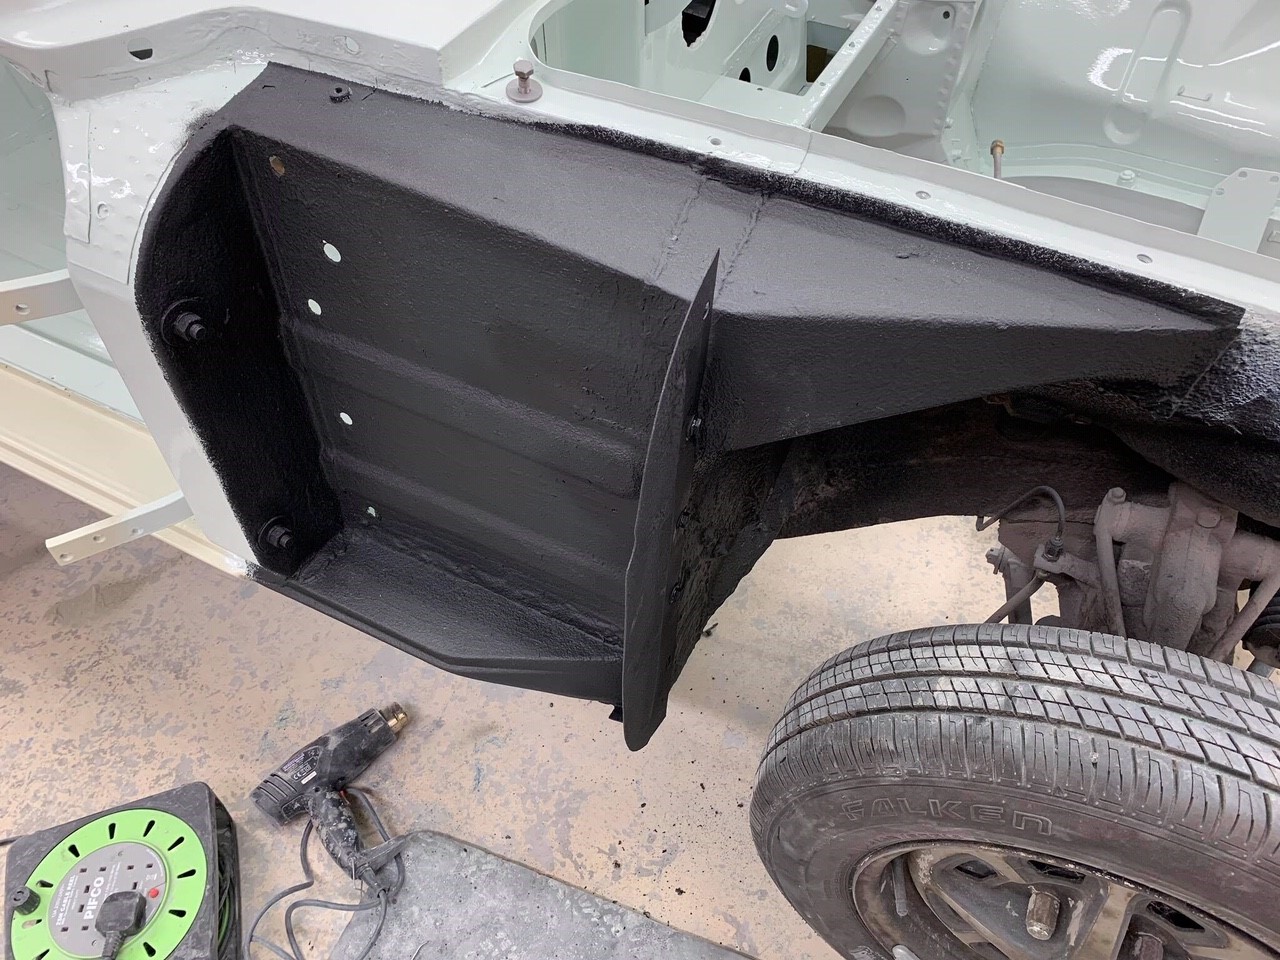
The inner wings look so smart
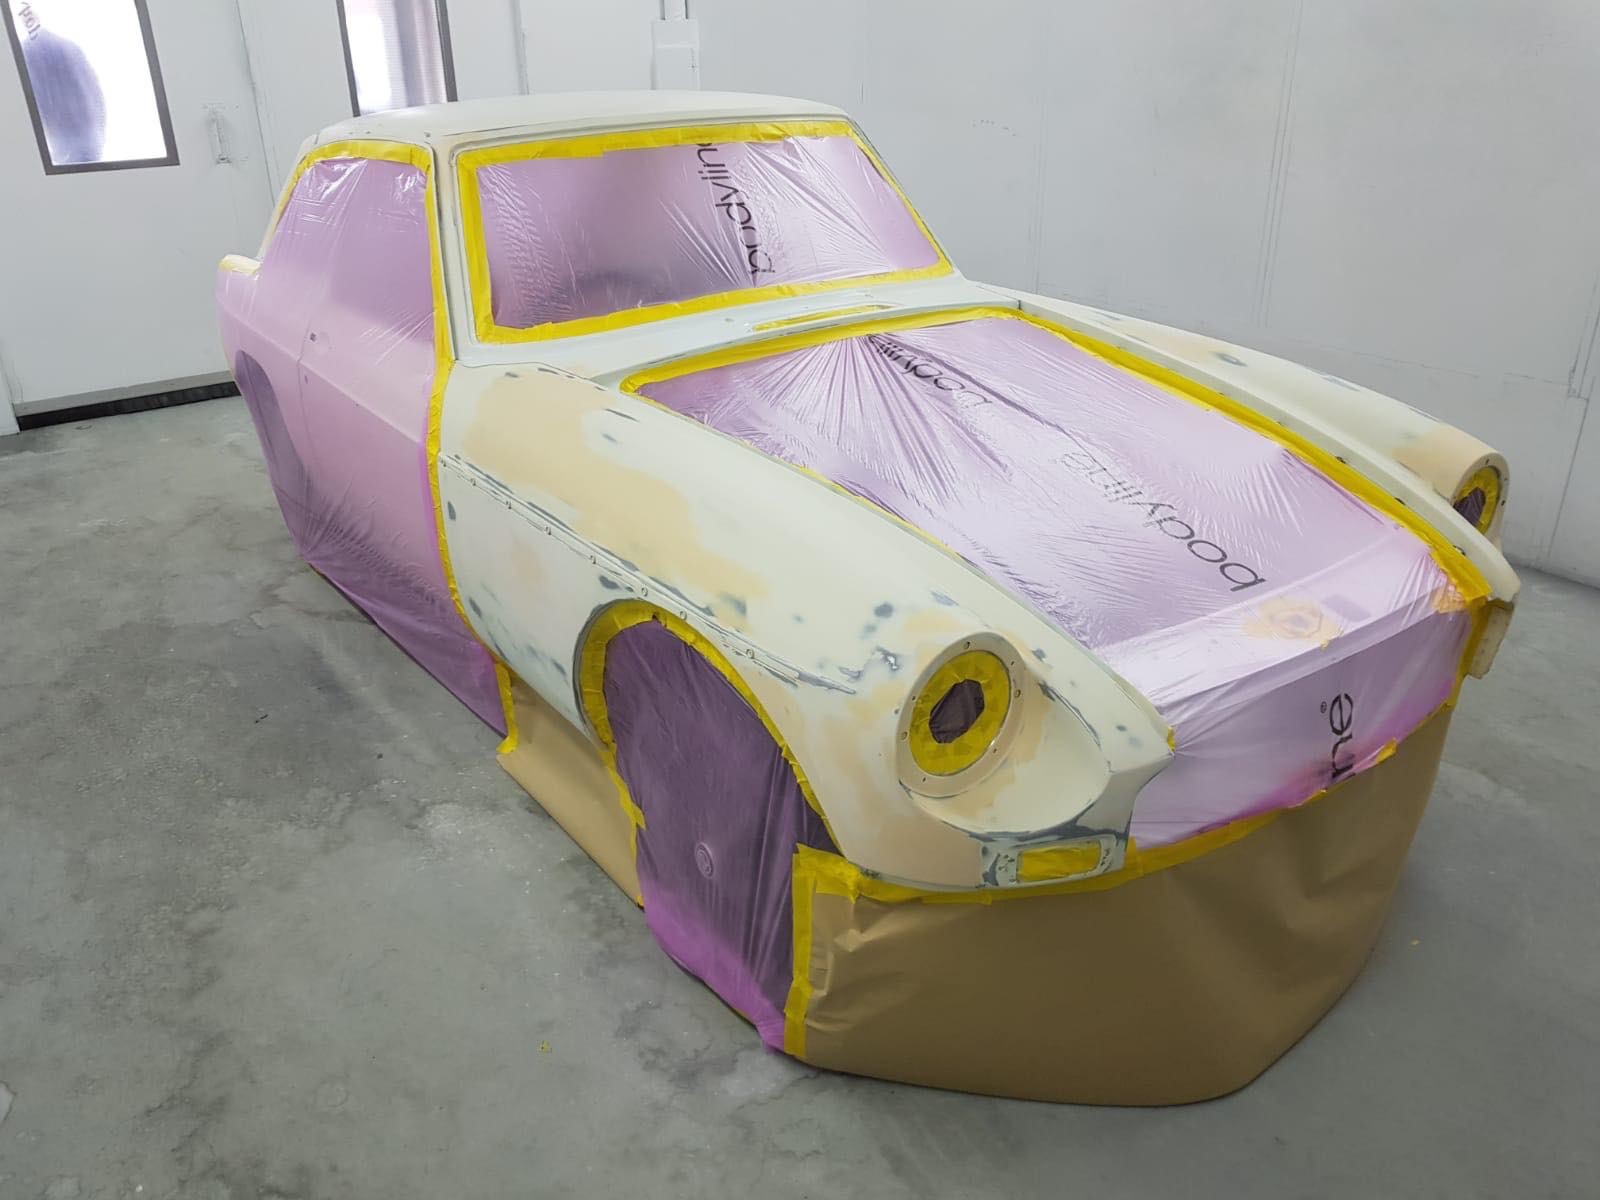
Masked up ready for primer
Gavin was keen to get some paint on areas that had been worked on to avoid exposing the bare metal
I am really pleased with the work being done, the inner wings look especially tidy compared to how they looked previously. The identified problems are gradually being worked through and we are moving ahead.
This afternoon (Saturday) I spent a couple of hours in the garage sorting parts, adding to the junk pile and just generally getting my head around what’s ahead. For example, I plonked the gearbox onto the cross-member with the old mounts just to see how it goes together. I also removed the thrust bearing as I am going to replace the standard carbon item with a roller bearing version. That has to be the easiest part I have ever removed, two circlips to rotate and it couldn’t wait to come off. Nice to have an easy job for a change. I also trial fitted two more gauges into the dash just for fun. They have all cleaned up okay, but the acid test will be whether they work when they are all reconnected and I have my doubts about some so am prepared to replace what doesn’t work.
Lou took a picture of me looking pleased with myself


 With the master cylinders in place I can now imagine the first job involved in replacing the brake lines which is to fit the first two lines which come from the master cylinder. This involves them coming out of the cylinder and then performing a 180 degree turn so that is going to test my pipe bending skills. Might get some help for that bit! I did have Mark on hand today to help me fit the bonnet gas struts but with it being a windy day (Storm Hannah), we thought better of doing a delicate drilling job in a gale and instead had a good look at the brake kit which seems quite organised.
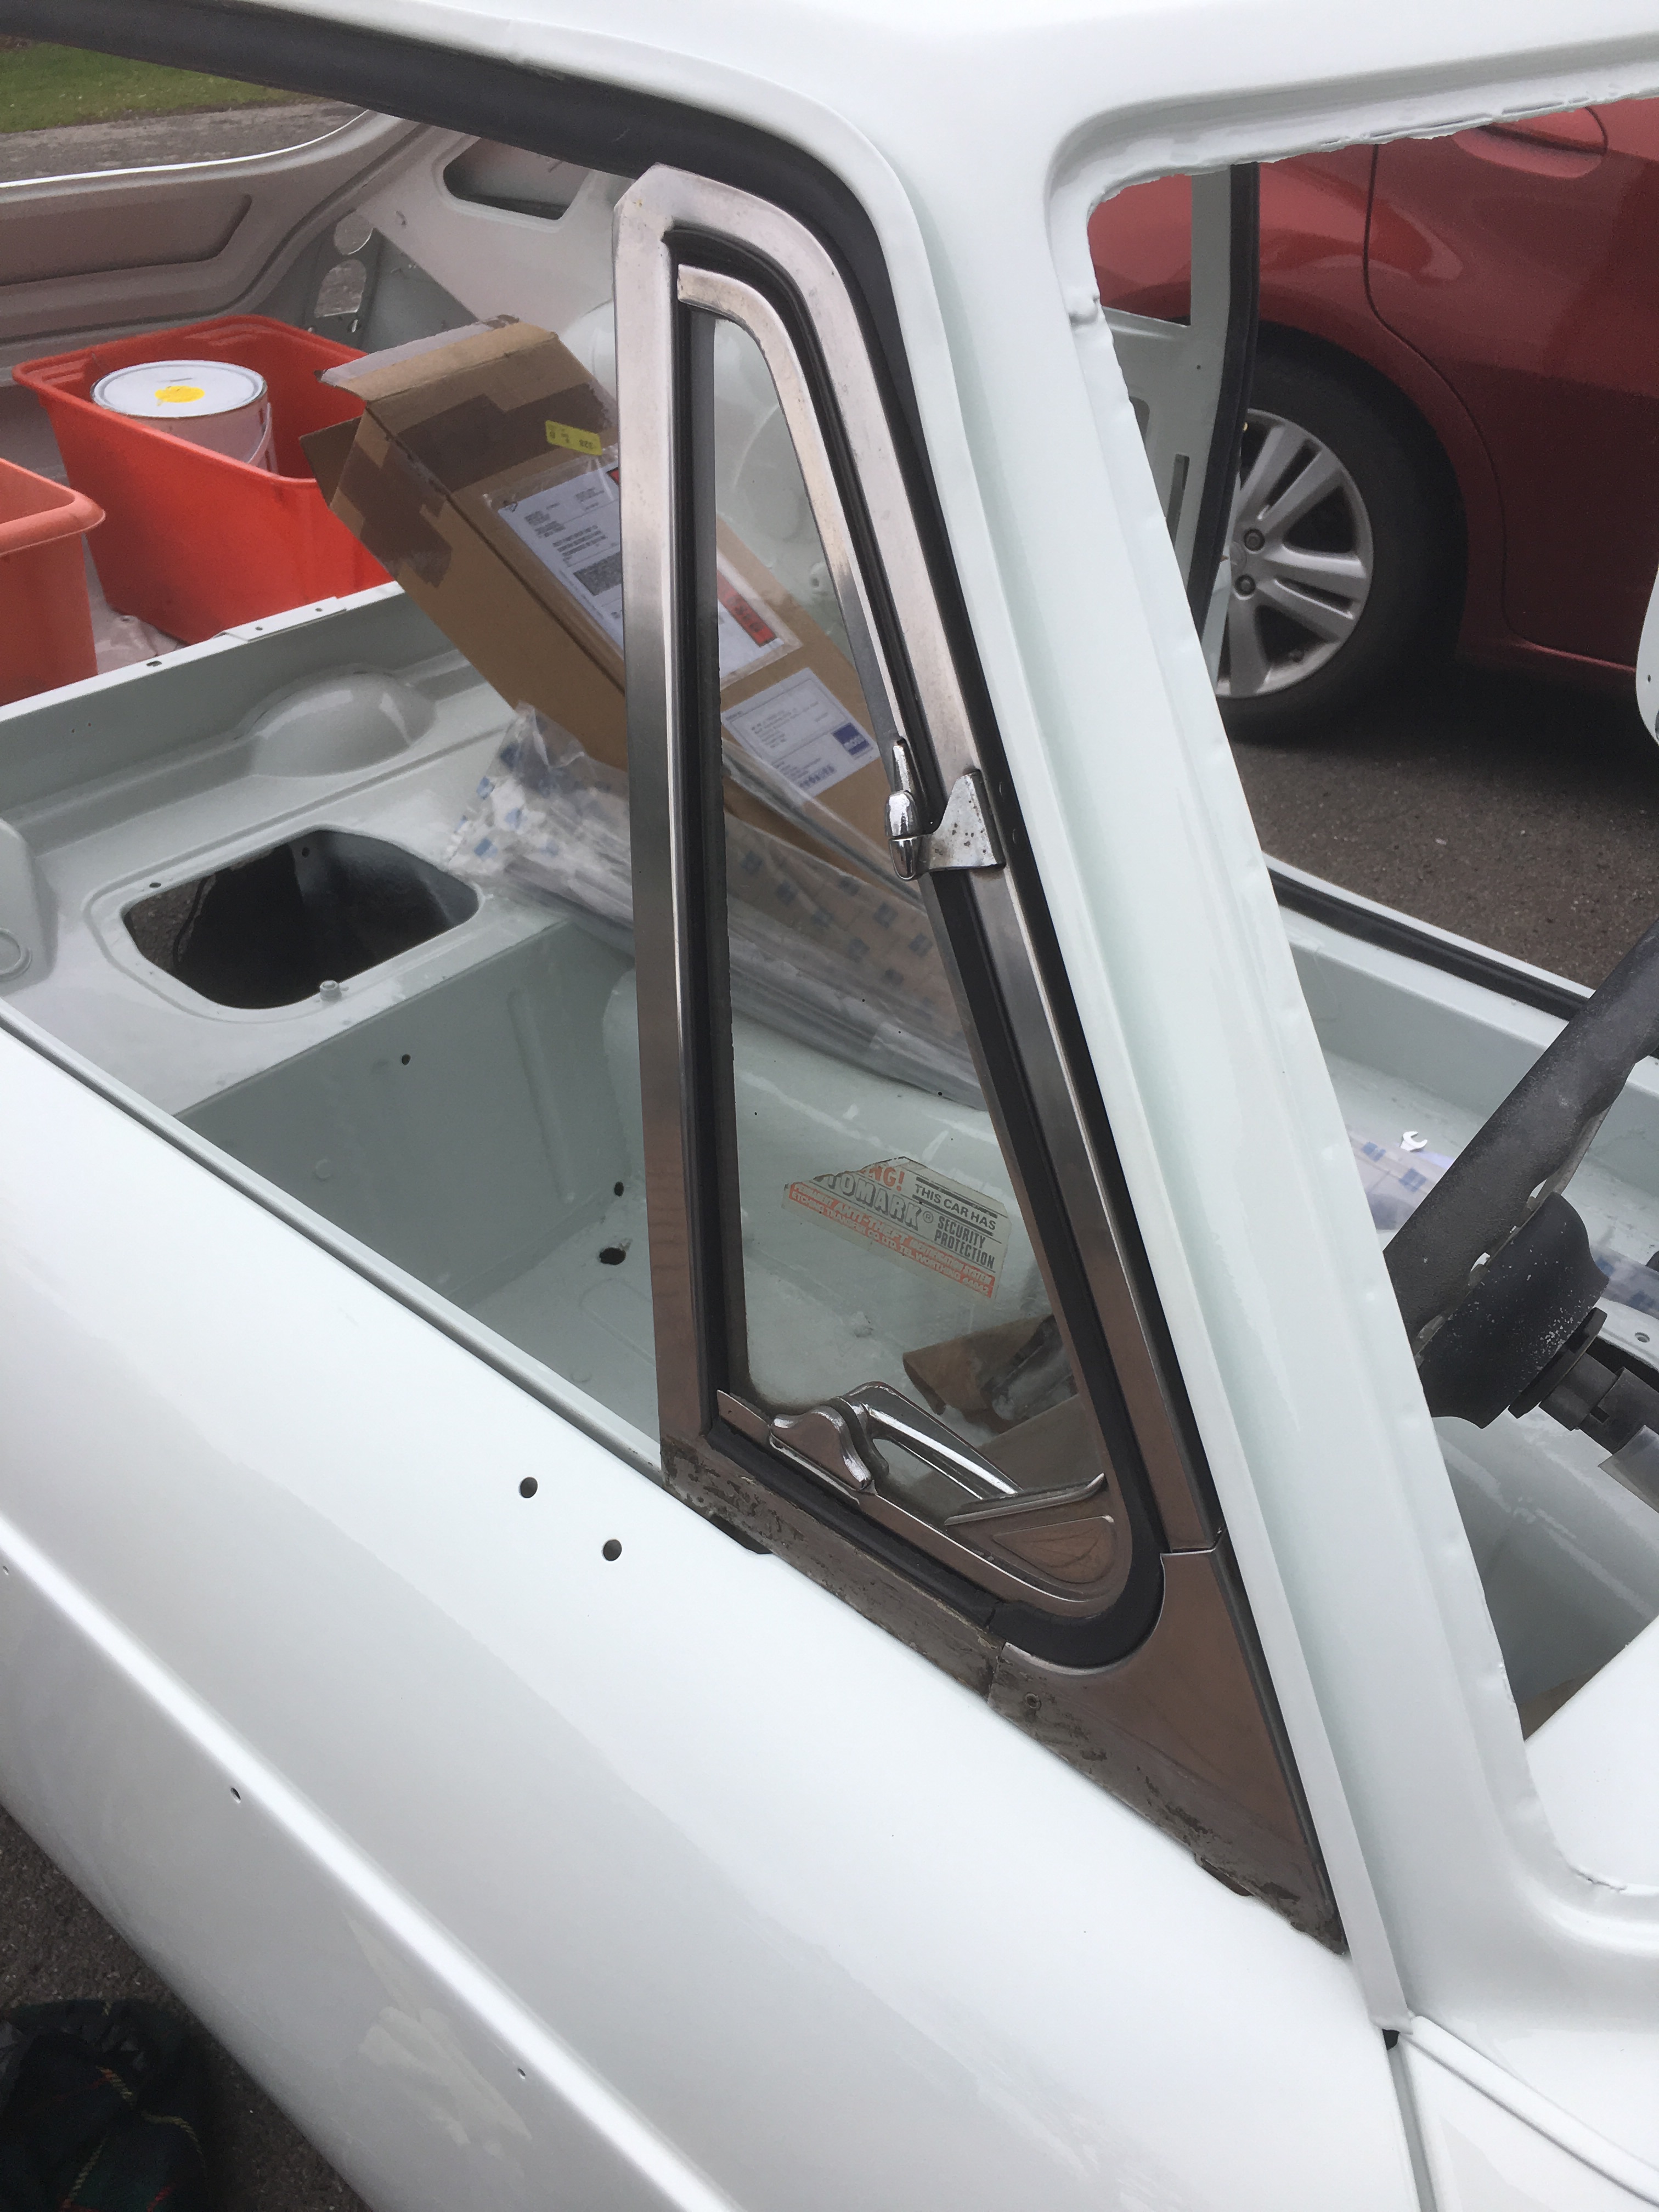
 Just to be make room in the garage I also put the spare wheel into its recess, laid the cover over it, put the battery into its cradle and put the loose rear seat base in place. Well why not.
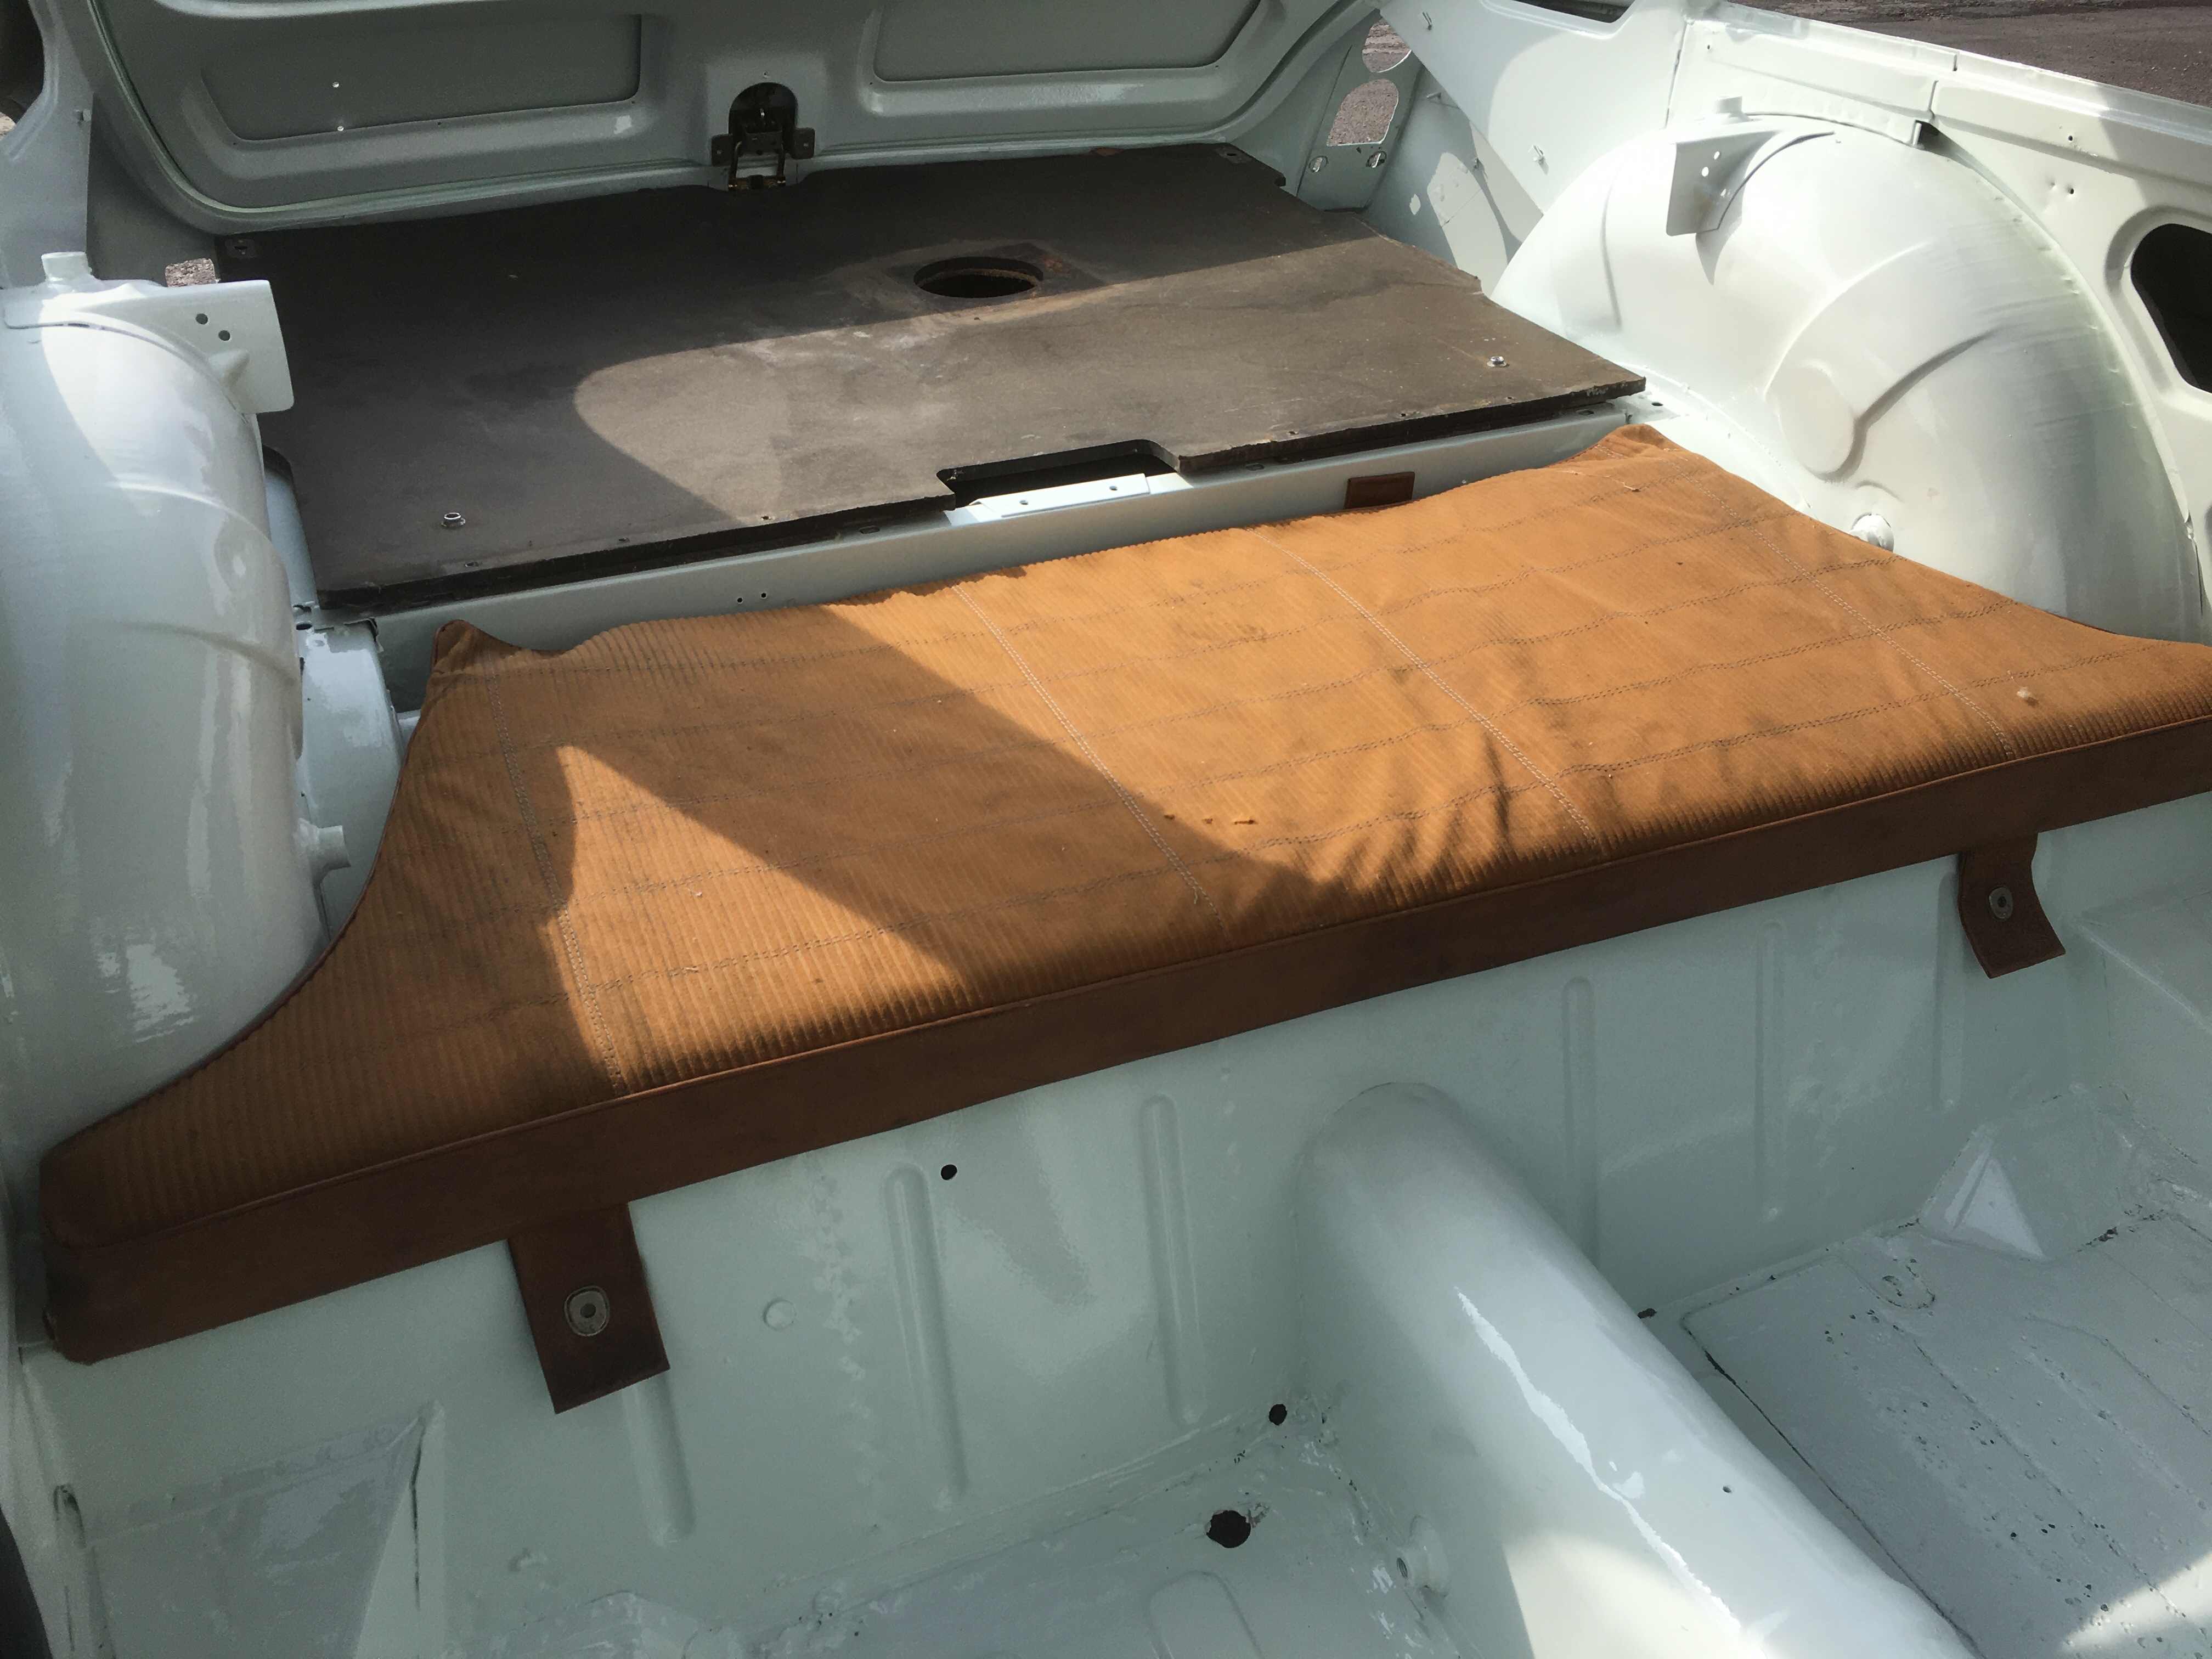
 Still, not an expensive item, just need to buy the right one now.