3 March 2022 Batch Day #2

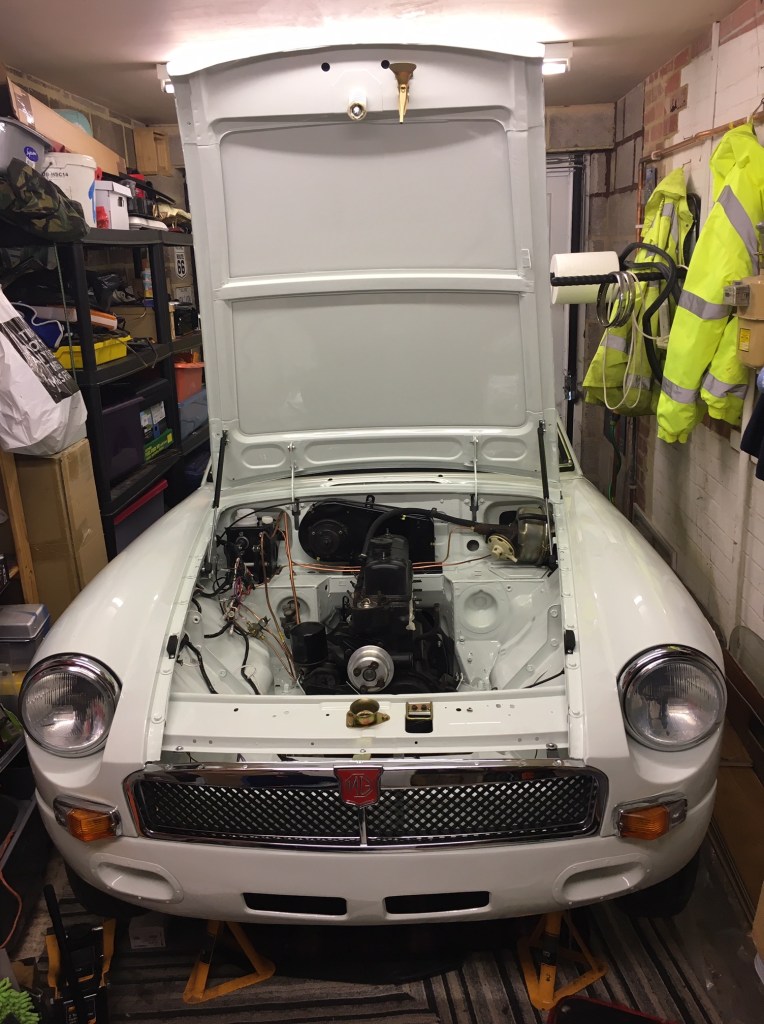
Day two of the batch of jobs was again a damp day but we had a gazebo erected over the the MG butted up to the open garage door so were protected from the worst of the elements. Ashley was again on hand to help with the list of jobs.

Gearbox cross-member: We started with what we expected to be a very difficult job which was doing up the bolts which fit the gearbox to the cross-member. This was a job left over from the engine install, over two years ago and was essential for the car to be roadworthy. While recognising that the bolts are very fiddly, Ashley managed to do them both up and it was a bit of an anti0climax really.

Brake bleeding: Next job was to bleed the brakes. A long time ago I had got the system operational (with help!) but I had a soft pedal which needed a pump to get them to go. We bled them using my Gunson pressure kit which worked well and we had a little air out of the system. A later short drive around the block confirmed that we now have a firm pedal and effective brakes, albeit not quite in the same league as my 400 bhp Polestar 2 EV. I will keep a close eye on how its braking and keep an eye out for any leaks. Dad insists I get a low level warning lamp – its on the list Dad.

Fuel tank leak: The fuel tank has been seeping petrol annoyingly for a while when topped up over the level of the sender. I have tightened the sender, and from inspection today it looked like it was seeping from the welded section around the sender, not the sender connection itself. Annoying, as I can’t do anything about a manufacturing fault apart from complain to the supplier (which I will) but even if they give me a new tank, I’ll have to fit it, so not happy. I have bought some tank putty which I may put on as a temporary hold. No solution at the moment, and fuel is rather important to the whole project.

Is that seeping from the seam. It looks like it

Seat fitting: We were feeling really confident about fitting the seats. We had the runners all ready to go, so we offered up the driver’s seat thinking this would be an easy job of simply doing up the backs, then sliding the seat back on its runners and doing up the front. Four bolts – easy! Several hours later and having tried a few different things, including changing up the sequence, and changing a runner, we were still without a satisfactory fit. The basic problem was that we could not get four-bolt to seat runner alignment. We could get two out of four and even got three out of four with a lot of work, but the fourth bolt would not align with the captive threads in the floor. So this is baffling us at the moment and we had to admit defeat of this for the moment pending inspiration. Around the same time we concluded that the old seat belts were really not going to cut it as the mechanism was not operating right and the belts looked well past their best. Safety first, I ordered new from Moss to collect the following morning.

We were nearly out of ideas so decided to stop, think and retry tomorrow

Door cards and capping: While Ashley was experimenting to try to fit the seats I fitted the passenger side door card and capping. The door car is a very simple fit and it went on like a treat. These are second hand ones that I fitted and I am pleased with them. The door capping, which is a chunky piece which fixes to the door top screwed on nicely. I was feeling chuffed until I noticed a gap around the door handle and realised that the I did not have the escutcheons – darn! Another thing to add to the Moss order

It’s starting to look like a car!

Road test: A start up (best avoided usaully) had been essential today as we had the car up on ramps. So as our working day drew to a close, its seemed justifiable to run the MG around the block. Gingerly backing off the ramps I reversed onto the road (I am fully insured) and waited while Ashley jumped in (sitting on the floor). I was in the drivers seat which had three out of four bolts, was fully back (a bit too far) and with no belts. We weren’t planning on going over 15 miles per hour so I judged this to be okay. First to test were the brakes which pulled the MG up nicely. Otherwise, the test went fine, the MG pulled cleanly, although the steering feels really heavy and the large wheel is in the way of my thigh. I have a wooden wheel just needing the correct boss, so that will improve things.

So a few more jobs to do tomorrow to conclude this three day burst. Ashely has been brilliant, a calm, considered, clever and strong par of hands to lend to the long list of jobs. We’ve made good progress.

2 March 2022 Batch Day #1

I booked three days off from work, and a friend (Ashley) to help me tackle a batch of jobs on the MG. This is what we achieved on day 1.

Fan belt: I thought it prudent to replace the fan belt which came with the car. Given that the MG had been stood for at least five years, and in my ownership for three years, and that the current fan belt was of unknown vintage I had decided to replace it with a shiny new one. The job itself is really simple, slacken off the lower bolt on the sliding bracket. then the two top bolts on the alternator. The alternator can then be swung, taking the tension out of the belt and its comes off easily enough. The new belt took a bit of work with my thumbs to sit over the pulleys, but not too bad. I then swung the alternator back into position, applied some tension and tightened the bolts. The belt tension felt about right, although time will tell and anyway an easy thing to adjust. It certainly isn’t too tight. It brought back memories of when Dad used to service cars and I would help him. I seem to remember that he would ask me to hold the alternator, which of course would immediately move, and he would have to put it back and again and say something encouraging like ‘this time hold it.’ Oh the fun we had, I am not sure how much help I was!

A not very exciting picture of the new fan belt in place

Bonnet Seal: Next easy job was to fit a rubber seal to the seam which runs up the wings and then joins the scuttle. On the MG this is a three quarter affair – its starts halfway up the wing, goes around the top and then halfway down the other wing. This was a simple matter of pushing the rubber seal onto the seam and making sure it sat nicely. Then when I found that the two sides were uneven (it went further down one wing than the other), taking it off and doing it again.

The new seal fitted around the top of the engine bay

Seat Preparation: I had previously had all sorts of hassle with the seat runners, a victim of a mis-order resulting in too few of the right parts and too many of the wrong ones. Anyway, I now had everything I needed, so in the comfort of my study I laid out the parts and worked out what went where. The seats are now ready to be fitted.

Steering Column Bracket: Some time earlier in the build I had temporarily popped a bolt through the steering column bracket to hold it in place while I fitted the dash. I remind myself that temporary fitting of anything has tended to end badly. So it was that Ashley and I found ourselves struggling to remove the temporary bolt which had wedged itself into the bracket (note: the bolt was too short to stay permanently). Combining this job with re-fixing the dash as I wasn’t happy with the fit, we loosened off the dash fixings and this enabled us to manoeuvre the steering column and dash allowing the temporary bolt to pop out willingly and the correct bolts to be promptly inserted and tightened up. With the steering column properly fixed to the underside of the dash we could then refit the dash, with the correct stays in place and a bit of adjustment to the brackets, achieving a better overall result. Its not perfect in terms of fit, but it is solidly and correctly placed which is good enough of me.

The correct bolt fitted to the steering column bracket so we now have a firmly attached steering wheel (this is important)

Rear Window trims: The MG has door capping trims which extend from the front doors to the rear windows. We had previously been short of the right screws to fit these. They are important to keep down the carpets and of course aesthetically. Ashely went on a mission to Halfords, Screw Fix and then B&Q in the hunt for suitable screws and returned with a suitable product which was swiftly fitted and so another job was struck off the list.

Rear capping securely fitted

Door Glass: I’ve had a couple of goes at putting the door glass in before, but this time, I had Ashley alongside and I had a feeling that he would have a better three dimensional picture of what needed doing which turned out to be the case. I have trouble imagining things in three dimensions – my brain is tuned to other things, so these sorts of jobs I find really taxing. Ashley suggested checking that each door lock worked before fitting the glass and we verified that yes they were working fine. This was a smart check as otherwise it could have been very annoying to have to take it out again. We then spent a bit of time just looking and (Ashley) figuring out what needed to go where and then had a proper go. The tricky part is feeding the winding mechanism through the door as the opening is really tight and then aligning the bracketry so that the actuator is at the correct orientation as well as the other bracket which takes the weight of the window. Another challenge is getting the glass passed the outside window trim which again is tight. However, the drivers side glass went in and wound successfully up and down. We did have the adjust the quarterlight and rear rails to pull the window forward as the glass was too far to the rear and catching on the B-post. After adjustment it was better, but the glass was still a little short and far back – looking at it, we concluded that the door has dropped. This also explains why the door does not shut well. Neither of us was confident in adjusting the door hinges, so this remains on the job list, alongside other panel adjustments needed to the bonnet and hatch.

The passenger side was a repeat job and naturally doing it for the second time it was easier. Saying that, Ashley was the brains of this particular job, although it would be difficult for one person to do due to the need to both manoeuvre the mechanism and support the glass at the same time. This side fitted perfectly first time, providing further evidence that the drivers side door has dropped.

In the box of window bits was a chrome trim which we worked out was fixed to the door trailing edge (I love that term) to stabilise the glass when it is up. This needed to be rivetted in place, so an excuse to get out the rivet gun which is huge fun and within minutes the drivers side was fitted and looking good. However, there was only one trim in the box, so where was the passenger side one? Fortunately, I had previously sourced a spare door which had said trim, so it should have been an easy job to swap it on. However, not only were the rivets very reluctant to let go, but the chrome trim had been over-sprayed in green by the previous owner of the door. With some targeted brute force we removed the trim and set to with sandpaper to remove the horrible paint. After around 40 mins of effort we had the trim is reasonable shape and condition to be fitted. I walked around to the passenger side and…you’ve guessed it, the trim was already in place, having been over-sprayed in white (and thus invisible to us earlier). How we laughed.

The lovely chrome trim riveted in place

Overall a good day of progress and a few jobs knocked off the list.

It was a busy day

2 Nov 19 Sitting it out

A gloomy Saturday in SW England, rain is lashing down and England just lost the Rugby World Cup to South Africa. But there are reasons to be cheerful!

This week I collected the refurbished seats and new carpets from Mirror Trim near Bedford and they look great.

I’m really pleased with how the seats have turned out, they look absolutely fantastic and along with the new carpets, the interior should look really smart. For now, the carpet box is standing upright in the study and the seats are in Lou’s bedroom (sorry Lou…).

Second reason to be cheerful was the successful fitting of the slave cylinder to the side of the gearbox earlier today. With the weather outside miserable, I worked on the car in the garage and it was surprising okay. Not needing access down the side of the car, I just jacked up the front, propped it on axle stands and wriggled underneath from the front. With more space in the garage since I fitted the engine and handed back the crane, this was much more feasible. The slave cylinder and the fittings all went together easily enough. There wasnt much room to swing spanners, but on the whole I was happy with the job. While under the car, I took a moment to improve the routing of the o/s brakepipe and was happier with it as a result.

So the next job will be to charge the clutch hydraulics with fluid, bleed the system and then test the clutch is functioning correctly, before adding any engine ancilliaries and connecting up the exhaust and so on. This is following the advice of Papa Trigg who knows about these things. I have a friend at Church with a bleed kit who has offered to help with bleeding the system, so his availability will drive this next task.

Happy Saturday everyone – God Bless.

MG looking snug in the garage