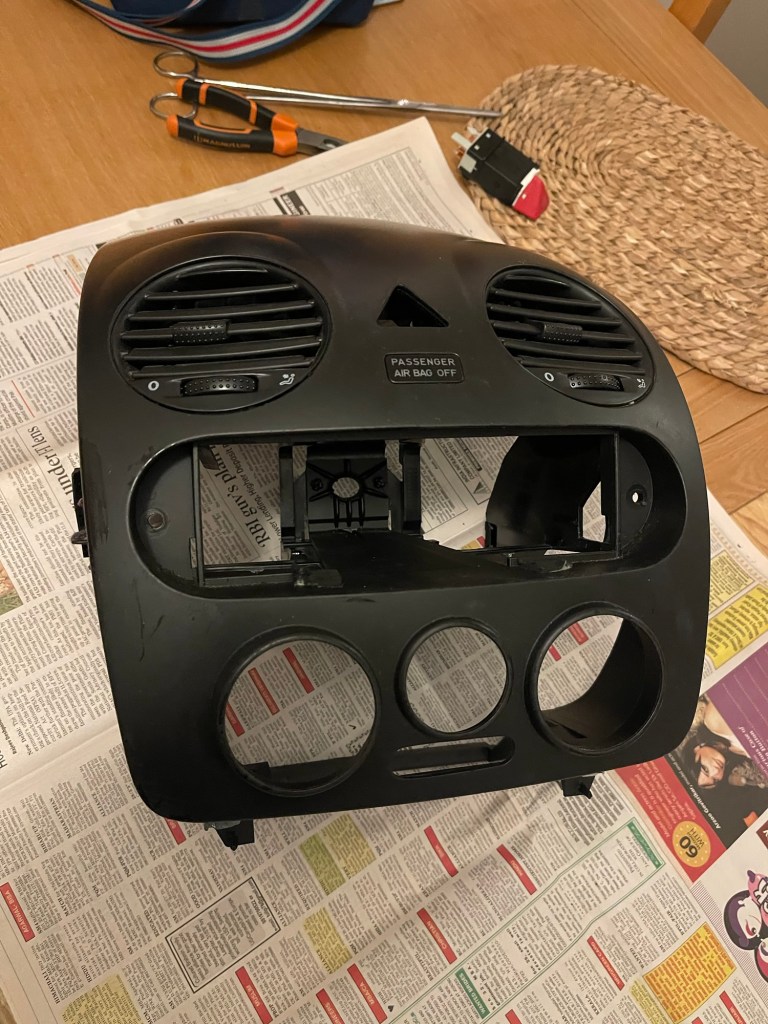
I had removed the centre dashboard panel to replace the hazard switch but I was having real difficulty finding the correct part in all the usual internet places. I got a correct looking switch but it was the wrong alignment and although I tried cobbling a Frankenstein switch made up of the old and the new I reached a dead end. Cue refund and another approach. I even considered remounting the hazard switch where it’s put on the later model but this would bring other complications such as having mismatched dashboard parts.
Regrettably I had to purchase ANOTHER WHOLE centre dashboard panel to get the correct switch! I really could not see another way around and having checked with the vendor that the panel included the switch I went ahead and ordered it. Fortunately all was well and the panel arrived with the switch and it all went back together very easily. Of course I had a couple of screws left over. I wonder where they were supposed to go?!
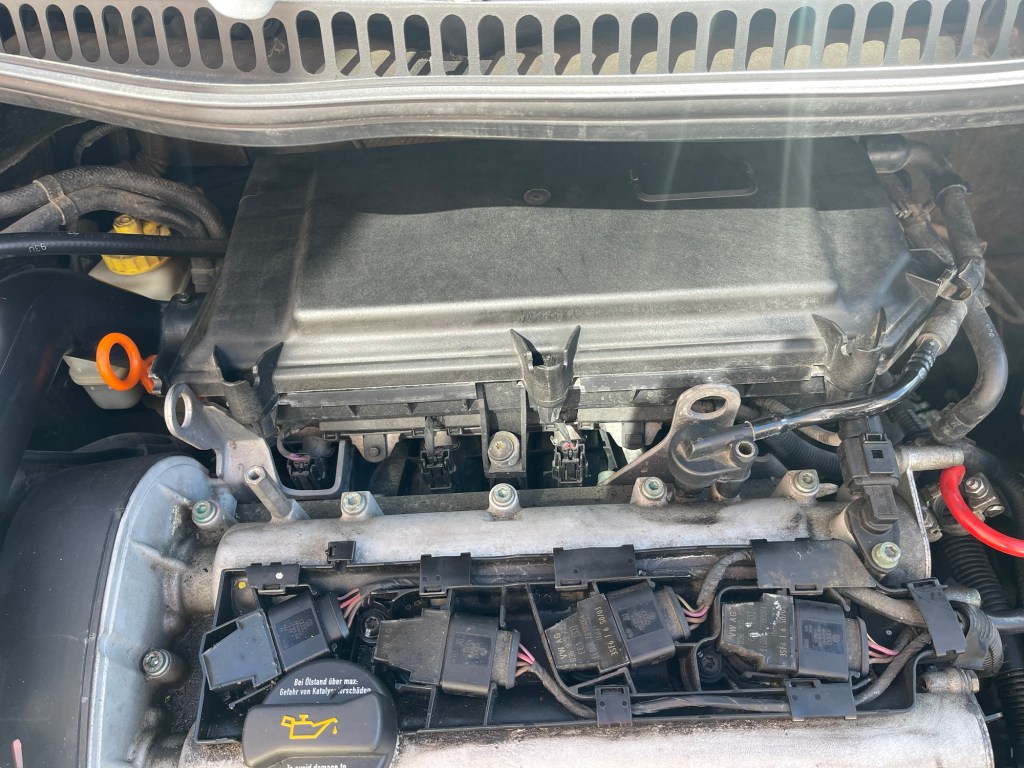
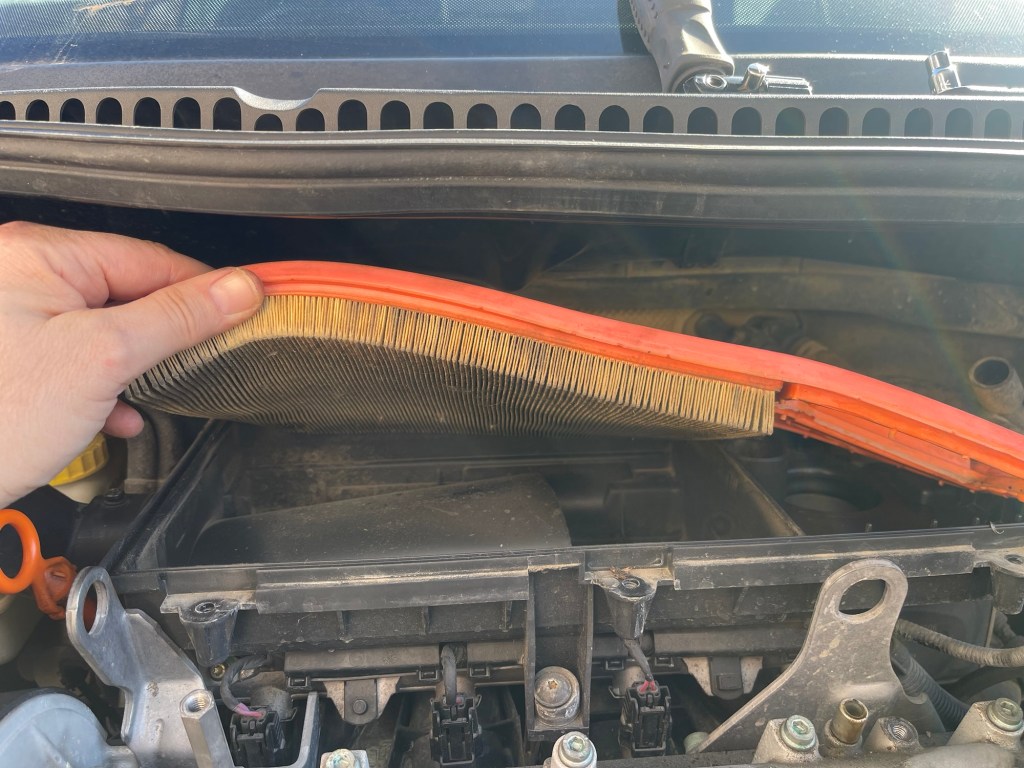
As it was a nice sunny day I then went under the bonnet to fit the new air filter and this went fine although the incredibly tight space to fit the rear screws was as hard to do up as it was to undo. I also put back the plastic engine cover which I had cleaned.
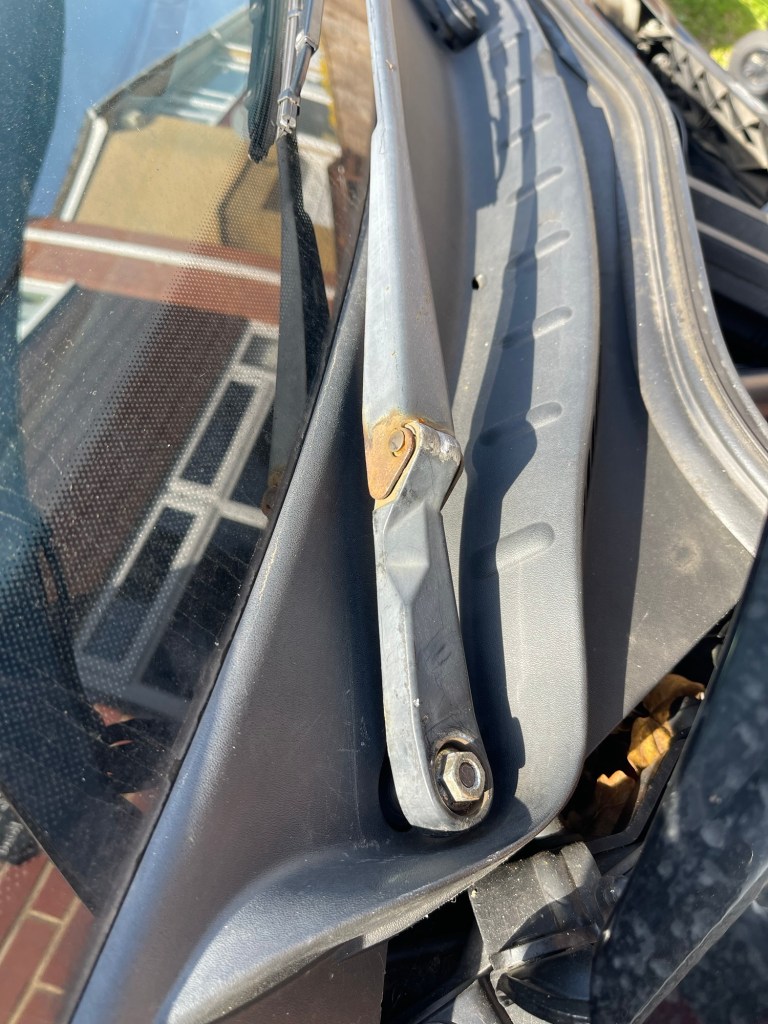
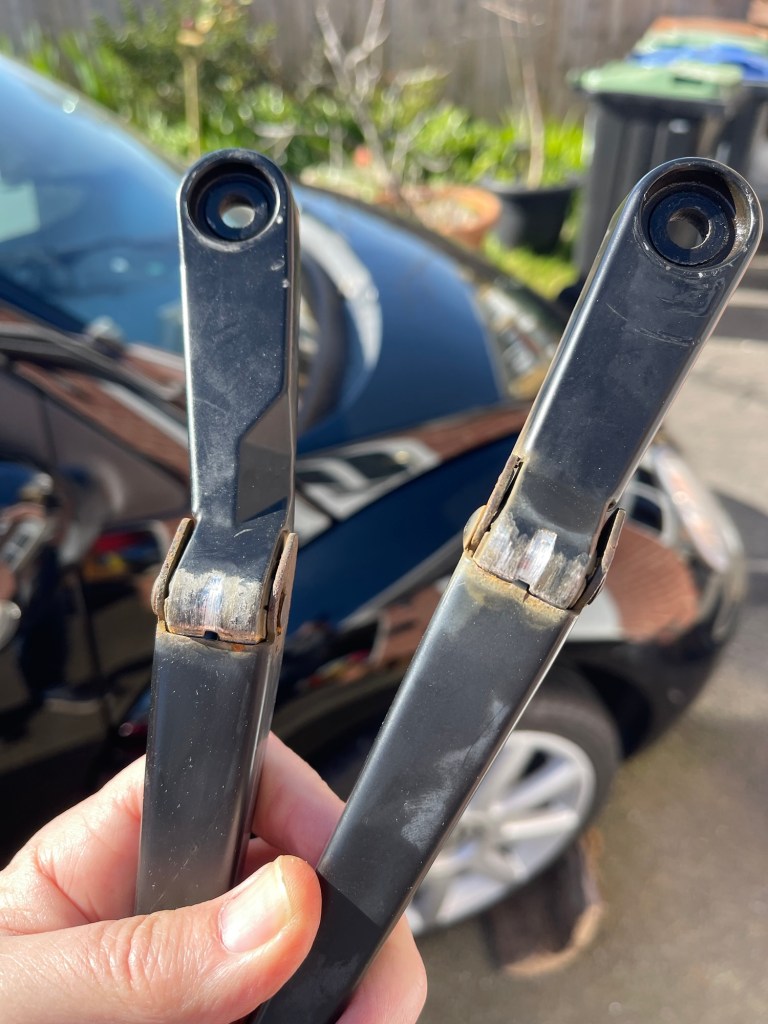
Last job was to put the wiper arms back on. These are very worn but new units are expensive so I’m wondering about finding something from a scrap yard. These will do for the moment (post test drive note: they were not tightened up enough!).
So with the car looking more roadworthy I was itching to have a drive so I taxed it and drove up the road to Tesco to lob in some petrol as it was getting a bit low. One brake was slightly scuffing but not enough to actually bind, otherwise she drives like a 116,000 miles VW – not bad all round.
After refuelling I dropped the roof down and enjoyed that wind-in-the-hair thing we all love.
There are quite a few things left to do for eventual sale, next will be the passenger door handle which has pulled too far out. I’ve looked at how to remove it and it either needs refixing or replacing. Also I need to find out how to replace the battery in the remote – I can’t figure it out but without it the alarm keeps going off when I park it which is antisocial and very annoying. Also, with the warmer weather I’m more inclined to crawl underneath to explore the oil leak and hopefully remove the undertray which was previously reluctant to come off.
The new air filter slotted into placeAir filter cover fixed, fiddly rear screwsI vacuumed this area (where I expected the cabin filter to be)and replaced the panelReconnected the speakerReplaced the panelI gave this area a wipe with WD40 before refitting the centre panel
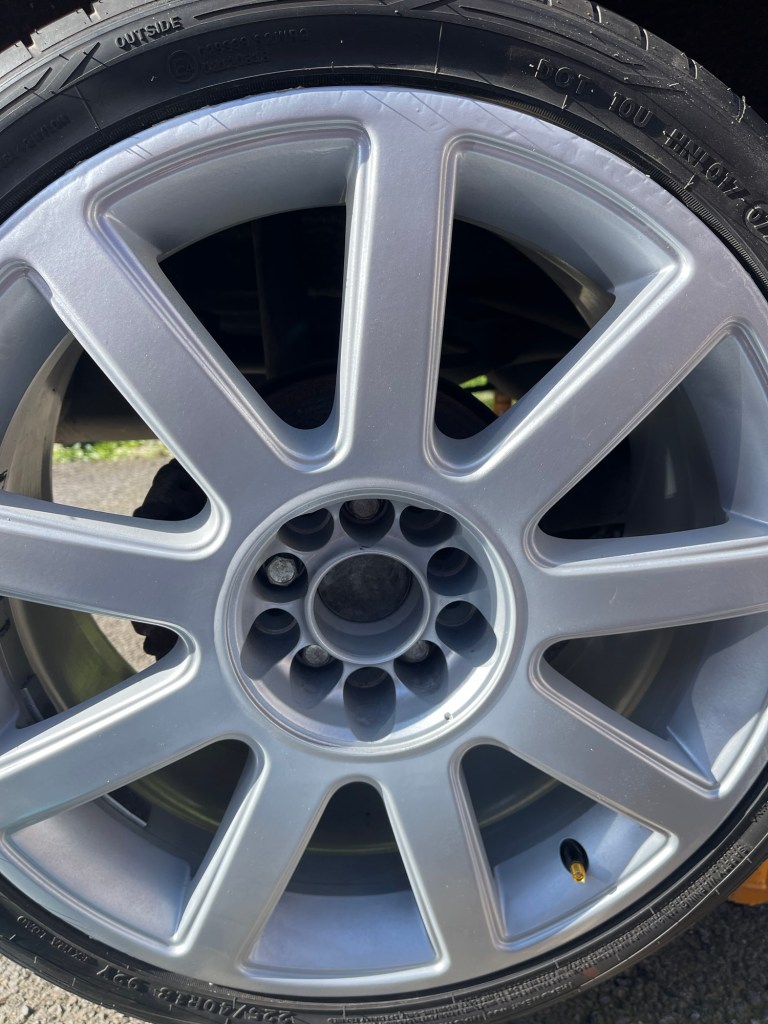
I managed to finish my repaint of the rear wheels through the week so first thing this morning I removed the last of the masking tape and refitted the wheels. There’s a nack to putting a large heavy alloy wheel on with studs and I started to get there today, with it between my knees and shuffling on my knees to ease it onto the stub at the same time threading one stud to secure it.
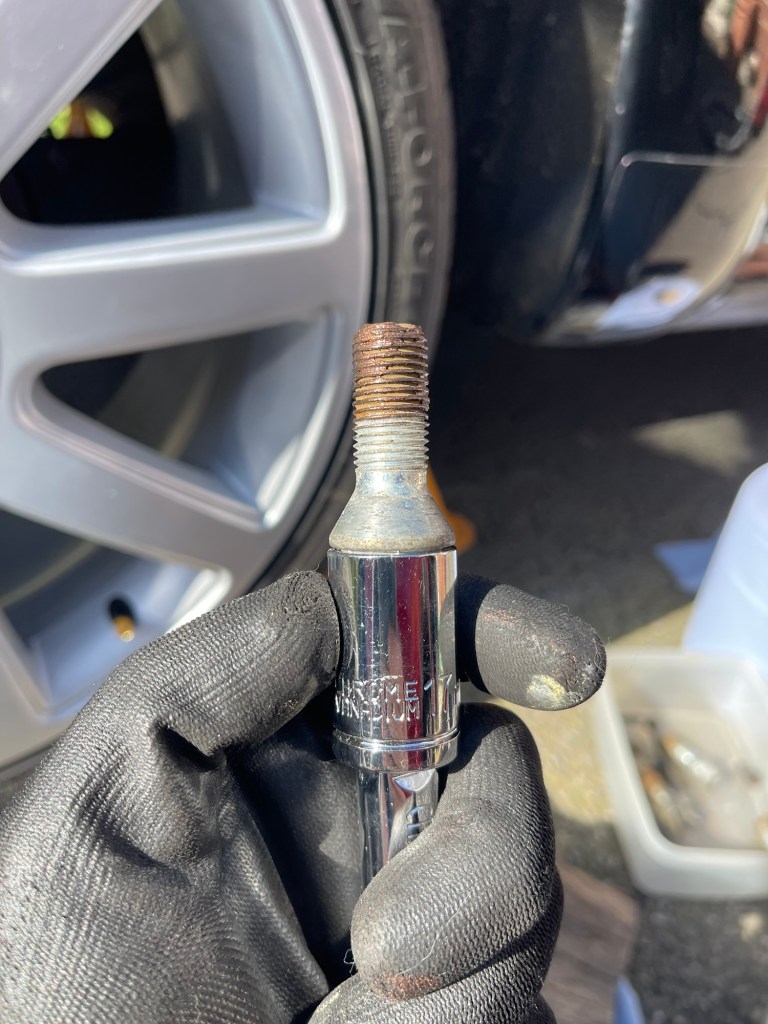
Given the aggro when removing the wheels (one broken wheel wrench) I applied a little Copper grease to each thread on the rear wheels. Then I had to remove the front wheel studs one by one to grease them. So that’s 16 studs I greased and then had to retighten to the correct torque with my torque wrench. I really do sometimes question my life choices and as I’m selling the car will anyone really care.
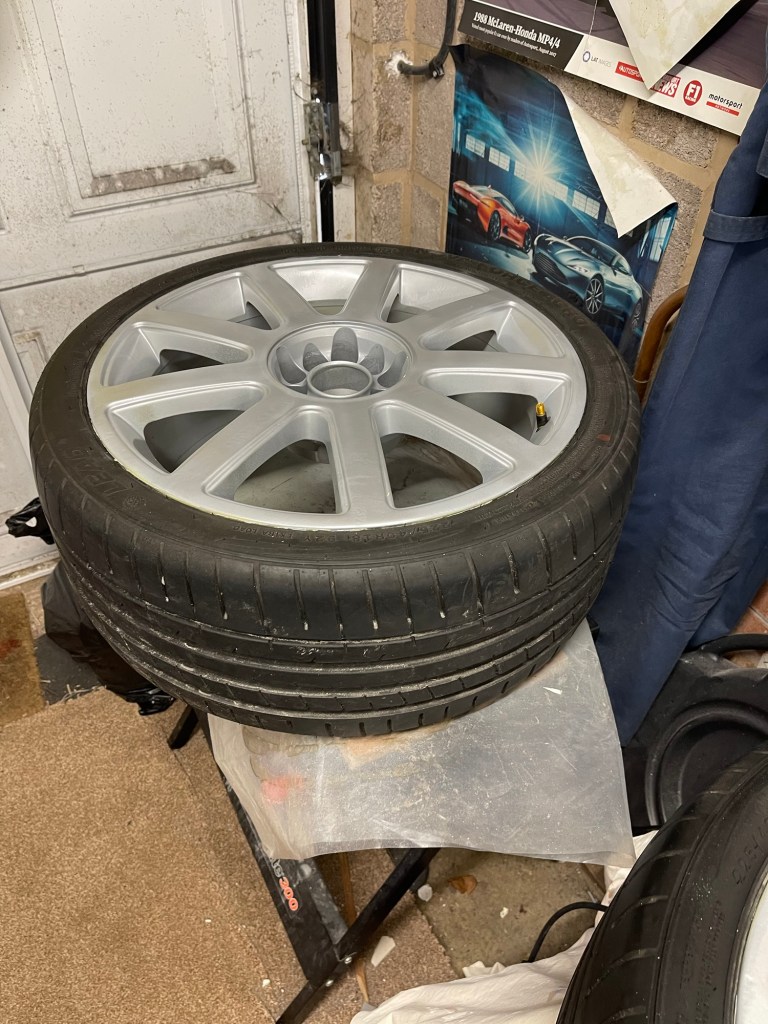
Anyway, a few mins of a puny compressor had both rears inflated and the Beetle was once again in its own four wheels.
I am never ever doing alloy wheels myself again, it takes such a long time and is very fiddly. The results are pretty average versus the effort but as this is a budget job it will have to suffice. The car sadly is not worth enough to send the wheels away for refurbishment.
In between doing this I had given the bodywork a quick once over with a spray on cleaner that you can use dry. This was just to give it a bit of shine as it was looking a bit sad.
Next I removed the wipers arms which are in a rough state. The sprung mechanism is worn and so it’s scratched itself to bits. To begin with I’ve oiled it but I may need to replace as I can’t see a way to repair them. New units are over £60 so I will see what can be had second hand.
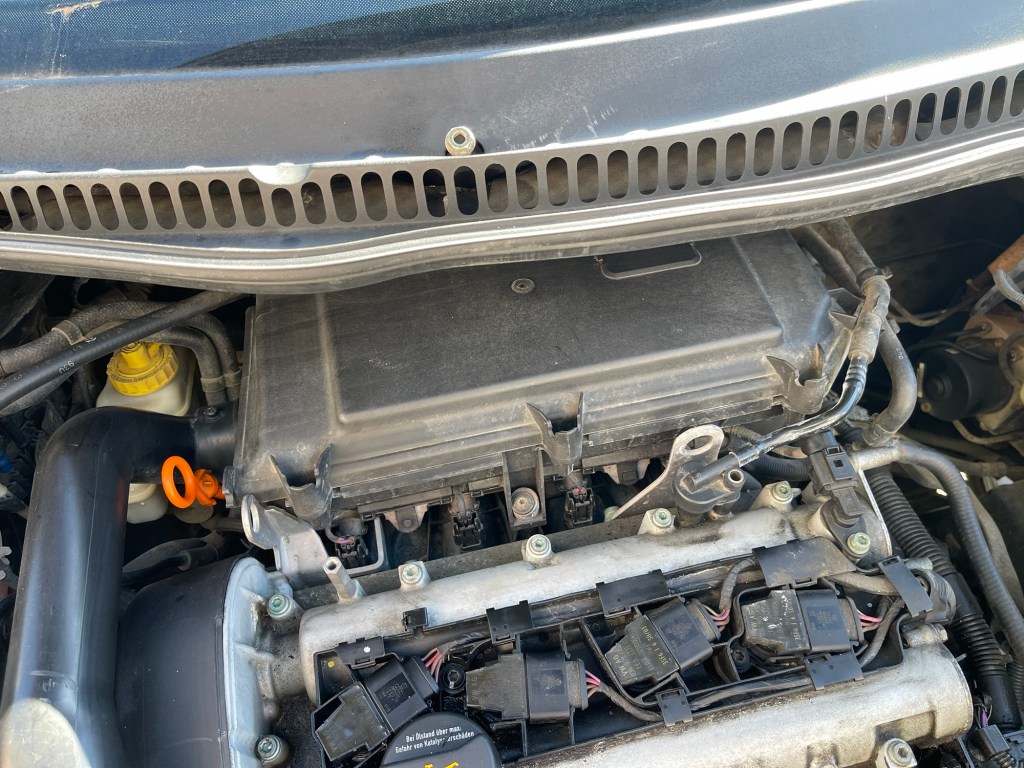
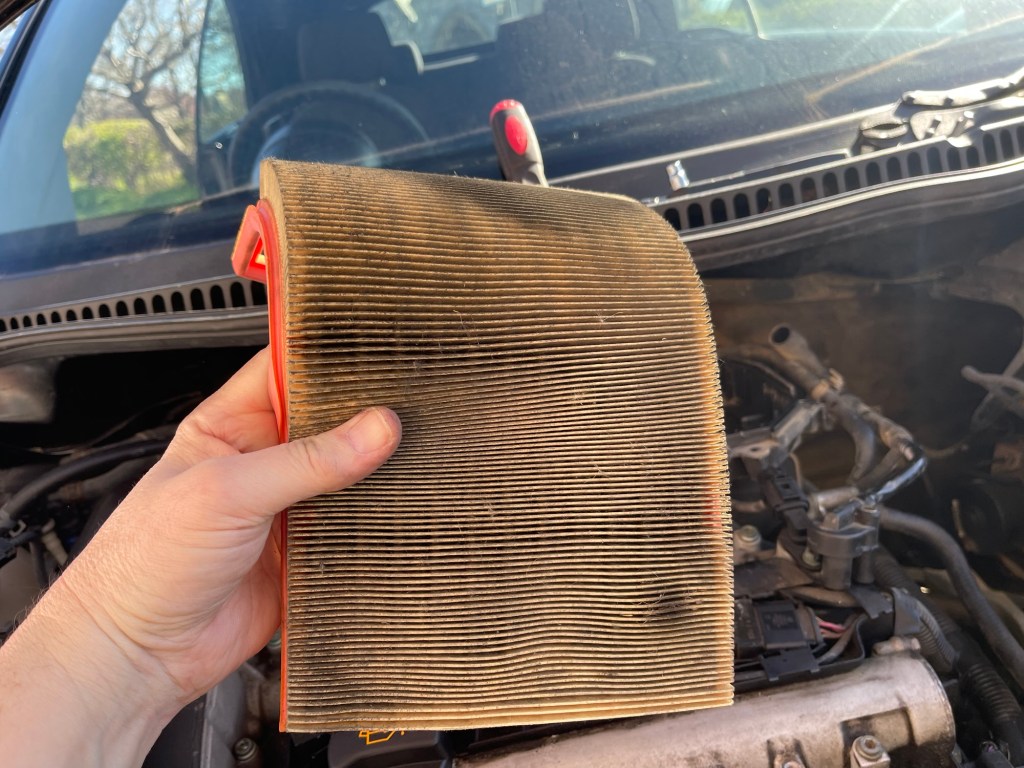
As I still had some time I explored removing the air filter which is at the rear of the engine bay tucked under the scuttle. This means that the front three screws come out easily but the back two are very awkward. I tried a few different tools, eventually finding that my screw bits fitted a socket in my mini-socket set and that gave me a low profile screw using the ratchet. I was impressed with myself for my ingenuity! I was glad when the air filter was found to be dirty because that justifies the effort in removing it. I’ll order a new one online.
Unbelievably that little work took most of a day but to be honest I was just doing it all for fun really and just enjoying being outside in the sunshine. Oh – I did clean the interior of Helen’s car as well so not that unproductive!
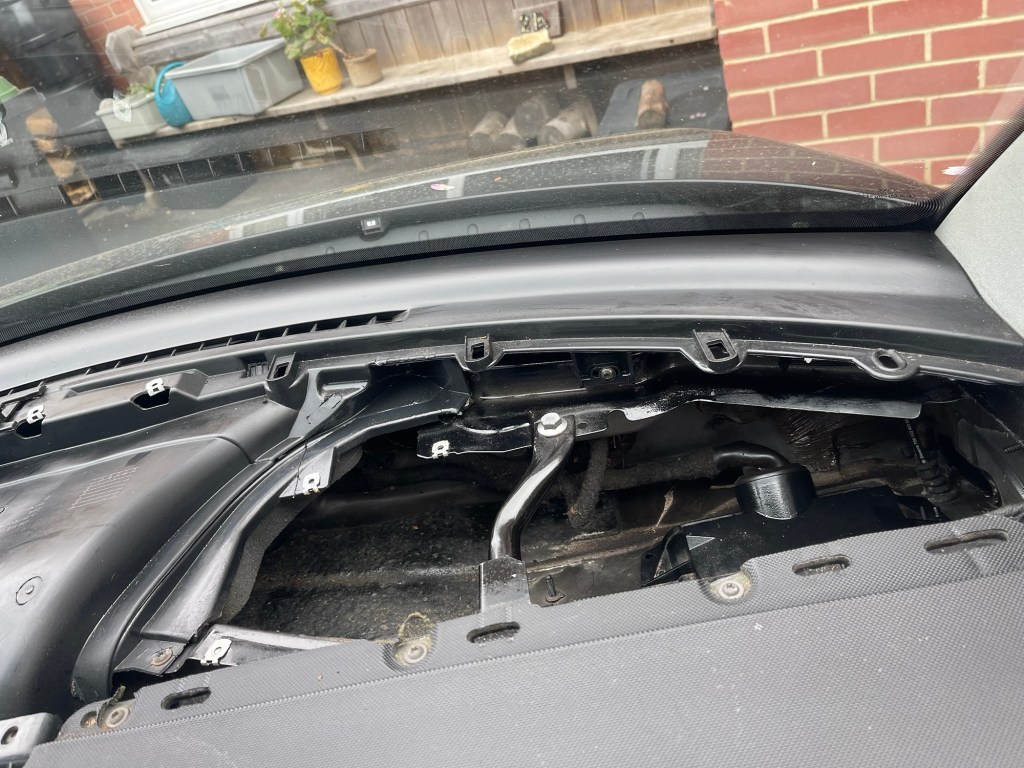
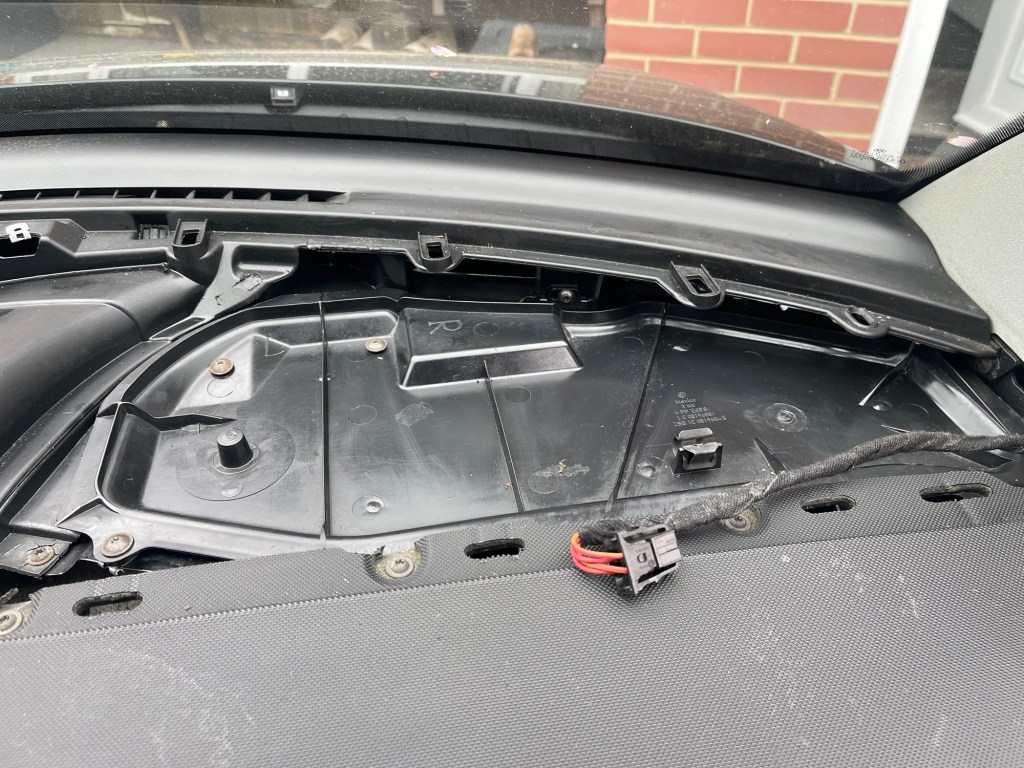
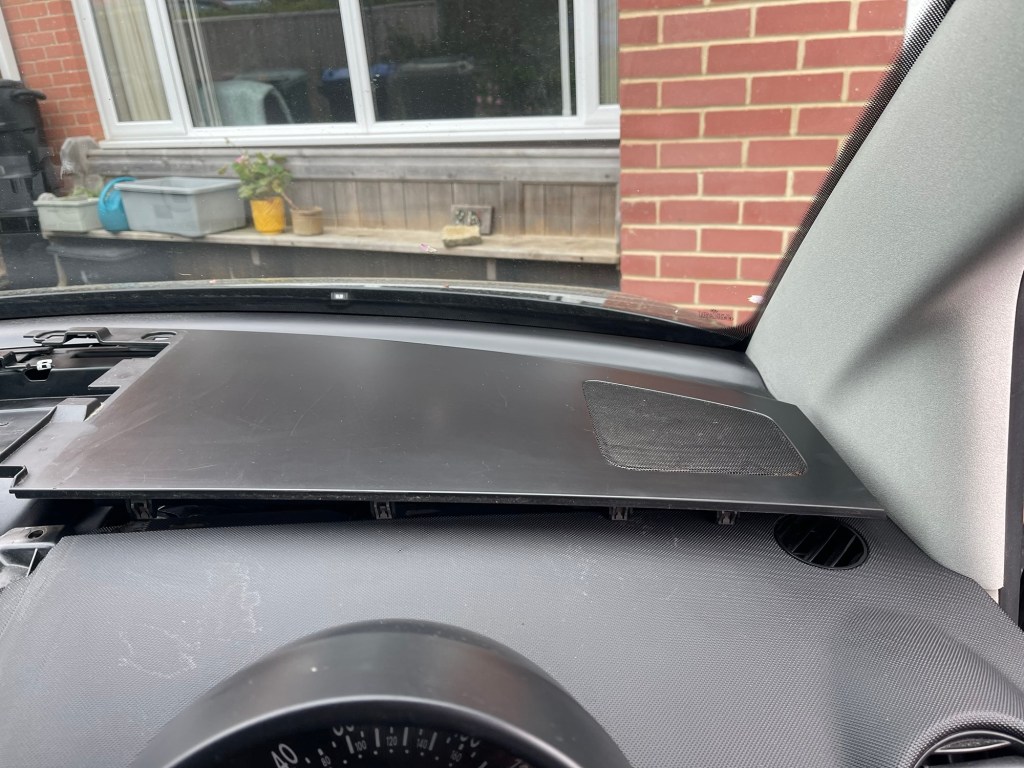
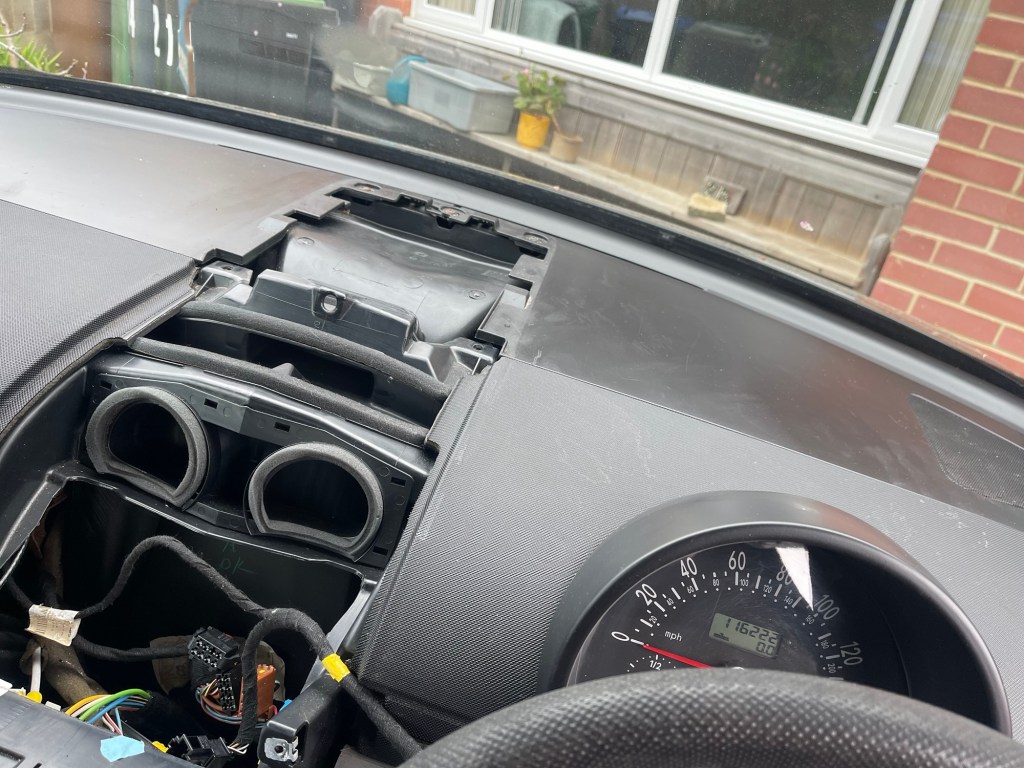
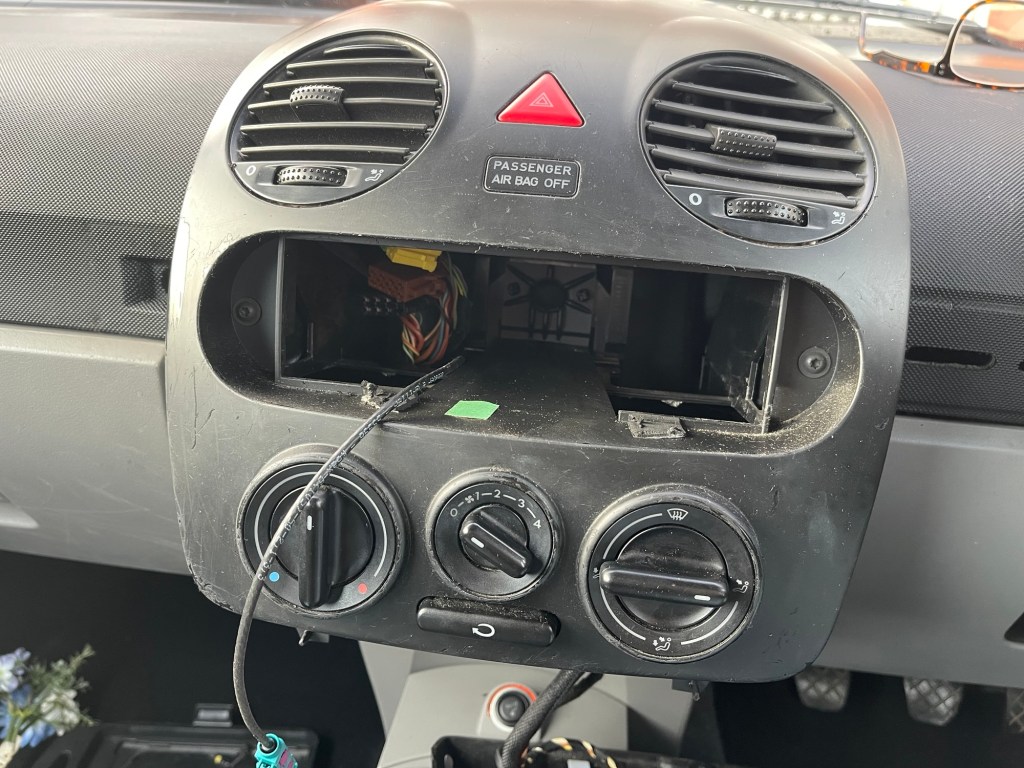
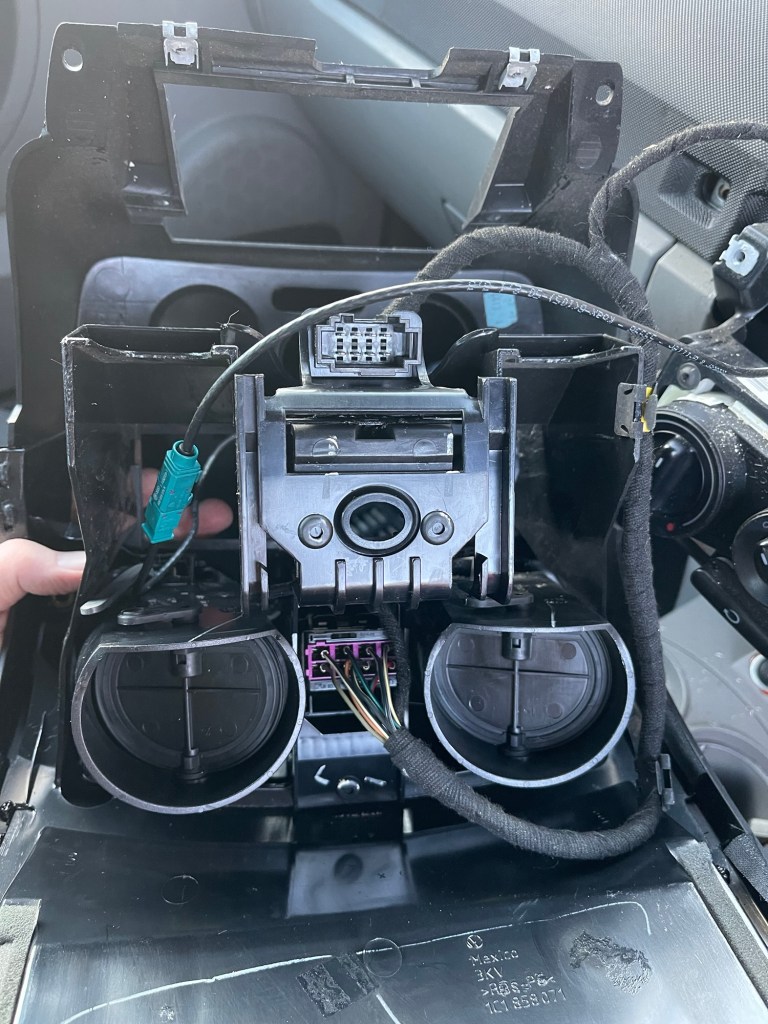
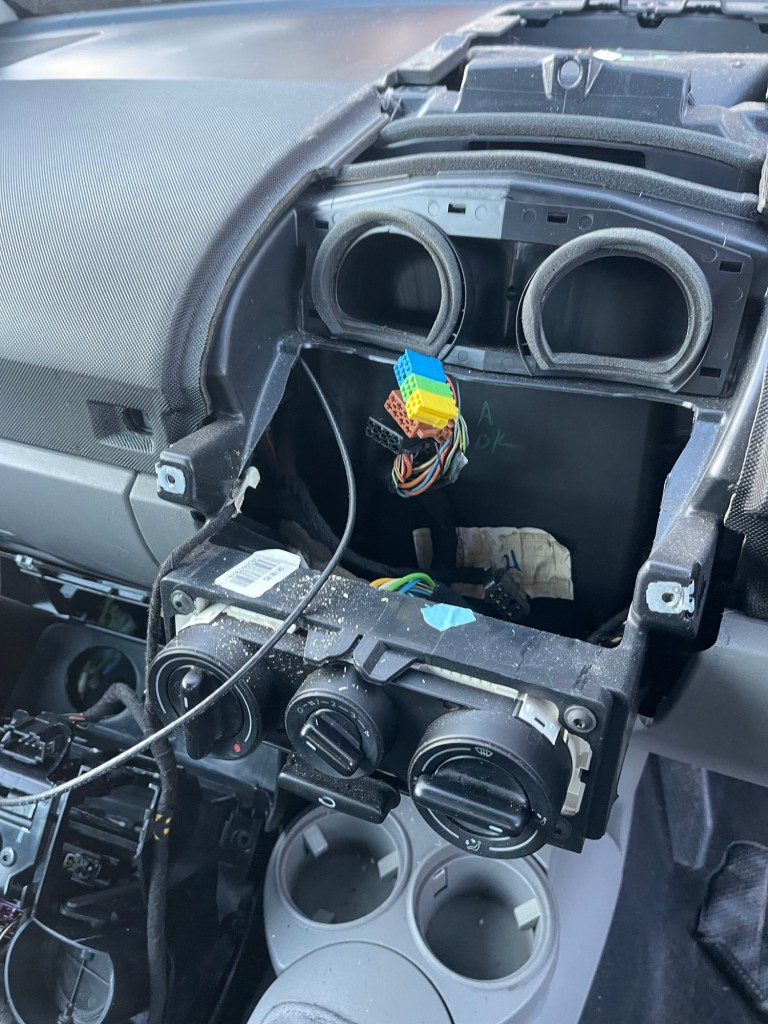
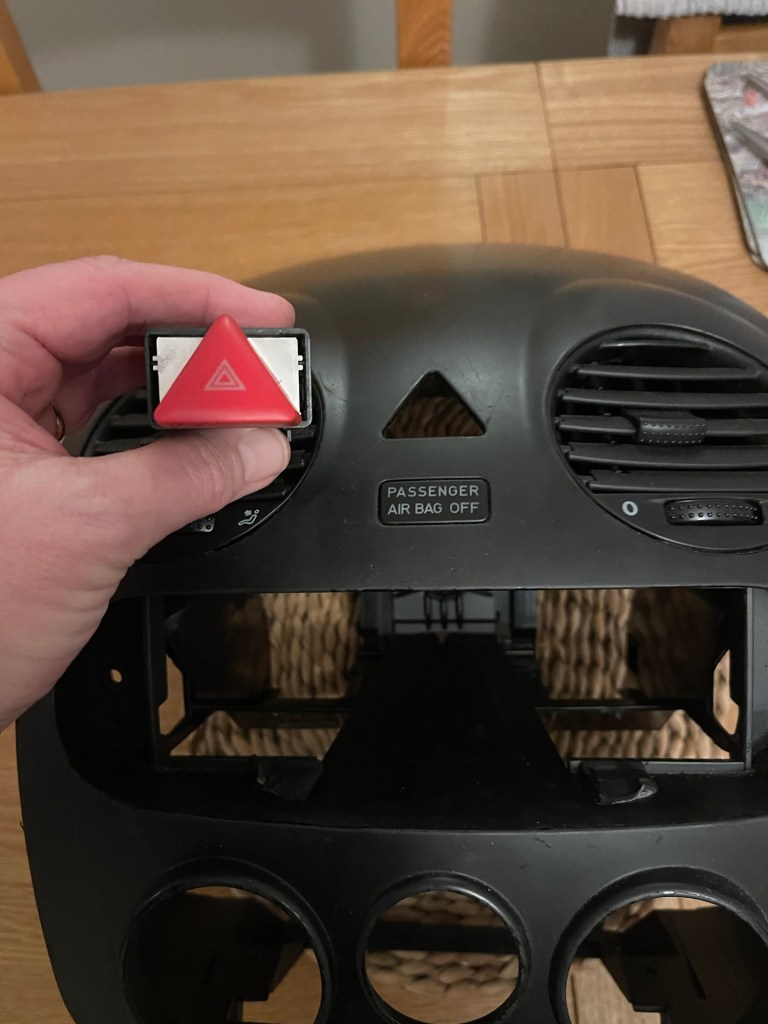
One of the face vents on the Beetle had ceased working a long time ago and with me also wanting to replace the hazard lights switch which is in the same panel it was time to tackle the not uncomplicated task of removing the central dashboard panel.
First you have to remove the front top panel which simply slides out and lifts off to reveal 2 x screws. At the bottom end there is a switch panel which comes apart with a combination of push fit and screwed fittings.
Next to remove is the radio and I’m going to give the short version here. I used two special keys which slide into slots on either side of the radio unit which unclip the radio and allow you to pull it out and disconnect it. I made that sound simple. It wasn’t.
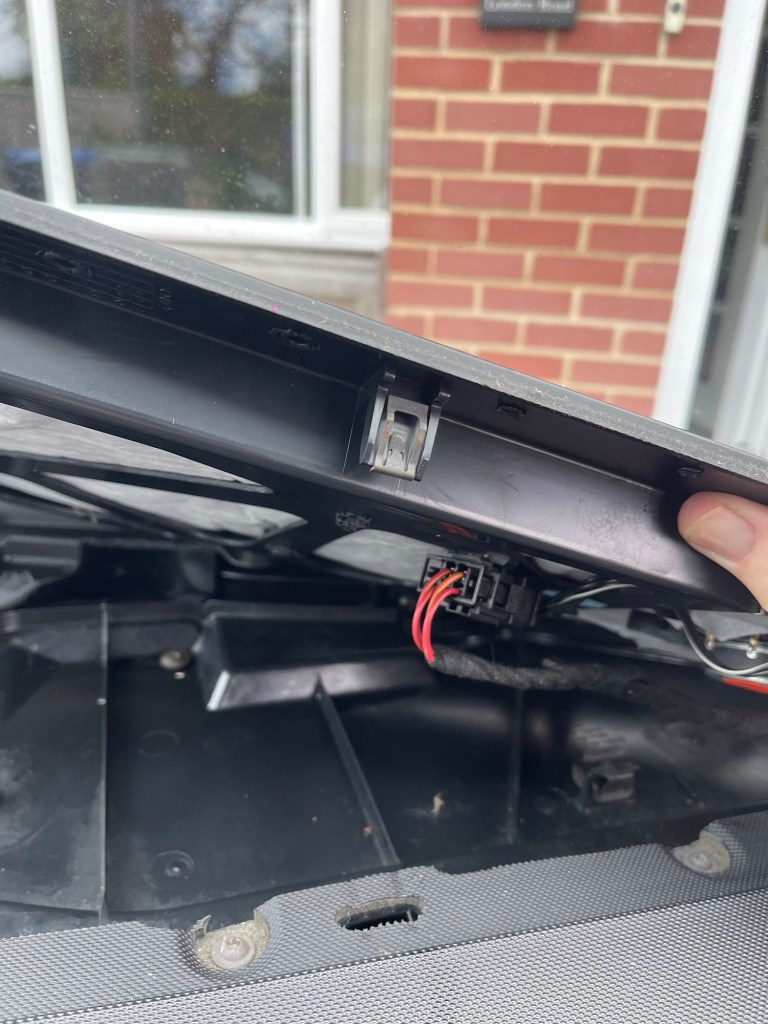
This reveals the final 2 x screws which enables the panels to be removed and all cables disconnected. Only the panel doesn’t want to come off. Something is keeping it on – it comes so far then stops fast. Mmm. A wiggle. An exploratory tug and the brittle plastic creaks ominously. more perseverance, a few different angles and I can ease the panel off – phew.
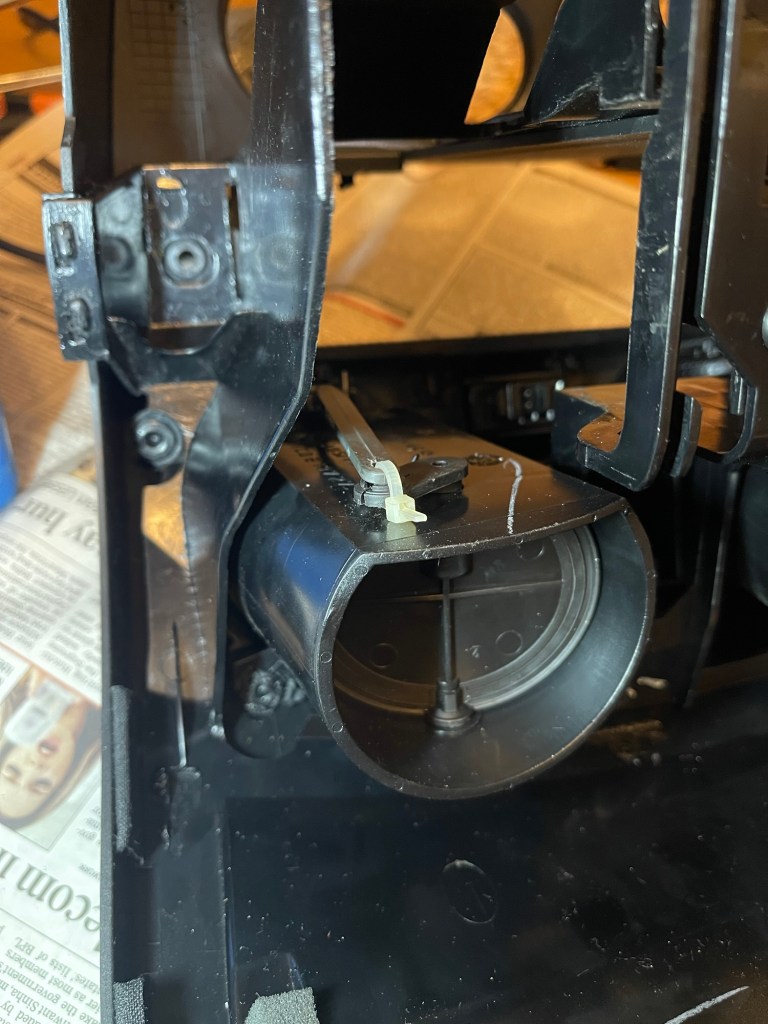
Panel removed I can clearly see the snapped lever which operates the face vents. Later I try to screw it together and end up drilling a tiny hold and using a small cable tie. Not elegant but effective.
I borrow some long nosed pliers from a friend to free the hazard switch and order a new one online. It will be funny if the new switch doesn’t fix the clicky indicators….! (An internet search diagnosed this as the problem).
Watch this space!
Radio removedWires disconnected Lower switches removedThe broken face vents leverPanel removedHazard switch removedQuick fix on the face ventsHazard switch
I rarely work on the MGB during the week, being in that phase of life where the day job takes the majority of my time and energy. However, I found myself with a free hour this evening and I was itching to fix some bits I had bought with some birthday money. The parts in question are window winders and door handles. As is often the case, the reason for selecting parts is partly aesthetic and partly needs-based. When we fitted the doors cards earlier in the summer we fitted the existing ‘telephone’ style door pulls. These are soft touch items and very much of their time from the 1970s. Both handles were original and not in the best of shape although I did give them a bit of a scrub up. The one handle was in really poor shape and it barely lasted a couple of pulls before coming free of its fixing. As new units are quite expensive, I instead researched the after market and found an array of aluminium handles (with sporty drilled out holes) which would do the job nicely for a lower cost. My research led me to a reasonably priced set of door pulls and window winders actually intended to fit a Mini but with interchangeability with the MGB. Weirdly this meant ordering the set which comes with Mini escutcheons and door catches which I have no use for but at a lower cost than buying separate parts. To be clear, I haven’t splashed out on these, they are fairly cheap parts but fully up to the job.
Fitting them proved really simple, once I had found suitable screws for the window winders which have a fine thread. I fitted the handles with ‘botch-it’ self tappers into the worn original door fitting – hope that doesn’t offend any purists, it was a pragmatic solution. So there we have it, a nice smart and economical installation and another job off the tick list. Mrs Relentless Duck can now enjoy the luxury of not having to ask to borrow the window winder if she wants to lower the window.
Driver’s side door pull and wonderLooks fairly smart I think
Shopping: The last of my three days dedicated to completing a batch of jobs on the MG started with an early jaunt to Moss of Bristol to buy some extra parts identified yesterday as being required to finish the job. I was at the shop before it opened and there for around 40 mins while we worked through the order and straightened out some previous issues. It was good to catch up with George and Owen who are always helpful and knowledgeable. A couple of hundred or so (cough) pounds later and I was back to the house by 10am to get the car our while Ashley arrived from Oxford.
Bonnet Safety Catch: First job of the day was the incredibly satisfying replacement of the bonnet safety catch. This might seem slightly odd, but the background is that this catch hasn’t really worked properly for yonks. We had looked at it yesterday and speculated that it had been mangled but without a comparison it was hard to confirm. As I compared the new part with the old, it was clear that the old part was indeed bent out of shape. Maybe it could have been bent back into alignment, but for such a cheap part, this seemed pointless. I screwed the new catch on and after a visual check peering into the gap of the nearly closed bonnet I could see that it was indeed correctly aligned. The bonnet now opens and shuts nice and tight.
This catch turned out to be mangled The new catch fits flush to the bonnet and everything aligns!
Bleed Nipple Dust Caps: A really tiny job was to fit a full set of dust caps to the bleed nipples on the brakes as some were missing when we bled the brakes the day before!
These popped onto the bleed nipples to keep them nice and clean
Seat Belt Installation: Before we could fit the seats, we needed to fit the new seat belts I had bought from Moss. These went in relatively easily, although we had to remove a door capping for one and had some grief with a painted thread on another. Another lesson we mean to pass on to to anyone willing to listen is that when you are stripping a car for a respray it would be a good idea to reinstall any captive threads with their bolts. Although the bolts will be painted, you are probably going to use new ones, so putting in the old bolts to the threads will keep them free of paint. Sounds like a trivial issue, but the paint really does seem to make some bolts hard work to drive when the threads are painted! The action of the seats belts seemed absolutely fine and I was happy with the decision to replace with new.
Seat belt was quite easy to fit
Seats Installation: Next we tackled the challenging seat installation. This had foxed us the previous day with alignment being the challenge. However, overnight it had occurred to me that for the marginal error we could just slot the offending hole. So with a little judicious filing, we were able to get a good line of sight of all four fixings and were ready to install the seat. We also learned from yesterday to more thoroughly grease the runners so they would slide nicely (we used white grease as suggested by George from Moss). I won’t bore anyone with the details of every aspect of this install except to say that when the runners, spacers, rails, wooden supports, bolts, washers, seats and the two technicians are all the right way around then the MGB seats go in really quite easily! We learned a lot from this part of the build – that pattern parts are rarely as good as the original, that pattern parts and original parts are rarely compatible and that the original assembly works best with no steps removed. The passenger seat went in first, and most easily. The driver’s side, with the large diameter steering wheel was a bit more difficult, and it was just a more fiddly job for some reason. Maintaining our concentration, we completed the install and doing in so, achieved another major milestone!
Both seats are now where they should be!
Steering Wheel Removal: Ah, the MGB steering wheel. A large diameter item which digs into my thighs (I’m not massive) and was in poor condition so an obvious candidate for a swap out. My friend John has a spare wooden wheel, I just needed to buy the correct boss, and remove the old one. At first we could not get this to budge, having loosened, but not removed the nut. We tried shock loading it with a firm tap of the hammer on a lump of wood to no avail. My friend Mark, who had stopped by earlier dropping off some bolts, had even gone back to his house and returned with a bearing puller, which frustratingly had not fitted around the wheel boss. However, this morning I returned to the job with a can of WD40 and some tips from MG forums. I applied some WD40 into the gap between the steering column and the boss, left it a minute and then firmly rocked it from side to side. After a couple of goes I felt some movement and then it was loose. Good news. I just need to prepare the new wheel, including assembling the horn mechanism (which I don’t yet understand) but sadly do not have the right sized Allen key. I did offer up the new wheel and this does make the thigh clearance better, but I think I will have to work on the driving position to get comfortable in the MG.
The wheel which wouldn’t budge one day, popped off easily enough the following day
Door Interior trims: I had trial fitted a door card yesterday, discovering missing trims, now bought from Moss. So today we tackled doing them properly. The passenger side has a problem with the door pull as one of the captive threads is missing. We had to improvise with a nut, bolt and washer combo which holds the door pull in place, however its not that strong, so this will need a rethink. The door pulls are a bit ratty and replacements are expensive. I may go for an earlier model chrome door pull instead, something to give some thought. Meanwhile I put both door cappings once I had found suitable and matching screws to fit them.
Gear lever surround: A lesson in sequencing here folks. The gear lever surround is mounted to a metal plate which ideally is inserted before the tunnel carpet is fitted. Ah. Some teamwork here had the tunnel carpet lifted up (its really stiff) and the plate inserted to allow the gearbox surround to be bolted down. Ashley was doing this job while I was fitting the door cappings and it involved some tricky cuts to the carpet, however the finished article looks good.
Test Drive: After all this work we treated ourselves to a brief drive around the block in seats, with seat belts! I popped the wipers on even though they are not wired up, just to avoid attracting unnecessary attention. We literally went around the block as per yesterday and all was well with the engine pulling cleanly, good oil pressure and water temperature all as it should be and no leaks (apart from the known fuel tank seepage). After three longs days we reflected on our progress, the multiple lessons you can only learn from experience and the laughs we’d had along the way. As the sun lowered, the sky lit up with an orange glow and Ashley climbed into his Mini Clubman and was on his way.
Day two of the batch of jobs was again a damp day but we had a gazebo erected over the the MG butted up to the open garage door so were protected from the worst of the elements. Ashley was again on hand to help with the list of jobs.
Gearbox cross-member: We started with what we expected to be a very difficult job which was doing up the bolts which fit the gearbox to the cross-member. This was a job left over from the engine install, over two years ago and was essential for the car to be roadworthy. While recognising that the bolts are very fiddly, Ashley managed to do them both up and it was a bit of an anti0climax really.
Brake bleeding: Next job was to bleed the brakes. A long time ago I had got the system operational (with help!) but I had a soft pedal which needed a pump to get them to go. We bled them using my Gunson pressure kit which worked well and we had a little air out of the system. A later short drive around the block confirmed that we now have a firm pedal and effective brakes, albeit not quite in the same league as my 400 bhp Polestar 2 EV. I will keep a close eye on how its braking and keep an eye out for any leaks. Dad insists I get a low level warning lamp – its on the list Dad.
Fuel tank leak: The fuel tank has been seeping petrol annoyingly for a while when topped up over the level of the sender. I have tightened the sender, and from inspection today it looked like it was seeping from the welded section around the sender, not the sender connection itself. Annoying, as I can’t do anything about a manufacturing fault apart from complain to the supplier (which I will) but even if they give me a new tank, I’ll have to fit it, so not happy. I have bought some tank putty which I may put on as a temporary hold. No solution at the moment, and fuel is rather important to the whole project.
Is that seeping from the seam. It looks like it
Seat fitting: We were feeling really confident about fitting the seats. We had the runners all ready to go, so we offered up the driver’s seat thinking this would be an easy job of simply doing up the backs, then sliding the seat back on its runners and doing up the front. Four bolts – easy! Several hours later and having tried a few different things, including changing up the sequence, and changing a runner, we were still without a satisfactory fit. The basic problem was that we could not get four-bolt to seat runner alignment. We could get two out of four and even got three out of four with a lot of work, but the fourth bolt would not align with the captive threads in the floor. So this is baffling us at the moment and we had to admit defeat of this for the moment pending inspiration. Around the same time we concluded that the old seat belts were really not going to cut it as the mechanism was not operating right and the belts looked well past their best. Safety first, I ordered new from Moss to collect the following morning.
We were nearly out of ideas so decided to stop, think and retry tomorrow
Door cards and capping: While Ashley was experimenting to try to fit the seats I fitted the passenger side door card and capping. The door car is a very simple fit and it went on like a treat. These are second hand ones that I fitted and I am pleased with them. The door capping, which is a chunky piece which fixes to the door top screwed on nicely. I was feeling chuffed until I noticed a gap around the door handle and realised that the I did not have the escutcheons – darn! Another thing to add to the Moss order
It’s starting to look like a car!
Road test: A start up (best avoided usaully) had been essential today as we had the car up on ramps. So as our working day drew to a close, its seemed justifiable to run the MG around the block. Gingerly backing off the ramps I reversed onto the road (I am fully insured) and waited while Ashley jumped in (sitting on the floor). I was in the drivers seat which had three out of four bolts, was fully back (a bit too far) and with no belts. We weren’t planning on going over 15 miles per hour so I judged this to be okay. First to test were the brakes which pulled the MG up nicely. Otherwise, the test went fine, the MG pulled cleanly, although the steering feels really heavy and the large wheel is in the way of my thigh. I have a wooden wheel just needing the correct boss, so that will improve things.
So a few more jobs to do tomorrow to conclude this three day burst. Ashely has been brilliant, a calm, considered, clever and strong par of hands to lend to the long list of jobs. We’ve made good progress.
The MGB-GT has a hilariously small rear seat, justifying its moniker as a Grand Tourer. I had intended to leave out the rear seat but that actually is more work than refitting it. I haven’t had the rear seat (it comes in two parts) recovered but that will be done in the future. In the meantime I had a play this afternoon with the existing units, seeing how they go back together. Pleasingly I was able to bend the seat back hinges into shape and find enough of the right sized bolts and screws to fit it, and the boot floor panel which utilises the combined hinge unit. Once recovered I can fit the new carpet piece to the back of the seat and the chrome handles. A useful hour of work.
I have been wanting to get on with fitting the carpets to the MG for some time, but wanted some assistance. Ashley (the son of a University friend of mine) has been working on cars and bikes since he could stand up and kindly offered to help, so we arranged the day and here we were. I had previously made a tentative start on the carpets by fitting the moulded piece to the transmission tunnel and gluing the sills. Ashley’s first advice was not to glue everything down straightaway, and also to only glue what really needed to be stuck down. This would allow us to pull carpets up if I needed to access areas in future or to pull it back if I was working in a particular area and wanted to protect the carpet. He added that through use, any areas which needed glue would make themselves apparent, and that some areas could be fixed with Velcro for easy removal.
The battery area presented some issues. Firstly I had earthed the battery to the bulkhead which goes up to the seat base and battery cover. For reasons unknown, the battery in the MGB is mounted under the rear ‘seats’. The bolt securing the earth cable was protruding on this bulkhead which would have resulted in a bulge in the carpet. So we moved the earth cable from this bulkhead to a likely looking hole in the rear of the battery compartment and insulated the cable as well. A much neater installation, and this allowed us to (sparingly) glue the carpet to the bulkhead.
Next up was to fix down the battery cover. This is fixed by five neat fixings which require a quarter turn. Amazingly through the whole strip down and repaint, four of the five fixings survived which was a surprise. Ashley used some of his detailing products to clean up the battery cover and we fixed it in place.
We then moved onto the rear arch carpets which were a world of weirdness with what appeared to be lots of excess carpet at the top of the arch and the cuts in the wrong places. We used the rear window trims as a guide to what needed to be trimmed and took the minimum excess amount off the top. Although I had both rear window trims, I did not have all the right screws, so we just put these in place with the minimum fixings and I will order new screws to finish this area off. The carpet then runs up into the inner arch, so for the present, we placed it there rather than cutting and gluing pending agreement of the final layout we settle on.
The GT version of the MGB is blessed with a micro-rear seat with a vertical seat back and mini-bench only really suitable for small children, and then not safely as there are no seat belts. I had not intended putting the rear seats back in, but am now reconsidering this as otherwise I think it creates more work in having to deal with what is left unfinished. So I will need to organise for having this recovered, or tackle it myself.
Actually it was yesterday. Another sunny February day and it was time to fill up the brake system for the first time since I had replaced all the brake lines and the entire front brake assembly, disks, pads and callipers. I had a Gunson kit to help and my friend John was on hand to direct me from a suitable distance on the driveway. The Gunson kit uses pressure from the spare tyre via a rubber tube which goes into a bottle filled with brake fluid with an outlet which fits to the master cylinder. Had to inflate the spare first, which was flat obviously. We also jacked up the rear, removed the rear wheels and verified that the bleed nipples were okay. With the kit connected up, the fluid started to go down as the brake pipes were filled. I was watching at the back of the car, and the level was going down but no fluid. Then we spotted the rapidly growing pool under the engine bay. We had a leak at the four-way junction with one of the joints leaking fairly well. There followed some rapid reaction work with me in charge of sluicing the spilt fluid before the nice new paint melted while John disconnected the four way junction for inspection. I should mention that we did first just try nipping it up but to no avail.
The four way junction nor the line had no catastrophic issues, but John’s keen eye had spotted a little gunk in the fitting and on the threads. So we conducted a clean with some WD40 and a rag, blowing it out with an aerosol air canister. After some careful reassembly and re-tightening of the four lines to the junction, we recommenced filling operations. No leaks this time. For each brake in turn, we connected a length of plastic tubing to the bleed nipple and opened it up. I watched the flow and when the bubbles had cleared, I nipped up the bleed nipple. So far so good.
Moving to the front of the car, we again jacked it up and removed the wheels. The n/s side went smoothly enough, all new components, so it was a dream really. On the o/s, a little fluid was weeping from the connector between flexible and hard pipes but this was nipped up promptly enough. A prod of the brakes confirmed we did indeed have a brake pedal. As it was now getting on in the day, we decided to call a halt there. Further testing has identified that it is soft on the first push, then firm, which I think means there is still some air in the system. A quick browse around the internet suggests that the pipes into and out of the servo need to be bled and possibly also the junction connection at the rear which splits the fluid to left and right. This will be sorted out soon. However, all in all, excellent progress and a milestone reached. The car now starts and stops!
So to today, Sunday, and I was on my own, so a little pottering was in order. First job was to investigate the misfire which has been plaguing the MG lately when running it up. The carbs are not in tune, I have a plan in mind for the that, but it has definitely been running worse and worse. Taking a look around the engine bay, I discovered that the vacuum advance pipe was looking very sad. Being rather on the long side, it had drooped onto the exhaust manifold and basically melted. So I snipped off the mangled bit and fortunately there was plenty of length to make a nice route to the inlet manifold. Next I investigated the distributer, and as a non-expert, the one job I could do myself was to swap the distributer cap which on inspection was a bit rough looking with the contacts worn. So I popped in the new one which came with the electronic distributer and this saw an immediate improvement. I was tempted to just pop the new distributer in but as this is quite is quite fiddly, I put it off for when I have a longer go and have taken some advice. Instead, I did a couple more jobs on the dash. First, I fitted the rev counter properly. I had lost one of the knurled wheels that fit to the studs and hold the two brackets. Miraculously, I found it on the driveway yesterday! That saved a £5 order to a specialist (apologies to the parts market, I need plenty more bits honest!). Then I moved to the n/s to fix the dash properly. Having done the o/s earlier in the week, I knew how this went and it was straightforward to fit this. With the centre nut also fastened up tight, the dash is now looking right, albeit I still have a few switches and the vents to install. As I had to lie on my back in the footwell to do this, and with a mind to future required jobs, I got out the new carpet set and lobbed the footwell carpets in and the boot carpet while I was at it. I am not quite ready to commit to carpeting the MG, but it was good to see the set and acquaint myself with the different parts.
The dash now correctly fitted
Melted vacuum pipe
I have now removed the legendary ‘no fluids’ tape’
Pushed the MG out into the cold January air after Church today. It was a funny day weather wise, definately cold without enough sun to feel any warmth and threatening clouds scudding overhead. Continuing to focus on the engine start I decided to offer up the dash panel. I could continue to engine start without the fascia in place, but unless I connect up some of the gauges I am not going to know stuff like oil pressure, so I think its worthwhile.
I wrestled with the dash a bit which is ungainly due to the gauge fitted and their respective connections (temperature capilliary tube and oil pressure pipe) and I recalled how it was a bit of a struggle to remove. The pinch point is around the steering column: The bottom of the dash straddles the steering column while at the top is a bracket which goes under the dashtop where it bolts into place. The clearance is really tight, but with a bit of a heave I managed to get it in, then realised I had scuffed the dash slightly around the steering column. Later that day a friend would ask ‘You didn’t cover it with a cloth then?’. To conclude, the dash is in, held by a single bolt for the time being and ready for its connections to be threaded through into the engine bay.
I had also placed the new seats in the car earlier. Note, placed, not fixed. The seats are in the car purely to make a bit of room in the house while we have a room decorated. I can’t fit the seats just yet because I am missing a seat runner. I bought the car partly stripped down and on stripping it down I found a runner was missing. Unfortunately, the runners are handed and I am not sure if the missing one is left or right. A logic puzzle to ponder sometime soon, but not critical to my current engine start mission. I am undecided whether to leave the seats in or take them out when we have our room back. I think they should probably go back inside the house for now as they will be in the way as I fit out the interior after engine start is achieved. They will need to be protected from the cat who sees any such object as a legitimate scratching post.
My friend John appeared, bearing an oversized spanner which fits the engine pulley bolt which I was after so I could set the timing on the distributer. While he was there, he turned the pulley until we found the timing mark, so that was handy. Just need to dap some paint on it now and then study the distributor instructions. Thanks John!
Plan for my next opportunity on the MG is to fit the exhaust. As I was saying to Helen (and I sure she was fascinated), I haven’t really looked at how this fits. The old one came off without much fuss so re-fitting this should be relatively easy (famous last words). This will then allow me to attempt to fire up the engine without upsetting the neighbours (such hope!).