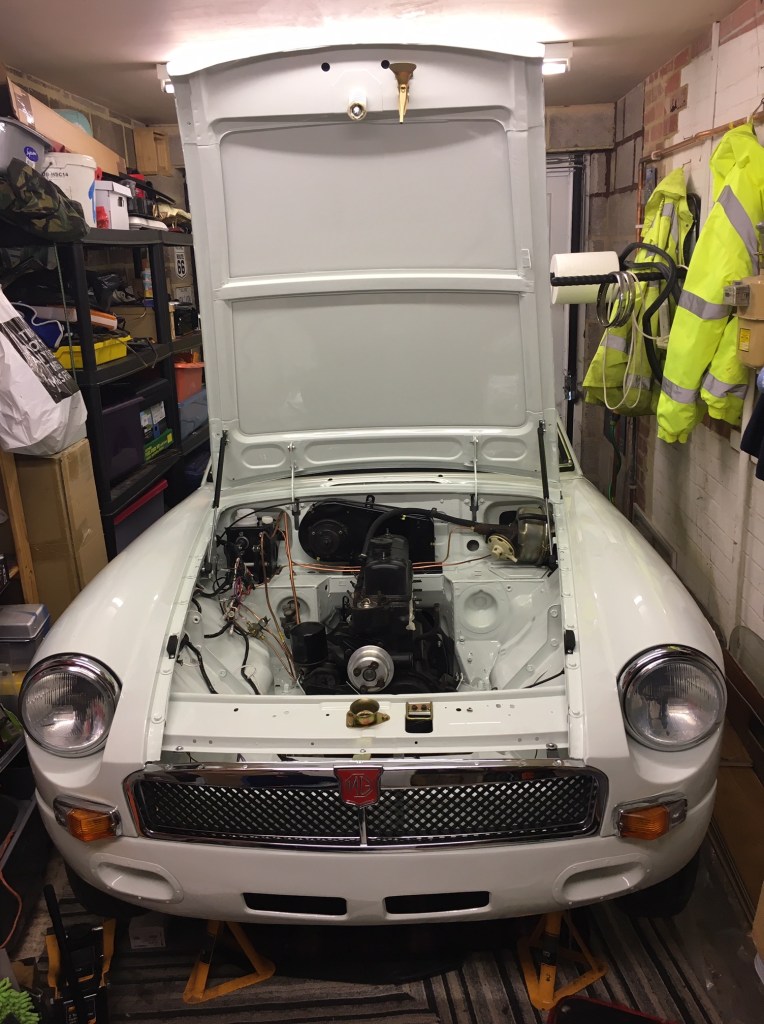
A gloomy Saturday in SW England, rain is lashing down and England just lost the Rugby World Cup to South Africa. But there are reasons to be cheerful!
This week I collected the refurbished seats and new carpets from Mirror Trim near Bedford and they look great.
The new carpets will stay in the box until I am ready to fit them
Lovely refurbished seats retrimmed in leather
I’m really pleased with how the seats have turned out, they look absolutely fantastic and along with the new carpets, the interior should look really smart. For now, the carpet box is standing upright in the study and the seats are in Lou’s bedroom (sorry Lou…).
Second reason to be cheerful was the successful fitting of the slave cylinder to the side of the gearbox earlier today. With the weather outside miserable, I worked on the car in the garage and it was surprising okay. Not needing access down the side of the car, I just jacked up the front, propped it on axle stands and wriggled underneath from the front. With more space in the garage since I fitted the engine and handed back the crane, this was much more feasible. The slave cylinder and the fittings all went together easily enough. There wasnt much room to swing spanners, but on the whole I was happy with the job. While under the car, I took a moment to improve the routing of the o/s brakepipe and was happier with it as a result.
One side of the slave cylinder
the other side, showing the bleed screw
So the next job will be to charge the clutch hydraulics with fluid, bleed the system and then test the clutch is functioning correctly, before adding any engine ancilliaries and connecting up the exhaust and so on. This is following the advice of Papa Trigg who knows about these things. I have a friend at Church with a bleed kit who has offered to help with bleeding the system, so his availability will drive this next task.
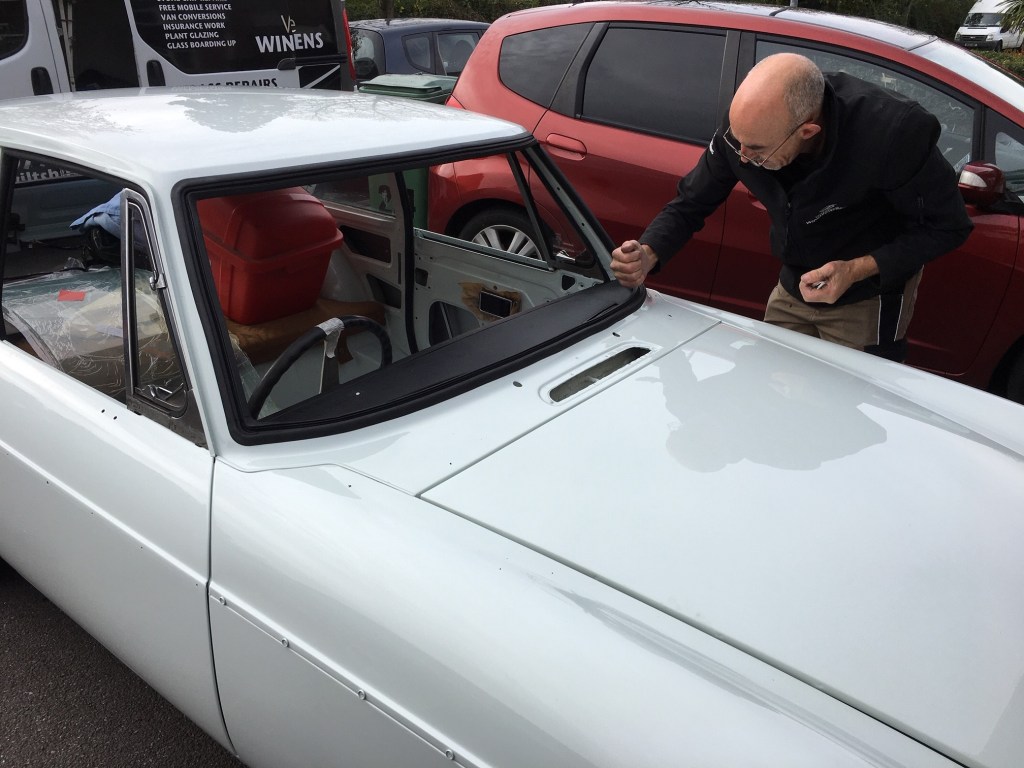
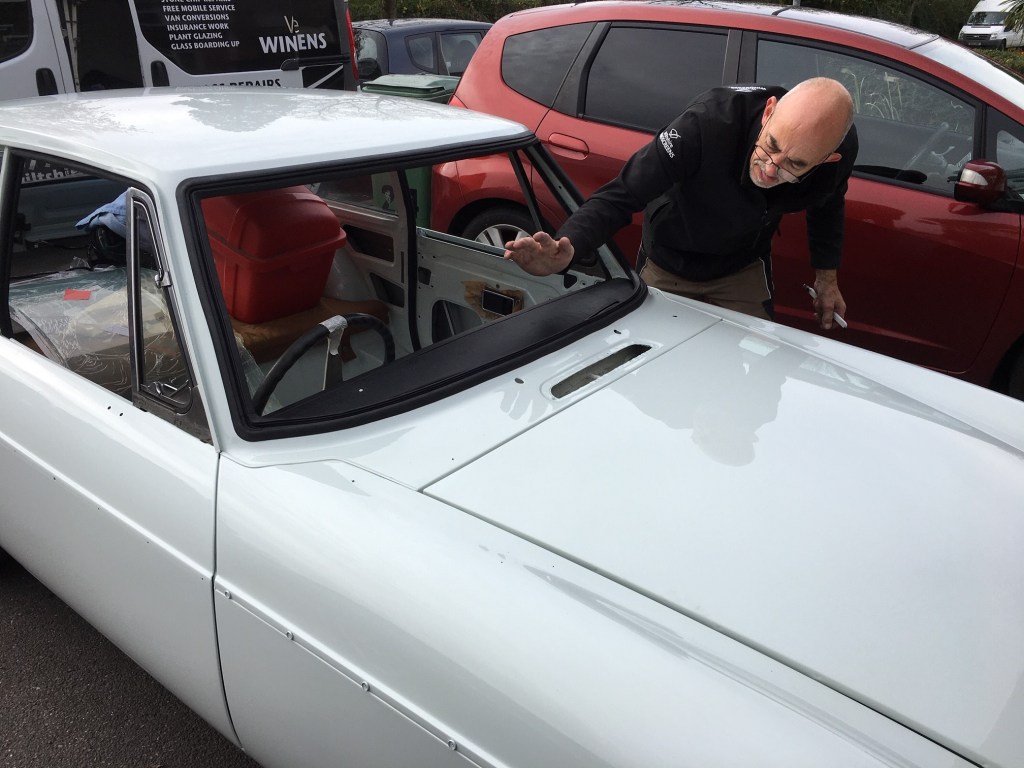
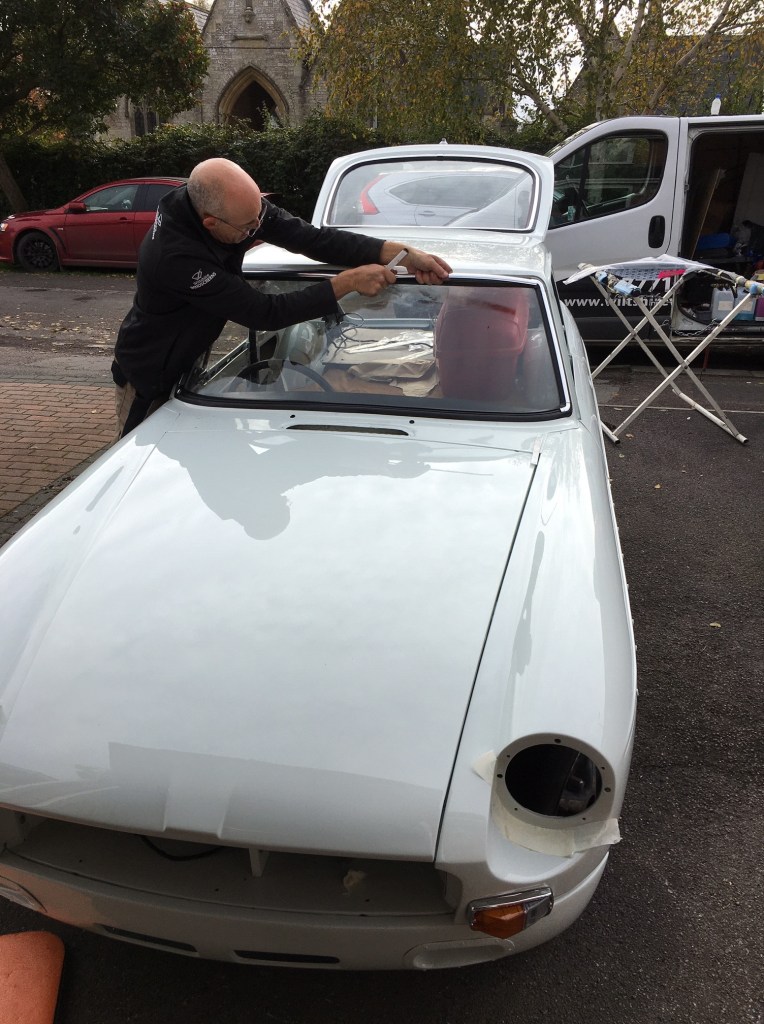
Andy from Wiltshire Windscreens came over to fit the Windscreen following some issues over the last fortnight around the weather and a rubber seal from a supplier which did not fit. This time however, the weather was good and all the kit fitted (with a bit of grunting, and a minor modification) and the windscreen is now in and looking fantastic. I have to hand it to Andy, he did a fine job, was great company and charged a very reasonable fee.
Thump, thump, Andy bashes the seal on
One more clout should do it
Fitting the tricky trims
All done, but Andy can’t help tweaking the rear screen (which he fitted previously)
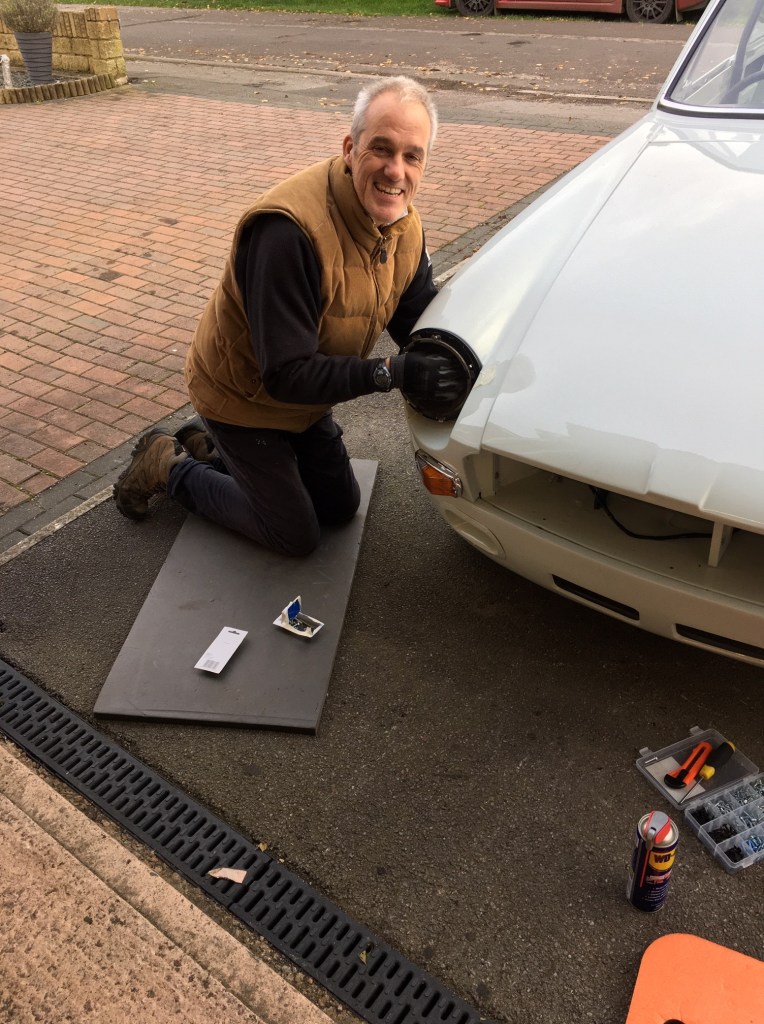
Paul had also come up to help me for the day. I wanted him to look at the o/s headlamp since I could not fit the bevel and it was causing me annoyance. We played around with the other unit (the one not fitted) and sort of worked out how it went on. We concluded that the unit was too tight to the seal to allow the bevel to hook up to the securing lip, so reluctantly removed it for a refit. I had used very short bolts because I didnt want the bolts protruding into the wheel arch, but on relfection I had gone too short and now the assembly didn’t work. While inspecting the lamps, Paul was recalling his days working on his Triumph 2500 that he had in his youth. Helpfully, he could still remember how the lamps went together and he did a good job dismantling and cleaning the unit which then looked much more presentable. After a quick visit to Halfords to buy some bolts, we assembled the lamp units in situ and to my delight, the bevels fitted. We weren’t completely sure that the lamps are as securely fitted as they need to be, but this was a step forward and like a lot of things on the car, once something is on, it can be endlessly fettled, and probably will be.
Next job was to refit the grille which had to be removed to maximise the reach of the crane for the engine install. Refitting the grille was relatively easy, although its a tight fit and it was better to do this now, than leave it in the kitchen to annoy Helen.
On a roll from our success, I asked Paul to work with me on sorting the bonnet release which wasn’t operating. I wasn’t happy with the cable routing, so we altered it by hanging a clip off the last wing bolt which held the cable more securely. Having Paul’s input, as well as extra pair of hands to hold the cable while I tightened the securing nut was invaluable and on testing, the bonnet release worked as it should.
Paul getting intimate with the MG
What a smart looking vehicle
Two happy middle-aged men and an MG
So a really successful day and some more milestones achieved. To quote the Beatles, I get by with a little help from my friends.
A big milestone achieved today with the engine and gearbox installed. It was just getting dark as we finished, and we didn’t manage to properly fit the geatbox mountings (a well known MGB challenge), but as my friend noted ‘It looks in’.
We just got enough done before it got dark
The engine is back where it belongs
This is how it unfolded. The original plan was to install the engine yesterday, but unfortunately in this part of the UK we had a severe rain storm and it just wasnt feasible. Moving the job to today, meant I lost one of my two helpers, who had a work commitment up North. So it was just me and a friend from Church, John, who knows a thing or two about mechanics and is a practical and clever guy who I was confident would get the job done. Question was, would I be enough of an assistant?
First job was to see how to sling the engine. John got on with this while I torqued up the gearbox bolts. We then lifted the engine just to see how it would hang.
John getting a feel for the engine lift
Engine is now pointing the right way and so is the car
Having got the engine rigged up to the crane we had to rotate the engine and car through 180 degrees. The engine crane takes some manouvering. We used spare wooden floor boards as runways for the castors to make it as easy as possible, but even this was tricky, with having to move them around and the crane occasionally falling off the runway. To turn the MG, we had to push it up the drive and onto the road to do a three point turn. An old gentleman was walking his dog and looked curiously at us. He asked ‘What’s wrong with it?’. John replied ‘It hasnt got an engine’. He seemed satisfied with the answer and continued on his slow walk up the road.
As further preparation I jacked up the rear of the car and removed the grille to give us some more room to get the crane as close as possible for maximum reach. We also laid throws around the engine bay and wrapped the gearbox with a sheet and a feed bag as protection against any accidental knocks.
Received wisdom recommends jacking up the rear to help the angles
So having done all the preparation, it was time to see if we could do the job.
Here John articulates our well planned operation ‘lets give it a go!’
First attempt at lifting the engine ended in failure. We found that with a single sling we weren’t able to tilt the engine enough by force alone to get anywhere close to the angle we needed to fit into the car. So we rigged up the balance bar which I had been loaned by Corsham Tyre Services. The balance bar has two lifting points connected by a threaded bar which allows you to tilt the load. Cool piece of kit which as it turned out was critical to the job getting done.
With the whole unit tilted, we were on our way
Our next set of challenges were around maximising the reach of the crane which was at its absolute limit. We had to release the bonnet struts and lash the bonnet up as high as it would go (see picture above). With the crane at maximum reach, at maximum tilt and very close to the bonnet, it looked as if we would be short of where we would need to be. However, with a bit of shoving and pushing, some very careful manipulation of the crane height and angles, and some light prying, we got the engine close enough to the mounting brackets to get a bolt on each side. Seems easy when I write it now, but it was fairly stressful as the space is really quite tight, especially with the starter motor on, not one of my best ideas. So we had the engine in place, and our focus now turned to the gearbox and the dreaded cross-member.
John trying to fix the cross-member
The cross-member is an awkward piece of design by MG which is well-known for being very difficult to fit. And so it turned out to be. We managed to get one gearbox mounting fitted, but the other side refused to play ball despite our best efforts. Regretfully, we had to bolt up the cross-member with only one mounting properly installed because we were losing the light at this point. A sensible decision, as there was quite a lot of kit to put away, and although it was disappointing to be beaten, we at least had got the main job done and left things in a safe state for future completion.
So thanks John for leading the job today – in the evening, I was invited over to his place, where John’s wife had cooked a delicious spag bol (my wife Helen was away on a school trip to China).
Secondly, thanks to Corsham Tyre Services for lending the lifting kit without which we really would have struggled.
Thirdly, thanks to Austin for his generous loan of the engine crane.
I wasn’t counting on doing any work to the MG today, but finding myself with an hour free towards the end of the day I rolled it out and thought I would install the reversing lights. This should be a simple job, but turned out to be annoyingly difficult and ultimately resulting in a ‘fail’. I had bought shiny new reversing units from Moss recently as the old ones were yellow and cracked with age. I had previously trial fitted one of the old ones just to see how easily it went together.
This old reversing unit just wouldn’t look right on the fresh MGB
I started with removing the old unit, and thinking I would need to remove the bulb for later use, eased a screwdriver against the bulb holder (yes I know, a screwdriver…) and it promptly exploded on my hand. Hey, ho, its just a bulb, I can get another. Moving to the new unit, I removed the lens only to discover that it comes fitted with a bulb already. I shrugged to myself and started lining up the new unit to fit on the o/s. It attaches by two little bolts which go through the lens and body and into a captive thread. After a couple of attempts, I realised that neither bolt was biting on the thread, so I applied a bit more pressure, to squash the gasket that I thought might be pushing it back. Still no biting. Around this time I noticed red marks appearing on the bodywork and on the tools and of course, I had cut myself on the glass and was bleeding. Quick visit to the first aid cupboard for a plaster. I had another couple of goes at getting the bolt into the captive thread and concluding that it wasnt going to work, decided to drill the threads out and just rely on the bolts to hold it in place (I know, I know). This was the usual messy affair with the drill bit variously seizing in the hole and just generally being a rough and ready approach to solving a problem. Utimately I achieved installing the first reversing light on the o/s but not a very satisfactory process. Managed to fit the connector from the loom so in theory good to go.
The troublesome o/s reversing light – should have been so easy
Moving to the other side, the same problems encountered. This time I decided to think about the problem first. Didn’t the bolts on the new units look a little bigger than the bolts on the original unit? Hang on a minute. So I tried threading the old bolts onto the old unit and hey presto!, they fitted easily. Grrrr. So obvious when you look. I gave the bolts a final tweak and the new plastic lens cracked. At this point I decided to pack it in for the day.
From here you can’t see the cracked lens – a Concours Judge would see it!
Cup of coffee and 1/2″ spanner, what else do you need?
Haven’t slept well for a couple of nights. My eldest is job-hunting in London after graduating this summer, and my youngest is off to University next week. At work, I’ve got some challenges and alongside that, we’ve been thinking about whether to move house. Meanwhile, I wasn’t progressing the MG. Hence, busy mind, and disturbed sleep. A day in the garage / on the drive was what I needed and that’s what I did. Awake early, I had the MG pushed out onto the driveway by 7:30am. A busy day followed in which I did the following:-
Painted the gearbox cross-member – this is an overdue job needed before I put the engine and gearbox back in. I sprayed it with crackle finish because I thought it would be durable and because the can was within reach! Hung to dry on the washing line with the other washing.
Fitted the fuel tank incuding the sender unit. This was a bit awkward, doing it on my own, so I used a box and the jack to help me hold it up to the bolts. I cleaned the filler neck and it looked quite presentable afterwards
Fitted the gearbox to the engine. Again, a bit awkward on your own, but I propped the engine on some magazines and used the jack and a bit of man-handling to mate the gearbox. It was a bit fiddly, but overall not too difficult. Bolts need checking and torquing up before installing back in the car
Installed the rear hatch gas struts – this involved me drilling into my freshly painted car for the first time. Helen helped me to measure where to drill the holes. The drilling and fit went okay, although I did have the hatch ball joints on the wrong way around first time and we nearly had a disaster, but I managed to recover it without any damage. The hatch doesn’t sit right when closed now, but I am not going to make any changes until the glass is installed. At the moment it doesn’t have the correct load on it, so worth waiting and then doing it once properly.
Fitted the bonnet pull – not working yet as it needs some adjustment, but its in – needs tightening I think
Replaced the accelerator cable – Can only fit one end as I am missing the engine at present. One less thing to do and all part of having a smart engine bay
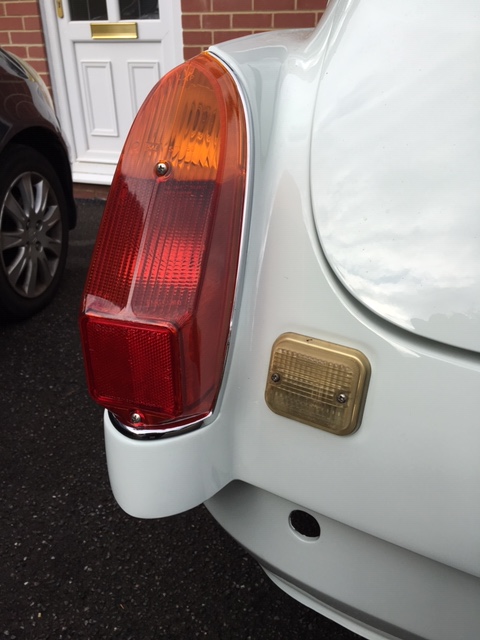
Took the rear lights off and installed the foam seal which I had forgotten about, but found in a box this morning. Helen helped with this as she was bringing me out a cup of coffee, so got roped into the job.
Began fitting the rear wiring loom – first electricals on the rebuild. Thought I would start with something simple and so it was – relatively. I have the old loom, which is labelled, so used that to guide me. I actually connected up the new loom to the rear lights – we are making progress!
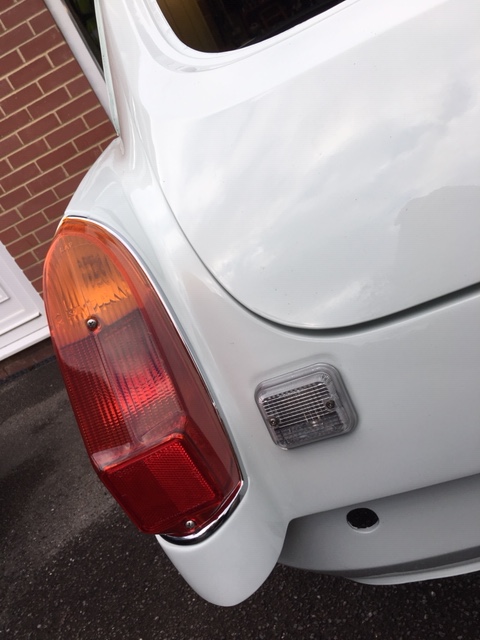
Fitted the near side indicator unit. Just wanted to see how it will fit – the answer is, not bad, not great. There is a hole just visible unfortunately from when someone cobbledit to fit prior to my ownership. A detail to sort one day. In the meantime, one less thing to do.
This was a sociable day on the MG. People love to stop and see how it’s all progressing and they nearly always have an encouraging word. There was the usual ‘Hello’s’ from dog walkers who stream past our house on the way to the local fields. Helen and I chatted for a while to a couple who are near neighbours and the husband was admiring the MG and interested to hear about what I was doing. Nearly everyone mentions the TV show Car SOS or Mike Brewers’ Wheeler Dealers. I dont have the heart to tell them I find those shows difficult to watch because its all editted down into 30 minutes, they have a huge fully equipped workshop and the talented mechanics make it look so easy. Had a useful chat to Russell (another dog walker), who has stopped to speak before. He has restored many cars, including MGBs so is always a useful person with whom to discuss things. Today he gave me the number of a person who may be able to transport the MG for a reasonable price when I come to get the windscreen and rear screen fittted.
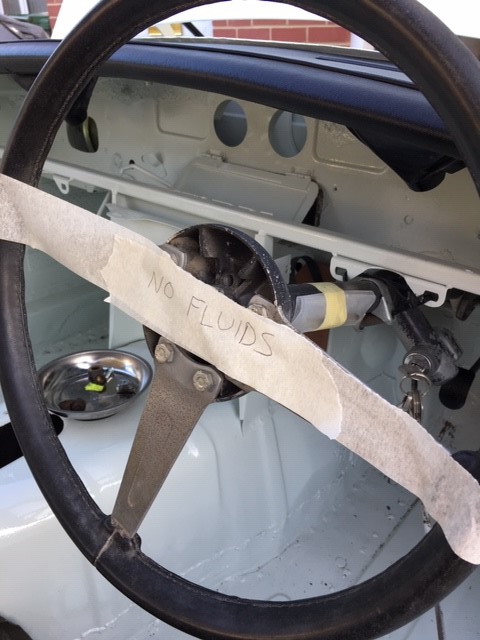
I’ve occasionally worried about whether when I get to finally restart the MG, I somehow forget to say, fill the gearbox with oil or some such idiosy. I spoke to my mate Rob, who races classic cars and is always taking gearboxes and so on out of his cars. He said that when he removes fluids, he puts a big sign in masking tape over the steering wheel to this effect. Hence…
What a day it will be when I remove this bit of tape…
As I worked on the car, I listened to Louis Theroux on Desert Island Disks, a bit of radio 4 and then to the Monza Grand Prix which was won by Charles LeClerc in his Ferrari. What a day for the young man and for Italy.
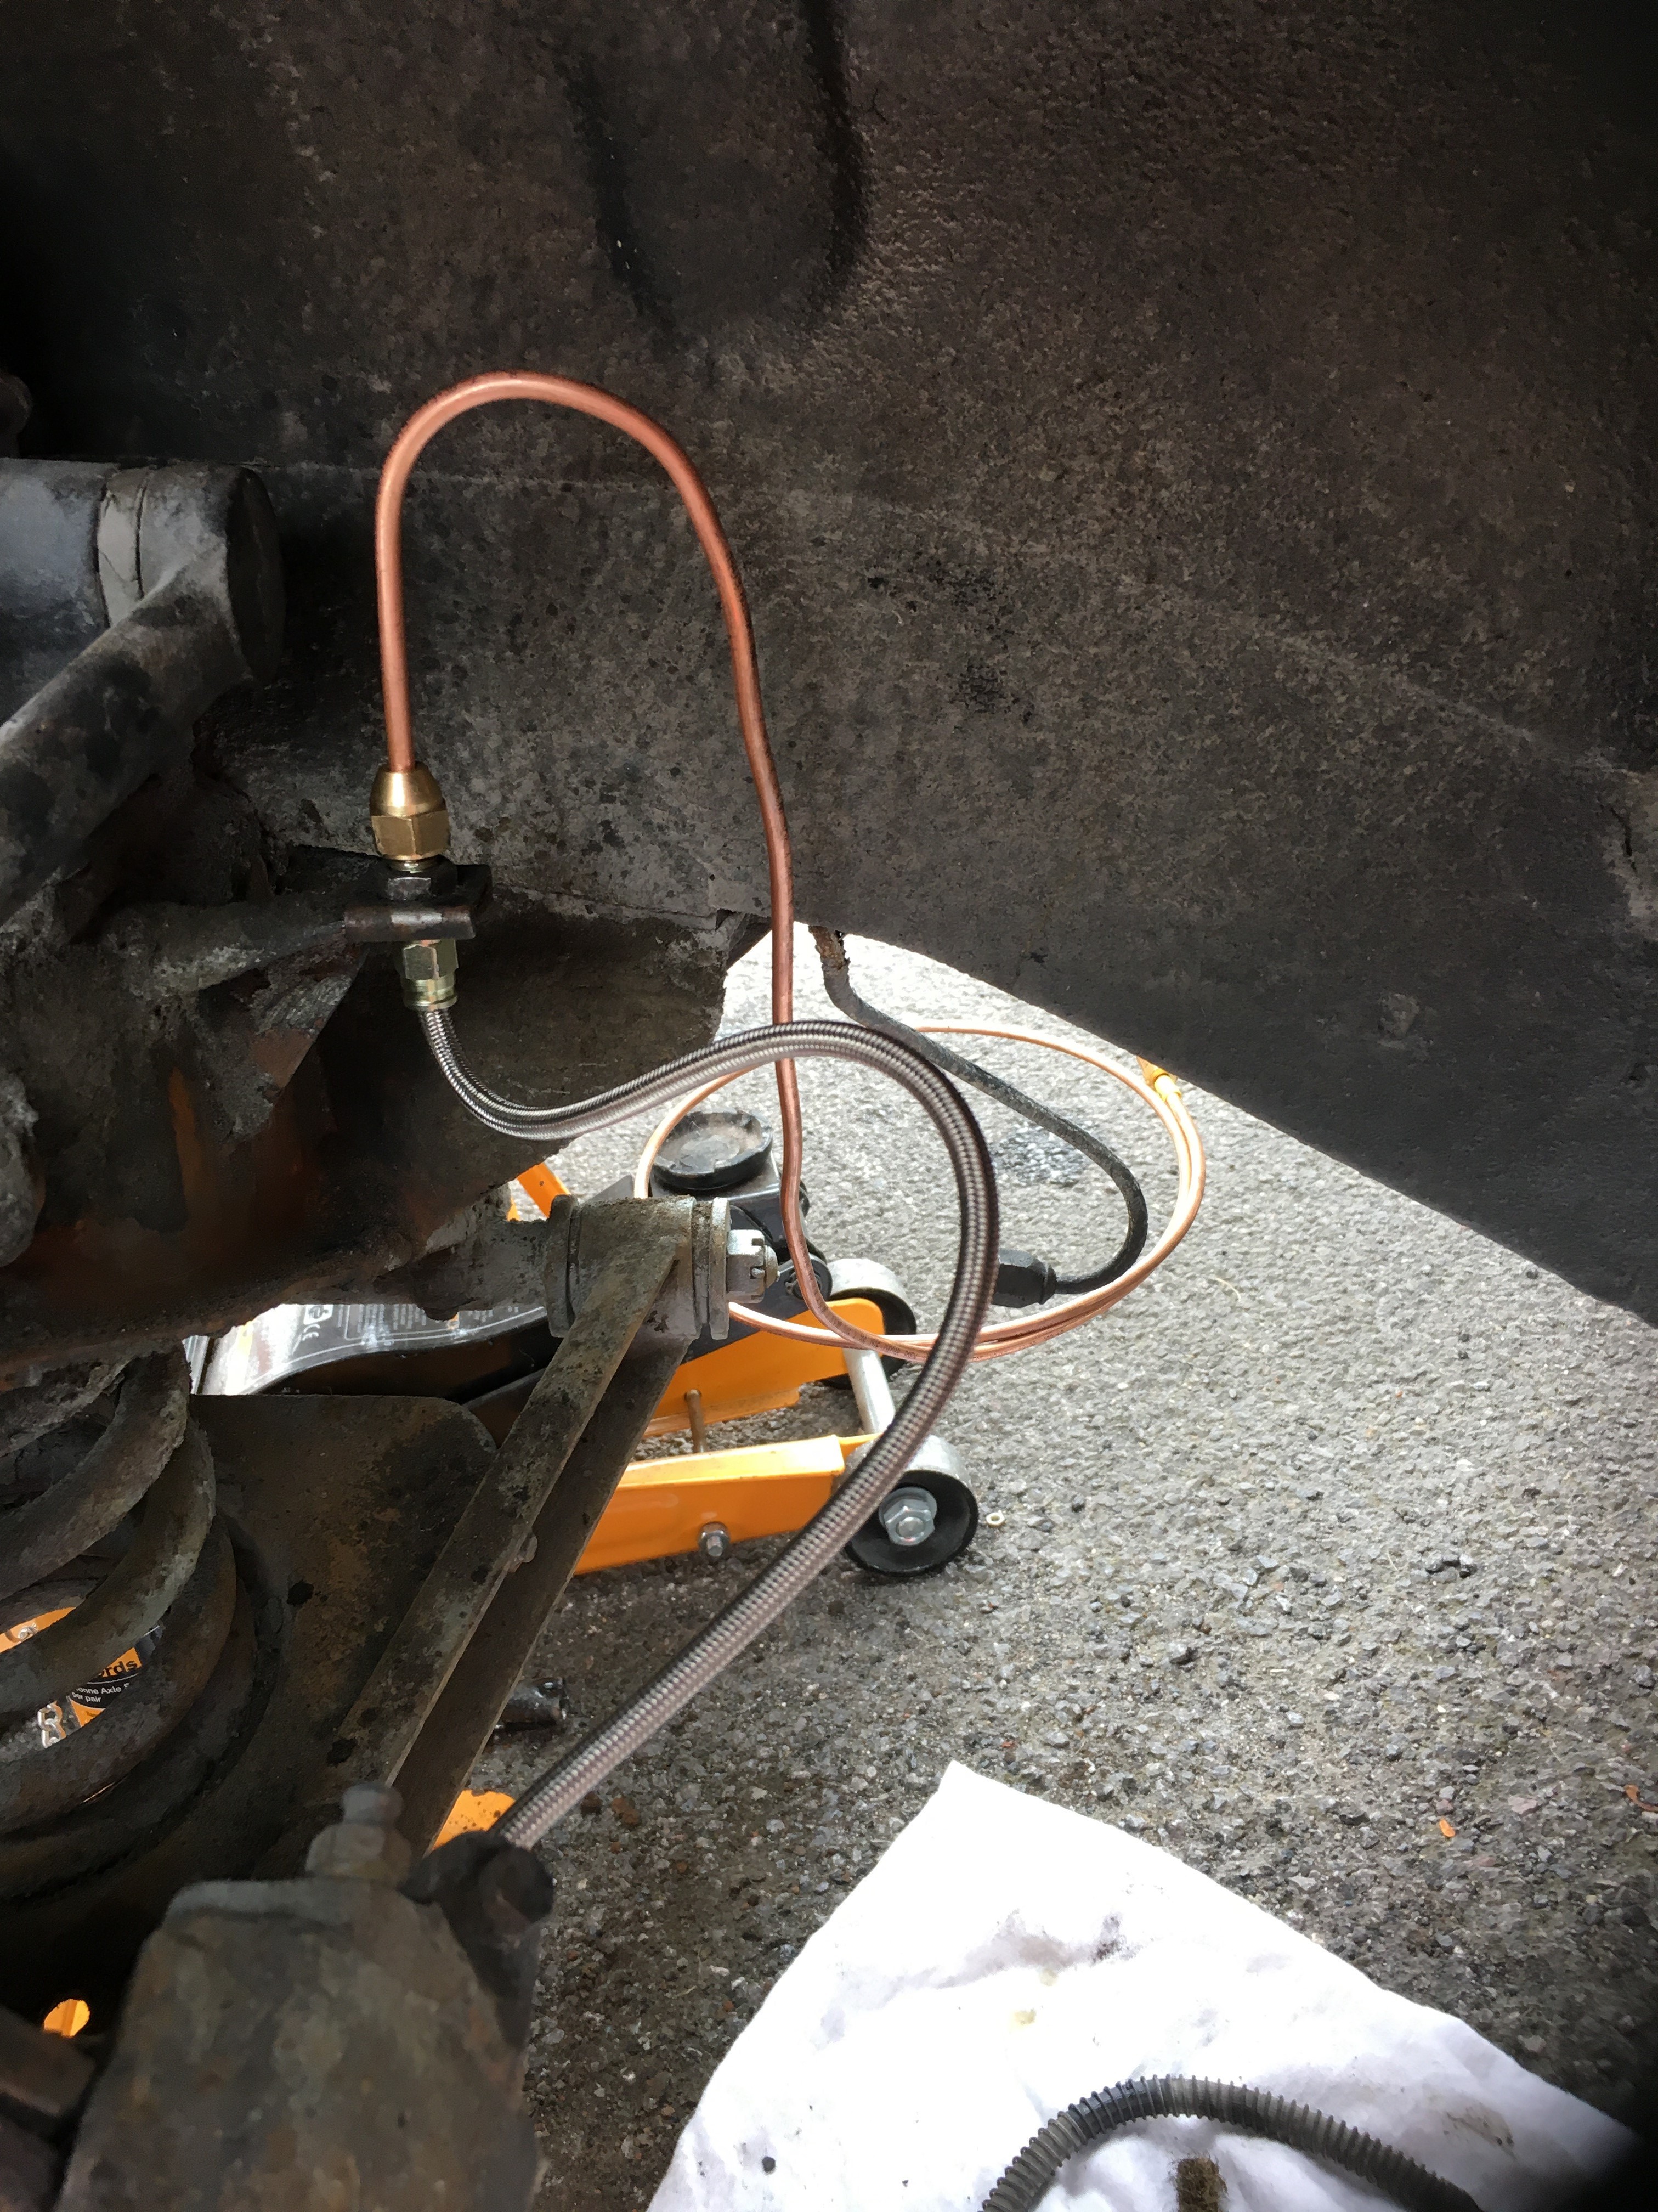
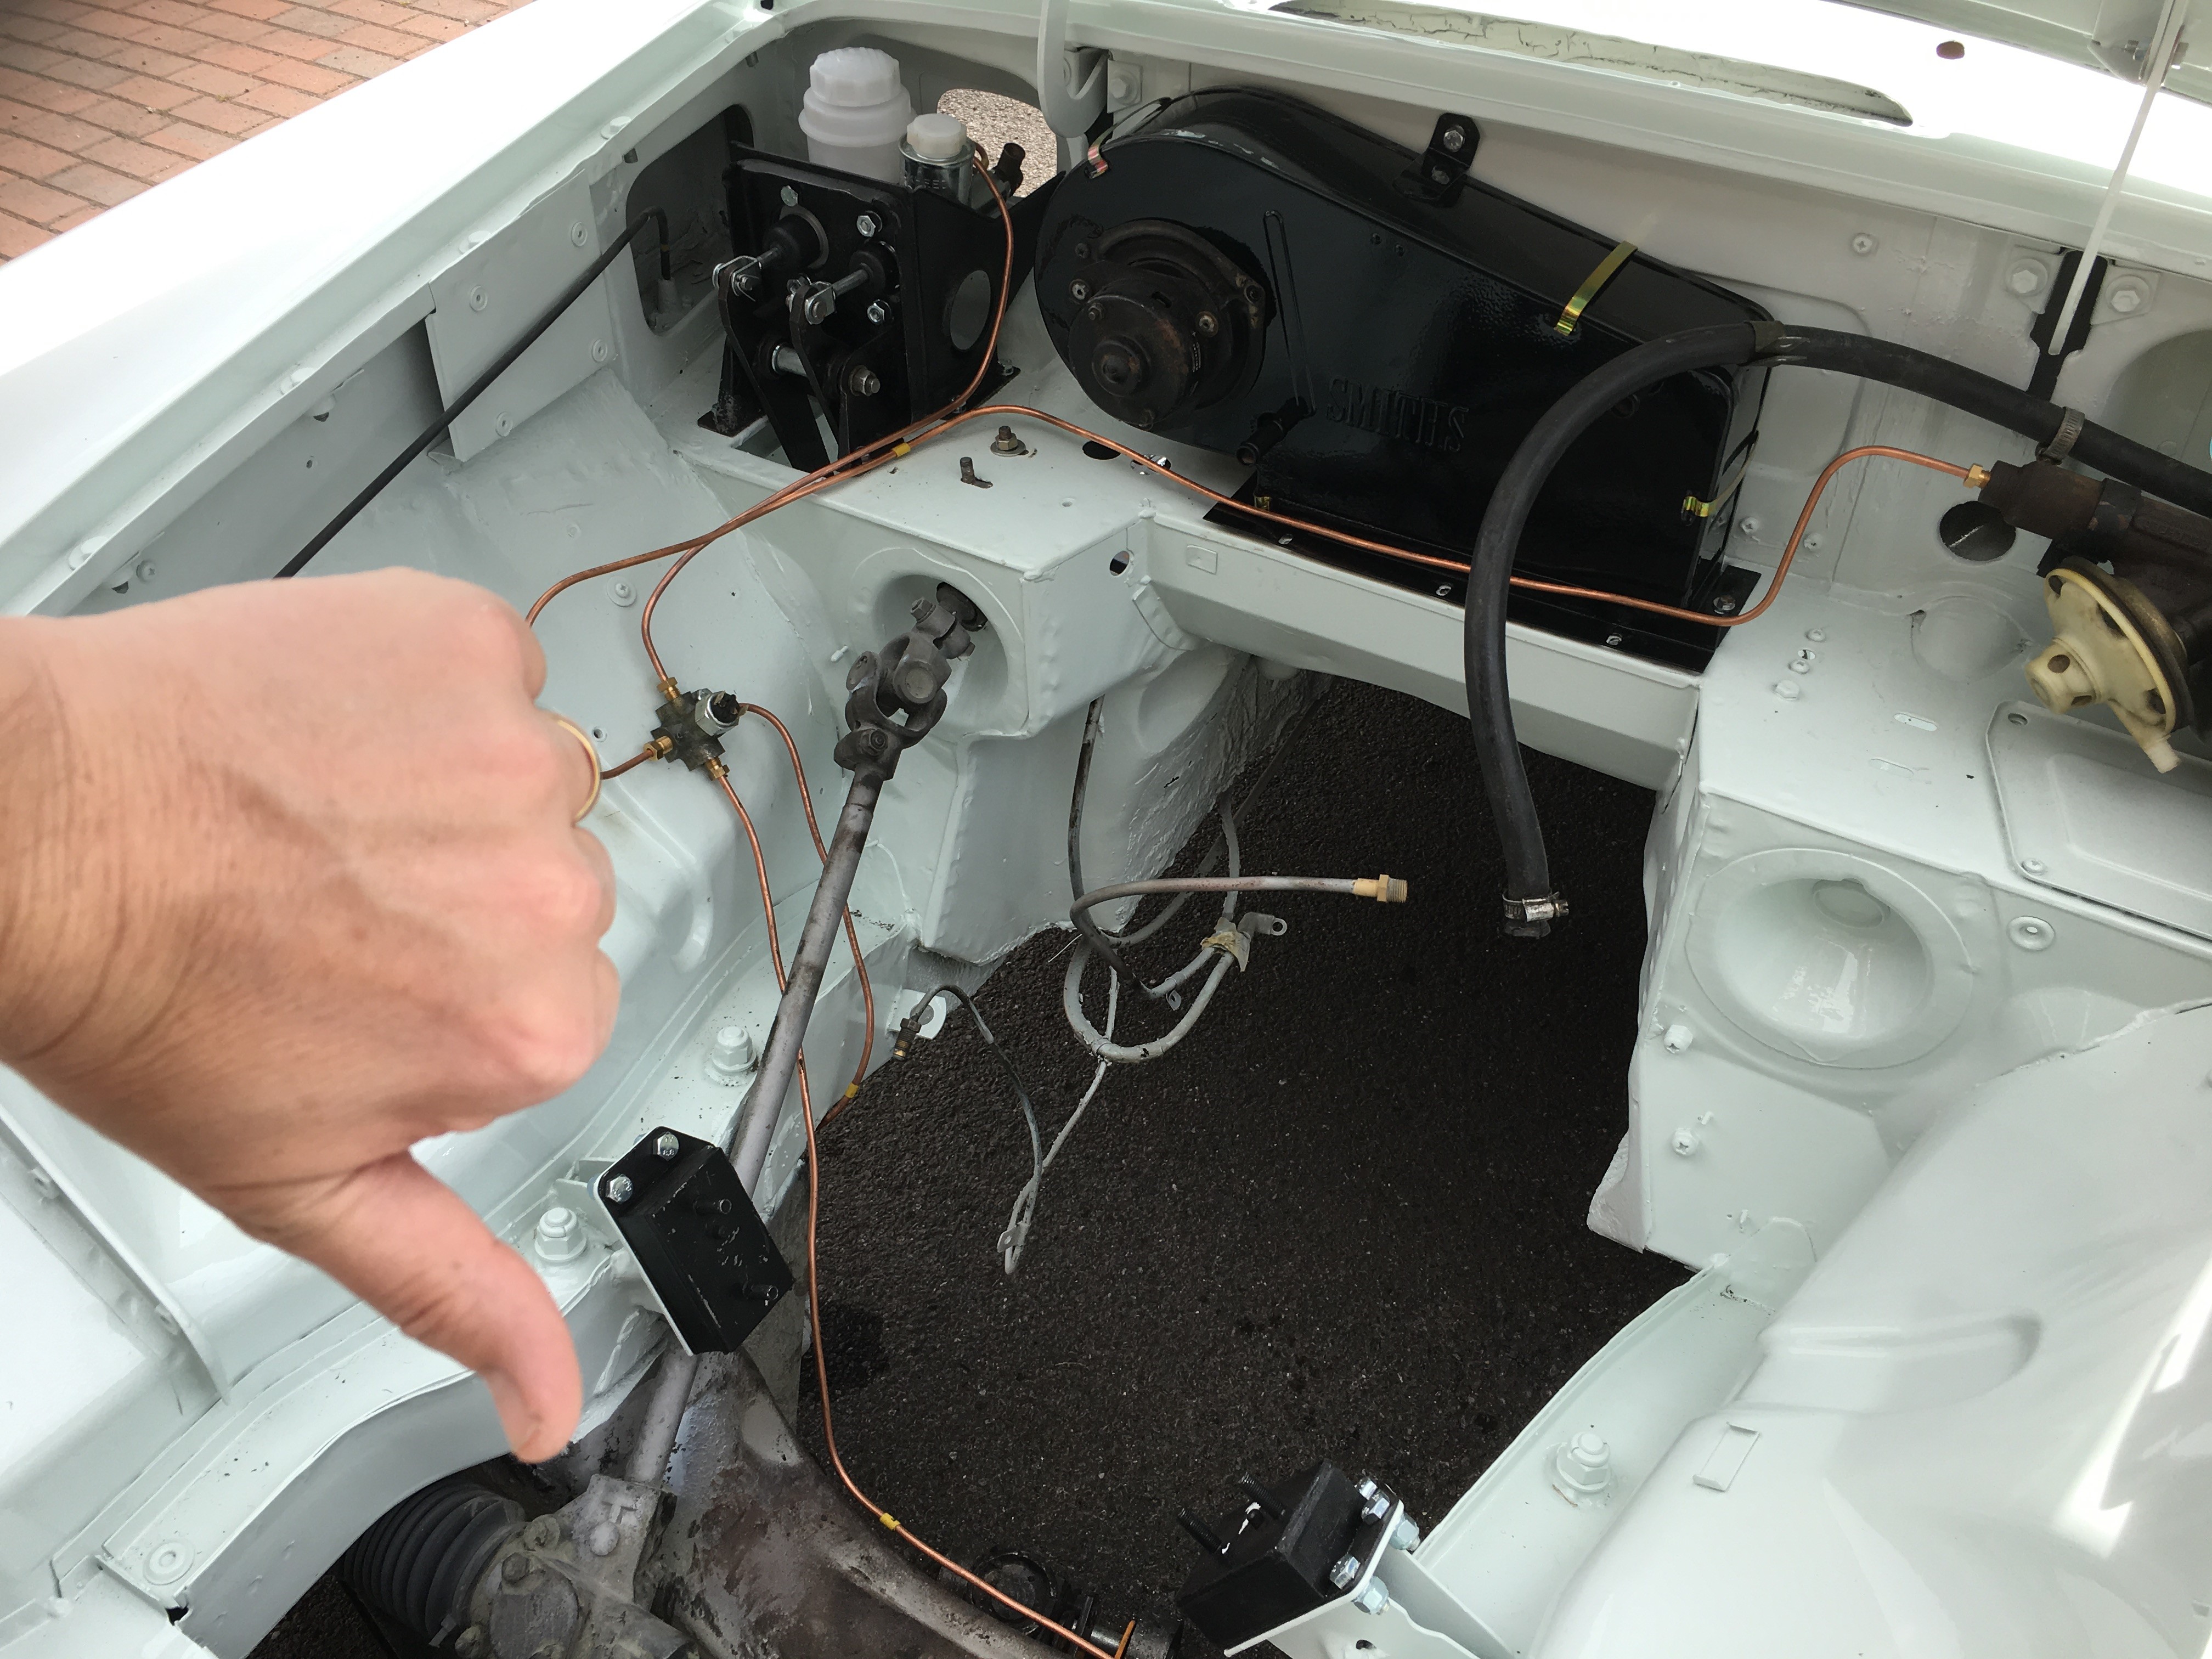
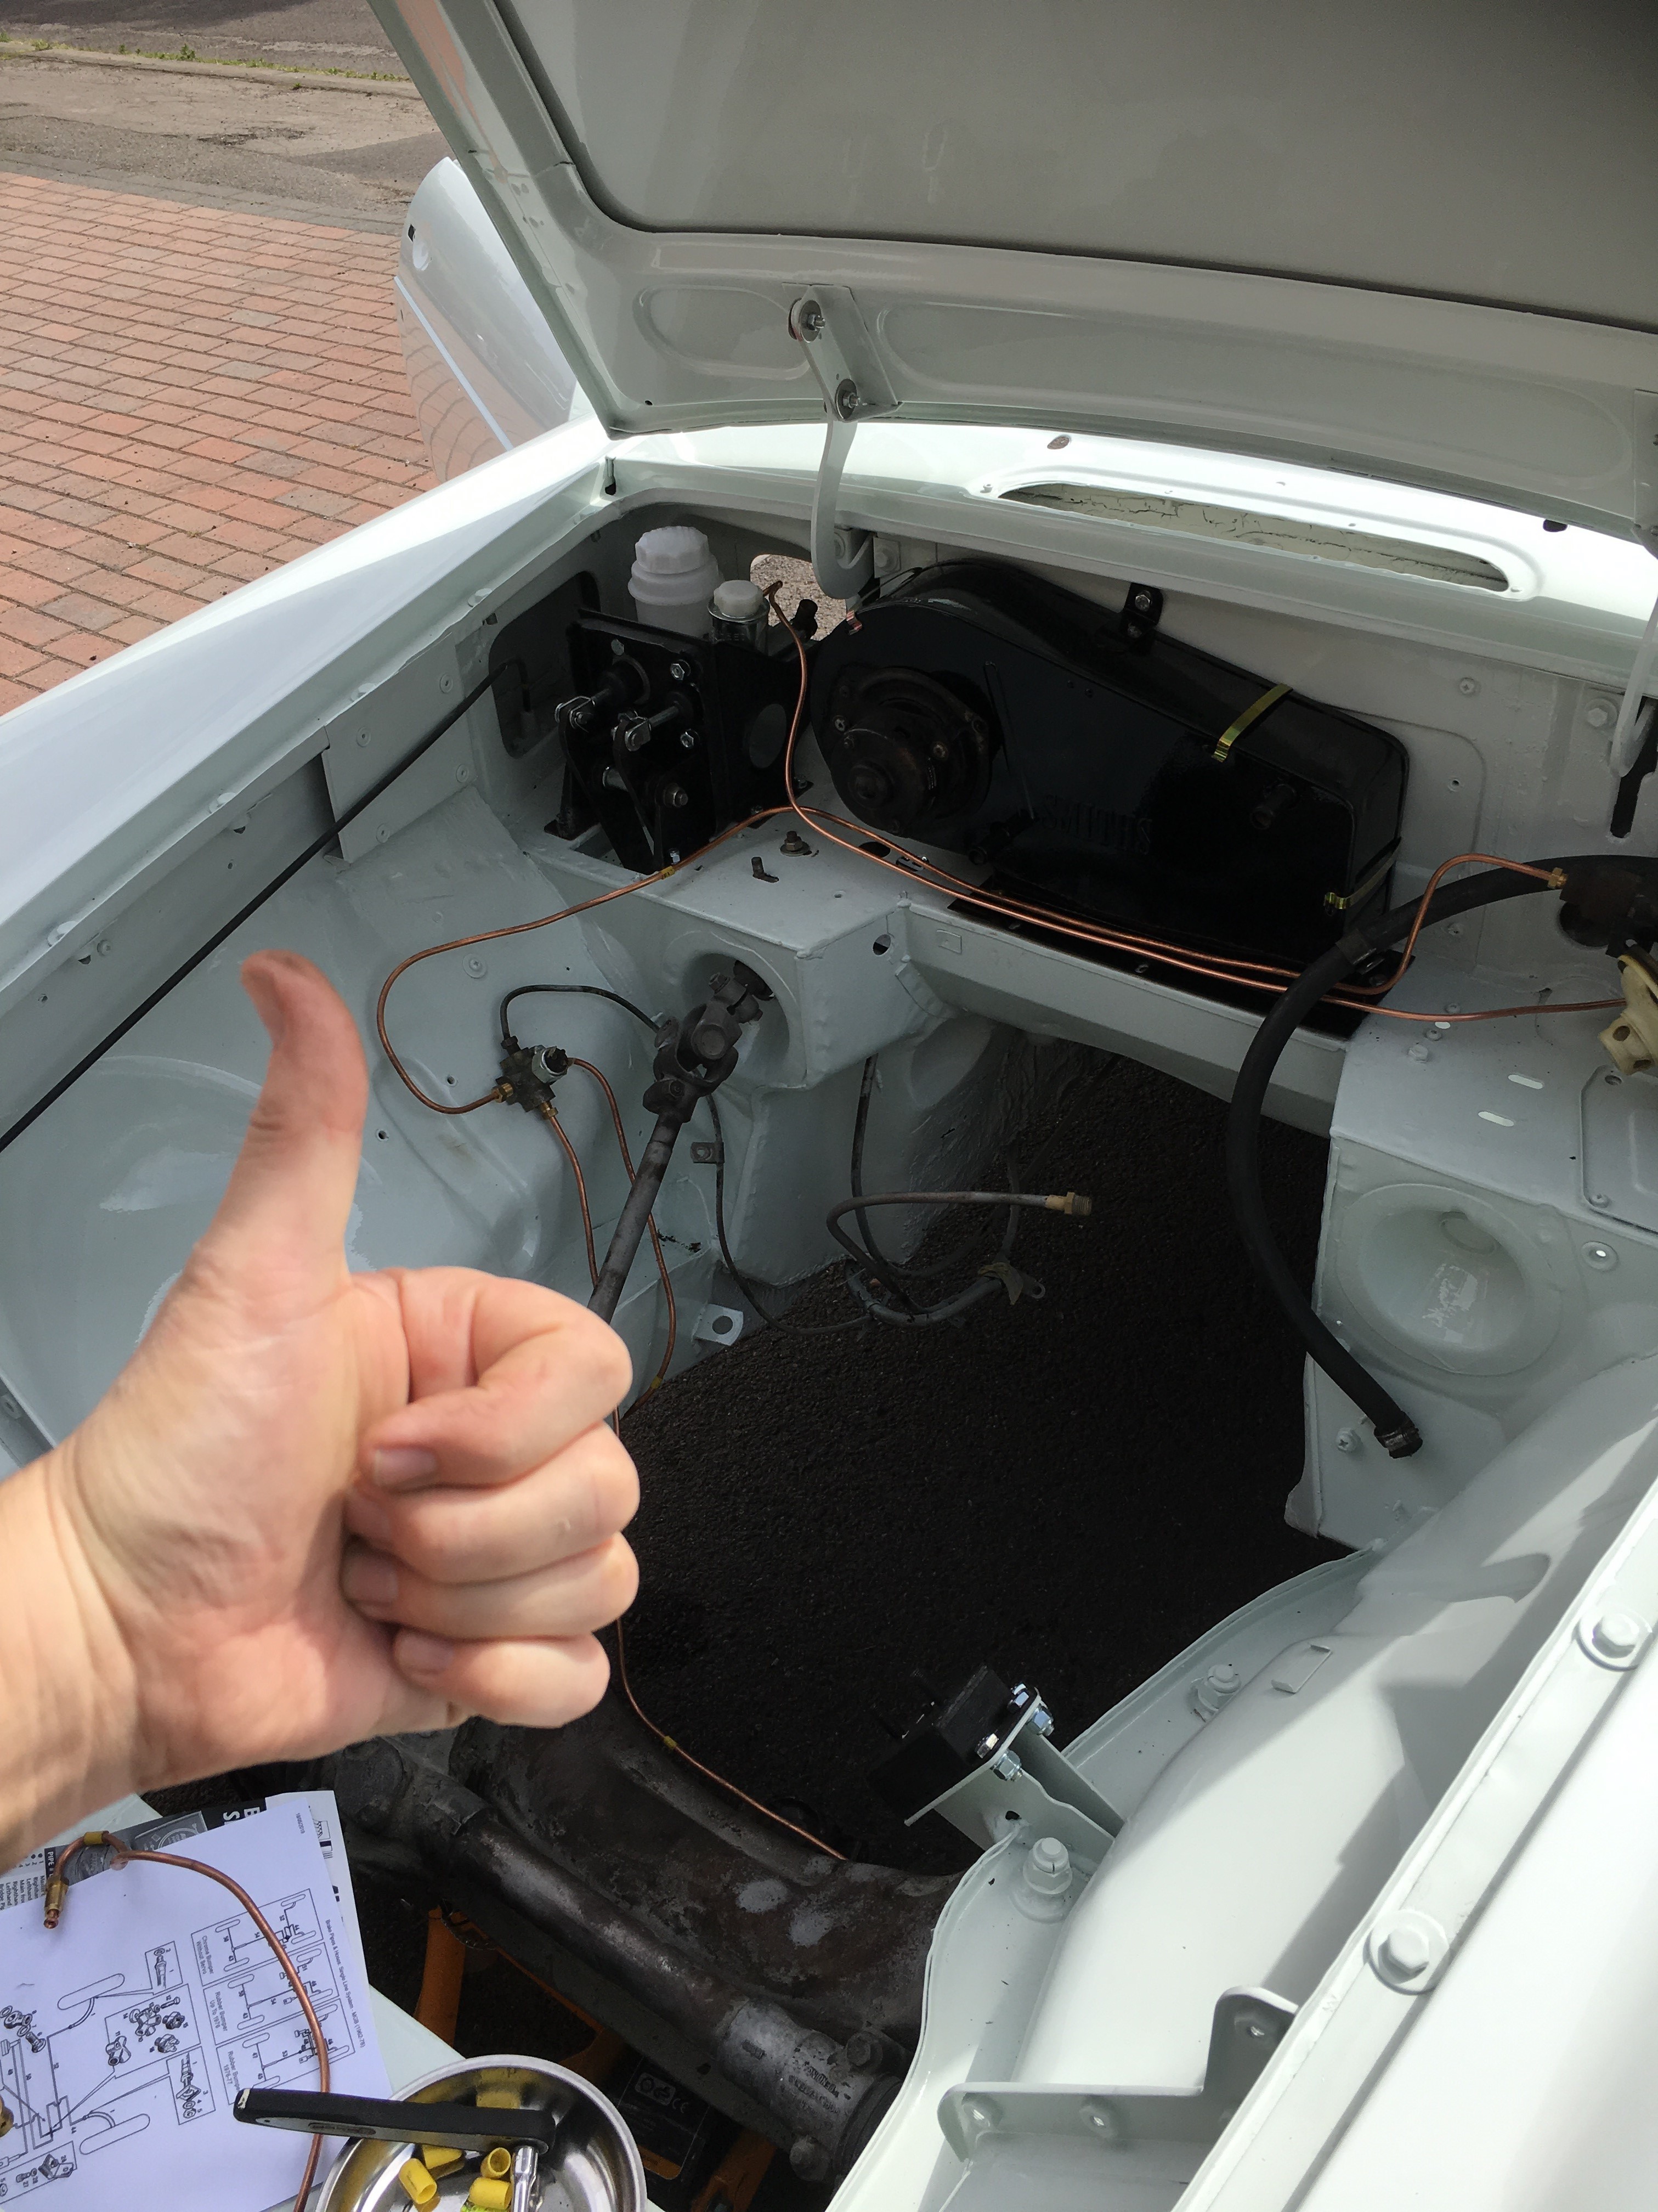
It’s a sunny Saturday! After a morning stroll with Helen, I spent a useful hour on the MG fitting the copper pipe from the Clutch master cylinder. The pipe runs down from the master cylinder to a bracket on the fletch plate where it becomes braided stainless steel. All went in okay with a bit of creative beding here and there. The pipe routing needs a bit of finessing, but they are broadly in the right place. Straighforward installation, although I needed Helen to hold the pipe in place while I tightened it from the interior.
Before: Clutch Master Cylinder
After: Copper pipe is fitted
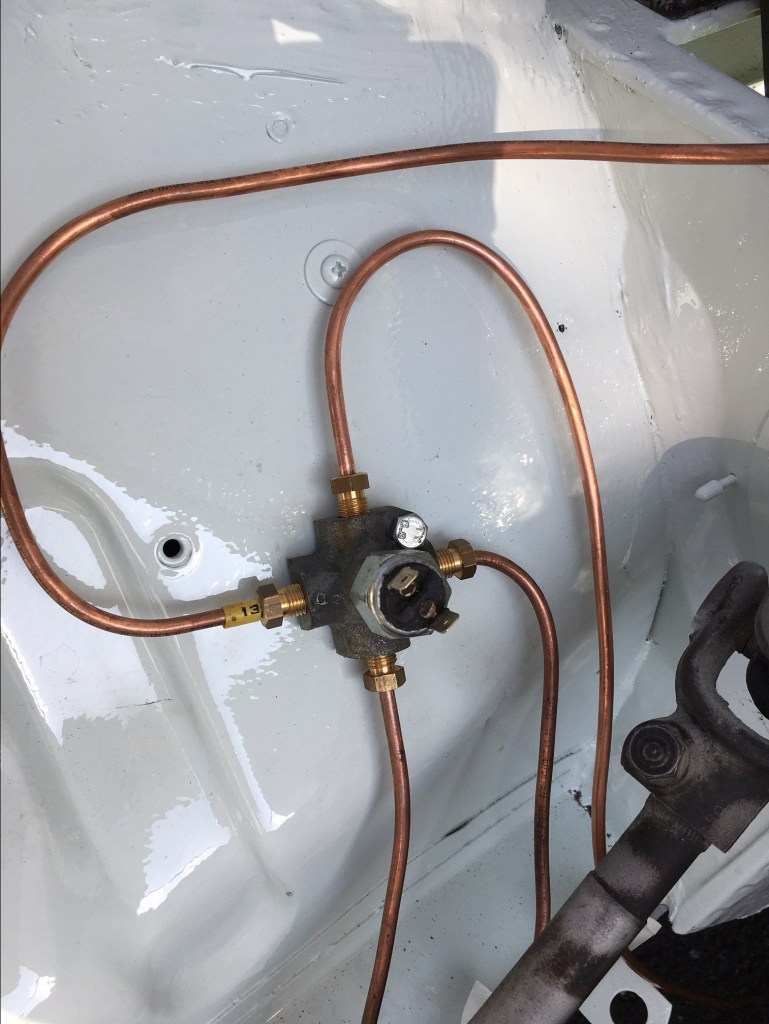
Couple of things from last week which I didn’t record. I fitted the final brake pipe to the four-way union on the inner wing. This is the pipe that comes up from under the car to the rear. It fitted alright although as mentioned earlier the routing needs a tweak and they all need fixing in place.
The four way brake junction – hopefully it wont leak brake fluid everywhere!
I also puzzled over the fuel pump – I have a new fuel piping kit and have fitted the main front to rear pipe. However, the pipe routing around the pump and the tank isn’t that clear and I haven’t got a good understanding of how it works. I am going to have to bite the bullet, fit the tank and then work it out from there.
The fuel pump which to me is baffling
I have been putting off fitting the tank as its a two-person job, but when done, this will have completed much of the mechanics at the rear, and is critical to the ‘engine in and started’ milestone. Something to prioritise.
Last week, Austin (the welder who kindly lent me the engine crane) was in touch to say that a friend of his, Adam, wanted to borrow the engine crane. No problem I thought and he duly came around and we got it out from the corner of the garage and loaded it into his car. We got talking about the MG and he admitted that he had fitted an engine and gearbox into an MGC a while ago, so I seized the opportunity and asked if he would be prepared to help me with the reinstall when he returns the crane. He was willing, although as he is getting married soon, he was being careful not to over-commit. I commented that once he wanted to pay for his wedding and honeymoon, I would happily pay him to re-fit the engine. Not convinced he is up for this, but he has to bring the crane back, so I will take my chance then to firm up arrangements.
Finally, just for fun, my neighbour, who is a bit of a joker, was clearing out his garage. ‘Here Ad’, he said, ‘I’ve got something for you’ and hands me an oversize spanner.
‘King-Dick’ is the legend on the spanner. Thanks Graham!
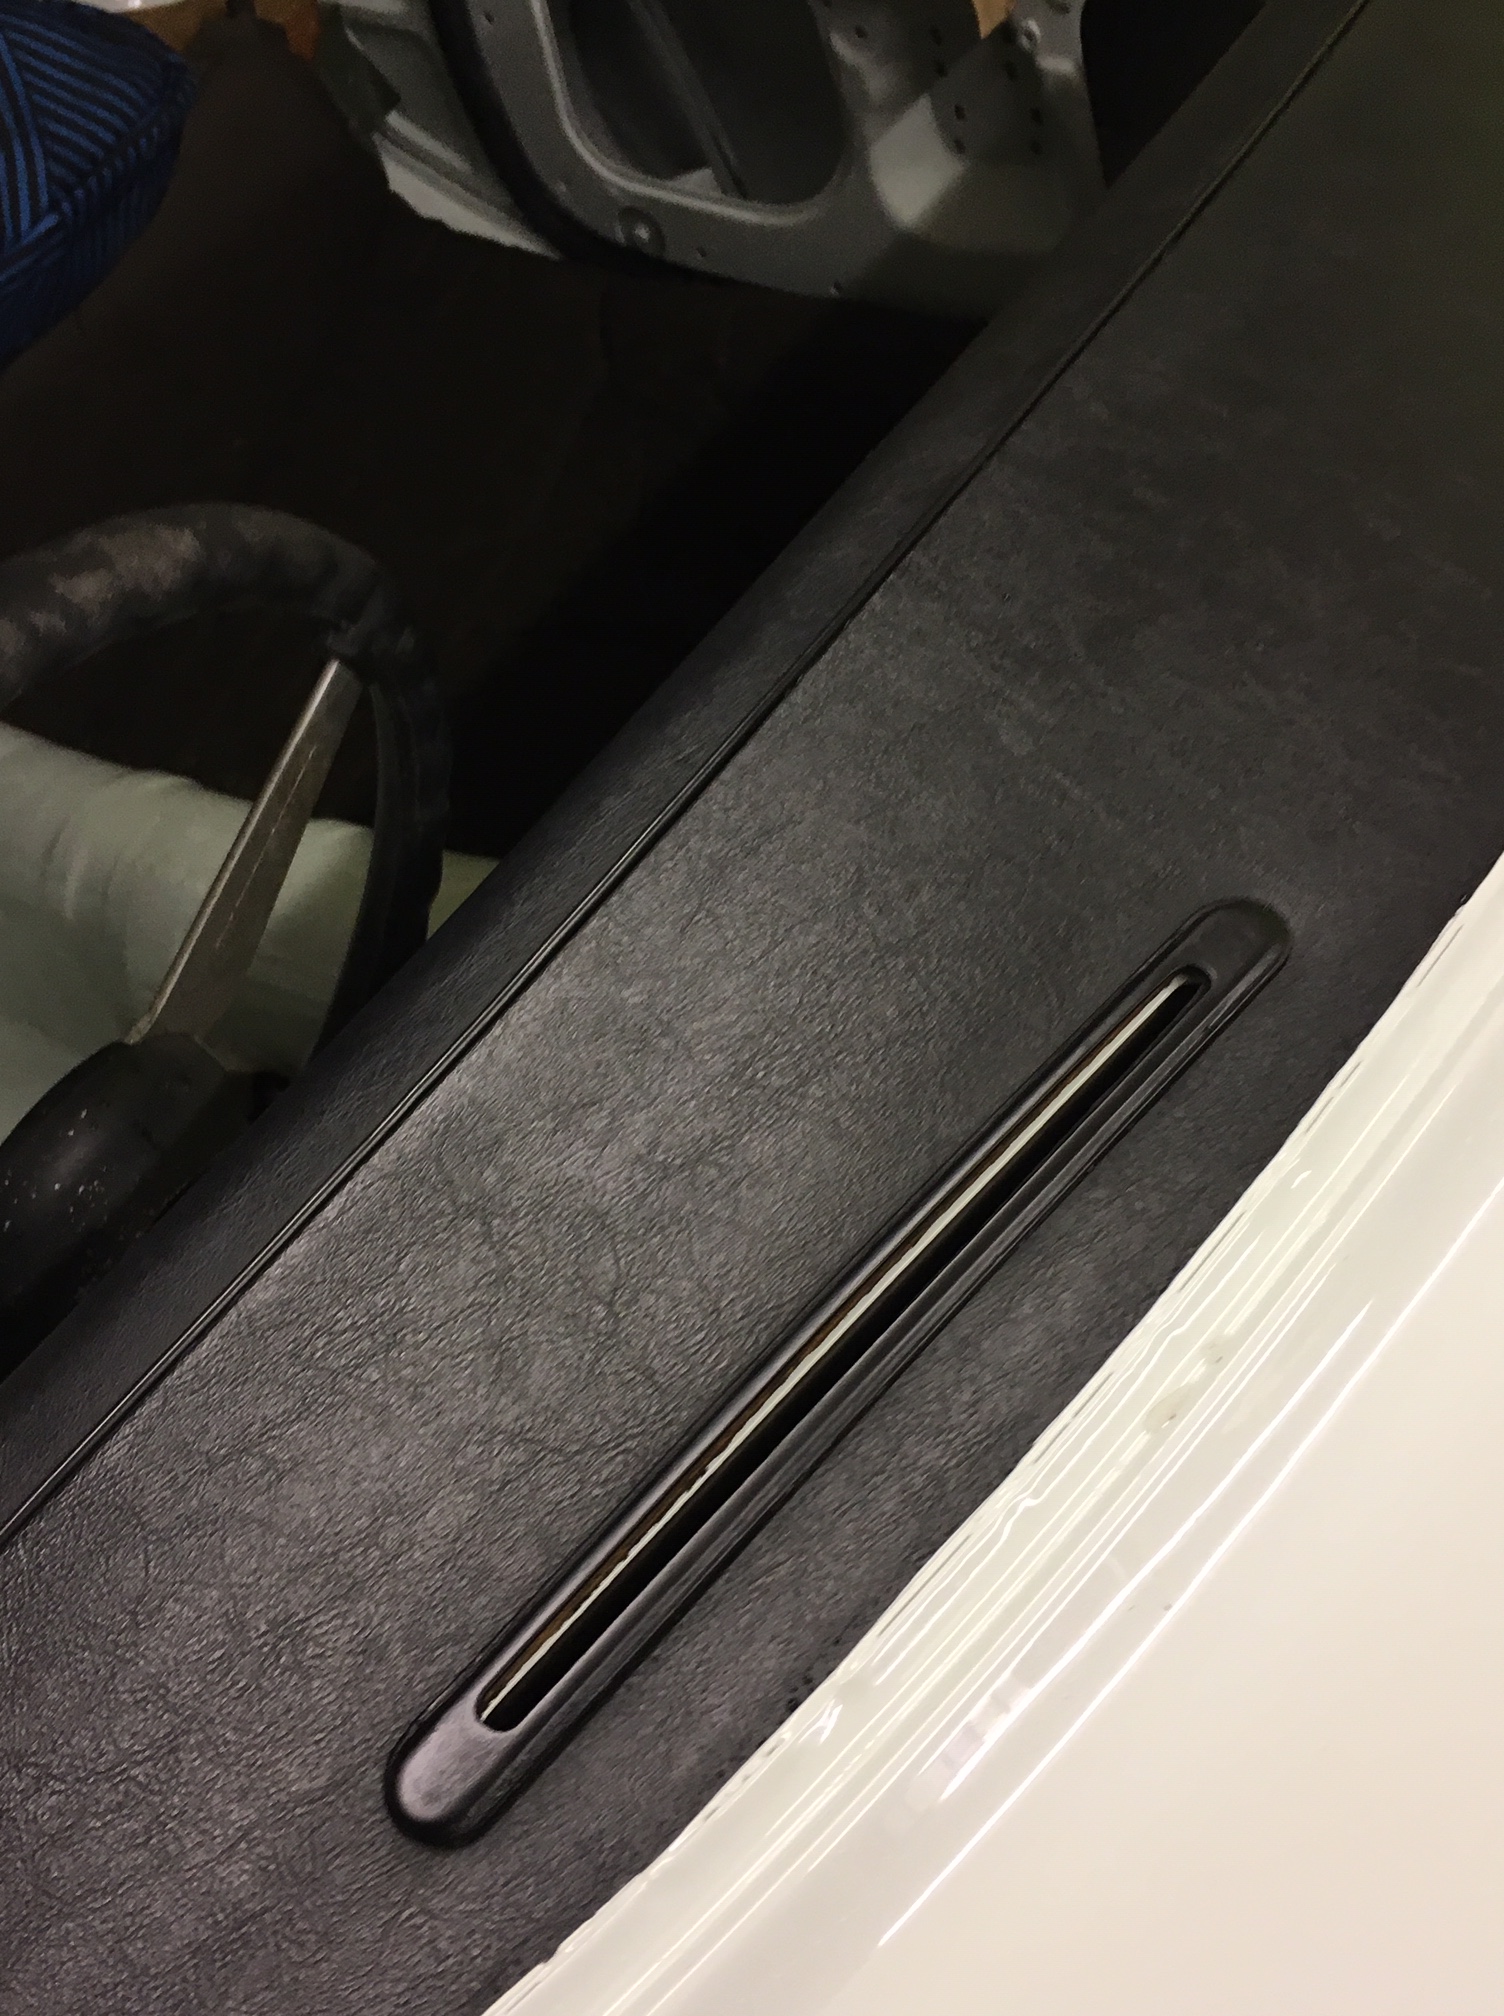
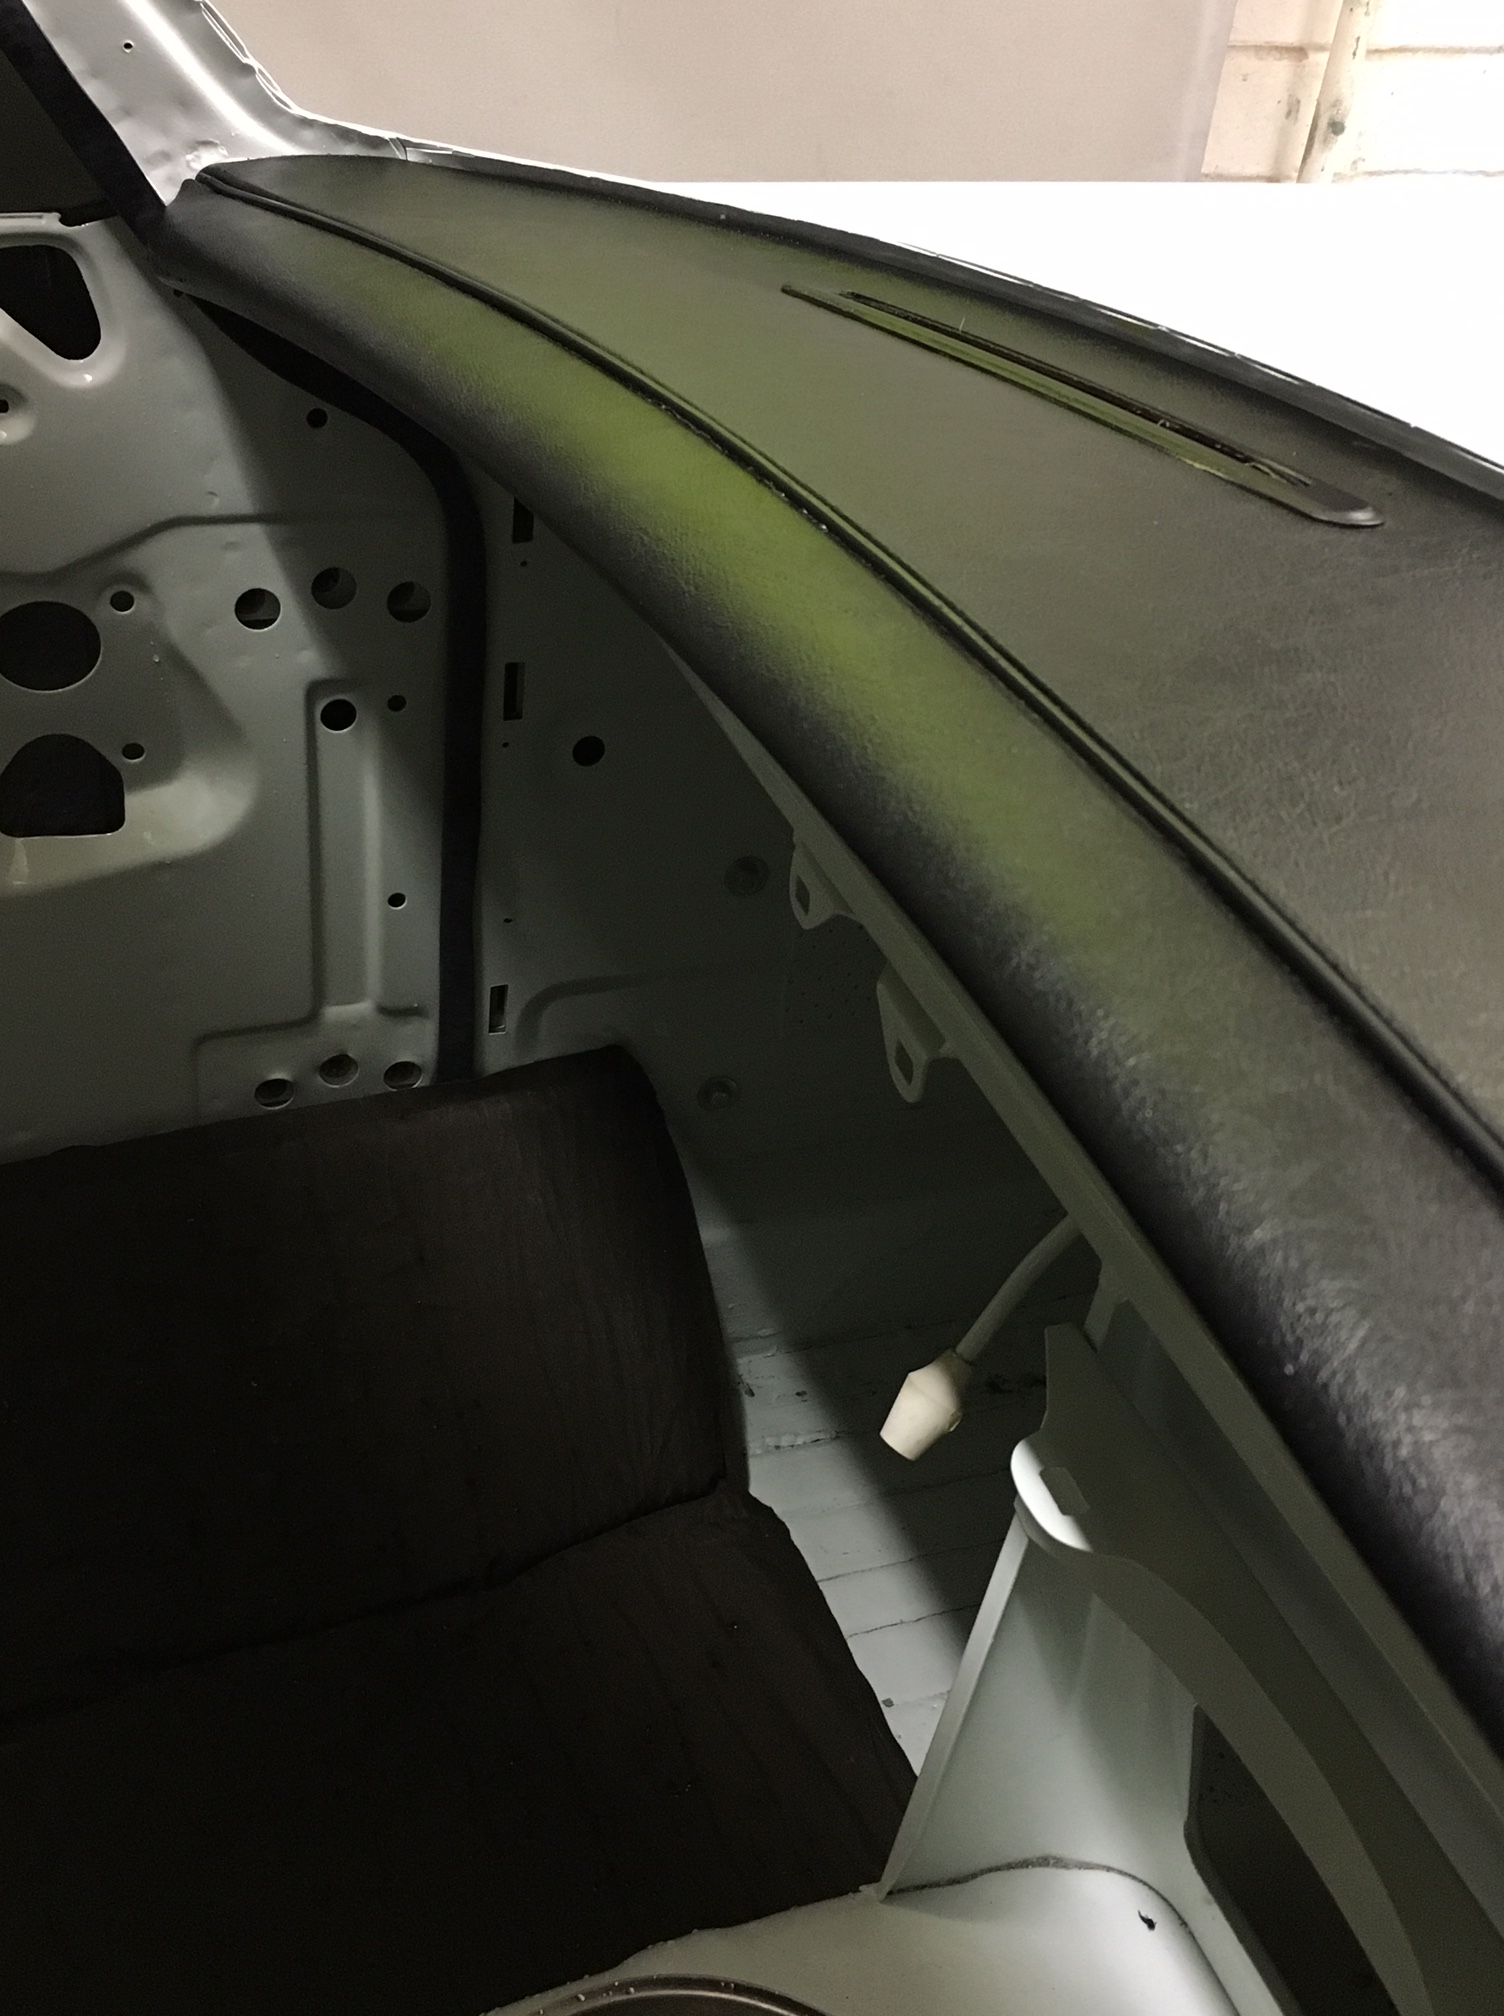
Back from very hot holiday in Crete to a rainy August day in the UK. I had intended to spend a while today on the MG, progressing a few jobs, but after an hour, the rain was cleary set in for the day, so I packed up and retreated inside (in mitigation, I only got back at 2:00am last night and with the time difference, our bodies really thought it was 4:00am). I did manage to get one job done today however. I had recently resprayed the demister vents which sit on the dash top, so I decided to fit them today. The vents themselves hold down the vinyl dash top, so fitting this starts the whole dash re-fitting sequence. The vents fitted back easily enough on the original (to my knowledge) vinyl and I then bolted on the crash rail, which is what MG offered as it’s interior safety feature in 1973. Compare that to contemporary cars with their air bags, air curtains and interior padding, its quite a contrast.
The resprayed vents in place on the dash-topThe crash rail in place, looks okay doesn’t it? The yellow colour is a reflection of my Hi-Viz jacket if you are wondering
A few things to report. Firstly, not much progress. I was a little distracted with preparing for and then undertaking a sponsored walk for the charity Open Doors, which serves persecuted Christians worldwide. Christians get beaten up and worse for their faith and that can’t be right. So a friend of mine, Chris and I walked 140 miles over 7 days, attracting donations of £3,600 and raising awareness of Open Doors.
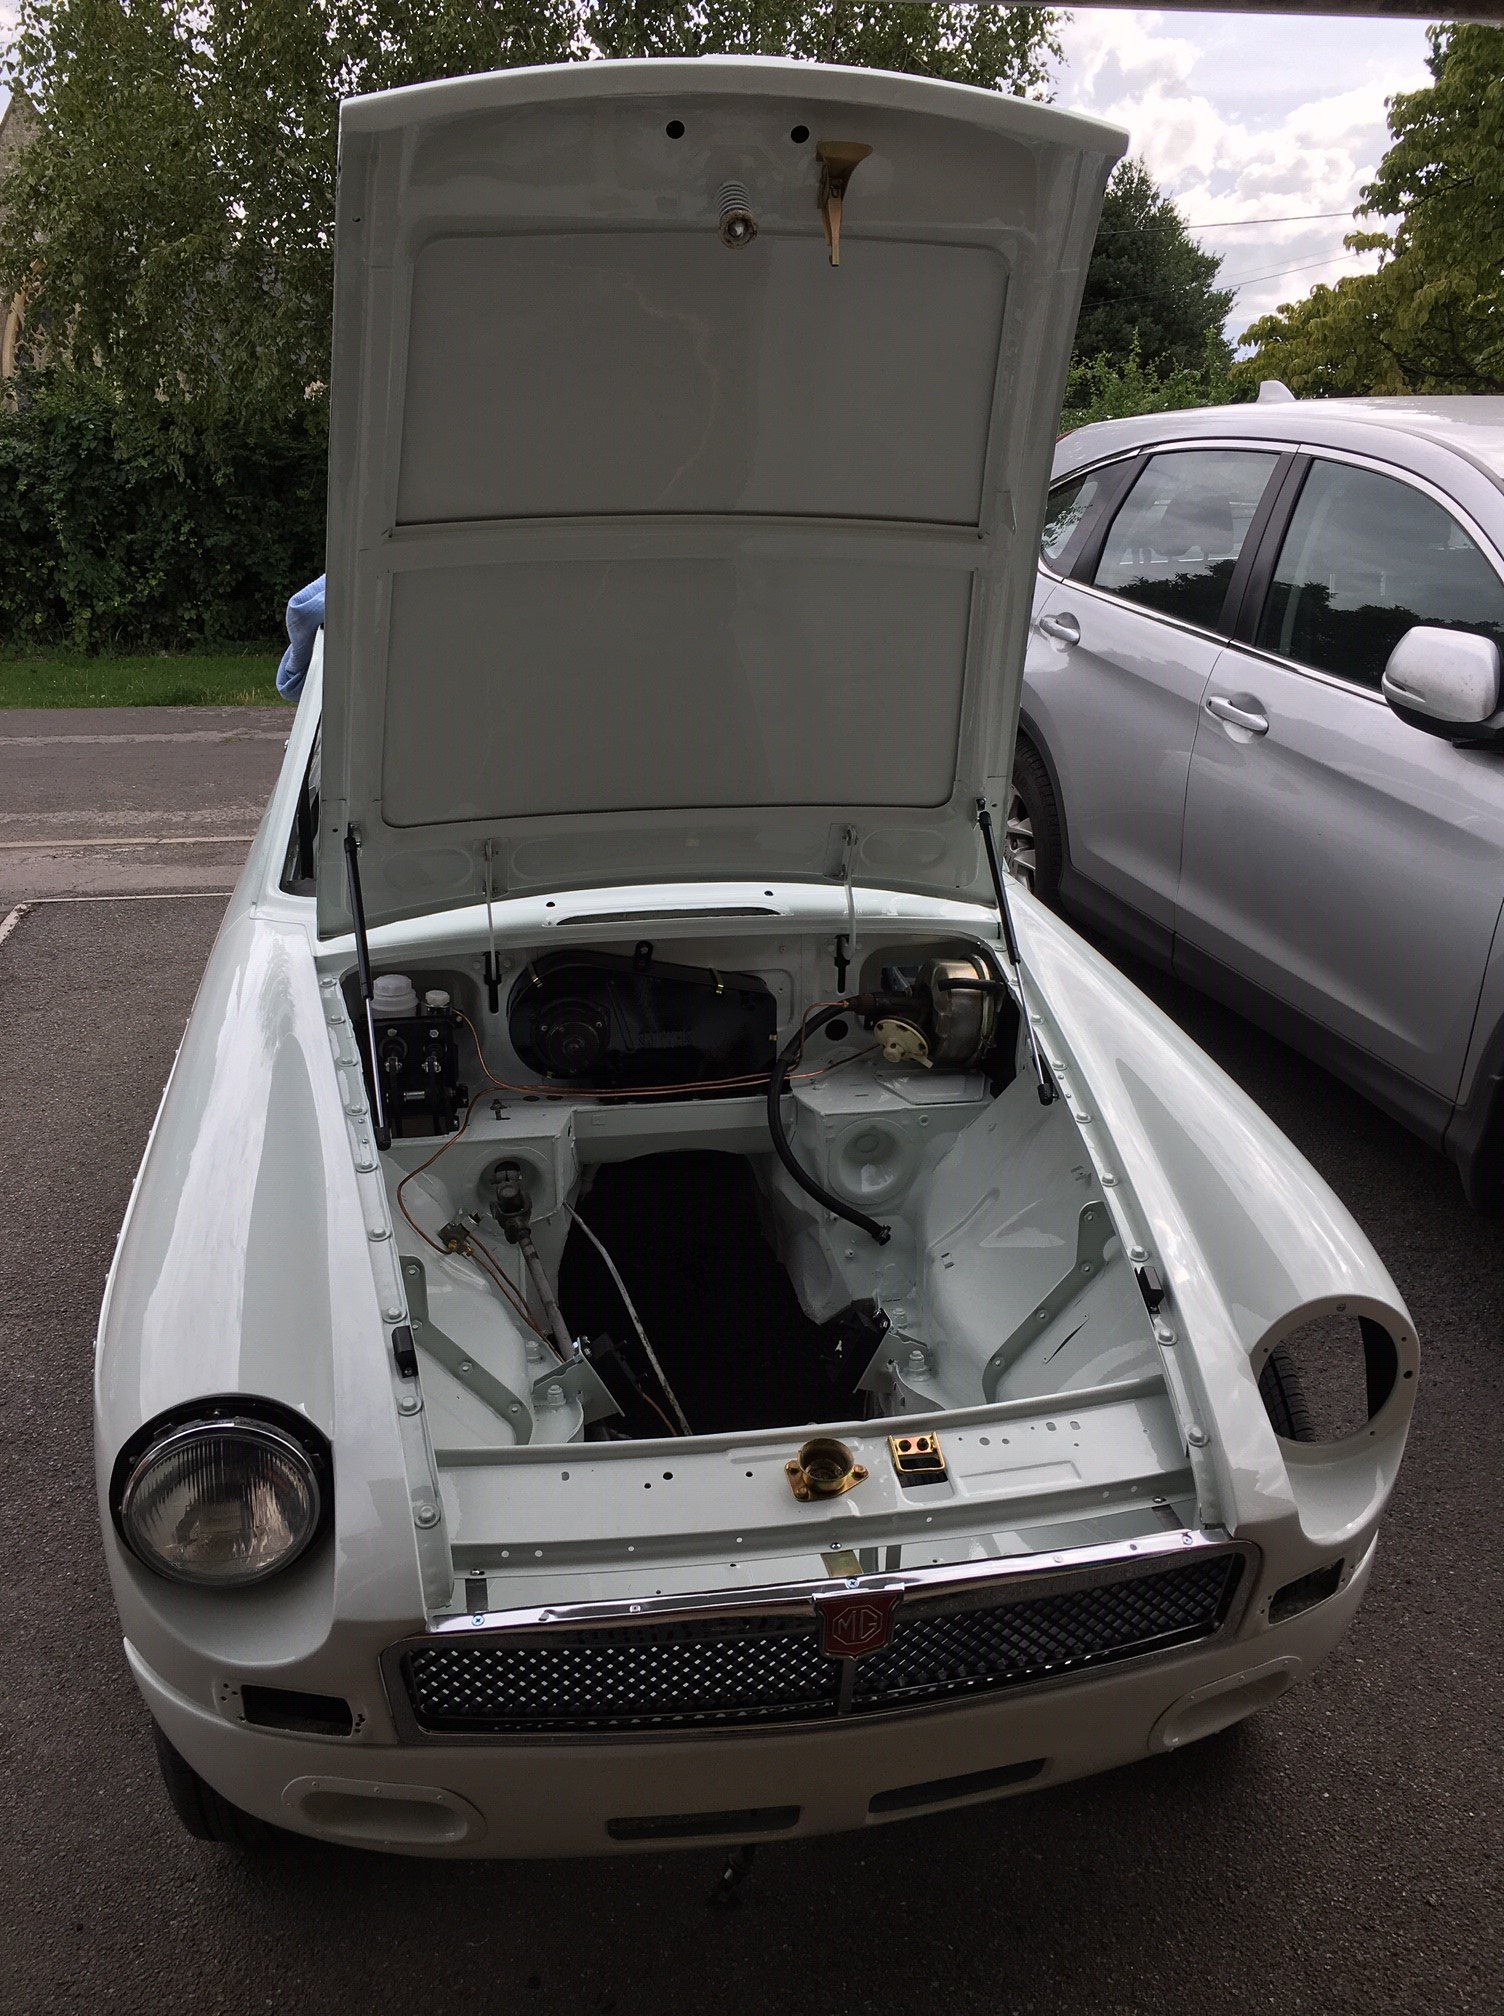
Back to the MG, I had recently managed to obtain a part on the bonnet gas strut that I had mullered on installation, so that’s now working and here is a photo showing the bonnet proudly erect on its struts. All very nice, but during fitting, the hinges took a bit of stick with one gas strut agressively pushing up one side and so now the bonnet needs a press at the top edge when lowered so that is something to be sorted one day…(not a priority!)
The gas struts raise the bonnet to a much higher angle than the saggy original single strut
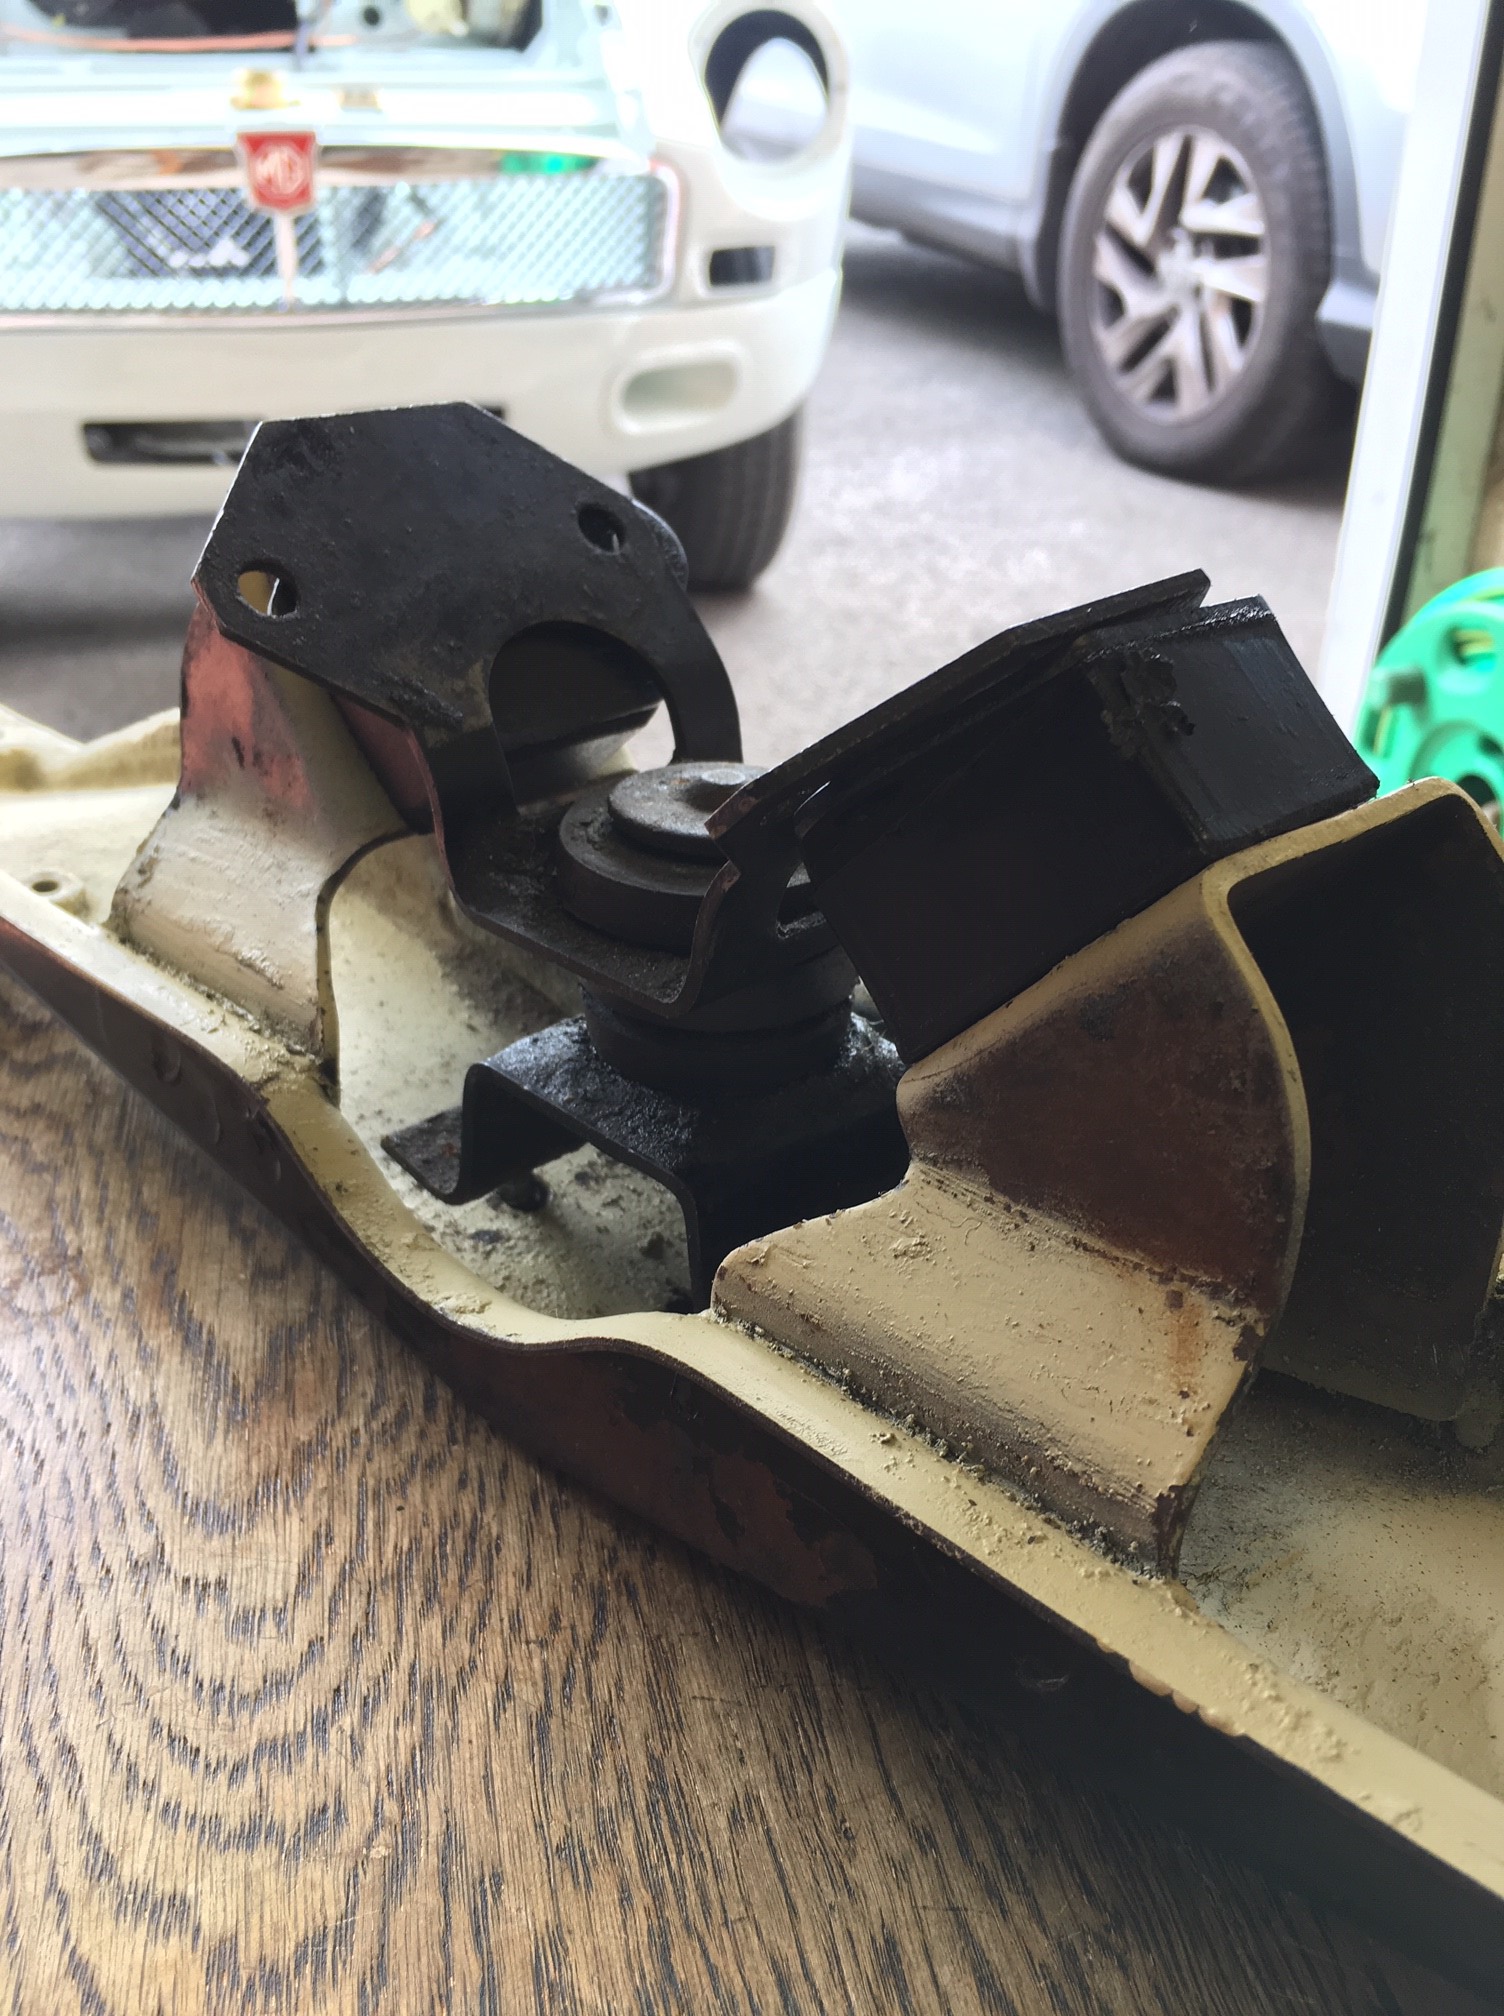
I didn’t have long on Saturday to work on the MG so I had to be selective about what I tackled. As usual, a quick garage tidy is always a good start and I managed to reorganise things to give a bit more room. Then I focussed on what parts I would need to have organised to tackle the engine and gearbox installation. Chief among these is the cross-member and its associated mountings. As I did not take the engine and gearbox out, this involved a bit of guess work in sorting through the bag of nuts and bolts I was given after it was taken out. It actually didn’t take too long to figure it all out, althought it is quite a complex arrangement and I think will be very fiddly to install. See photo below of the mocked up cross-member. Its still in primer as I haven’t finished refurbishing it yet.
The dreaded cross member – how easy will it be to fit this to the gearbox?
Latest theory from having taken some advice, it to install the gearbox first, then the engine, having trial mated them together first. This is because the combined unit is very long and its challenging to get all the angles to work to fit it in. So I am now focussed on getting this installation done (with a little help from my friends of course) as soon as I can. This won’t be that soon as my 25th Wedding Anniversary is coming up and a holiday to Crete, but after that I am going to focus on this and push on with the job. Wish me well, this next bit could be a challenge!
Received notification from Coln Engineering in Gloucester that they have finished the refurbishment of the carburetters. The price has gone up slightly because the throttle spindles were knackered and they had to replace some missing linkage parts. So overall I think a good choice to get them done, as they should now see out the life of the car without further work. The carbs will be shipped over the next couple of days, checked in by the Goods Inwards Department (me), stacked in the parts bins by the Warehouse Supervisor (me) and their fitment scheduled by the Chief Planner (me). The Chief Planner (me) needs to have words with the Chief Mechanic (also me) about progress on the MG which has slipped recently due to ‘prior engagements’, including a planned 140 mile walk for the charity Open Doors in July. I am assured that the Chief Mechanic will focus on the backlog of jobs on the MG once he has completed his walk, had his 25th Wedding Anniversary Party in August and his holiday to Crete shortly afterwards.
From the sublime to the ridiculous, yesterday lunchtime, looking for 20 mins relief from work, I trial fitted the old number plate onto the back of the car. I am interested to see how it will look without the bumpers and I have yet to consider how to light the back plate (in accordance with the law) without the bumper where the number plate lights are usually mounted. I expect someone like Car Builder Solutions will have a universal lamp I can use. Anyway, here in all its glory is the numberplate in situ. I quite like the idea of using some old parts on the car, but not sure I am going to keep this as its a bit ratty. Anyway, one less item on the shelf and back on the car which I count as progress!
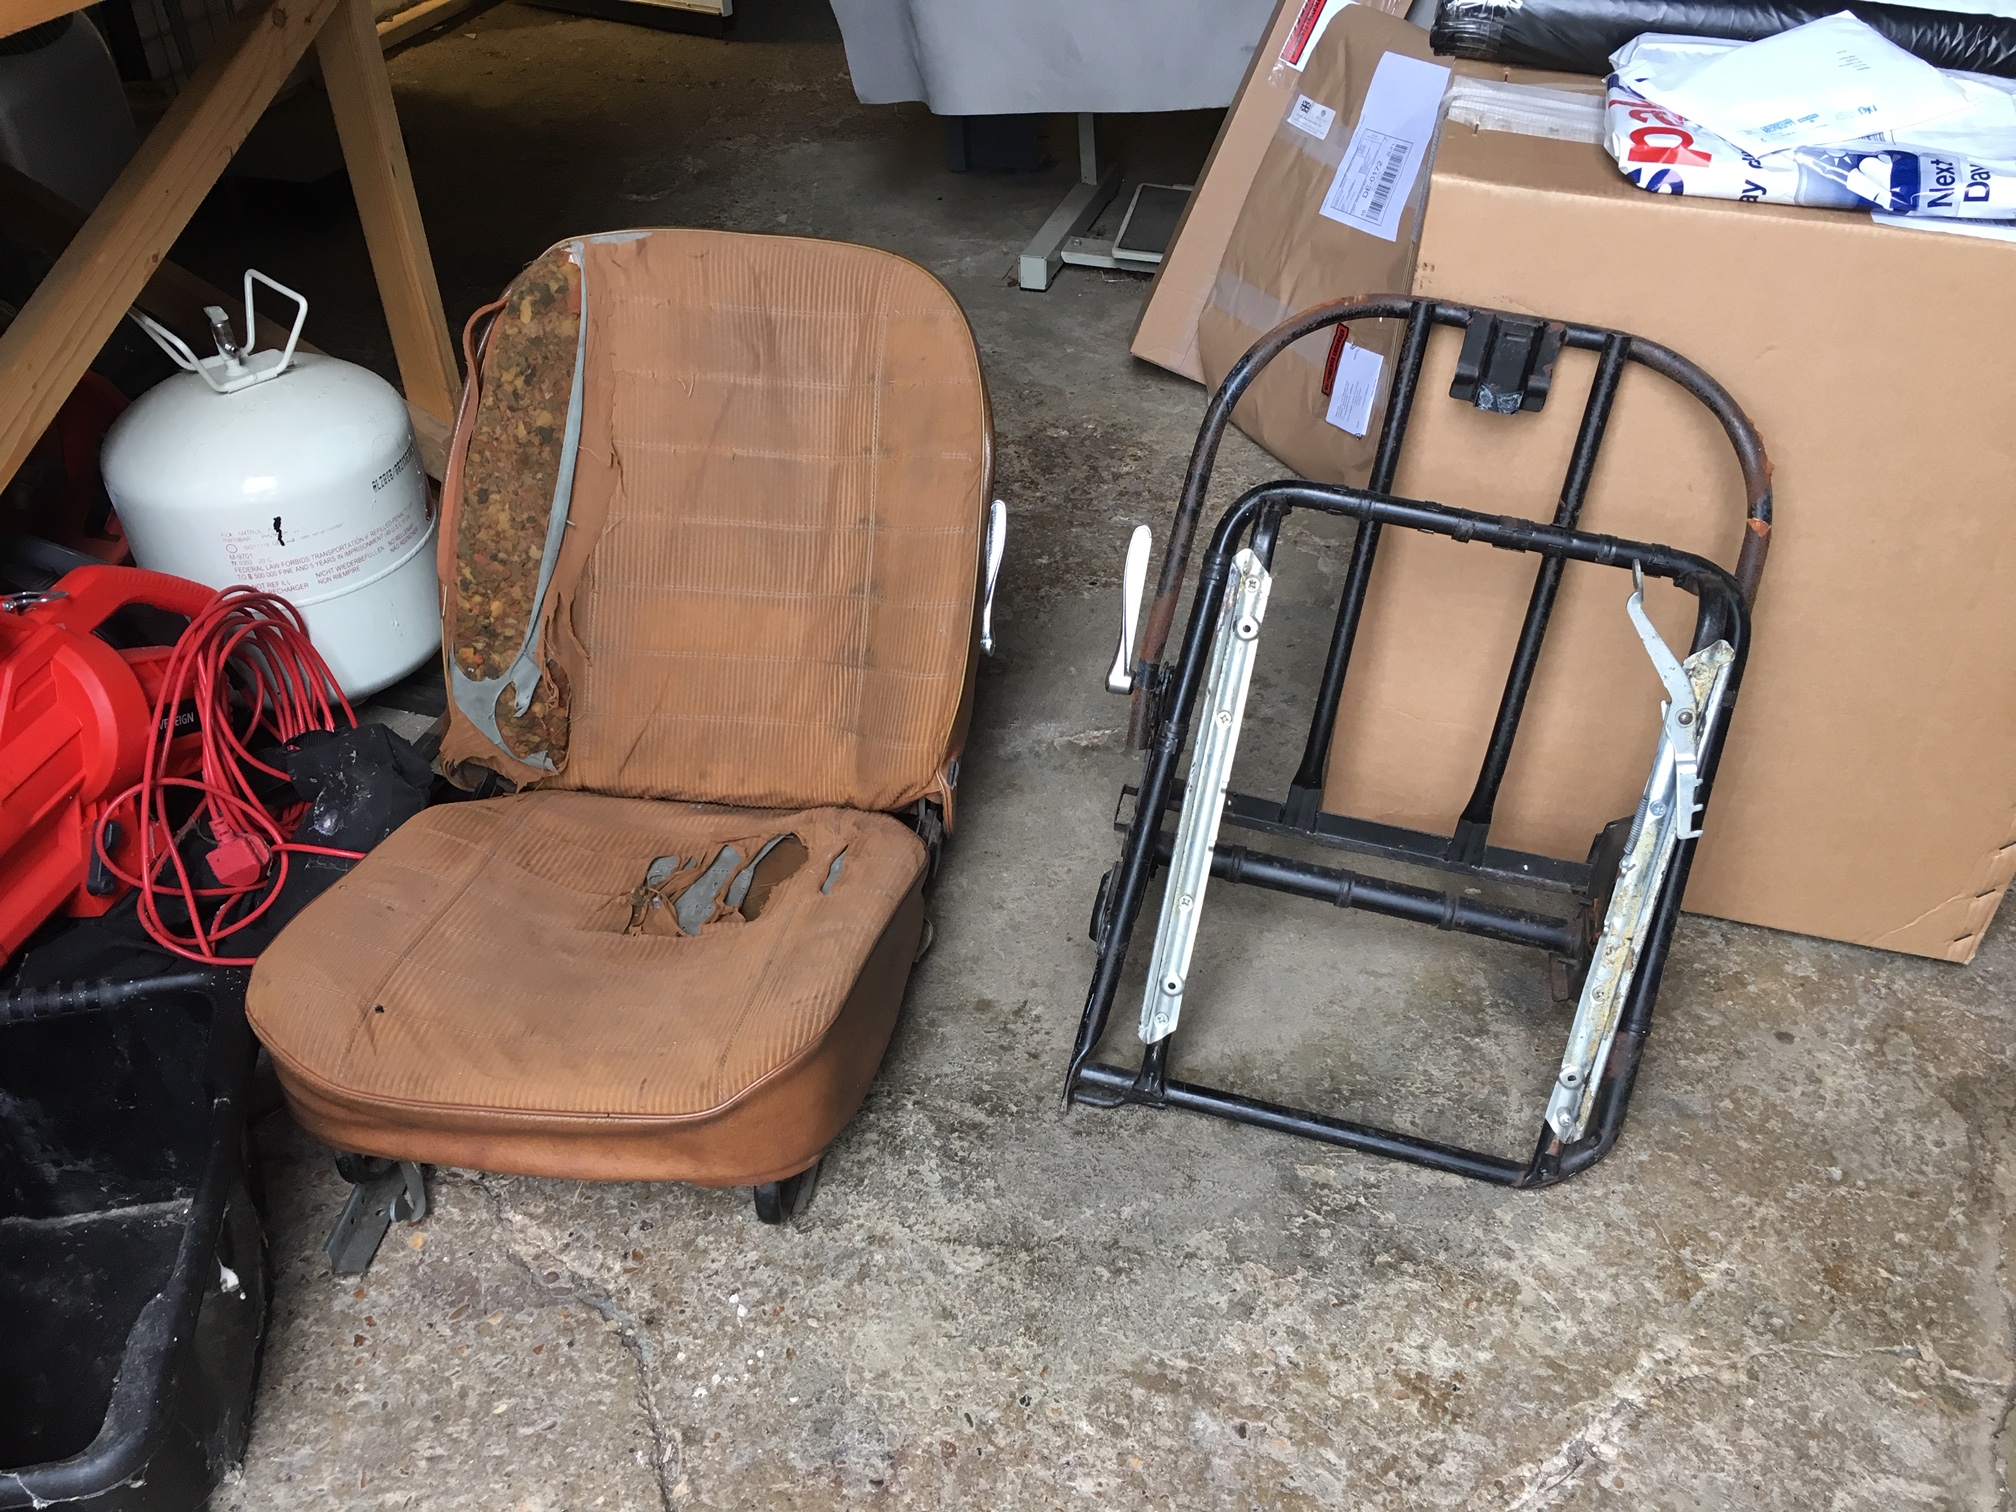
And finally, today en-route to Cambridge for work, I dropped the old seats at Mirror Trim in Toddington. I had placed the order for the seats at the MG & Triumph Spares Day earlier in the year and arranged for them to done through the summer. They should be ready around September and will either go into storage, or straight into the car depending on progress. Mirror Trim are also making up a set of carpets, so that will be a substantial part of the interior sorted, although the headlining remains a maze of choices from which I have not yet found the exit. Mirror Trim are one of those lovely cottage industries working literally out of an old oak framed barn from where they churn out high quality product. What a great way to make a living I’m sure. Here is a last look at the seats before their transformation.
Had a couple of hours to spend on the MG, but the weather wasn’t playing ball with steady rain. I limited myself to an inside job, although I did push the MG halfway out of the garage so I could move around a little bit easier. Decided to install a front headlight as I had all the parts having recently purchased nice new rubber seals from Moss. The rubber seal is quite a robust piece which sits on the headlight plate (remember that the headlight plates are new, having been installed as part of the respray to address the serious front wing corrosion in this area). When I got the car, the lamp bowls were held in place with big screws, but I didn’t think that British Leyland intended it to be this way so I had previously bought some stubby bolts which I figured could be manouvred to fit. I had already found out on another occasion that longer bolts could not be fitted, so shorter ones had to be obtained.
A gorgeous front end, but the bevel doesnt want to go on
First task was to make holes in the rubber seal for the bolts since as bought they just have markings where the bolts go. Tricky job, but the dremmel made a reasonable job and then a craft knife, carefully wielded to avoid a nasty cut eased them open. With the seal held in place with two lugs, I held the lamp bowl up to the seal and worked the bolts through the holes and then with the other hand reached around under the wheel arch to fit the tiny nut on the end of the little bolt. If anything, the bolts were a bit on the short side, but once tightened up, there was plenty of thread on which to bite as the rubber does compress a bit. A fiddly job. Final task to install the lamp is the clip the chrome bevel onto the bowl and push it home. This didn’t go well unfortunately as the bevel declined all requests to hold tight. I wonder if I have installed something wrong? I am going to have a look at the other lamp and see if I can better understand how the bevel clips on. A quick search on YouTube had some smug restorer clipping it in place with a short tap. Mmm, not how it turned out for me. Anyway, something to overcome along the way, and progress of a sort (maybe too tightly fitted?). Another challenge identified was in the fixing of the combined indicator / side lamp. The fixing for the new unit from Moss has different mounting points to the existing unit so while one side fits nicely, the other fixing misses the aperature and to all intends and purposes needs to be fixed to fresh air. Currently reviewing options on that one, but I am sure I can figure something out and learn some more. All comments welcome!
A positive post because today I managed to install the front brakes lines. I have been dreading this job, but actually it went okay. There were a couple of challenges, but that’s all part of the learning curve. Anyway, never mind that, look at the shiny braided hoses – phwoar!
Lovely braided hoses
Okay so it didn’t go all that smoothly, but as always, staying calm and thinking saves the day. First challenge was working from the flexible hoses fixed to the caliper. Removing the hoses was a bit tough and I had to wire brush all the suspension which was still filthy with paint-booth muck so that took a while. Once I have built the car, I will go back and refurbish the suspension, including refreshing the paint, but I want to be up and rolling by that stage. When putting it back I forgot the nut so got in a bit of a pickle – one of the those situations where it didn’t feel right, so it couldn’t be right . After I stepped back to think, I discovered the forgotten nut and then it went back nicely. I fitted the flexible hoses and the new copper pipes and then worked my way into the engine bay, even getting some help from Helen who had to hold a pipe under the bonnet while I accessed the master cylinder from the inside of the car (through the firewall). Feeling smug, I finished up under the bonnet with the remaining brakes and stepped back to admire my work. At this point I realised that having mis-installed one pipe I effectively had created the world’s first MGB with only front brakes. Cue much concerned consultation of the manual and internet searching before I realised my mistake. I had missed the second servo brake pipe, but it was a relatively easy fix to re-pipe what I had done and correct my mistake.
So it was all sorted out in the end. I still have to install the pipes under the car to the rear, but I am now much more confident about this work.
As I still had some time left in the day, I decided to take on a simple job, but one which would remove some more clutter from my shelves. Installing the rear quarter windows was relatively simple but first I cleaned them up using some kitchen spray and a ball of kitchen cooking (aluminium) foil which I had been told (by Rob) was good for refurbishing chrome and it did prove to effective. They went back in nice and simply with all the fixing intact and available. There are a lot of trims to go these windows as well as new rubbers, so they may have to come on and off, but it just felt like a useful thing to do and the car seemed to appreciate it (as mad as that sounds)
So a positive day and I was pleased with progress. It was an inspired decision to work from the calipers into the engine bay, but I am not sure who to thank – either God, or some long passed-away relative was looking down and saying ‘do it this way’. In either case, thanks!
A lovely sunny day and some free time provided the perfect opportunity to start on the brake lines install. But it wasn’t going to be that simple, eh? I had previously checked that the kit from Autotec was complete so today was just a case of choosing what to do first. Chickening out of tackling the master cylinders first, which will require some intricate bending (of the pipes, and perhaps me) I decided to start with the pipe from the servo to the four way union on the flitch plate. This required me to mount the servo which has been sat in a box since I removed it sometime last year. First I gave the servo a bit of a clean up using degreaser and some 1200 grade wet and dry sandpaper. Having made it look half respectable, I then turned it every up to work out how it mounted and once I had worked that out, spent a while trying to find a pair of nuts to fit the mounting bolts. With a bit of fiddling, the servo was reinstalled.
Now to the pipe which needed two 90 degree bends added for it to drop from the servo to run across the face of the heater. I formed the bends using my new bending pliers and I was reasonably pleased with how it turned out, this being my first attempt at bending. The copper is very malleable – I found this out as I had first to straighten the pipe from the coil in which they formed in the box.
At this point I decided to sort out the heater mounting since it would be behind the pipe and should be secure. I won’t detail all the frustrations but suffice to say that a legacy of the strip down was that I left some ruined mountings unresolved and so tried to sort these today involving a drill, a dremel and no real success. I then also mistakenly mis-installed the heater so having just finished it, had to take it out again. Fortunately, it was one of those days that was too nice to get annoyed, so I just put it down to experience.
I took care all day to protect the bodywork, including when I had to hop into the engine bay frequently to take care of the heater. I also harvested the bango fittings from the old brake pipes which I had completely forgotten about. I mounted them on the master cylinders at a 45 degree angle to make fitting the pipes easier. Hope that works out when I get to them. I had found the four way junction which fits on the flitch plate earlier, given that a clean up and checked for fit.
So a bit of a learning day, but progress overall, so that’s positive. It took a while to pack down the tools today, I must have got everything out at some point, but that’s what happens when you encounter old car problems.
Nice environment to work in!
My first attempt at pipe bending – a few more to go!