Another big gap in posting due to other life distractions. Recently I had an electrician (Phil James) booked in to do some jobs on the MG. He did a cracking job, fitting the electric fan, switches in the dash and centre console and the heating rear window. Of course we needed to fire up the MG to commission the fan and this is where things began to go wrong.
The week before Phil came I had done a few little jobs including tidying up the brake, fuel and loom lines which run under the car as well as fitting the air filters. A good job done. Annoyingly the MG then refused to start and was the same when Phil and I needed it to.
Poor Phil, he tried everything and in the process sorted out the carbs which had overfilled dashpots and the rear carb where the piston was not moving freely. So we had to admit defeat on the day.
Meanwhile my Dad had said ‘it will be something simple’ and today I got to the bottom of the issue. I tried a simple test which was to remove the fuel pipe to the front carb, stick it in a bottle, turn on the ignition and see what happened. In short nothing. So I removed the rear wheel to get a good view of the fuel pump. I confirmed the connections were all good so it was a mystery until I noticed that a rubber pipe which connects to the main fuel line under the car was going through a tight curve and looked kinked. And so it turned out to be. I adjusted the curve switched the ignition on and hey presto click, click, click and fuel at the carb. Woohoo! So problem solved and another step along the way. The MG fired up and ran smoothly. I then spent some time sorting out the wiper mechanism which I had incorrectly installed. Still work in progress, but it’s on the right lines now, just blooming fiddly work. A good day’s work.
Me looking happy and relieved that I’ve got the MG going again. Onwards and upwards!
Crikey, its been a while since my last post. What can I say, I’ve been busy.
Anyway, today was a good day. Recently I’ve been trying to resolve a misfire and due to my low level of competence, I had unsuccessfully tried to change the points in the distributor and managed to convert the misfire into a non-starting issue. So I left things alone for a few weeks while other events took precedence such as work, volunteering at Church, Gardening and walking with Helen. Of course Dad had been saying why not just fit the Electronic Distributor that I had bought originally but I had got it in my head that it was a horrendous, virtually impossible job. Then Thursday of this week, later in the evening instead of slumping in front of the TV, I popped into the garage and stared at the distributor. Then I reached for a 7/16th spanner and sort of offered it up to the bolts. It’s really fiddly, but I got some movement going and then the bolts were getting slack. I reached down to the distributor and just like that it came out. I was that surprised I just stared at it in my hands. How did that happen?
Buoyed up by this, today I slotted in the electronic distributor pretty easily and then just wondered if it would start. It did! I was really chuffed, and the misfire had gone, so success all round. I did have a bit of fun with tweaking the timing and having to adjust the carbs but before too long I had it idling nicely and cleanly revving, so this was a big step forward.
I spend the rest of my time pottering around. I fitted the twin horns, discovering as I connected them to the loom that the switch was live. That made me jump alright. With both units connected, they make a pleasing ‘honk’. I did give the heating controls a good check over and discovered that I need to buy one new one. I stripped the cables and connections off the old units ready for re-fitting. Completing the heater installation is going to be quite a project in itself I reckon. I then spent some time stripping the spare door that I recently bought in readiness for installing the glass from that door into my car. Finally, Helen and I sat out the front of the house with a cup of tea and a piece of cake in the sunshine. I had the usual couple of nice chats with passing neighbours and the postie who all admired the MG which was looking very bright in the sun.
Actually it was yesterday. Another sunny February day and it was time to fill up the brake system for the first time since I had replaced all the brake lines and the entire front brake assembly, disks, pads and callipers. I had a Gunson kit to help and my friend John was on hand to direct me from a suitable distance on the driveway. The Gunson kit uses pressure from the spare tyre via a rubber tube which goes into a bottle filled with brake fluid with an outlet which fits to the master cylinder. Had to inflate the spare first, which was flat obviously. We also jacked up the rear, removed the rear wheels and verified that the bleed nipples were okay. With the kit connected up, the fluid started to go down as the brake pipes were filled. I was watching at the back of the car, and the level was going down but no fluid. Then we spotted the rapidly growing pool under the engine bay. We had a leak at the four-way junction with one of the joints leaking fairly well. There followed some rapid reaction work with me in charge of sluicing the spilt fluid before the nice new paint melted while John disconnected the four way junction for inspection. I should mention that we did first just try nipping it up but to no avail.
The four way junction nor the line had no catastrophic issues, but John’s keen eye had spotted a little gunk in the fitting and on the threads. So we conducted a clean with some WD40 and a rag, blowing it out with an aerosol air canister. After some careful reassembly and re-tightening of the four lines to the junction, we recommenced filling operations. No leaks this time. For each brake in turn, we connected a length of plastic tubing to the bleed nipple and opened it up. I watched the flow and when the bubbles had cleared, I nipped up the bleed nipple. So far so good.
Moving to the front of the car, we again jacked it up and removed the wheels. The n/s side went smoothly enough, all new components, so it was a dream really. On the o/s, a little fluid was weeping from the connector between flexible and hard pipes but this was nipped up promptly enough. A prod of the brakes confirmed we did indeed have a brake pedal. As it was now getting on in the day, we decided to call a halt there. Further testing has identified that it is soft on the first push, then firm, which I think means there is still some air in the system. A quick browse around the internet suggests that the pipes into and out of the servo need to be bled and possibly also the junction connection at the rear which splits the fluid to left and right. This will be sorted out soon. However, all in all, excellent progress and a milestone reached. The car now starts and stops!
So to today, Sunday, and I was on my own, so a little pottering was in order. First job was to investigate the misfire which has been plaguing the MG lately when running it up. The carbs are not in tune, I have a plan in mind for the that, but it has definitely been running worse and worse. Taking a look around the engine bay, I discovered that the vacuum advance pipe was looking very sad. Being rather on the long side, it had drooped onto the exhaust manifold and basically melted. So I snipped off the mangled bit and fortunately there was plenty of length to make a nice route to the inlet manifold. Next I investigated the distributer, and as a non-expert, the one job I could do myself was to swap the distributer cap which on inspection was a bit rough looking with the contacts worn. So I popped in the new one which came with the electronic distributer and this saw an immediate improvement. I was tempted to just pop the new distributer in but as this is quite is quite fiddly, I put it off for when I have a longer go and have taken some advice. Instead, I did a couple more jobs on the dash. First, I fitted the rev counter properly. I had lost one of the knurled wheels that fit to the studs and hold the two brackets. Miraculously, I found it on the driveway yesterday! That saved a £5 order to a specialist (apologies to the parts market, I need plenty more bits honest!). Then I moved to the n/s to fix the dash properly. Having done the o/s earlier in the week, I knew how this went and it was straightforward to fit this. With the centre nut also fastened up tight, the dash is now looking right, albeit I still have a few switches and the vents to install. As I had to lie on my back in the footwell to do this, and with a mind to future required jobs, I got out the new carpet set and lobbed the footwell carpets in and the boot carpet while I was at it. I am not quite ready to commit to carpeting the MG, but it was good to see the set and acquaint myself with the different parts.
The dash now correctly fitted
Melted vacuum pipe
I have now removed the legendary ‘no fluids’ tape’
I took back a day that work owed me today and had a whole day on the MG outside in the warm February sunshine (yes, really!). Here is a quick synopsis of the jobs I completed.
Fitted new bolts to the n/s brake caliper replacing the ones that got mangled when removing the old calipers. Fitted the tab washer while I was there
Fitted interior light to the centre console ready for wiring up.
Scavenged the heated rear window warning light from the old loom and old centre console
Connected up the speedometer cable to the back of the gauge. To do this I dropped the dash off its single bolt to get access to the back of the gauges
Fixed the ignition switch to the steering column. No more fishing around in the footwell for the ignition switch.
Fixed the o/s corner of the dash which enabled me to hoist the dash up to its correct alignment and therefore to be able to slip a temporary bolt across to mount the steering column to the dash for the first time is a couple of years! To do this I lay on my back with my head in the footwell and my feet sticking up into the boot. The things we do!
Fixed the o/s door light switch and discovered that the n/s looks a bit mangled (hence why Phil had not wired this before)
Removed the rear wheels, rubbed them down, sprayed them with primer then a top coat of satin black. They turned our better than the brushed hammerite on the front wheels! This now completes the set of wheels, which are now a lot tidier than they were, understanding that this is temporary cosmetic fix-up pending a more permanent selection of wheels for the project. And because Dad kept pestering about their shabby appearance
Cleared out the interior of rubbish, tools, nuts, washers and grit!
Fitted grommits to the footwell aperatures
Found the rear bumper brackets, but sadly discovered they are very rusty and one had a seized and sheared off bolt. I had considered fitting the rear bumper and had given it a once over and reckoned it would do as a temporary solution. I think now I have discovered this, I will keep it bumper free at the back as originally planned. Need to figure out how to light up the rear number plate without having the over-riders on the bumper to mount them on (I might just not bother…)
Tidied up the garage and sorted through the spares.
Being a lovely sunny day I had quite a lot of interaction with passers by with most people saying something encouraging. One older lady remarked that an old boyfriend of hers had one in the 1970s – cute! Another family walked past when I had the engine running to put the car away. As we know the engine is not in a good state of tune at the moment and I had cranked up the slow running to be too fast and was on choke, so it was revving at about 2750 rpm and popping and banging. As I glanced behind, the lady had her hands over her ears. Sorry about the sports exhaust
February already, and for those who were saying that 2021 had to be a better year than 2020, its wasn’t looking that way for the first few weeks with a guge increase in the rate of infections, hospitalisations and deaths. Having said that, across the family we are gradually having our vaccinations and what a giant leap forward that is. I had my vaccination through a curious querk of my job. I work as a Programme Manager for a company owned by Guys & St Thomas’ Hospital (GSTT for short) in London. Once GSTT had vaccinated all the clinical staff, they rolled out the jab to non-clinical, and after that to affiliated companies. I hesitated initially to go forward, as I didn’t want to be seen to be jumping the queue (being only 50 years old), but conversations with colleagues persuaded me otherwise. Their view was twofold – firstly, that the Trust had surplus batches and were not permitted to send them back or give them to anyone else, secondly, that if offered, you should accept the vaccination as part of ‘doing your bit’ towards everyone being vaccinated. One less jab for our local GP surgery to do. Anyway, a brief round trip to St Thomas’ Hospital saw me heading home with a slightly sore arm, but feeling really grateful. London roads were deserted which was a bit odd, but of course completely logical.
On the MG front, I was being barracked by a couple of friends on a Teams call on Friday who were asking why I hadn’t finished the MG yet. I replied that it hadn’t really been the weather for it. One of my friends asked “Is it snowing in your garage then?” Thanks Rob. The truth is that busy-old life just keeps getting in the way, what with the 9-5 itself, walks in the countryside, ironing, picking up the shopping, keeping on top of Church stuff like PCC meetings via Zoom, cooking and so on. However, I have made some progress with the MG, as reported here.
Gearbox loom – a leftover from fitting the loom was the part which runs to the gearbox to operate the overdrive and reversing switches. I decided on a recent dry day to jack up the MG, crawl underneath and feed the loom through. I tied a piece of string to the end of the loom so I could pull it through all the right places. Weirdly, it was quite hard to work out which switch was which and yes, you guessed it, I got them the wrong way around first time. this is where the loom is always worth listening to (stay with me) as it usually wants to ‘sit’ in the right place. If you are having to drag it around against its will, chances are you have it in the wrong place. My spacial awareness isn’t great so you can imagine that with a gearbox having a front and a back and a car having a left and a right that when I was under the car I was getting confused about what was left, what was right and which way was up! Add to that my hat kept falling off and my gloves were on and off (where did I leave them this time?) and it all took a lot longer than it would had it been a pleasant spring day with a friend at hand to help. Anyway, its in, just needs testing now.
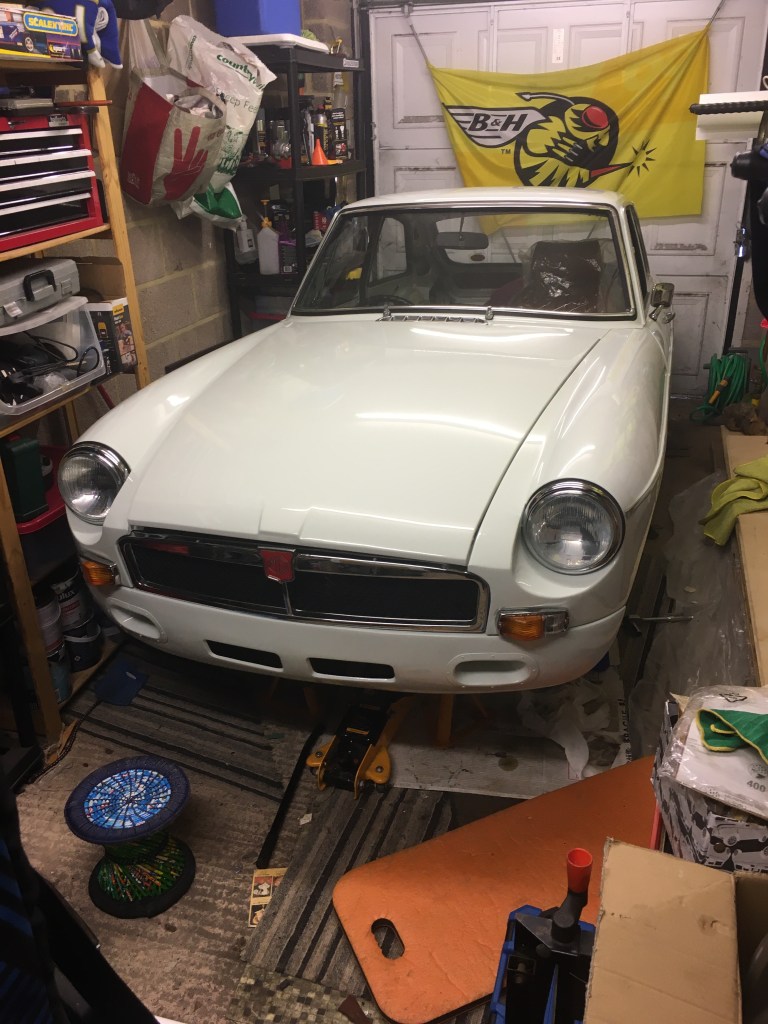
I also purchased a revotec electric fan, a conversion I’ve been planning and that required assembly inside the house before I can attempt to install it. I have Phil the electrician in mind to connect it all up, once I have the hardware installed. I am stalling on installing this just now since I need to commit to draining the coolant and I want a good day to do that outside and have to buy the new coolant ready.
I did have a second go at the n/s front brakes today. Having pushed the MG into a position in our single garage where I could get the n/s wheel off, not the usual way it is parked, I jacked it up and placed axle stands. With the wheel off, I gave the caliper nuts a good 20 second blast with freeze spray to try and budge them (I had previously failed). Unfortunately, today I was still no longer able to get them to budge. I can get a good grip with a 5/8″ socket and bar but there is just no movement back or forth with the nut and I can feel the bar flexing rather then the nut yielding. So that was a bit disappointing, but perhaps this needs an overnight dosing (I’ll give it another spray) and another attempt tomorrow (after work!). Alternatives would be to apply some heat, but I’m not sure whether that would be effective (hasn’t worked for me in the past) and there is always big Mark, although that would have to wait until after lockdown. So a bit frustrating as sorting the brakes is key to the next few stages of the rebuild, so its holding things up. I have left the car jacked up to make other attempts so at least the job is ready to be tackled.
First of all, a very Happy Christmas to everyone – I hope you’ve all had, or are continuing to have a great time. Progress on the MG took a leap forwards (actually backwards, but we will get to that) recently following a visit from Phil James, who is a specialist classic car electrician. We had been messaging back and forth for a few weeks after my initial web enquiry and finally settled on a date that worked for us both in early December. Phil came for the day and after a brief chat he just got on with labelling, tidying up, connecting and sorting out the loom with all its connections. I got on with my day job, but checked in on him from time to time, keeping the tea topped up. He made rapid progress and by the end of the day, he had got a lot more connected than I could have hoped for or achieved in the same period! I would recommend him highly.
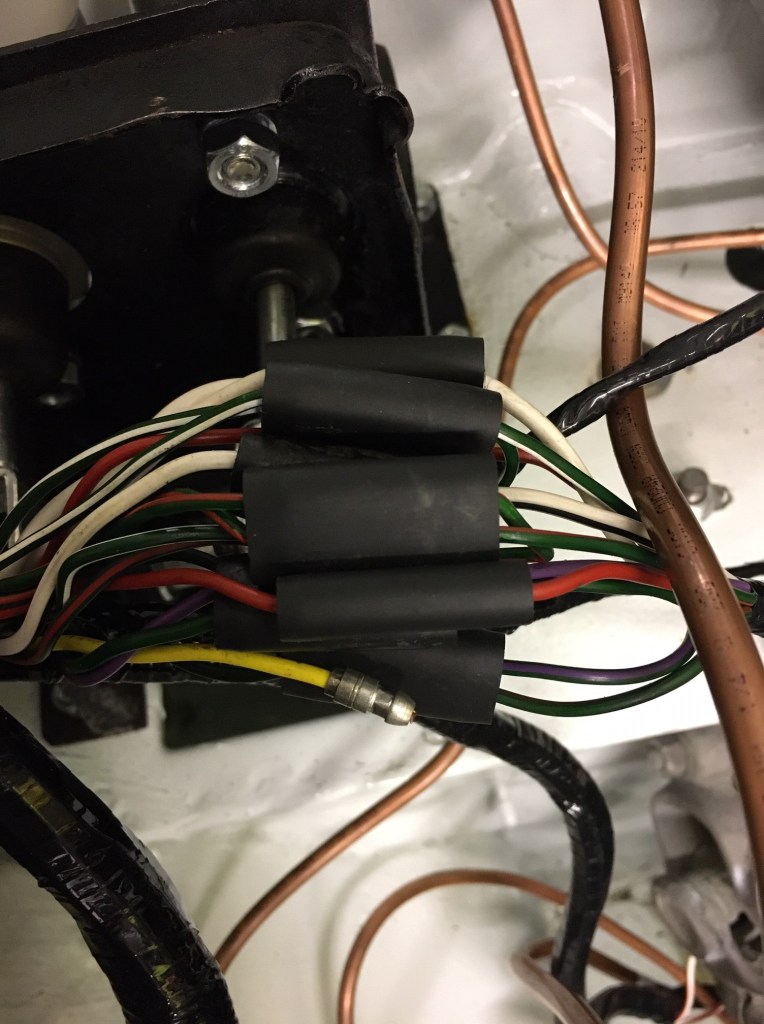
This photo doesn’t really do justice to how much more complete the electrical loom is based on the work done by Phil
So that was a good day’s work and I’ll have Phil back soon to fit some more components which I have needed to buy. Part of the idea of getting him involved was to help me work out what was needed and we certainly achieved that and I’ve been busy since on the internet ordering the missing bits. Watch this space for further updates as various components get fitted.
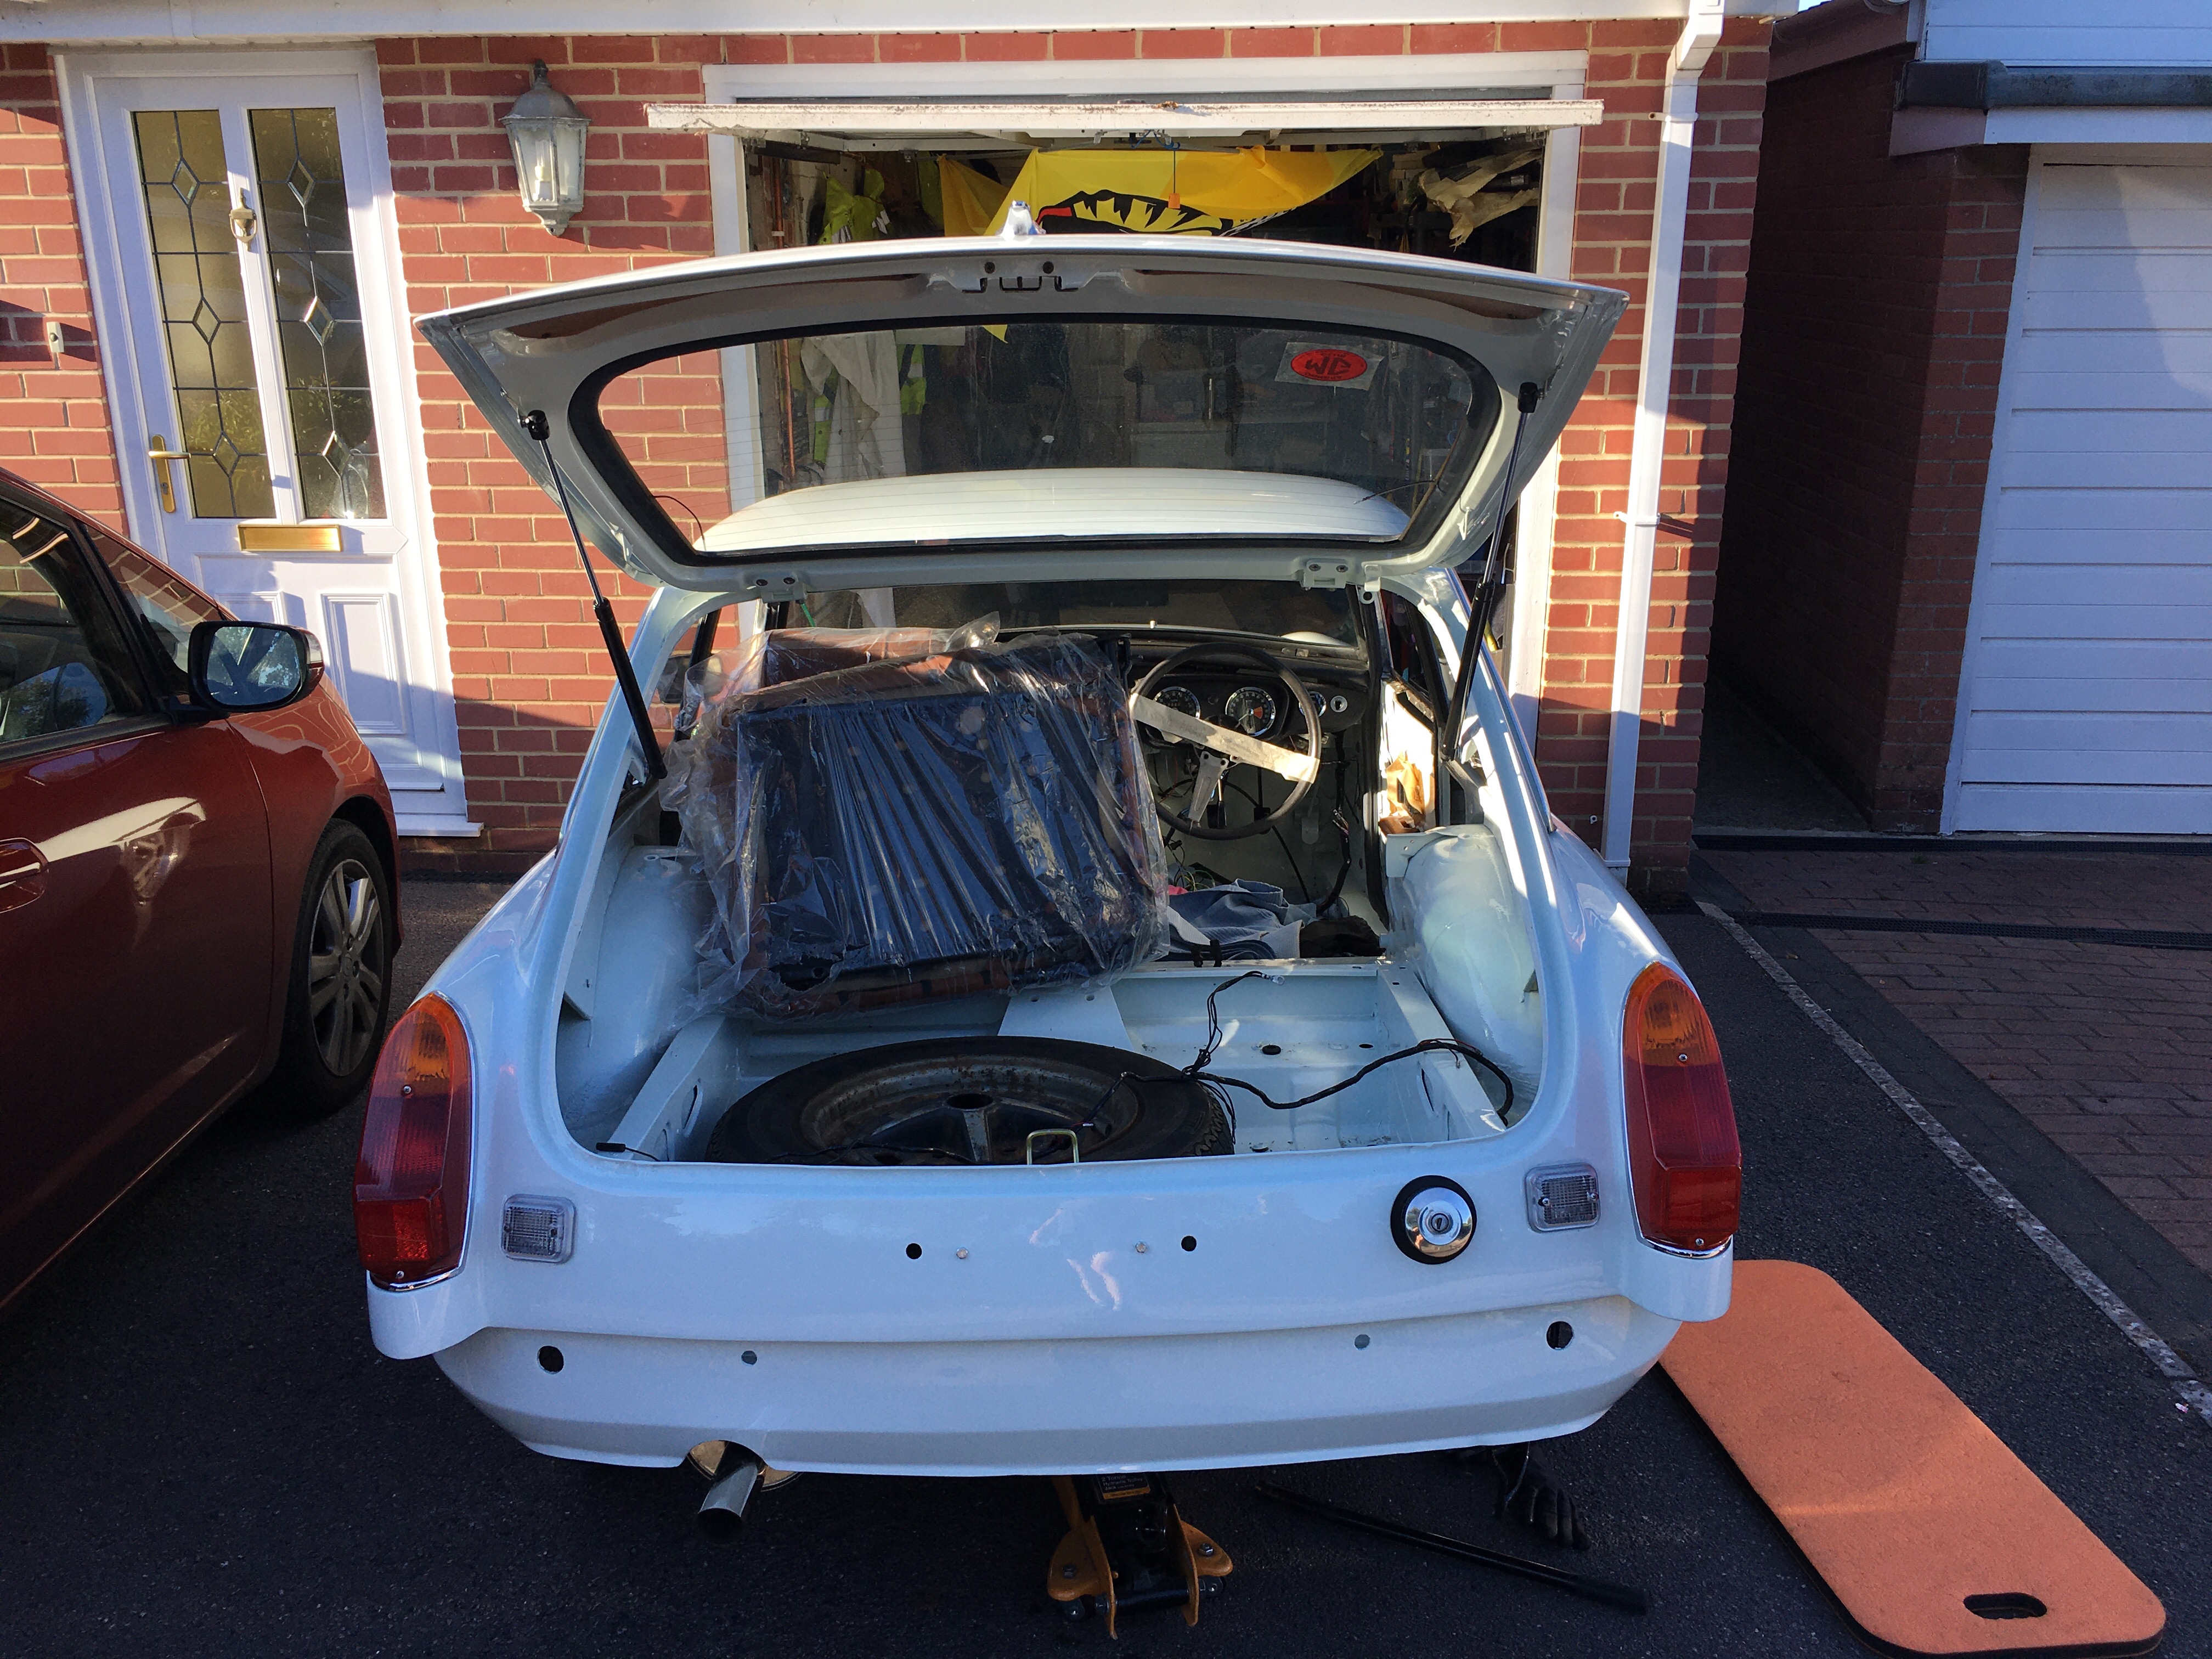
So it was with refreshed enthusiasm that I crawled into the MG through the hatch the following day (which was a Saturday) and decided that I would attempt to drive out of the garage, rather than the usual back-breaking push. I should explain, that there wasn’t room to open the door due to how it was last pushed in. Feeding myself into the driving position (the seat had been lifted out to make room for Phil), I cranked the MG over and was pleased for it to burst into life on the second turn of the key. It would have fired up first time, but I am still getting used to ‘catching it’ as it turns-over. It was a bit intimidating to select reverse for the first time, with the engine running, but I gave it a go and was greeted by a grinding noise. Ah. I gave the clutch a couple of pumps and tried again. This time, the gear selected smoothly and I was able to feel for the bite point on the clutch, raise the revs a little and ease the MG out of the garage. This was the first time the MG had moved under its own power in my ownership, and from a time perspective in approximately 8 years. Woohoo, what a moment! Before I got carried away, and remembering that I have NO BRAKES, just a handbrake, I gingerly allowed the MG to come to rest on the lip of the garage entrance and shut it off.
As I reflected on this progress, both electrical and mechanical I was enthused to order new brakes (Calipers and disks) for the MG and I’ve put sorting the brakes onto my priority list for the new year, so it can be moved around with confidence, and of course, when appropriately complete, to be driven for real.
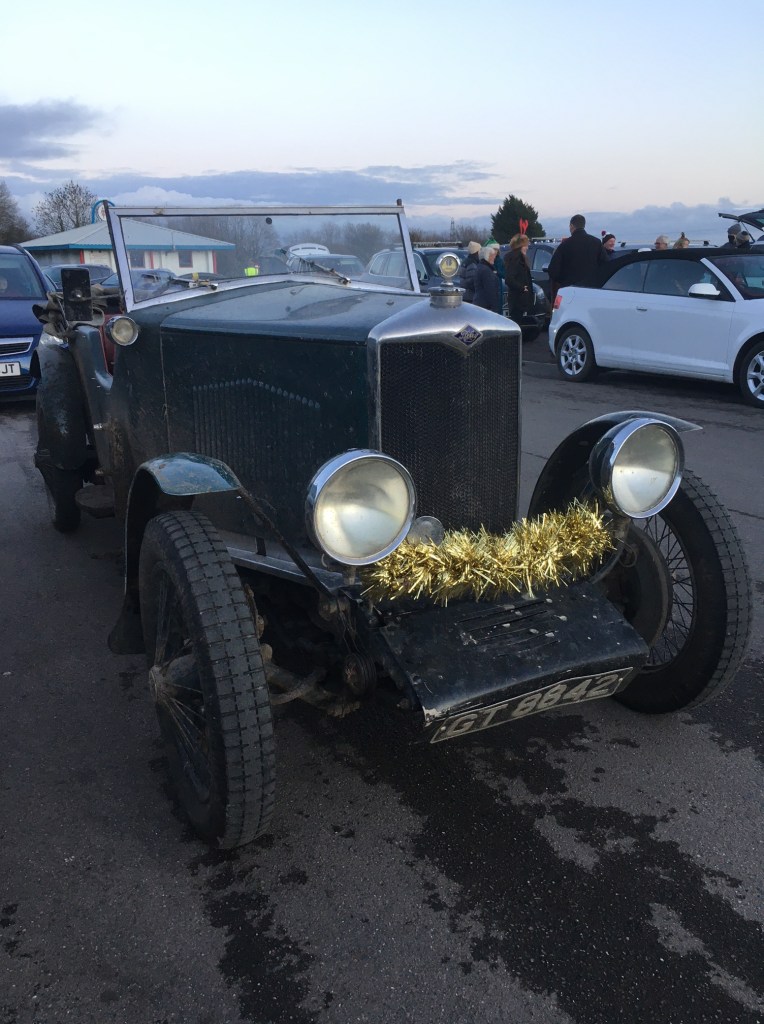
On a festive note, a couple of photos below of a nice pre-war Riley that I spied at a recent event new to me, which was Carols on Track, a drive-in Carol Concert organised by the local Churches after Castle Combe Racing Circuit generously made their paddock area available for the event. As a response to the pandemic restrictions, Churches all over have been thinking about ways to celebrate the Christmas season. Our own Church has been hosting restricted services, as well as online content, but we had no way to hold our traditional Carol Service. So we were delighted and intrigued to attend Castle Combe. The basic idea was to get parked up and then either stay in your car, or stand socially distanced outside, as the Carols and Lessons were played out over a professional PA system. I have to hand it to the organisers, who had arranged for hot drinks and hog roast stall to be available for the punters. The service was a combination of deeply emotional carols such as Silent Night to the all out riot of the 12 days of Christmas with horn blowing and lights flashing. Great fun, and it may become a permanent fixture, COVID or no COVID. Turnout was about 100 cars as a conservative estimate.
What a Christmas Cracker….
…although somewhat exposed to the elements
So, I’m feeling positive about 2021, with more work due on the MG, perhaps that elusive first drive, and us all getting on top of COVID. Best wishes to you all and God Bless
In early December I have a classic car auto electrician coming to look at the loom on the MGB and to help with its installation. He’ll carry out an assessment first, and then recommend what he is able to do. In readiness for this, I rolled the MG out onto the drive on this sunny November afternoon. Before I got on with the neccessary work, I couldn’t resist firing up the MG. She started on the second go, so the battery had held out, which is encouraging in terms of the alternator actually working. I had a bit of a fiddle with the idle speed and mixture and managed to get it idling relatively smoothly with the choke fully in engine warmed up. I am not kidding myself that the carbs are set up, but at least its running better than when initially started a few weeks ago. I am a bit addicted to the noise and couldn’t resist a couple of revs. My neighbour’s grown up son came to see what the noise was and he liked what he heard!
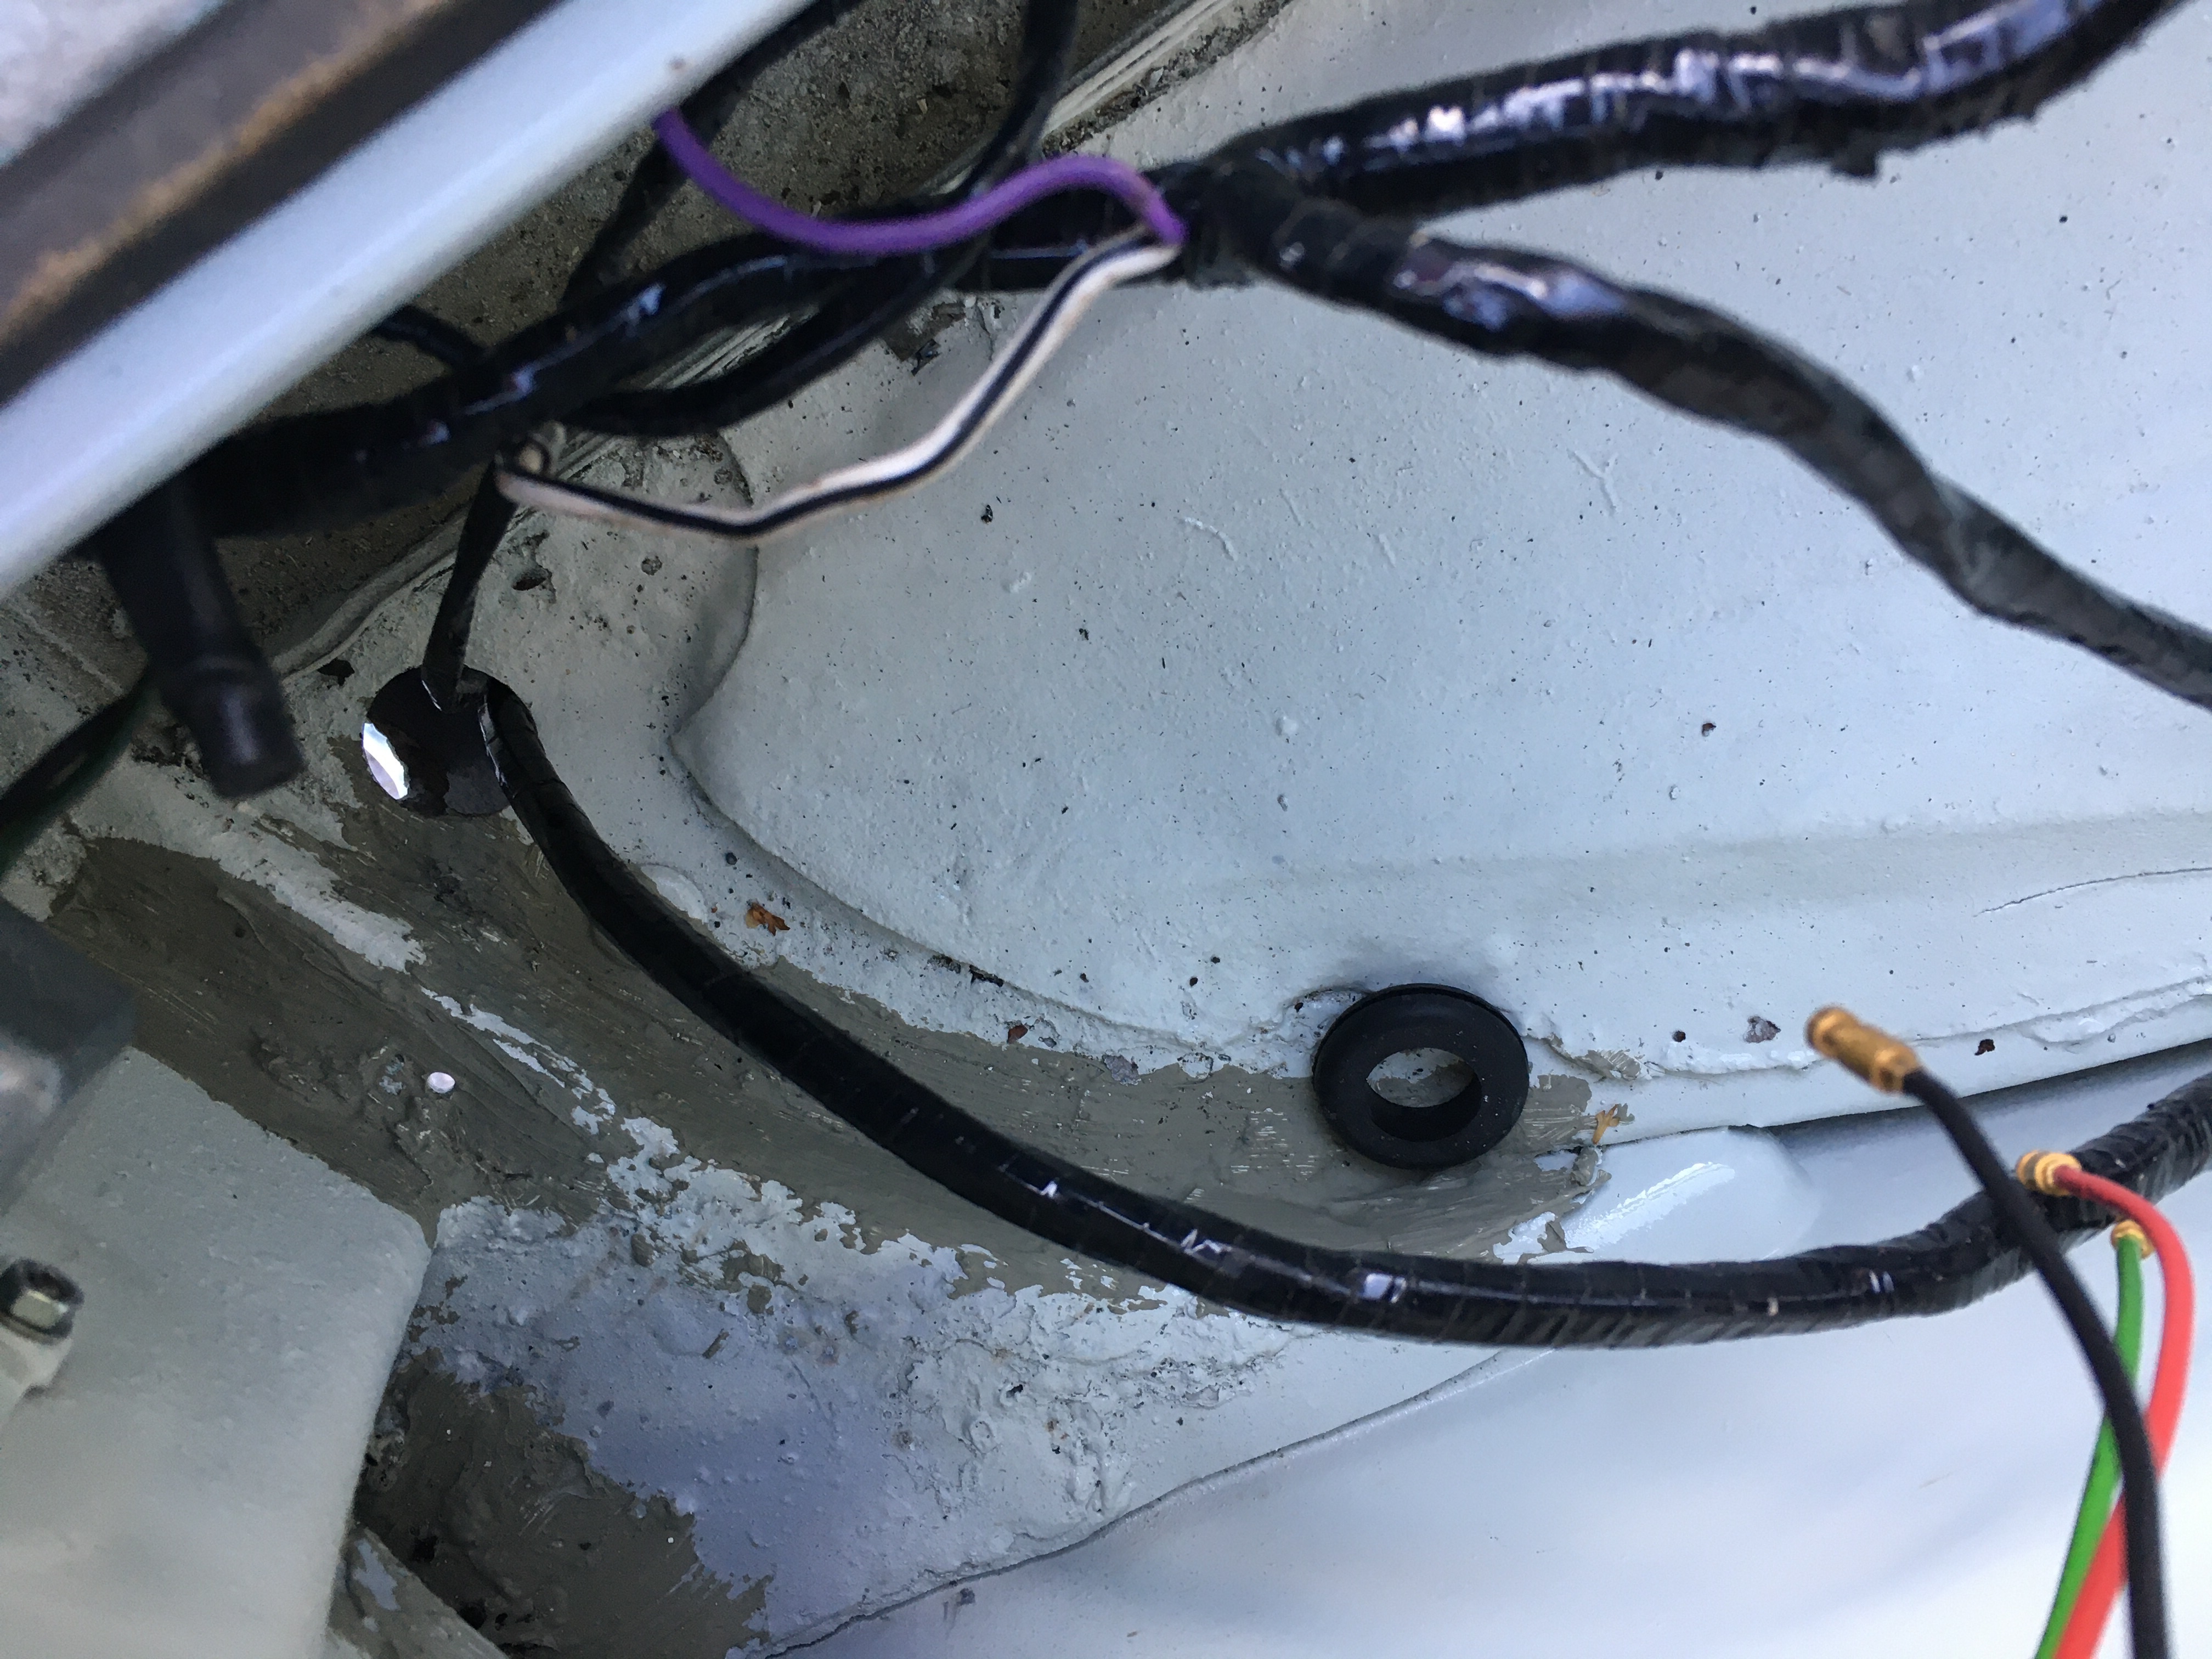
The preparation on the loom today consisted of me undoing the jerry-rigged set up I had created to get the car started. The loom was basically resting in the foot well which is clearly not right. I disconnected the ignition switch (having taken numerous photos) and various other connections including several temporary earths. I then took a good look at the loom and carefully unravelled it to lay behind the dashboard in roughly the right configuration. I then looked at where the loom enters the interior and identified the correct location of the first earth connection. Having learned that stainless steel does not have as good connectivity as mild steel, I didn’t use a fresh shiny bolt but dug out an old one from the bolt box. That led me to contemplate the wiper motor which is just under the dash on the off side (UK). The wiper motor was dangling awkwardly from the drive cable so needed to be fitted properly in its mount. First I tightened up the drive cable connection to the motor as this was only half on. I then offered the motor up to its mount, noting that the angles didn’t really work, but it was possible to persuade it in. The motor is mounted by a steel hoop, but to keep it in snug there are two rubber elements – a pad which goes against the bulkhead and a lining to the hoop. Getting these to align and stay in place as I tightened up the two bolts was tricky to say the least, but I managed it after a couple of attempts. So with the wiper motor in place I was able to fit the earth connection I had spotted earlier. Due to the exact positioning of this, effectively under the scuttle, and the bar runs below the dash, this wasn’t that easy – I had to sit on the floor with my back to the car and feed my hand through the various obstacles and then get the right angle. Hopefully, that can stay there now for the duration!
I also greased the speedo cable in anticipation of connecting this up in the near future. All the while I was listening to a radio adaption of Ian Flemming’s James Bond in Moonraker. A great afternoon.
A surprisingly sunny November morning appeared from what I had thought was a write-off rainy weekend, so it was out with the MG to swop out the old alternator with a new one from MGB Hive. When I first got the MG, the alternator was covered in white aluminium corrosion crystals. I scraped off the worst and when I fired the car up (this was 3 years ago) for the first time, there was a flurry of white as the loose crud spun out. Suffice to say I thought the alternator had seen better days and so having recently restarted the engine I decided to replace it. Also prompting me to this job was that whenever I have run the car recently, it has flattened the battery. This was either because the old alternator was not working properly, or because something wasn’t wired properly. As I was going to replace the alternator anyway, I tried this first.
The alternator is held in place with two bolts at the top, which mount onto lugs on the engine block and with a single bolt at the bottom which secures a curved slotted plate. The slotted plate allows the alternator to pivot so that the fan belt can be fitted over the pulleys and then tensioned correctly. The slotted plate then fixes to a lower lug fixed to the engine block. The lower lug is fixed with a specifically shaped bolt which I had replaced much earlier in the rebuilt when it had sheared off spitefully on removal. Before I took the old alternator off, I started the engine and measured the voltage at the battery – 12.3v.
Fitting the new alternator was pretty simple although it’s a heavy old bit of kit. I did a visual comparison before I removed the old one just in case it was to join my list of wrongly ordered parts, but it measured up alright so I committed to the job. I laid a decent blanket over the wing for protection and knelt on a tool box with a blanket on it for comfort. I used a combination of tools to remove the bolts which were 0/5″ and 9/16. This included my trusty Halfords Professional mini socket set, the Elora large socket set gifted to me by my friend John, the socket spanner set gifted to me by my brother Tris and a plain open jawed spanner. Each tool works well in its own way and I was grateful for the choice.
With the new alternator fitted and the fan belt at roughly the right tension, I fired up the car again. It fired second time and settled into a lumpy idle (carbs still not set up right – where are you Dad? ha ha). I tested the voltage at the battery and got…the same 12.3v. I was hoping for between 13-14v but I could be wrong. So maybe the issue is not solved. I should have had someone hold the revs higher and measured it again, but Helen was working in her study, so I didn’t disturb her. So we will see if the battery is flat when I try again. Hopefully next weekend we will get another weather window for further investigation. Before sitting down to do this update, I sent a web enquiry to a mobile auto electrician just to gauge their interest in giving the electrics a once over and validating what I’ve done. I think it might be worth getting a professional involved in this one…
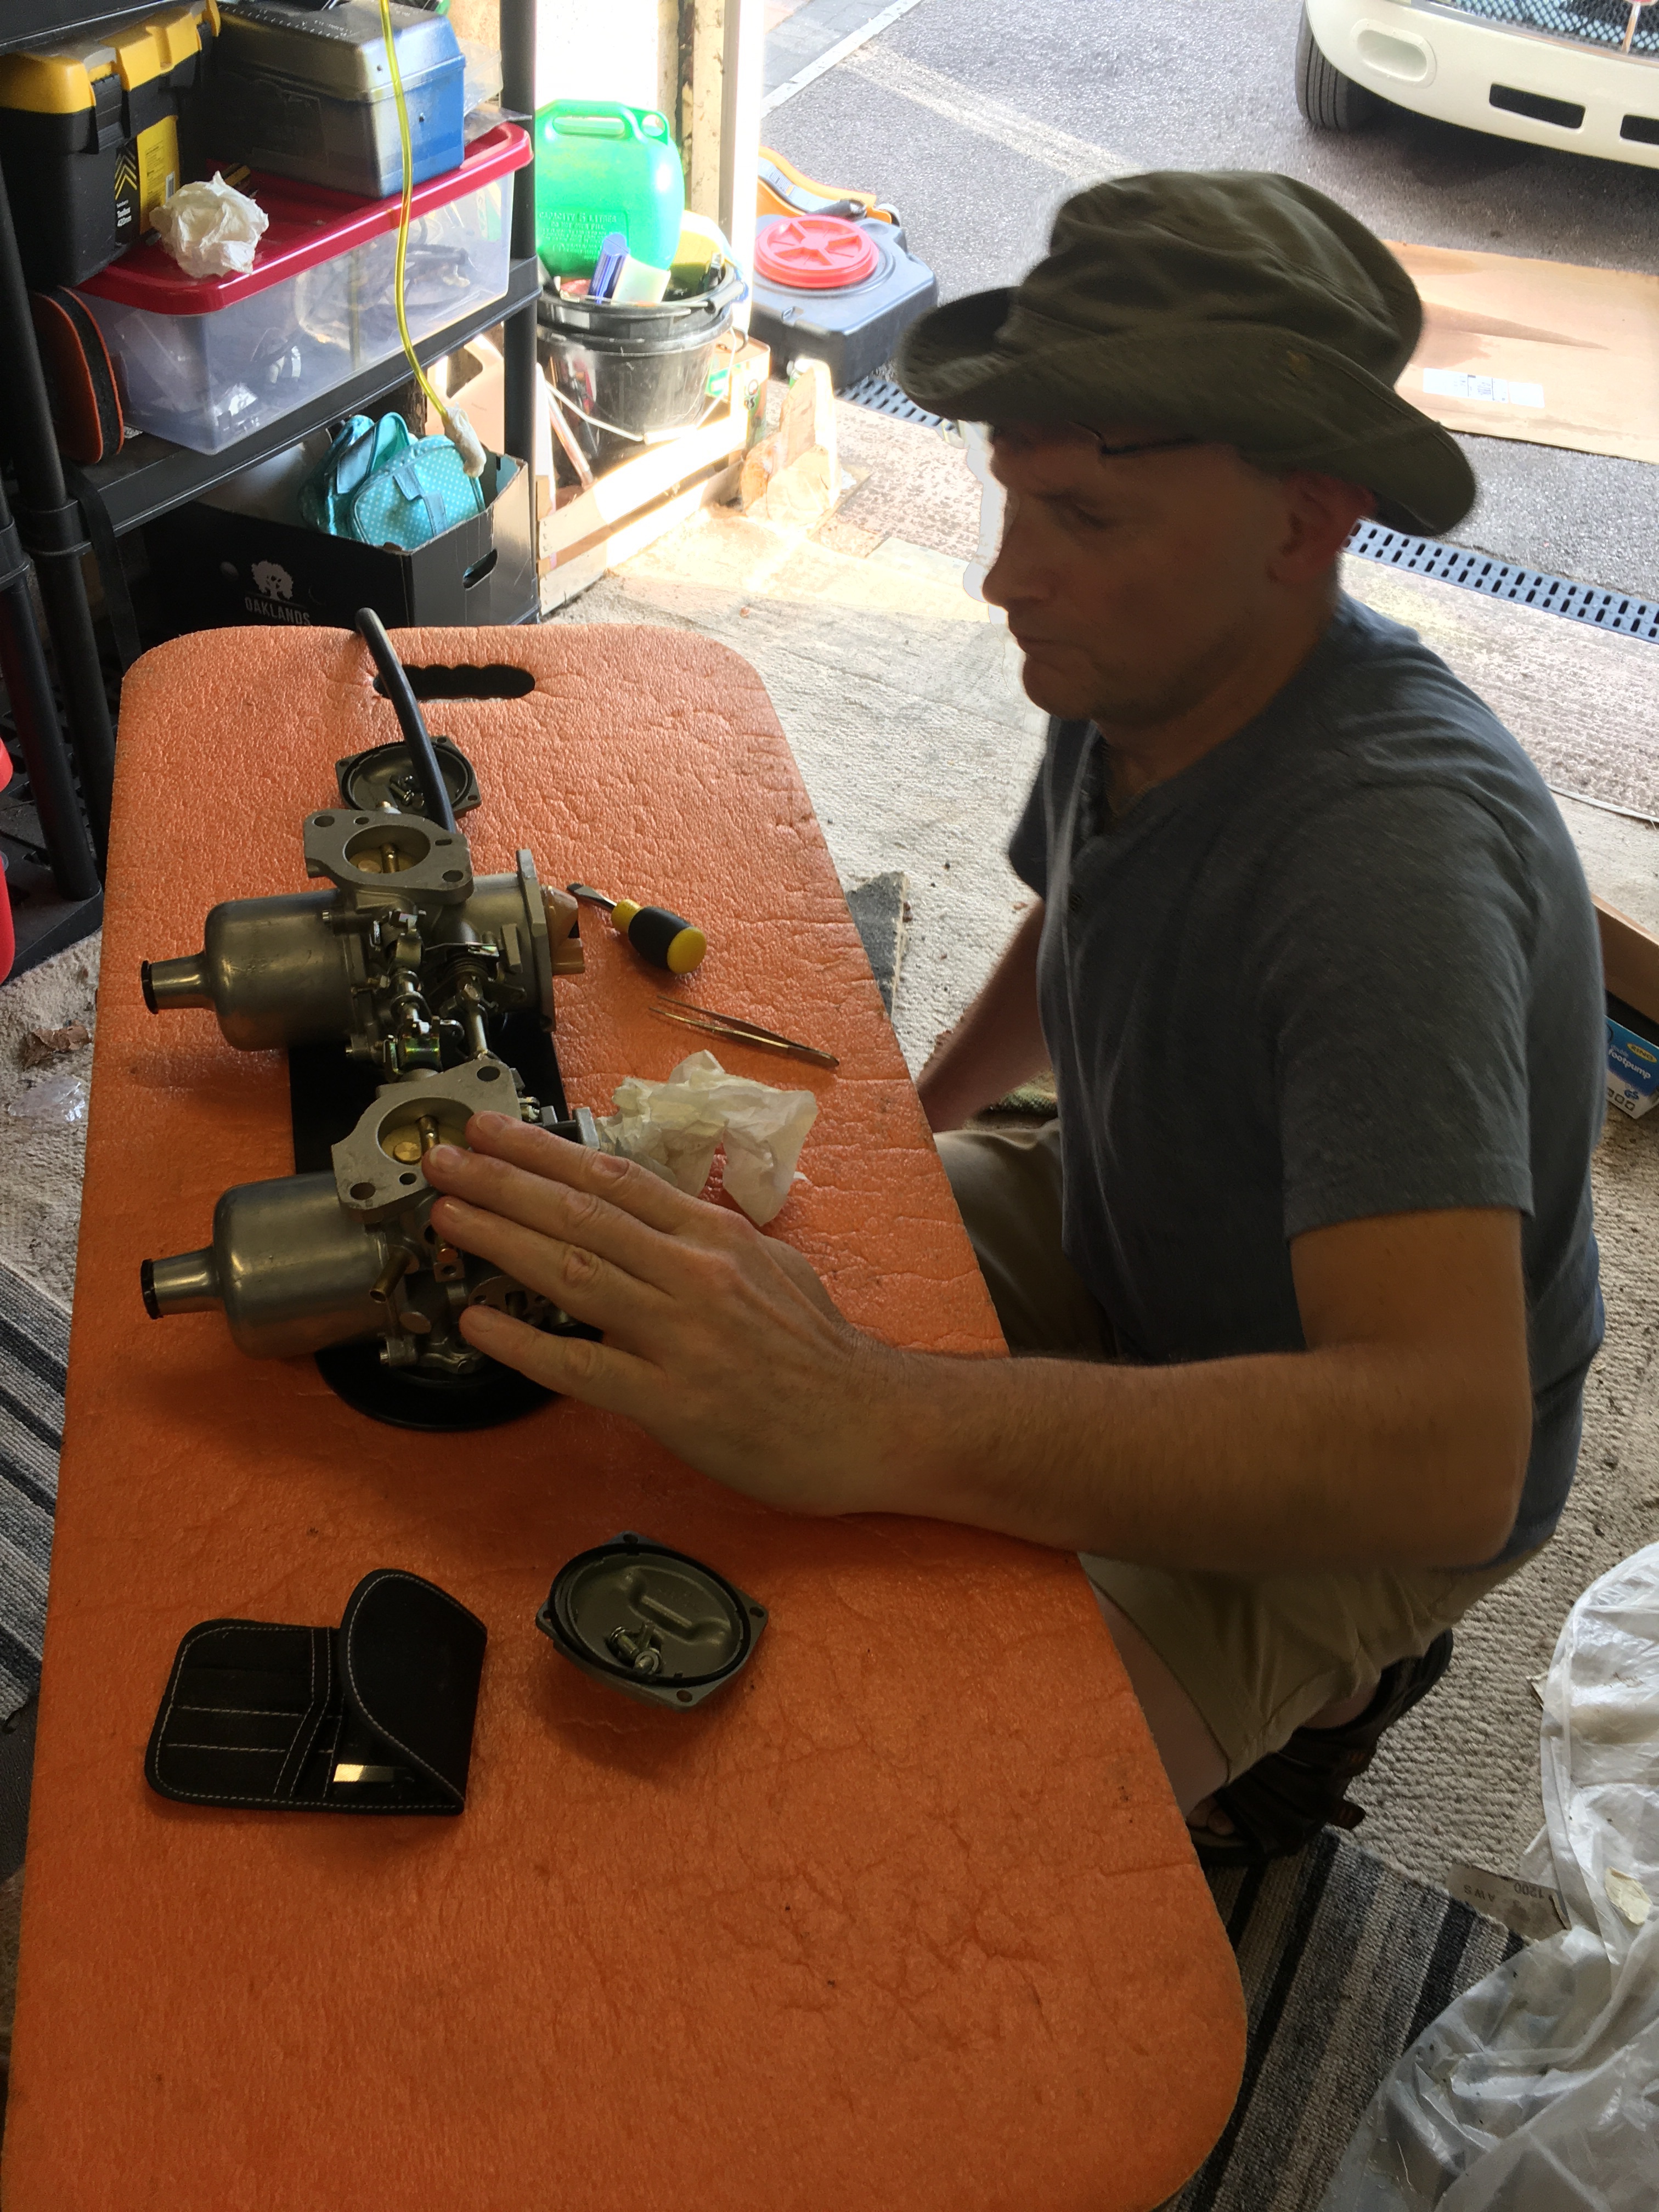
Having established at the weekend, with Matt’s help, that the carburettors were blocked, and having consulted the ‘MG helpline’, A.K.A. my Dad, I found time this evening, with the help of my friend John, to investigate the problem. The UK was in the middle of a heat wave, one in which the temperature and humidity peaked between 5pm and 6pm arond 30 degrees, which was when we started to look at the MG. So the only right thing to do, while we wheeled the MG out, was to crack open a couple of cold beers and take a leasurely look at the problem. With John on board, this was going to be a logical approach to problem solving. Having already proven fuel would flow up to the carbs, we now knew the challenge was with the carb itself.
Step 1: Use a footpump to attempt to blow air into the carb. Result: No air passing through. Conclusion: Float/Needle valve stuck
Step 2: Remove carbs. Removing the carbs in theory is easy, its just four nuts. In practice, its fiddly, because the nuts won’t come off without waggling them to the end of the studs and then getting the angle just right. Having two people on hand is a definate advantage here, unless you are an octopus. Next challenge was to keep the carbs together with the linkages intact. To do this, we had the idea to use the plate that holds the air filters as a sort of jig. That took a bit of work to get right, but without (much) swearing, the carbs rattled free of their studs and were on the work bench.
Step 3: Remove float chamber lids. These come off easily enough, although the ‘O’ ring on the front carb hopped out of its slot and showed little enthusiasm to pop back in. Using the footpump and with the float valve open we used the foot pump again to add pressure and with a nice ‘pop!’ the needle valve on the rear carb freed itself. Surely the front carb would do the same, but it wasn’t shifting, so John tickled it with a pair of fine tweezers and before long both carbs were wheezing along in harmony at each press of the pump. How satisfying.
Step 4: Reassemble and refit the carbs. Hmm. That float chamber ‘O’ ring did not want to play ball and needs to be replaced, however, we think we teased it back in place and made a seal on both float chamber lids. We then man handled and wiggled the carbs back onto their studs, tightened them up and connected the breather pipe, fuel line, throttle and choke linkages.
Step 5: Test start the engine. ‘Hang on a minute,’ said John ‘didn’t you say that the fuel pump and coil are always on when you connect the battery?’ A discussion ensued in which John advised me against firing the engine when we are not confident of how the wiring was configured. So we disconnected the ignition switch and using a multimeter, identified what the various terminals were and then attempted to connect the correct wires. As we were nearing a conclusion on this, the rain came in heavy so we abandoned the task for the day having made some actual progress, but with some work to go to achieve sustained running.
I was motivated to get outside after work today and do something useful on the MG. I have for a long time bemoaned how I routed the rear loom which turned out to foul the internal trim panels due to a temporary cognitive failure on my part. So I decided to reverse this and find a better route. Reversing the install turned out to be much simpler than I thought.
I then had to work out a better route and curiously it is remarkably unclear what this should be. After a bit of trial and error I have found a route which allows the loom to reach all the right places and also looks like a reasonable location to be clipped in place out of the way and logically. At least I hope so.
It was good to make some progress after having had a lot of (admittedly not entirely unpleasant) distractions. The only down side was a twinge in my back as the MG is getting heavier the more parts I bolt on, and my back is getting no stronger. I may revert to towing it up the drive until she’s a runner.
Confession time. I was banging on last week about having to lengthen the distributor wire, and why couldn’t it just be the right length and so on. Well I took a closer look today and actually I don’t need to lengthen any cables, I just need to connect it all up properly. That was a relief. I only had a very short time on the MG today, but I did spend some of it in finishing off connecting the front and rear loom. The rear loom connects to the main loom on a branch under the o/s near the master cylinders. I had previously connected some of the wires, but was having difficulty in getting others connected. Dad had suggested that I purchase a pair of bullet connector pliers and I used these for the first time in anger and they worked pretty well actually, although I had to salvage a couple of connectors from the old loom where the new one was missing some. So just one yellow wire left unconnected….any clues? no me neither.
Front to rear loom bundle
Correctly connected distibutor down there somewhere
Bullet connector pliers – essential!
So there you have it. The list of things to do before engine start is now quite short. Fit the vacuum pipes and oil gauge pipe, fit the battery, rig up a fuel bottle and that’s about it, apart from checking everything. As always, I have a busy couple of weeks coming up including a weekend helping at the in-laws farm, but soon enough I will be spinning the engine over. Exciting stuff.
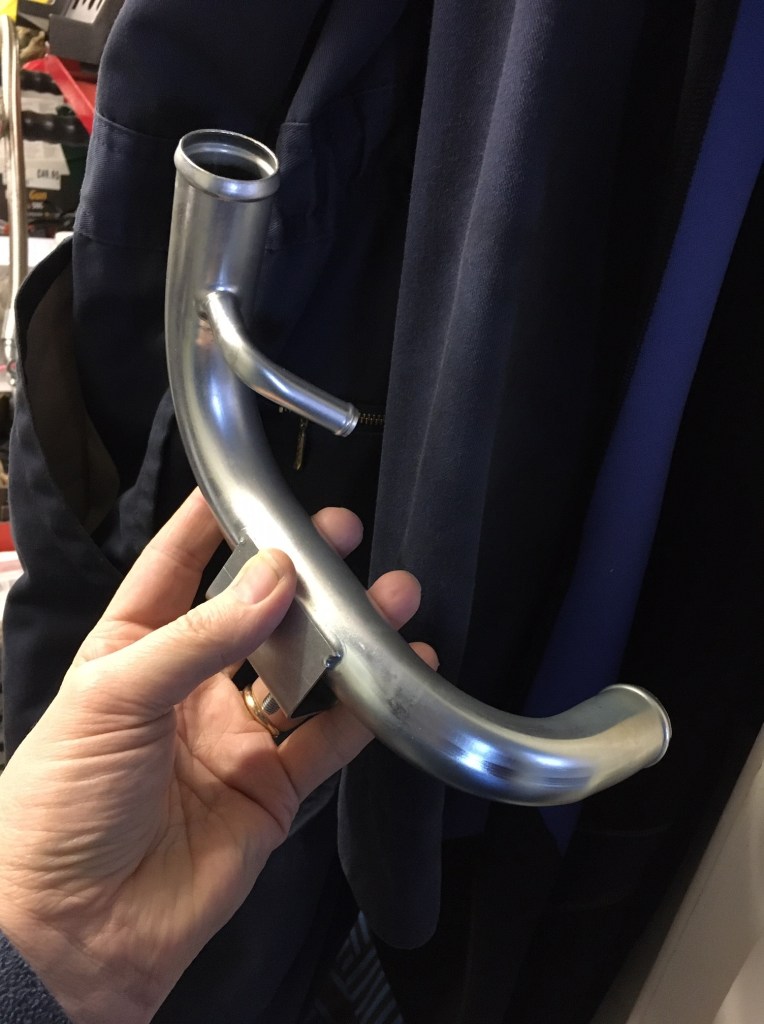
In other news, I bought a cooling pipe for my Suzuki Cappuccino (pictured below). The existing pipe is very corroded and I didn’t feel safe doing any distance in it in case it let go. Anyway, a phone call to Suzuki Islington of Trowbridge resulted in a £50 card transaction and a few days later the pipe was in for collection. The Suzuki dealer was also a MG franchise and it was interesting to see all the new SUV MGs in stock, not that I am looking for a new car. On the way back I bought new antifreeze from Halfords and I checked out refilling the system on the internet. Looks relatively straighforward. I’ll fit the new pipe to the Suzuki when the weather improves.
Spent a couple of hours on the MG this afternoon. It was cold and windy so I confined myself to the garage. First job was to finish off fitting the new rubber oil cooler pipes. I am replacing the nasty braided ones which are very stiff with OE spec rubber which is a bit more pliant. This is an awkward fit and it requires a bit of coordination because the oil gauge pipe has to be fitted AFTER the pipe cooler pipe because otherwise the spanner crushes the oil gauge pipe. Have a guess how I know this? After fitting the pipes I had to fit the hateful grommets to the radiator shroud which is another awkward job. Anyway it’s done now.
It’s all a bit congested here
Next I decided to progress the wiring loom connections. Last week I had to unpick the loom due to poor routing so this week I put some of that back. I connected the alternator which is easy then had to take the coil off to get that connected properly. So far so good. I then checked the fuse box which I wasn’t convinced had been connected properly. Rather than rely on pictures on the internet I actually used the wiring diagram and managed to use up all the available wires so it must be right! (It is right really).
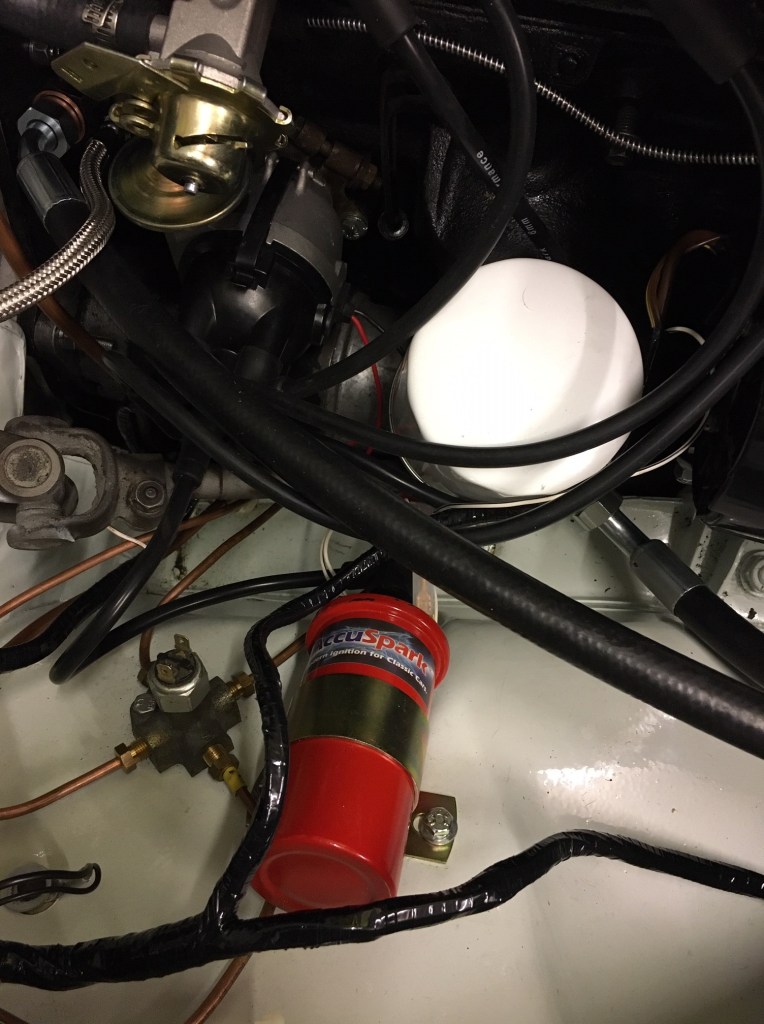
So onto the next thing and I identified a problem. The distributor, which is a new unit from Accuspark needs power which it gets from the coil. Unfortunately one of the cables is not long enough. It mentions this in the instructions which cheerfully say ‘you may have to lengthen the wire’. I might write back to them to say ‘you could just supply the right length wire.’ So I need to grab a pal who can joins a bit of wire for me
This is the probably definitely correctly connected fuse box
Final task today was to fit an earth wire to the inner wing. The original bolt had been painted over and the head rounded off when I tried to release it. Even my freeze spray couldn’t rescue the situation so I did the brutal thing and drilled it out. I managed to then get another bolt to fit and job done. Not a bad afternoon’s work.