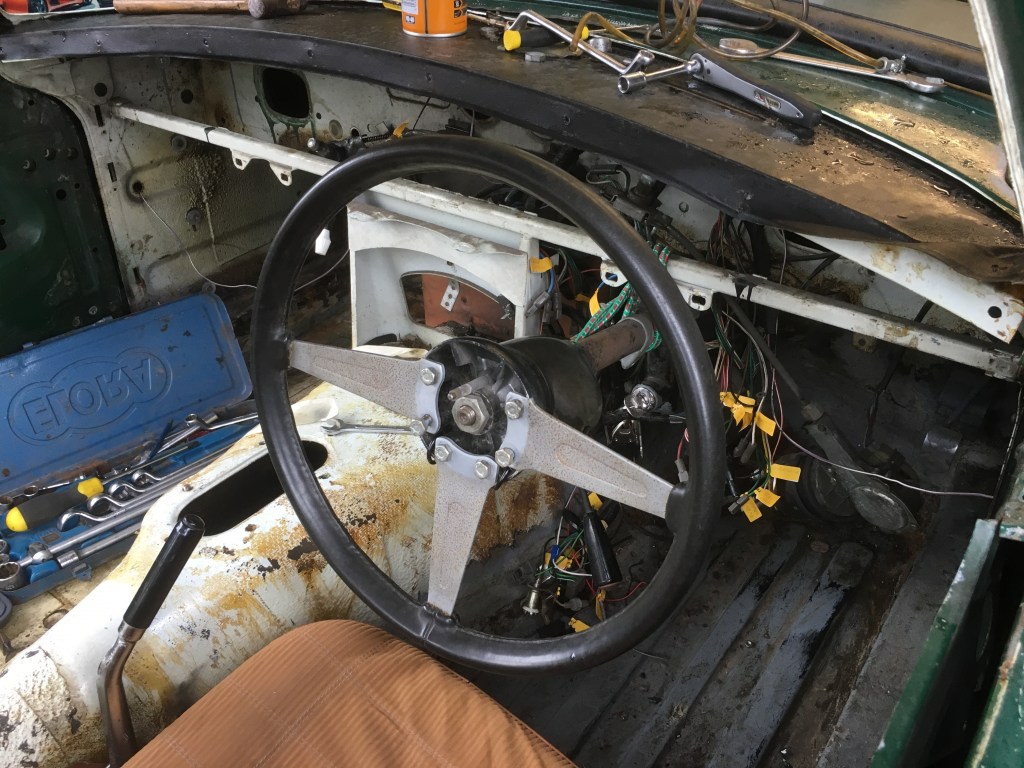
Stiff steering resolved, although not by me. I am striking up a good relationship with our local MG specialist and after a couple of disruptions I was able to get the MG down to him today and he resolved the stiff steering. The problem was with the column itself which had become misshapen and was catching on the mounting bracket. I don’t have full details on the fix as I wasn’t there but it involved reshaping it with some tubing. Anyway, the steering is now bang on and the car drove back from the garage a lot more nicely than it drove down! A major hurdle overcome. He also spotted a few other issues around the car such as the bonnet alignment and non cancelling indicators which are on my list but it was good to discuss possible solutions. The bonnet catch cable has unfortunately also failed, stripping its fitting at the dashboard end which is annoying so that will need a replacement. This evening I reviewed my Completion Schedule, updating jobs done and adding on the new jobs. Its nearly at one page now and with the car basically driveable I can get out and about to get things done. Finally, spotted a rear light out so another job for the list!
A final reflection, it was good to watch Clive drive the MG up the road as I could listen to the exhaust note from the outside – sounded good!
I’ve had a fuel leak / seep from the petrol tank for a long old time and today I got it sorted. I suspected the seam where the sender unit goes in, but to be honest, I wasn’t sure I had the sender in properly or the filler spout. I had obtained a replacement tank from the supplier which was a larger ‘touring’ unit so a swap was on the cards in any case. I was on my own today so not the easiest operation. I began with jacking up the rear and putting it on axle stands which enabled me to remove the end section of the exhaust which bolts on about midway along the car and is then attached to a rubber hanger at the other end. Then I detached the fuel line and with the tank propped up on a couple of boxes I undid the bolts and nuts on a diagonal pattern which sort of allowed it drop in a controlled manner.
Now to fit the new tank, but learning from previous experience I took great care to fit the sender, the rubber seal and sealing ring to the tank, and to slop some petrol in and check for leaks before it went anywhere near the car. Miraculously the new tank could hold petrol and I had confidence the sender was properly seated in place. Now for the awkward job of offering up the tank to the receiving bolts (fixed to the chassis) and simultaneously dropping the bolts from the boot floor through the brackets and lining up the threaded connectors. I needed to have a couple of extra hands, but with none being available I did my best octopus impression and managed to have all the nuts, bolts, washers and connections properly done up. The fuel line was easily fitted, so it was onto the exhaust. This was another job which was fiddly to undertake solo. It took me a while to get this done – the bolt up connection at the midpoint is easy enough, but the rubber hanger where the exhaust exits is seriously fiddly. The bolts just did not want to bite and the rubber hanger was pulling the bracket away from where they needed to be. Furthermore, the sun was streaming in my eyes making it difficult to see the holes. I had to drape a throw over the back of the car and crawl underneath just to see! Helen came home from popping out to see my feet sticking out from under the car with a cloth draped over it. She must have wondered what on earth I was doing. I refused to be beaten and just persevered until eventually I got one bolt and then the other started. Then it was just a case of tightening everything up which was tedious as the threads were long and the bolts were tucked up between the fuel tank and the exhaust (I did say a little prayer – so, thanks God). There followed some very tedious petrol movements while I harvested the petrol I had only recently put in the old new tank, but finally I had a working fuel system.
Looking up at the tank fittings
A long time ago I realised that I was missing some chrome trims from the B-post of the MGB and last week they literally fell out of a box at me which saved me from fretting about where to get new ones from. I was looking for a different profile of trim, but these turned out to be the right ones. I fitted these relatively easily earlier today, giving them a brief polish before fitting them with self-tapping screws. I had intended to rivet them on, however the space was a bit tight, so screws it is. This has finished off another aspect of the MGB nicely.
Without the missing trims…now fitted on both sides
Last job of the day was to fit the wooden wheel which my friend John had lent me ‘on approval’. I had established that this would fit (with a new boss) and the smaller diameter would give me more space for my legs which are wedged up against the steering wheel in the standard configuration. I popped it on the splines and tightened up the nut. I still have to install the horn switch, but that was enough for today.
I finished off the day with a quick test drive of about 2 miles (brave!) with Mrs T on board. This was Helen’s first time in the car and the first time I had driven it out of our estate in the three years I have had it. It was also the first time the car has driven more than about quarter of a miles in around ten years. I had already warmed up the engine and done some checks looking for leaks and we were good to go. Its quite intimidating driving a car that you’ve restored for the first time, being conscious of everything that can go wrong I suppose and also nervous of other traffic. However all was well and were were able to go through the gears into fourth and to cruise very briefly up to 50mph. The drive illustrated a few things, firstly that the hatch needs to be finished off with the rubber seal I have bought and the catch adjusted to stop it banging up and down, and the carburettors need tuning as the car is not pulling cleanly through the revs. The gearbox was a pleasant surprise, being nice and slick to shift although I dig get a ‘box full of neutrals’ at one roundabout while I grounds the gears. Fortunately, the MGB is torquey enough to pull out of the roundabout in third, although this coincided with the flat spot I mentioned so we sat at 32 mph with a BMW following curiously behind on our 50mph limit bypass. Helen commented favourably on the comfort of the seat, but noted the loud exhaust. With the car only partly trimmed and with a lot of grommets still to locate, I think I can tone down the noise a bit, and also I need to check the exhaust it properly done up. have to say, it does sound good and was turning heads. A good day!
Warmed up and ready to goThe lovely Mrs T ready for the offI’m concentrating so hard at this point!
I took back a day that work owed me today and had a whole day on the MG outside in the warm February sunshine (yes, really!). Here is a quick synopsis of the jobs I completed.
Fitted new bolts to the n/s brake caliper replacing the ones that got mangled when removing the old calipers. Fitted the tab washer while I was there
Fitted interior light to the centre console ready for wiring up.
Scavenged the heated rear window warning light from the old loom and old centre console
Connected up the speedometer cable to the back of the gauge. To do this I dropped the dash off its single bolt to get access to the back of the gauges
Fixed the ignition switch to the steering column. No more fishing around in the footwell for the ignition switch.
Fixed the o/s corner of the dash which enabled me to hoist the dash up to its correct alignment and therefore to be able to slip a temporary bolt across to mount the steering column to the dash for the first time is a couple of years! To do this I lay on my back with my head in the footwell and my feet sticking up into the boot. The things we do!
Fixed the o/s door light switch and discovered that the n/s looks a bit mangled (hence why Phil had not wired this before)
Removed the rear wheels, rubbed them down, sprayed them with primer then a top coat of satin black. They turned our better than the brushed hammerite on the front wheels! This now completes the set of wheels, which are now a lot tidier than they were, understanding that this is temporary cosmetic fix-up pending a more permanent selection of wheels for the project. And because Dad kept pestering about their shabby appearance
Cleared out the interior of rubbish, tools, nuts, washers and grit!
Fitted grommits to the footwell aperatures
Found the rear bumper brackets, but sadly discovered they are very rusty and one had a seized and sheared off bolt. I had considered fitting the rear bumper and had given it a once over and reckoned it would do as a temporary solution. I think now I have discovered this, I will keep it bumper free at the back as originally planned. Need to figure out how to light up the rear number plate without having the over-riders on the bumper to mount them on (I might just not bother…)
Tidied up the garage and sorted through the spares.
Being a lovely sunny day I had quite a lot of interaction with passers by with most people saying something encouraging. One older lady remarked that an old boyfriend of hers had one in the 1970s – cute! Another family walked past when I had the engine running to put the car away. As we know the engine is not in a good state of tune at the moment and I had cranked up the slow running to be too fast and was on choke, so it was revving at about 2750 rpm and popping and banging. As I glanced behind, the lady had her hands over her ears. Sorry about the sports exhaust
One advantage, perhaps the only advantage of lockdown is that we are forced to stay at home and not go ‘gadding about’ as we are normally inclined to do. So it was that after a most pleasant stoll in nearby Cirencester Park, Gloucestershire, as part of our permitted exercise, I found myself with a sunny late autumn afternoon to dedicate to the MG.
I decided to sort out the choke spindle on the carburetters (carbs for short) which I had managed to fit the wrong way around. What I haven’t recorded here is that I had previously corrected the throttle spindle which I had also fitted the wrong way around. Such is the lot of first time amateur car restorers such as myself, progress is riddled with little mistakes, however, with each mistake, I try to learn something. So to the choke spindle, which is an assembly comprising a spindle which sits within a cup on each carb (the MG has two). The choke mechanism operates when the choke handle is pulled on the dash. This causes the cable to tighten which, being attached to a lug on the spindle causes it to rotate. This rotation causes the choke mechanisms on both carbs to be operated because the ends of the spindles have lugs which fit onto the cams which themselves are on the end of the choke mechanism. The choke mechanism moves the needle inside each carb to richen the mixture, but also opens the throttle because the cams connect with a screw on the throttle spindle.
The fun begins when you realise that the spindles are not held in place in any way other than sitting in the cups on the carbs so when fitting the carbs you have to align the spindle ends (4 in total, 2 for the throttles, 2 for the chokes) with the cups, and have them aligned to the lugs (again 4 in total) while you are trying to to wriggle the carbs onto the mounting studs (4 in total). I make that around 12 points of contact which you are having to manage and it was certainly easier when I was able to phone a friend. To reverse the wrongly installed spindles, I loosened the carbs, but wanted to avoid taking them off as then you have to do the full accordian player impression as the two carbs writhe in your hands. The carb mounting studs are worth a mention, being located cruelly in the most awkward position and in perilous proximity to the razor sharp edges of the heat shield. It would be good to have three elbows on your arm at this point rather than the inadequate one we have to deal with. I won’t bore you with a blow by blow account, but suffice to say I got it all done in two attempts and only one skinned knuckle. I then fitted the air filters and went for a start up.
I connected the battery (ignition switch solution still pending), heard the familiar ticking of the fuel pump and turned the key. One click and then nothing. Mmm. I tried my spare battery, and it cranked over willingly but wouldn’t fire. Then I remembered to reconnect the coil wire I had disconnected. This time the engine started straight away, with full choke of course, and settled at a fast idle. After it had run for a minute or two I pushed the choke in and tweaked the idle speed to get it to idle correctly. I recorded the sound of the engine in the YouTube clip below. To get the authentic bass – use headphones. For an MGB is does sound rather tasty. Its obviously not set up right just yet, but it’ll do for the moment.
So that was a reasonable afternoon’s accomplishment. Today (Sunday) was a more gloomy day both weather and progress wise. A dull autumn day dawned and after finishing off the chores and watching Church online (another COVID consequence) I pushed the MG onto the drive intending to fit the engine fan I had bought recently. To get access to the pulley I determined it would be neccesssary to loosen the radiator and pull it away from the area. This is relatively simple on the MGB, being six 0.5″ bolts (what else) to remove. Having pulled the radiator back I realised that the fan I had bought was the wrong one – annoying as I thought I had searched it correctly. More catalogue searching required and another item for my MGB parts shop which I will be opening at some stage to sell on all the surplus parts I have amassed over three years. So I had to pointlessly put the radiator back again. It was then I remember that fitting the radiator is more difficult than removing it. The radiator is mounted by the aforementioned six bolts to a steel shroud which is fixed with eight bolts to the inner wings. The challenge is to get this all to align. The shroud in my MGB, despite being resplendant in shiny black from the paint shop, is I believe a bit warped. The off side is particularly difficult and I had to loosen all the bolts on the radiator and shroud on that side to get each bolt to bite on its thread. Having had this difficulty before, I was up to the challenge this time, and a bit of thinking and remembering got the job done in the end. All helped along by my Radio 4 soundtrack in the background, latterly a re run of ‘Just a minute’ with the late Nicholas Parsons.
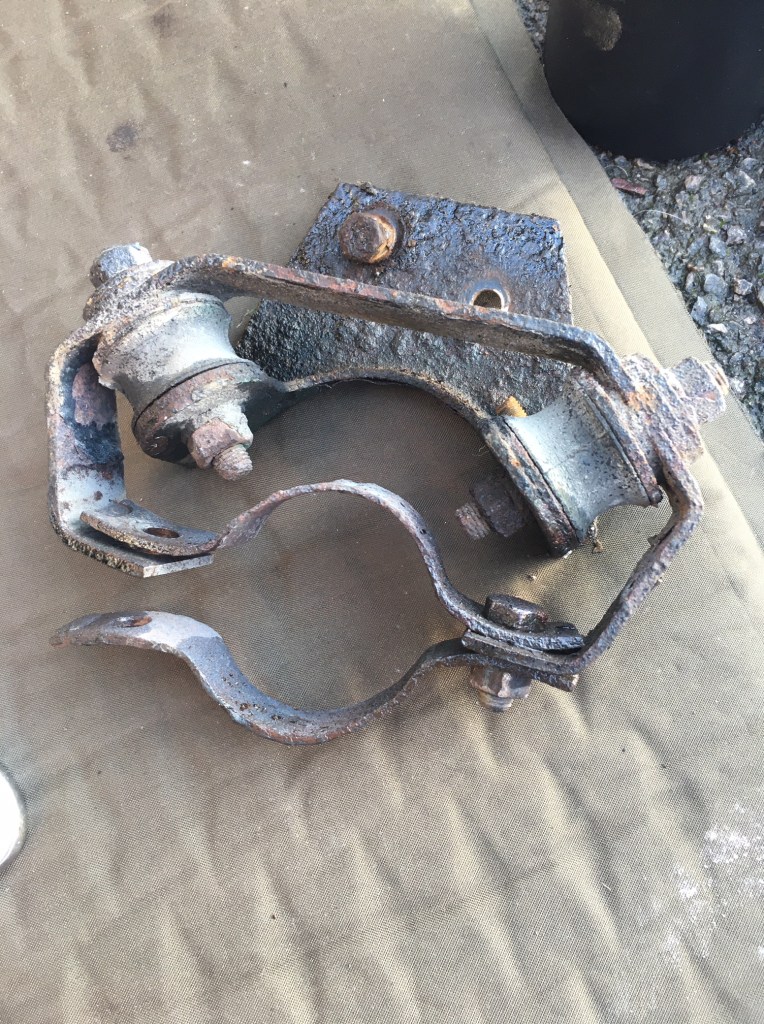
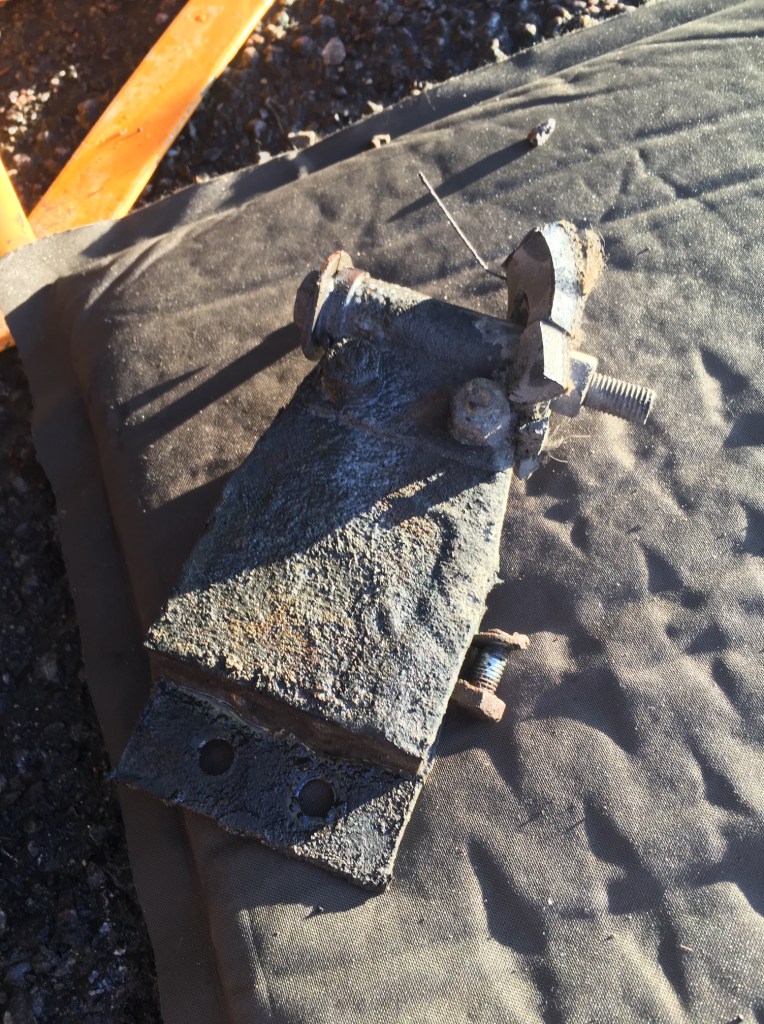
You guessed it, I fitted the exhaust today (sorry about the pun in the blog title). I bought a stainless steel Tourist Trophy exhaust system, including tubular manifold when it was on sale last year. I have already fitted the manifold but today I fitted the rest of the system. It’s the first time I have ever fitted an exhaust although I remember helping my Dad on old cars when I was first driving. We replaced the rear silencer on my Rover 2600 and I remember the lovely burble that car made through its new exhaust. Back to today, I laid out all the components and read the instructions which all seemed relatively straighforward. I hadn’t been under this side of the car since the strip down and I couldn’t remember how the old exhaust had come off except that it was alll very rusty. I was a bit concerned that the old fittings (which had to come off) would resist being unfastened. Thankfully, the old mid bracket and rear bracket came off remarkably early, although I did use my secret weapon, the freeze and unlock spray which puts the fear of God into any nut or bolt which fancies its chances. I think they know its coming now, and start to undo themselves at the mere threat of ‘the spray.’ I was interested in the intricacy of the old brackets pictured below. More complex than the new ones.
The old rear bracket – look at all that engineering
The old mid bracket, complete with rubber damping
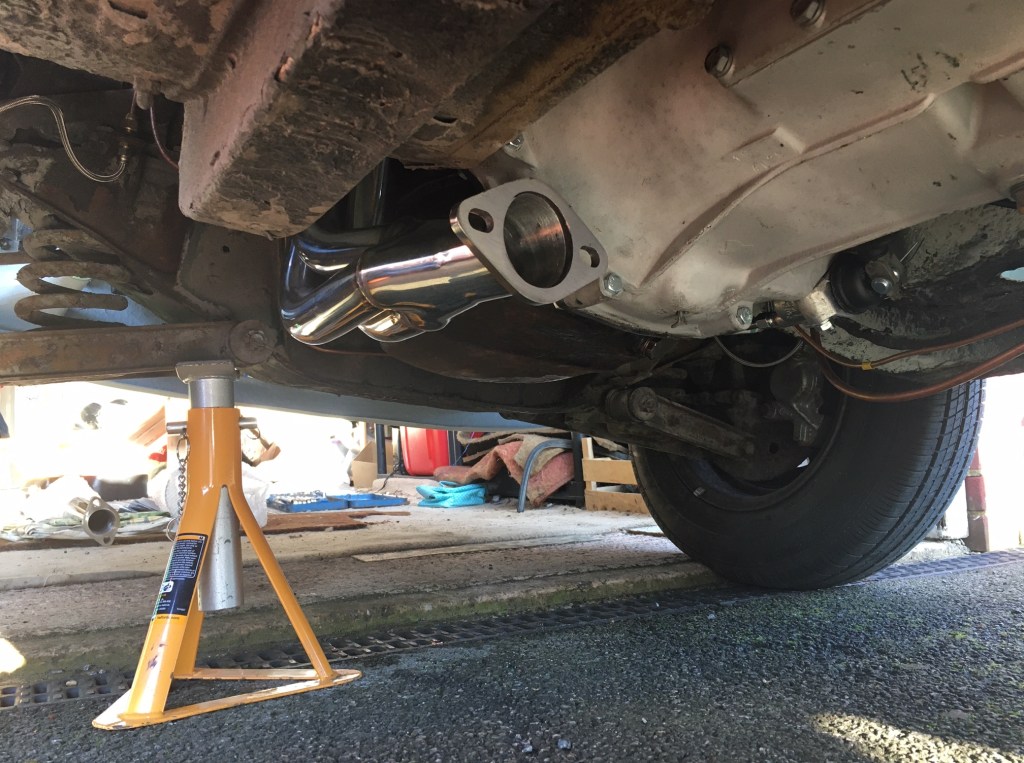
Fitting the new exhaust was mainly a matter of bolting the flanges at the end of each pipe to the next one and then using the rubber hangers to suspend the pipe to the new brackets. The new brackets fitted well enough making use of the existing captive threads and as I was feeling extra diligent today, I used copper grease throught out the build. Well done me.
New stainless steel bracket in-situ
This is where the exhaust manifold (or header) comes down from the engine bay
To fit the end pipe, I had to prop one end with the tool box (no helpers today!)
Looking along the shiny length of the new pipe
All the shiny bits
The MG jacked up on one side and propped on axle stands
So all good, except that having grappled with the awkward last pipe (with the heavy silencer), I stepped back to see that the pipe was drastically ‘dressed to the left’ (ahem). The instructions explain how to correct this so the pipe exits the body centrally and it involves sliding the rubber hangers along their brackets. For some reason, and maybe it was the end of the day, and I had a slight headache, but I couldn’t budge them. I have a day off tomorrow, so I will have another go when I am feeling stronger.
While the MG was out I filled the SU dashpots with Pentrite’s Damper Oil. I bought the oil earlier this week en-route to Cambridge for work as I pass by Bicester Heritage, home of Classic Oils and their helpful and friendly staff. Popping into Bicester Heritage is a pleasure, there is always something of interest being worked on, and it breaks up by journey to Cambridge.
The carbs said, ‘thanks for the oil’
Filling the dahpots with Damper Oil
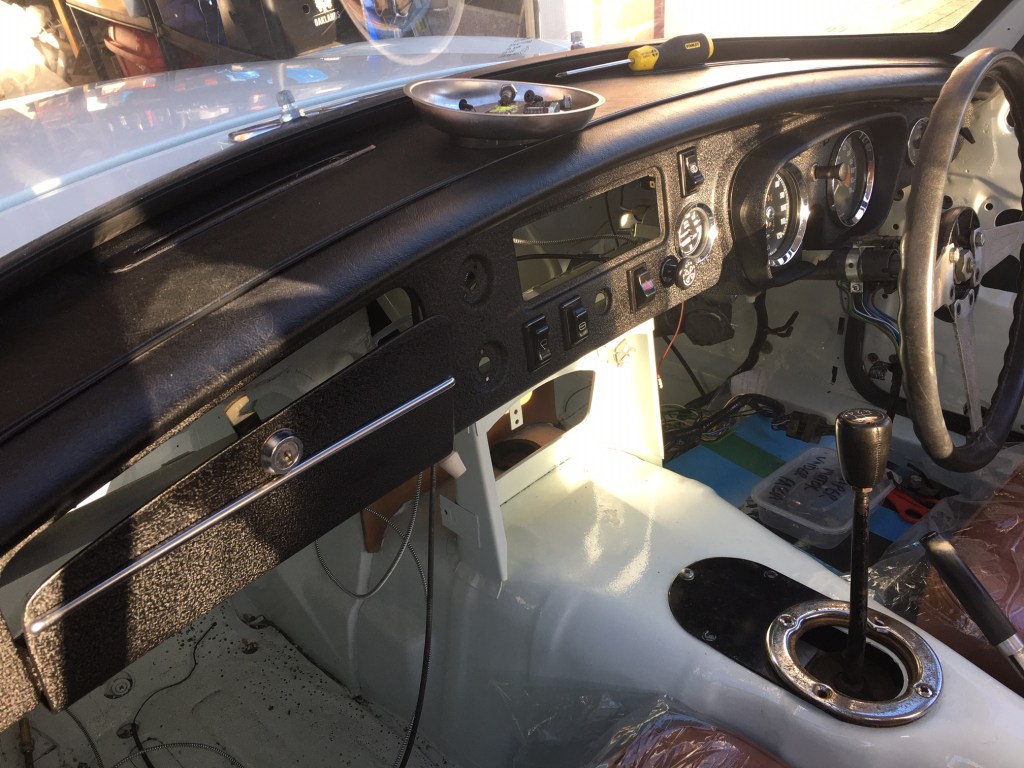
In my last Blog, I forgot to photograph the Dash once I had put it in the car. I hesitate to say, installed, its just in really. Anyway, for the record…
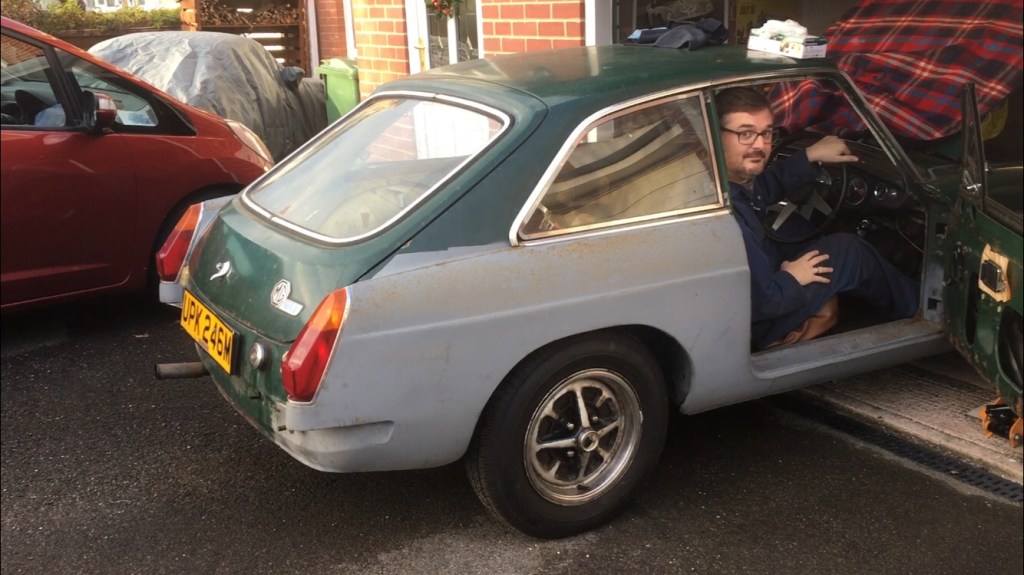
It’s two years today since I took delivery of the MGB and commenced the restoration! Its been an interesting journey…at the time I did not know how long it would take, but probably didn’t expect it to take this long. However, as I look at the car today, I can see my way through to the finish line, not that I think these projects are ever really finished…
I have learned a lot and spent a lot! I have enjoyed the help of lots of friends and I have had great service from lots of suppliers.
This is where it all started
First start up
At Austin’s for welding
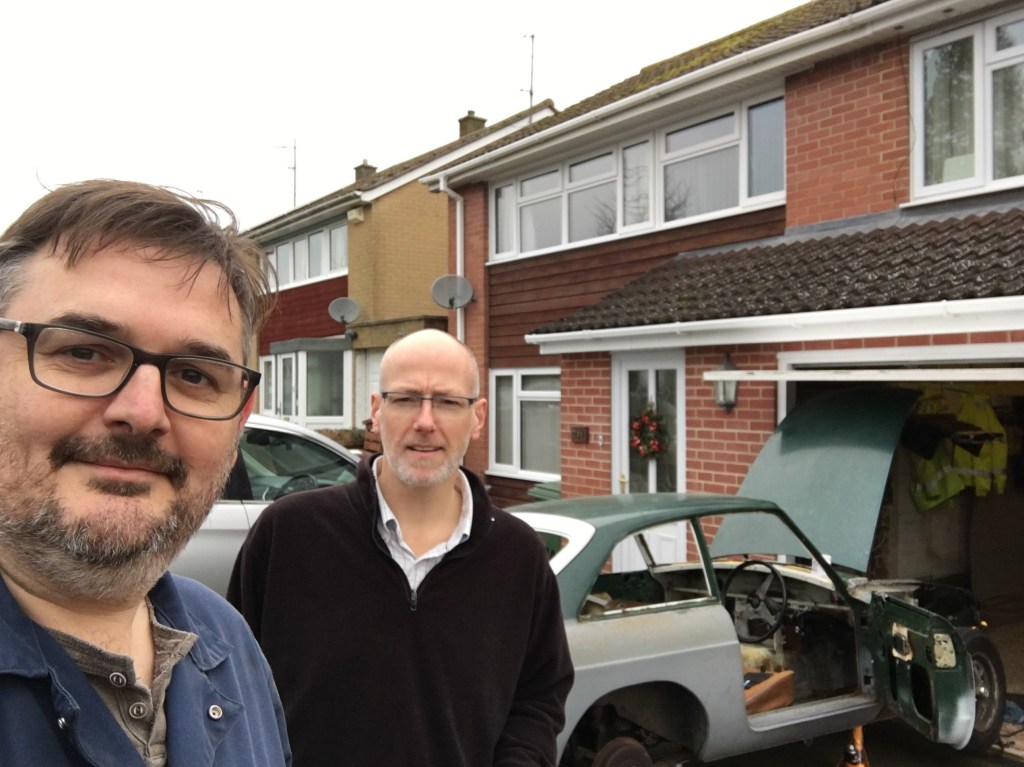
Garage selfie
Stripping the dash
Another cup of coffee
Phil has owned three MGBs so his insight was invaluable
Inspecting Gavin’s work
MG in the paint shop
That satisfied feeling when you’ve done a good job
Sunshine on the new paint
Dad ‘helping’
John helping install the gas struts
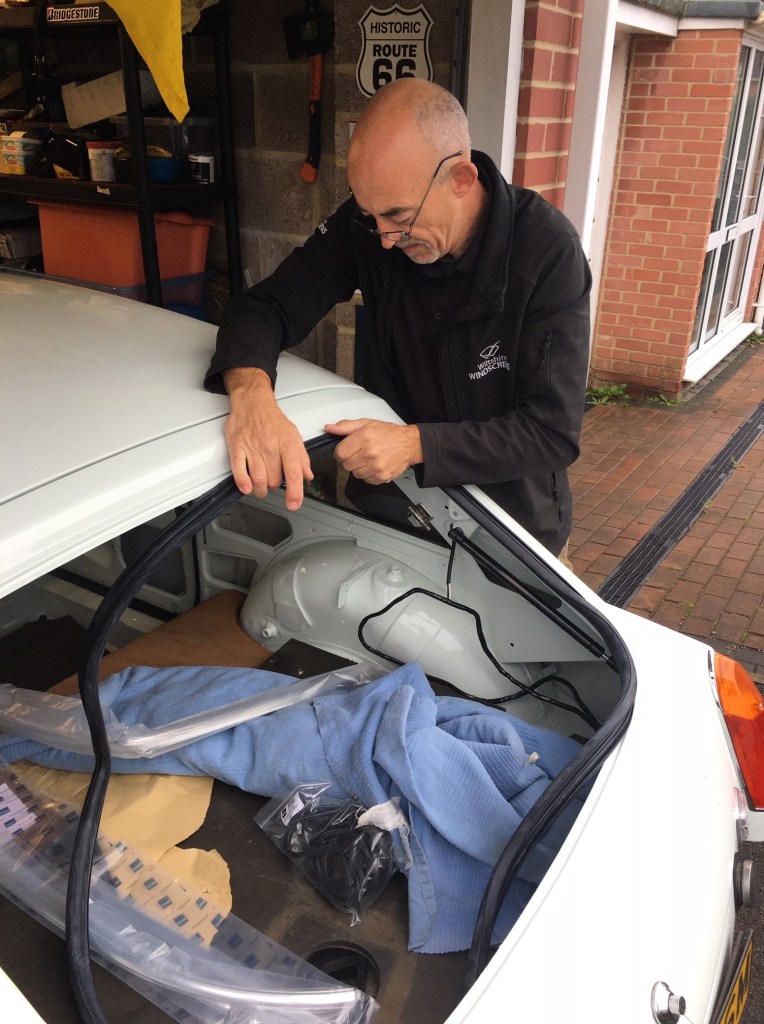
Andy fitting the rear screen
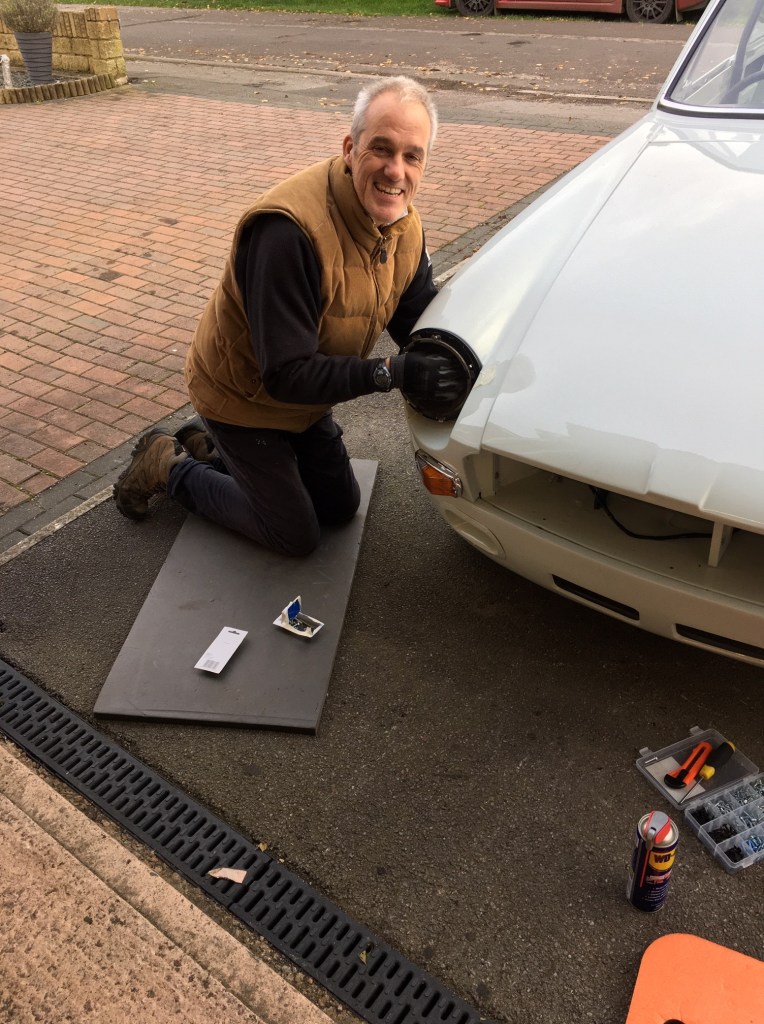
Paul fixing the headlamps
Andrew bled the clutch while I sat in the car pumping the pedal
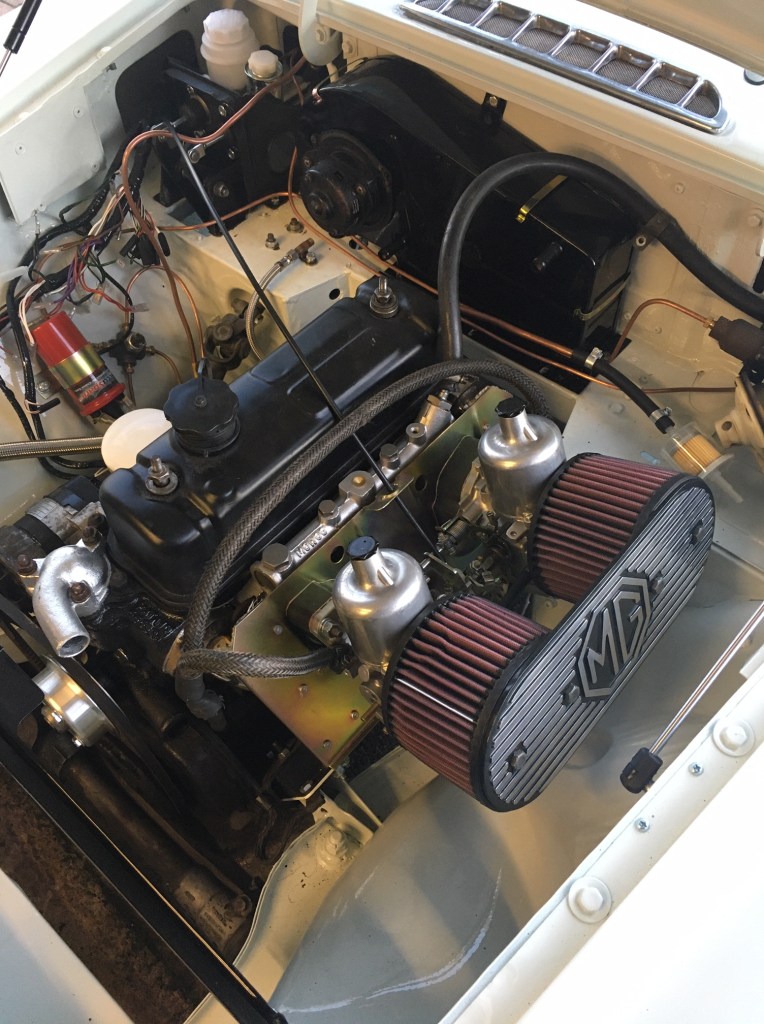
Enough celebrating, I still have lots to do. As a treat today, I did what I thought would be a nice easy ‘glory’ job – fitting the exhaust manifold, inlet manifold and carburettors. In the event it turned out to be a knuckle-scraping pain in the ass because of the unique way the MG is designed. The heat shield, which the carbs are mounted to is dual function – first to shield the carbs from heat, secondly to cut and scrape the hands of innocent mechanics with its sharp edges. ‘Wear gloves’ I hear you say, but unfortunately its all a bit intricate so gloves dont really work. Anyway, got it all done and doesn’t it look great!