20 March 2022 Oil in the wrong places

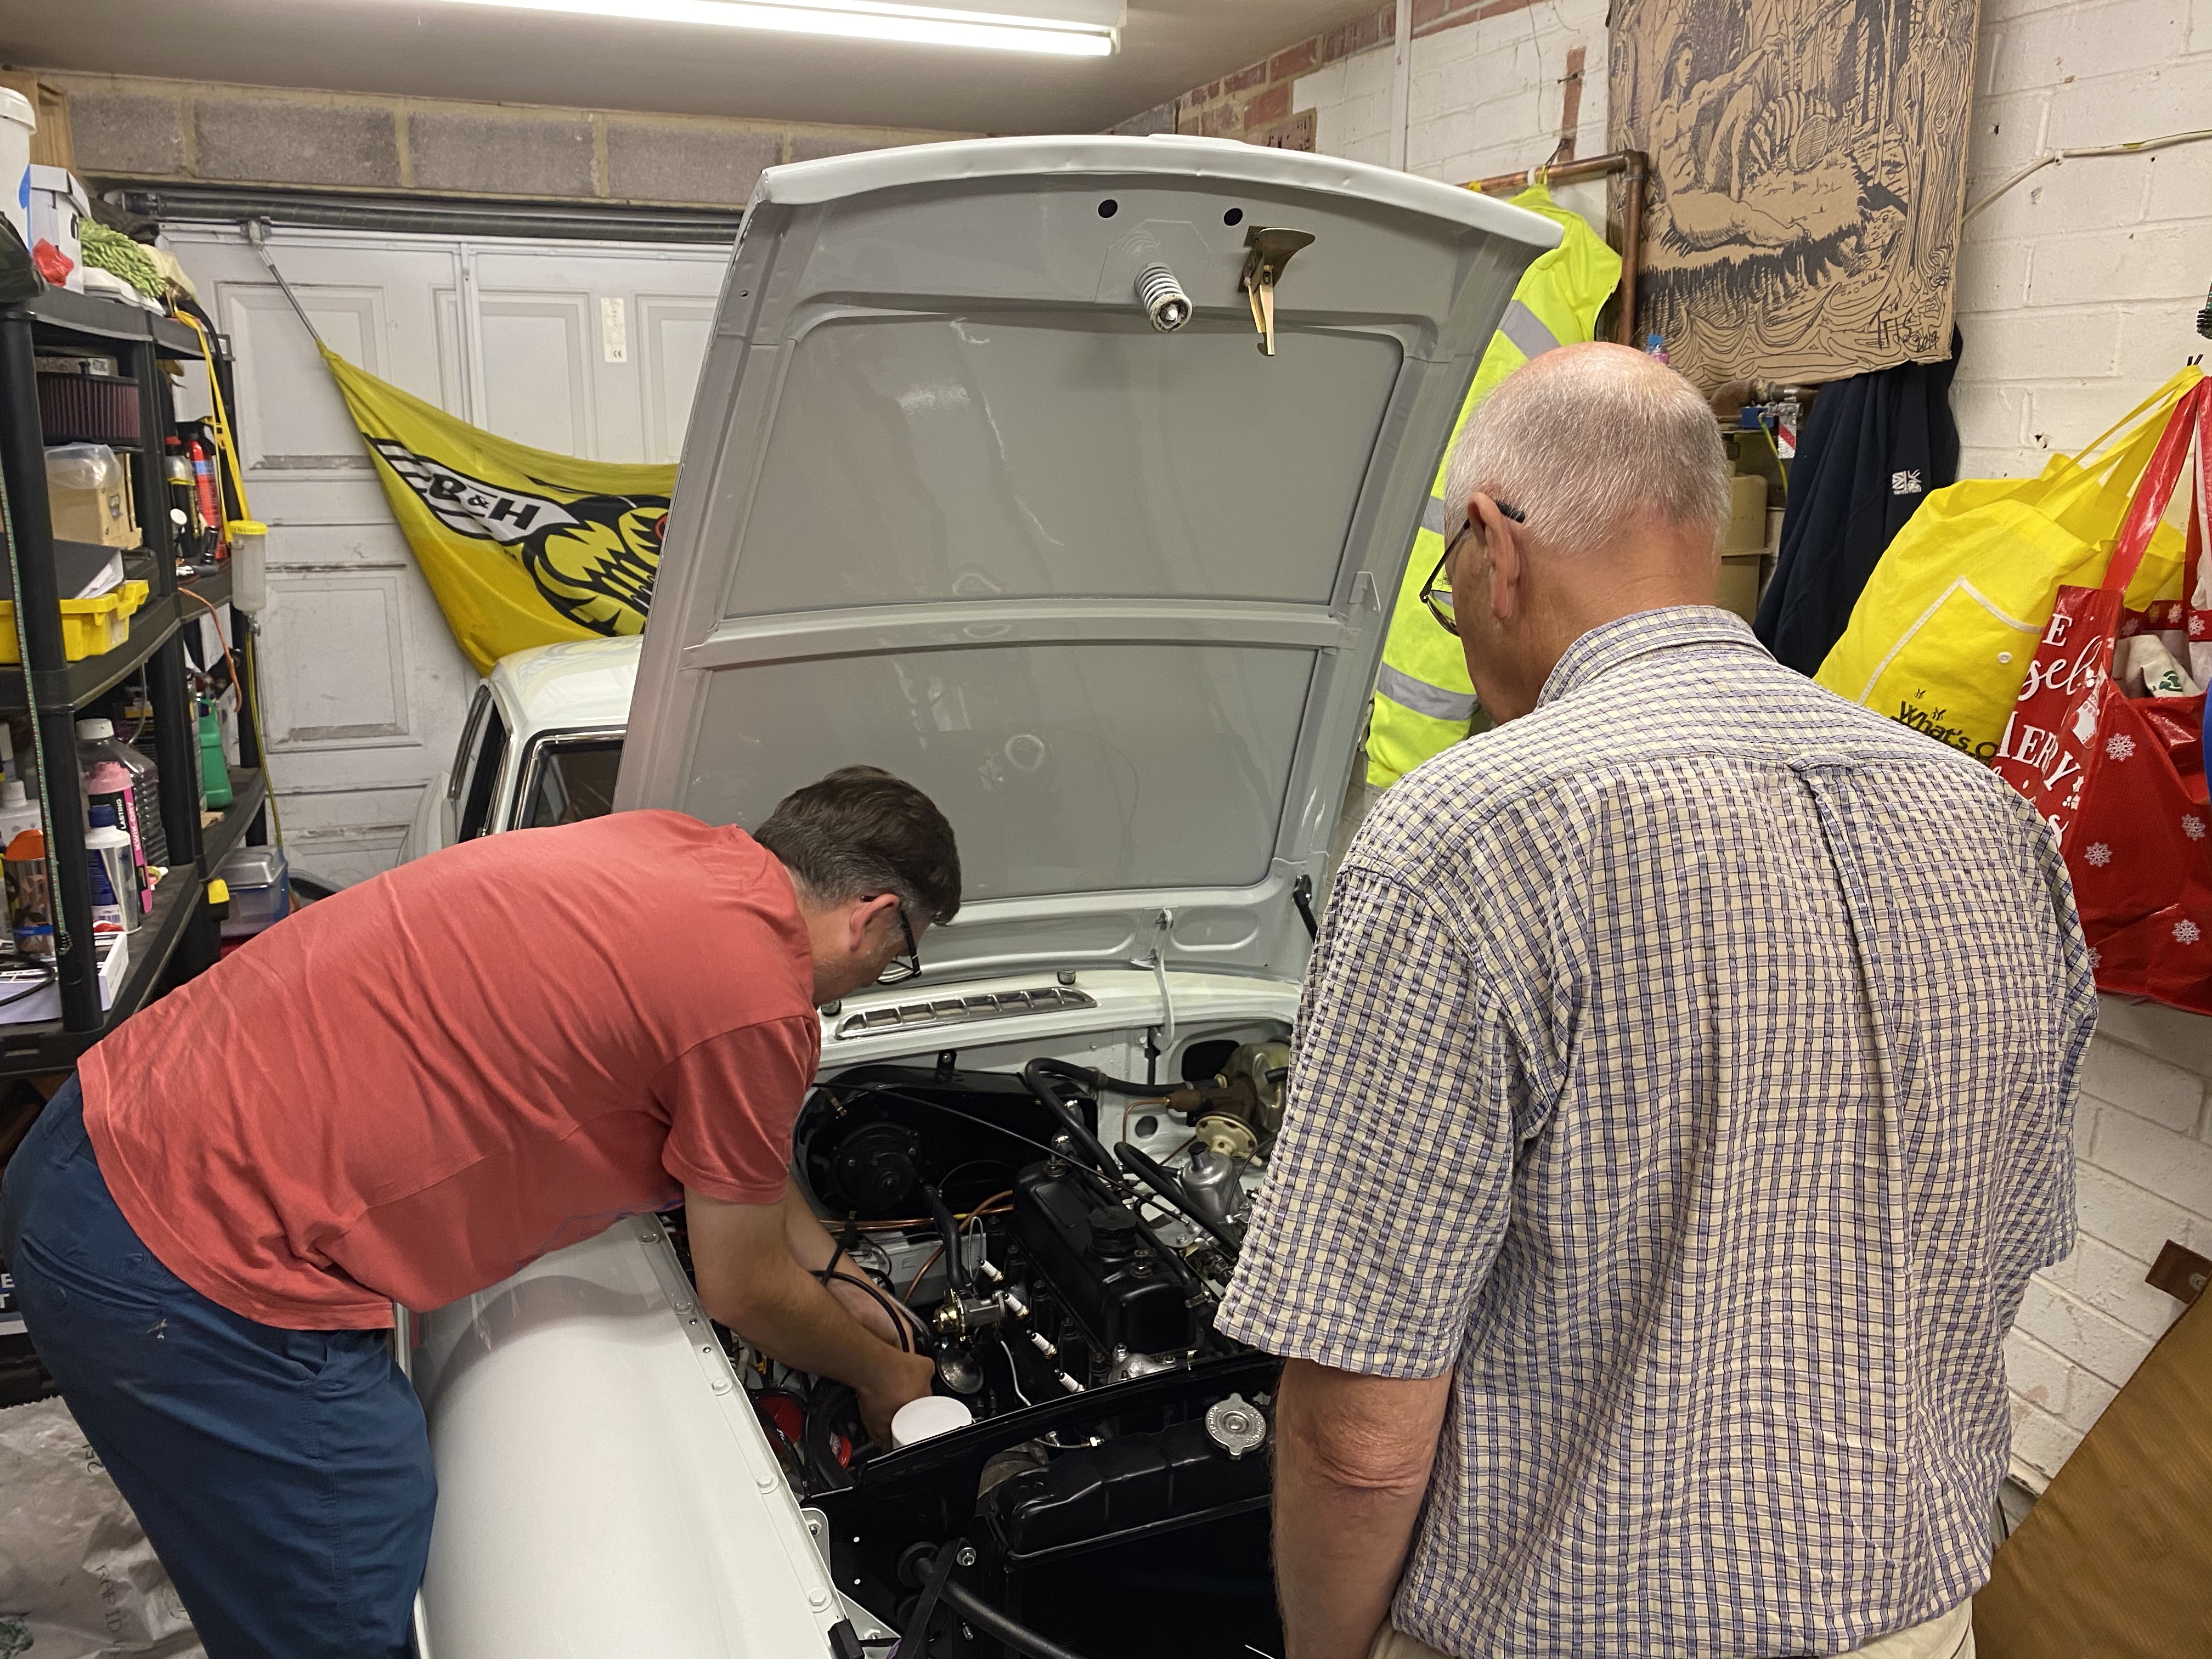
Oil is vital stuff, finding its way between all those rapidly moving metal bits that make the engine go vroom and preventing them from welding themselves together. However, sometimes it escapes from where its supposed to be and then it makes a big mess. Well this evening I was able to look under the bonnet of the MGB to check on some oil misting that has been present since recent start ups. It’s nothing severe, but clearly not right and I wanted to see how bad it was since my first drive a couple of weeks ago. On opening the bonnet there was a tell-tale mark, running transversely across the underside of the bonnet originating from the front of the engine. It wasn’t as severe as the other day, but there is enough to make a mark and not something to ignore. However, I quickly realised that this particular evening I wasn’t going to be able to get under the car to see where the oil was coming from, having checked all possible locations accessible from above where it might be coming from. The pattern of the misting point towards it being linked to the main pulley which as it goes round and round is I think throwing up the leaked oil. Everything points towards the sump, pulley seal or timing chain cover. So a fairly big weekend job there to work through these areas and resolve.

While I was looking, I did a general look around for any other leaks. In the near side chassis rail was some petrol. Not a lot, but a recognisable quantity. Oh dear. I felt around the fuel pipes which were nice and dry and then under the carbs. Aha. Under the front carb (the float chamber) it was damp, so this points towards a seeping seal. Darn. I have had these carbs apart when I was troubleshooting them, so its going to be my fault, but I suspect the float chamber cover seals are not, well, sealing. They were a pig to refit, so I’ll have the carbs off and look/replace the seals as they may well be mangled. Seals are £1.46 from SU (plus £5 for postage!). I am pleased to have spotted this at least before the leak got too bad!

Petrol leaking onto this chassis rail

While looking at the carbs I took a good look at the throttle mechanism as at present the car does not idle nicely all the time. The cable is a little slack but the the spindle returns to the stops so that is not sticking. It could be the mixture as I have fiddled with this in trying to set the carbs up. When I can grab an expert for the day (Hi Dad!) I’ll set these up from scratch, but in the meantime, I took the spark plugs out to see if they would give me any clues as to the mixture. The photos are below in front to back order. I’m going to leave this to the experts to comment, however I think its fair to say the carbs are not set up right!

The off-side chassis rail was also not pristine, having oil spotting around it. I wiped this up and looked for a possible culprit. Feeling under the oil filter, my fingers felt oil around the bottom of the union with the oil cooler pipe. This union is a beast of a with a 15/16th fitting. It a double nut thingy where you have to hold one nut while doing up the other so I had my 15/16th spanner on the oil pipe fitting and an adjustable on the filter end and was able to tighten it by a good quarter turn. I am hopeful that this will stop that leak, but it will need to be checked next time I run the engine.

I tightened up this joint

Finally, one of the grill stays had a loose fitting. No idea why, the grille hasn’t been off for ages, but I might as well fix it while I am here. The threaded screw was a bit second hand looking, so I looked for a replacement. I found a bolt the same thread which was a bit long so I shortened it with the hacksaw and along with a couple of washers it fitted nice and snug and that was one less rattly thing on the car!

Tightened up this grille stay

A busy half hour on the car, but some steps forward which is always good!

30 May 2021 Getting Kinky

Another big gap in posting due to other life distractions. Recently I had an electrician (Phil James) booked in to do some jobs on the MG. He did a cracking job, fitting the electric fan, switches in the dash and centre console and the heating rear window. Of course we needed to fire up the MG to commission the fan and this is where things began to go wrong.

The week before Phil came I had done a few little jobs including tidying up the brake, fuel and loom lines which run under the car as well as fitting the air filters. A good job done. Annoyingly the MG then refused to start and was the same when Phil and I needed it to.

Poor Phil, he tried everything and in the process sorted out the carbs which had overfilled dashpots and the rear carb where the piston was not moving freely. So we had to admit defeat on the day.

Meanwhile my Dad had said ‘it will be something simple’ and today I got to the bottom of the issue. I tried a simple test which was to remove the fuel pipe to the front carb, stick it in a bottle, turn on the ignition and see what happened. In short nothing. So I removed the rear wheel to get a good view of the fuel pump. I confirmed the connections were all good so it was a mystery until I noticed that a rubber pipe which connects to the main fuel line under the car was going through a tight curve and looked kinked. And so it turned out to be. I adjusted the curve switched the ignition on and hey presto click, click, click and fuel at the carb. Woohoo! So problem solved and another step along the way. The MG fired up and ran smoothly. I then spent some time sorting out the wiper mechanism which I had incorrectly installed. Still work in progress, but it’s on the right lines now, just blooming fiddly work. A good day’s work.

Me looking happy and relieved that I’ve got the MG going again. Onwards and upwards!

24 April 2021 Going Dizzy

Crikey, its been a while since my last post. What can I say, I’ve been busy.

Anyway, today was a good day. Recently I’ve been trying to resolve a misfire and due to my low level of competence, I had unsuccessfully tried to change the points in the distributor and managed to convert the misfire into a non-starting issue. So I left things alone for a few weeks while other events took precedence such as work, volunteering at Church, Gardening and walking with Helen. Of course Dad had been saying why not just fit the Electronic Distributor that I had bought originally but I had got it in my head that it was a horrendous, virtually impossible job. Then Thursday of this week, later in the evening instead of slumping in front of the TV, I popped into the garage and stared at the distributor. Then I reached for a 7/16th spanner and sort of offered it up to the bolts. It’s really fiddly, but I got some movement going and then the bolts were getting slack. I reached down to the distributor and just like that it came out. I was that surprised I just stared at it in my hands. How did that happen?

Buoyed up by this, today I slotted in the electronic distributor pretty easily and then just wondered if it would start. It did! I was really chuffed, and the misfire had gone, so success all round. I did have a bit of fun with tweaking the timing and having to adjust the carbs but before too long I had it idling nicely and cleanly revving, so this was a big step forward.

I spend the rest of my time pottering around. I fitted the twin horns, discovering as I connected them to the loom that the switch was live. That made me jump alright. With both units connected, they make a pleasing ‘honk’. I did give the heating controls a good check over and discovered that I need to buy one new one. I stripped the cables and connections off the old units ready for re-fitting. Completing the heater installation is going to be quite a project in itself I reckon. I then spent some time stripping the spare door that I recently bought in readiness for installing the glass from that door into my car. Finally, Helen and I sat out the front of the house with a cup of tea and a piece of cake in the sunshine. I had the usual couple of nice chats with passing neighbours and the postie who all admired the MG which was looking very bright in the sun.

Enjoying the sun

28 Feb 21 Milestone Day – we have a brake pedal

Actually it was yesterday. Another sunny February day and it was time to fill up the brake system for the first time since I had replaced all the brake lines and the entire front brake assembly, disks, pads and callipers. I had a Gunson kit to help and my friend John was on hand to direct me from a suitable distance on the driveway. The Gunson kit uses pressure from the spare tyre via a rubber tube which goes into a bottle filled with brake fluid with an outlet which fits to the master cylinder. Had to inflate the spare first, which was flat obviously. We also jacked up the rear, removed the rear wheels and verified that the bleed nipples were okay. With the kit connected up, the fluid started to go down as the brake pipes were filled. I was watching at the back of the car, and the level was going down but no fluid. Then we spotted the rapidly growing pool under the engine bay. We had a leak at the four-way junction with one of the joints leaking fairly well. There followed some rapid reaction work with me in charge of sluicing the spilt fluid before the nice new paint melted while John disconnected the four way junction for inspection. I should mention that we did first just try nipping it up but to no avail.

The four way junction nor the line had no catastrophic issues, but John’s keen eye had spotted a little gunk in the fitting and on the threads. So we conducted a clean with some WD40 and a rag, blowing it out with an aerosol air canister. After some careful reassembly and re-tightening of the four lines to the junction, we recommenced filling operations. No leaks this time. For each brake in turn, we connected a length of plastic tubing to the bleed nipple and opened it up. I watched the flow and when the bubbles had cleared, I nipped up the bleed nipple. So far so good.

Moving to the front of the car, we again jacked it up and removed the wheels. The n/s side went smoothly enough, all new components, so it was a dream really. On the o/s, a little fluid was weeping from the connector between flexible and hard pipes but this was nipped up promptly enough. A prod of the brakes confirmed we did indeed have a brake pedal. As it was now getting on in the day, we decided to call a halt there. Further testing has identified that it is soft on the first push, then firm, which I think means there is still some air in the system. A quick browse around the internet suggests that the pipes into and out of the servo need to be bled and possibly also the junction connection at the rear which splits the fluid to left and right. This will be sorted out soon. However, all in all, excellent progress and a milestone reached. The car now starts and stops!

So to today, Sunday, and I was on my own, so a little pottering was in order. First job was to investigate the misfire which has been plaguing the MG lately when running it up. The carbs are not in tune, I have a plan in mind for the that, but it has definitely been running worse and worse. Taking a look around the engine bay, I discovered that the vacuum advance pipe was looking very sad. Being rather on the long side, it had drooped onto the exhaust manifold and basically melted. So I snipped off the mangled bit and fortunately there was plenty of length to make a nice route to the inlet manifold. Next I investigated the distributer, and as a non-expert, the one job I could do myself was to swap the distributer cap which on inspection was a bit rough looking with the contacts worn. So I popped in the new one which came with the electronic distributer and this saw an immediate improvement. I was tempted to just pop the new distributer in but as this is quite is quite fiddly, I put it off for when I have a longer go and have taken some advice. Instead, I did a couple more jobs on the dash. First, I fitted the rev counter properly. I had lost one of the knurled wheels that fit to the studs and hold the two brackets. Miraculously, I found it on the driveway yesterday! That saved a £5 order to a specialist (apologies to the parts market, I need plenty more bits honest!). Then I moved to the n/s to fix the dash properly. Having done the o/s earlier in the week, I knew how this went and it was straightforward to fit this. With the centre nut also fastened up tight, the dash is now looking right, albeit I still have a few switches and the vents to install. As I had to lie on my back in the footwell to do this, and with a mind to future required jobs, I got out the new carpet set and lobbed the footwell carpets in and the boot carpet while I was at it. I am not quite ready to commit to carpeting the MG, but it was good to see the set and acquaint myself with the different parts.

26 Dec 2020 Moving under its own power

First of all, a very Happy Christmas to everyone – I hope you’ve all had, or are continuing to have a great time. Progress on the MG took a leap forwards (actually backwards, but we will get to that) recently following a visit from Phil James, who is a specialist classic car electrician. We had been messaging back and forth for a few weeks after my initial web enquiry and finally settled on a date that worked for us both in early December. Phil came for the day and after a brief chat he just got on with labelling, tidying up, connecting and sorting out the loom with all its connections. I got on with my day job, but checked in on him from time to time, keeping the tea topped up. He made rapid progress and by the end of the day, he had got a lot more connected than I could have hoped for or achieved in the same period! I would recommend him highly.

Phil’s website is here

This photo doesn’t really do justice to how much more complete the electrical loom is based on the work done by Phil

So that was a good day’s work and I’ll have Phil back soon to fit some more components which I have needed to buy. Part of the idea of getting him involved was to help me work out what was needed and we certainly achieved that and I’ve been busy since on the internet ordering the missing bits. Watch this space for further updates as various components get fitted.

So it was with refreshed enthusiasm that I crawled into the MG through the hatch the following day (which was a Saturday) and decided that I would attempt to drive out of the garage, rather than the usual back-breaking push. I should explain, that there wasn’t room to open the door due to how it was last pushed in. Feeding myself into the driving position (the seat had been lifted out to make room for Phil), I cranked the MG over and was pleased for it to burst into life on the second turn of the key. It would have fired up first time, but I am still getting used to ‘catching it’ as it turns-over. It was a bit intimidating to select reverse for the first time, with the engine running, but I gave it a go and was greeted by a grinding noise. Ah. I gave the clutch a couple of pumps and tried again. This time, the gear selected smoothly and I was able to feel for the bite point on the clutch, raise the revs a little and ease the MG out of the garage. This was the first time the MG had moved under its own power in my ownership, and from a time perspective in approximately 8 years. Woohoo, what a moment! Before I got carried away, and remembering that I have NO BRAKES, just a handbrake, I gingerly allowed the MG to come to rest on the lip of the garage entrance and shut it off.

As I reflected on this progress, both electrical and mechanical I was enthused to order new brakes (Calipers and disks) for the MG and I’ve put sorting the brakes onto my priority list for the new year, so it can be moved around with confidence, and of course, when appropriately complete, to be driven for real.

On a festive note, a couple of photos below of a nice pre-war Riley that I spied at a recent event new to me, which was Carols on Track, a drive-in Carol Concert organised by the local Churches after Castle Combe Racing Circuit generously made their paddock area available for the event. As a response to the pandemic restrictions, Churches all over have been thinking about ways to celebrate the Christmas season. Our own Church has been hosting restricted services, as well as online content, but we had no way to hold our traditional Carol Service. So we were delighted and intrigued to attend Castle Combe. The basic idea was to get parked up and then either stay in your car, or stand socially distanced outside, as the Carols and Lessons were played out over a professional PA system. I have to hand it to the organisers, who had arranged for hot drinks and hog roast stall to be available for the punters. The service was a combination of deeply emotional carols such as Silent Night to the all out riot of the 12 days of Christmas with horn blowing and lights flashing. Great fun, and it may become a permanent fixture, COVID or no COVID. Turnout was about 100 cars as a conservative estimate.

So, I’m feeling positive about 2021, with more work due on the MG, perhaps that elusive first drive, and us all getting on top of COVID. Best wishes to you all and God Bless

15 Nov 20 Replacing the alternator

A surprisingly sunny November morning appeared from what I had thought was a write-off rainy weekend, so it was out with the MG to swop out the old alternator with a new one from MGB Hive. When I first got the MG, the alternator was covered in white aluminium corrosion crystals. I scraped off the worst and when I fired the car up (this was 3 years ago) for the first time, there was a flurry of white as the loose crud spun out. Suffice to say I thought the alternator had seen better days and so having recently restarted the engine I decided to replace it. Also prompting me to this job was that whenever I have run the car recently, it has flattened the battery. This was either because the old alternator was not working properly, or because something wasn’t wired properly. As I was going to replace the alternator anyway, I tried this first.

The alternator is held in place with two bolts at the top, which mount onto lugs on the engine block and with a single bolt at the bottom which secures a curved slotted plate. The slotted plate allows the alternator to pivot so that the fan belt can be fitted over the pulleys and then tensioned correctly. The slotted plate then fixes to a lower lug fixed to the engine block. The lower lug is fixed with a specifically shaped bolt which I had replaced much earlier in the rebuilt when it had sheared off spitefully on removal. Before I took the old alternator off, I started the engine and measured the voltage at the battery – 12.3v.

Fitting the new alternator was pretty simple although it’s a heavy old bit of kit. I did a visual comparison before I removed the old one just in case it was to join my list of wrongly ordered parts, but it measured up alright so I committed to the job. I laid a decent blanket over the wing for protection and knelt on a tool box with a blanket on it for comfort. I used a combination of tools to remove the bolts which were 0/5″ and 9/16. This included my trusty Halfords Professional mini socket set, the Elora large socket set gifted to me by my friend John, the socket spanner set gifted to me by my brother Tris and a plain open jawed spanner. Each tool works well in its own way and I was grateful for the choice.

With the new alternator fitted and the fan belt at roughly the right tension, I fired up the car again. It fired second time and settled into a lumpy idle (carbs still not set up right – where are you Dad? ha ha). I tested the voltage at the battery and got…the same 12.3v. I was hoping for between 13-14v but I could be wrong. So maybe the issue is not solved. I should have had someone hold the revs higher and measured it again, but Helen was working in her study, so I didn’t disturb her. So we will see if the battery is flat when I try again. Hopefully next weekend we will get another weather window for further investigation. Before sitting down to do this update, I sent a web enquiry to a mobile auto electrician just to gauge their interest in giving the electrics a once over and validating what I’ve done. I think it might be worth getting a professional involved in this one…

7&8 Nov 20 Starting progress

One advantage, perhaps the only advantage of lockdown is that we are forced to stay at home and not go ‘gadding about’ as we are normally inclined to do. So it was that after a most pleasant stoll in nearby Cirencester Park, Gloucestershire, as part of our permitted exercise, I found myself with a sunny late autumn afternoon to dedicate to the MG.

I decided to sort out the choke spindle on the carburetters (carbs for short) which I had managed to fit the wrong way around. What I haven’t recorded here is that I had previously corrected the throttle spindle which I had also fitted the wrong way around. Such is the lot of first time amateur car restorers such as myself, progress is riddled with little mistakes, however, with each mistake, I try to learn something. So to the choke spindle, which is an assembly comprising a spindle which sits within a cup on each carb (the MG has two). The choke mechanism operates when the choke handle is pulled on the dash. This causes the cable to tighten which, being attached to a lug on the spindle causes it to rotate. This rotation causes the choke mechanisms on both carbs to be operated because the ends of the spindles have lugs which fit onto the cams which themselves are on the end of the choke mechanism. The choke mechanism moves the needle inside each carb to richen the mixture, but also opens the throttle because the cams connect with a screw on the throttle spindle.

The fun begins when you realise that the spindles are not held in place in any way other than sitting in the cups on the carbs so when fitting the carbs you have to align the spindle ends (4 in total, 2 for the throttles, 2 for the chokes) with the cups, and have them aligned to the lugs (again 4 in total) while you are trying to to wriggle the carbs onto the mounting studs (4 in total). I make that around 12 points of contact which you are having to manage and it was certainly easier when I was able to phone a friend. To reverse the wrongly installed spindles, I loosened the carbs, but wanted to avoid taking them off as then you have to do the full accordian player impression as the two carbs writhe in your hands. The carb mounting studs are worth a mention, being located cruelly in the most awkward position and in perilous proximity to the razor sharp edges of the heat shield. It would be good to have three elbows on your arm at this point rather than the inadequate one we have to deal with. I won’t bore you with a blow by blow account, but suffice to say I got it all done in two attempts and only one skinned knuckle. I then fitted the air filters and went for a start up.

I connected the battery (ignition switch solution still pending), heard the familiar ticking of the fuel pump and turned the key. One click and then nothing. Mmm. I tried my spare battery, and it cranked over willingly but wouldn’t fire. Then I remembered to reconnect the coil wire I had disconnected. This time the engine started straight away, with full choke of course, and settled at a fast idle. After it had run for a minute or two I pushed the choke in and tweaked the idle speed to get it to idle correctly. I recorded the sound of the engine in the YouTube clip below. To get the authentic bass – use headphones. For an MGB is does sound rather tasty. Its obviously not set up right just yet, but it’ll do for the moment.

So that was a reasonable afternoon’s accomplishment. Today (Sunday) was a more gloomy day both weather and progress wise. A dull autumn day dawned and after finishing off the chores and watching Church online (another COVID consequence) I pushed the MG onto the drive intending to fit the engine fan I had bought recently. To get access to the pulley I determined it would be neccesssary to loosen the radiator and pull it away from the area. This is relatively simple on the MGB, being six 0.5″ bolts (what else) to remove. Having pulled the radiator back I realised that the fan I had bought was the wrong one – annoying as I thought I had searched it correctly. More catalogue searching required and another item for my MGB parts shop which I will be opening at some stage to sell on all the surplus parts I have amassed over three years. So I had to pointlessly put the radiator back again. It was then I remember that fitting the radiator is more difficult than removing it. The radiator is mounted by the aforementioned six bolts to a steel shroud which is fixed with eight bolts to the inner wings. The challenge is to get this all to align. The shroud in my MGB, despite being resplendant in shiny black from the paint shop, is I believe a bit warped. The off side is particularly difficult and I had to loosen all the bolts on the radiator and shroud on that side to get each bolt to bite on its thread. Having had this difficulty before, I was up to the challenge this time, and a bit of thinking and remembering got the job done in the end. All helped along by my Radio 4 soundtrack in the background, latterly a re run of ‘Just a minute’ with the late Nicholas Parsons.

Thanks for reading – God Bless and Stay Safe.

4 Oct 20 Milestone #2 Engine Start – Achieved

So the title of today’s entry gives away the punchline, but suffice to say I am very pleased to have managed to start the engine today. Woohoo! As a quick recap, I had to send the carbs away as they had been incorrectly re-assembled when they were refurbished. I’ve had an explanation from the company boss that they were installed as they came in. Err, that will be me then. However, all I had done was to take the carbs apart, decide they were in a shocking state and send them away to be rebuilt. Anyway, its all good now and that’s the main thing.

As always with this project, there were some hurdles and hiccups along the way, mostly my fault as we will see. Firstly I removed the carbs from their wrapping. They had been thoroughly wrapped but of course as they were not on the heat shield, but separated so I had to do that thing where you put the linkages together and then hold it all together as a loose assembly as you carry it over to the car and mount it on the studs. In my enthusiasm to get it started, I fitted the throttle linkage upside down, only discovering this after I had awkwardly installed all four nuts and tightened them up. The nuts are extremely awkward to fit – to get the nuts onto the studs the carbs need to be slid up to near the tio to clear the carb body. The two under the carb are even more awkward. Still at least I have now had plenty of practice. Still impatient to attempt a start, I interupped Helen from her work educating the youth of today (yes, secondary school teachers work on the weekend) and asked her to crank the engine over while I manipulated the choke and throttles. On the second turn of the key, the engine fired, but didn’t catch. This was a promising sign, so Helen cranked again and this time I caught it on the throttle and we had a spluttering rev, and a bit of popping. A third attempt resulted in steady fast running with choke and throttle applied. A little exhaust smoke was rising into the engine bay and it was a it of a smoky affair all round. Having relieved Helen of her responsibility as chief cranker I set to to correct the linkage mis-assembly.

I was determined that to turn the linkage around to its correct orientation I wasn’t going to remove both carbs. Instead I removed the front carb, and loosened the nuts on the rear carb. This gave me enough fiddle room, just, to swap the linkage around and then to enjoy the fun game of ‘put the the nut on the stud under the carb bonnet’. It really is a dexterity test and took a bit of trying, but I got there in the end without breaking down in tears. With the linkage in the right way, I could connect up the throttle and choke cables and start the engine in the usual way from inside the car. When I say, the usual way, the ignition switch is on the floor of the car, so not exactly usual, but I didn’t say it was perfect. The car started on the second attempt and I was able to walk around to the front while it ran and see if there was anything amiss. The engine was running fine with full choke but started to splutter as soon as I reduced the amount of choke, so not sure if it was still a bit cold, needs setting up or a bit of both. Anyway, this was a test and I didn’t want to push my luck, so with a quick look around the engine bay I knocked the choke off and let it stall.

So issues identified to investigate today included:-

  1. Loose alternator bolt – tightened
  2. Noted broken cores in the Earth cable to the battery – need to order a new one
  3. Coolant level dropped – top up and check

So we have achieved ‘Engine Start Milestone’ which I set quite a long time ago. Next Milestone I am setting myself is ‘Dashboard Complete.’ This is a complicated one which is going to involve fitting all the gauges, the windscreen wiper system and the Heating and Ventilation System. However, it’s the next logical step and certaintly needs doing before any other interior work is undertaken. Thanks to all of you have journeyed with me towards this milestone. Your support and practical help have been invaluable. God Bless.

9 Aug 20 Fuelling around

So having demonstrated that the MG would start, it was time to connect up the fuel pipe and provide a reliable supply to the carbs to sustain running. I had a reliable assistant in the form of Matt (Ellie’s boyfriend). First we bought some fresh fuel and charged the tank with 5 litres. Next we connected the fuel pump wiring, connected the battery and heard a reassuring tick from the pump (err, surely after you turned on the ignition…). After a short while we were concerned that no fuel was flowing through and sure enough, on checking I found the pump was plumbed the wrong way around. I wonder who did that?

After a bit of replumbing and we were back in business although still there was no fuel feeding through to the filter let alone the carbs. Vaguely remembering something about air locks we released the pipe at the carbs end and with a hiss we started to see fuel travelling through the filter and turn up to the carbs. Progress!

But this wouldn’t be the Relentless Duck blog without some ‘issues’ and without detailing all the challenges, we did have a leak out of the fuel sender unit. Not being sure why this was leaking we set up a fuel can to catch the drips until the level was low enough for it to stop. The following day, on a break from work, a YouTube video showed how this should have been tightened up. Another day, another thing learned.

With fuel to the carbs, surely the MG would now fire up and continue running? Sadly not, the carbs refused to take the fuel and the removal of the lid from the float chamber revealed it to be dry. Oh dear. Further investigation needed, the outcome of which will be covered in a future post

07 Aug 20 ENGINE START!

I don’t really approve of ‘shouty’ capitals, but I think this entry justifies their use, albeit in the title only. Today, on my 50th birthday, we achieved the Engine Start Milestone. Let me qualify that a bit. When I say ‘we’ I mean, my Dad, mainly. When I say the engine started, I mean just that – we got it to start, but not run. This was principally because to fuel it, we were not using the main tank, but a borrowed fuel bottle hung from the bonnet catch. But it did fire up, several times and briefly make a loud ‘vroom!’ before ceasing when the fuel we had poured down the throat of the carburettor was consumed. The important point is – it starts!

So today being my 50th birthday, we had invited some close family over within the COVID regulations – so a much smaller group than usual and with the requisite social distancing. My darling wife Helen had, as usual, put on a lovely spread and guests arrived and were dining al fresco in the relaxed garden setting under the Gazebo. After waiting for what seemed to be a polite period of time, Dad said to me ‘what about the MG then’ and we discretely retired to the garage to scratch our respective heads on the non-starting issue.

Dad focussed on getting the electrical side of things sorted and this involved correctly wiring the distributor and setting the timing. This took longer than it should have done, which isn’t very interesting to record here, however after muc removal and refitting of the distributor cap and HT leads we had a spark occuring at the right time but no starting of the engine. We turned out attention to the fuel bottle and suspicious that fuel was not actually getting into the carbs, we poured (I should say, carefully measured a precise quantity of fuel) fuel into the throat of the carbs and turned the engine over. With a vroom and a puff of smoke out the exhaust the engine fired for the first time in over two years. Yes! So I am grateful to Dad (and Matt my Daughter’s boyfriend) for this birthday treat! It was all very exciting. We fired it a couple more times to see see if we could maintain the running before concluding that actually some fresh fuel in the tank and connecting the fuel pump was probably the way to go. Sadly we had run out of time, so this job was deferred for next time.

So this is a great encouragement – I’ve had a lovely birthday, which really started on Wednesday with a visit from my oldest (he not old, but I have been friends with him for the longest time) friend Phil, then a surprise gift and cake from my work colleagues on Thursday, leading to today’s event. Tomorrow we have friends over to continue the celebrations, again reined in by the regulations to a very small group. I heard someone say that birthdays should be a three day event – I’m on four days and going strong!

21 & 22 Mar 20 Significant progress

I am writing up progress over two days today, Saturday and Sunday of this first weekend in which we are living through the most extraordinary changes in our lives due to the COVID-19 outbreak. I’m not going to focus on that, instead I’m going to talk about progress on the MG.

On Saturday I managed to get the MG to crank over – this was a big step forward. I didn’t get it to fire up, but we’ll get to that. The main thing preventing me from starting the engine had been the wiring of the ignition switch. I had been baffled by the switch terminals which I just couldn’t relate to the wiring diagram. Added to that, having got it wrong and frightened myself with the battery terminal sparking, my confidence was low. However, after conversations with my Dad and some on-line help from Nick Dring (thanks guys), I sat in the MG on the driveway on a sunny Saturday and just ran through some wiring scenarios. Using my Dad’s fooproof lamp test to keeps things safe, it took eight attempts to finally get it right. I had the engine cranking over in every ignition switch position including 0, I and II. Position III remained elusive, but it was a great feeling when I finally stumbled on the right combination and it cranked over on position III. Of course I could have avoided all this by taking a photo of the switch before I stripped it down, but its a bit late for that now!

The rest of the day was spent in attempting to get the engine started, ultimately unsuccessfully. I did connect up the choke (not very well), tightened the throttle cable and resolved a couple of areas which were leaking oil due to not being tightened up properly – namely, the rocker cover and the oil filter oil cooler pipe union. For fuel I used a bottle (borrowed from my friend john) connected to the carbs and hung from the bonnet catch. Out of interest, I recorded key parts of the day on my iPhone and made them into a YouTube video, linked below. Be warned, its 14 minutes….

Video of me not starting the MG

Onto Sunday and I diverted from the engine (for which I need some brainy help) to focus on some items of trim which I have deliberately ignored for a good while now. It made for a change to be focussing on something different. Plan for today was to fit the chrome trims to the rear quarter lights. I had previously fitted these just to get them off the garage shelves but they had to come off for me to fit the trims. This meant that I needed to learn how to use a pop rivet gun which I have never used before. A quick YouTube video later and I was a pop-rivetting hero. As any one will tell you, its really easy. The trims are original and despite a clean up using autosol they are a bit ratty, but from what I remember, buying all new is extremely expensive and in these dire times I can’t justify any frivelous expenditure. I can always buy new trims later down the line. I got the o/s all sorted nicely, but the n/s side wasn’t as easy, the trims being a bit buckled and hence more difficult to fit and the rubber seal had gone missing (it’s somewhere in the garage). Anyway, some useful time wokring outdoors on the MG – I halted during the middle of fixing a trim to the A-post on the n/s due to being asked if I would like to go for a walk with Helen and Lou – priorities being what they are, I pushed the MG into the garage and that was the day’s work done.