7&8 Nov 20 Starting progress

One advantage, perhaps the only advantage of lockdown is that we are forced to stay at home and not go ‘gadding about’ as we are normally inclined to do. So it was that after a most pleasant stoll in nearby Cirencester Park, Gloucestershire, as part of our permitted exercise, I found myself with a sunny late autumn afternoon to dedicate to the MG.

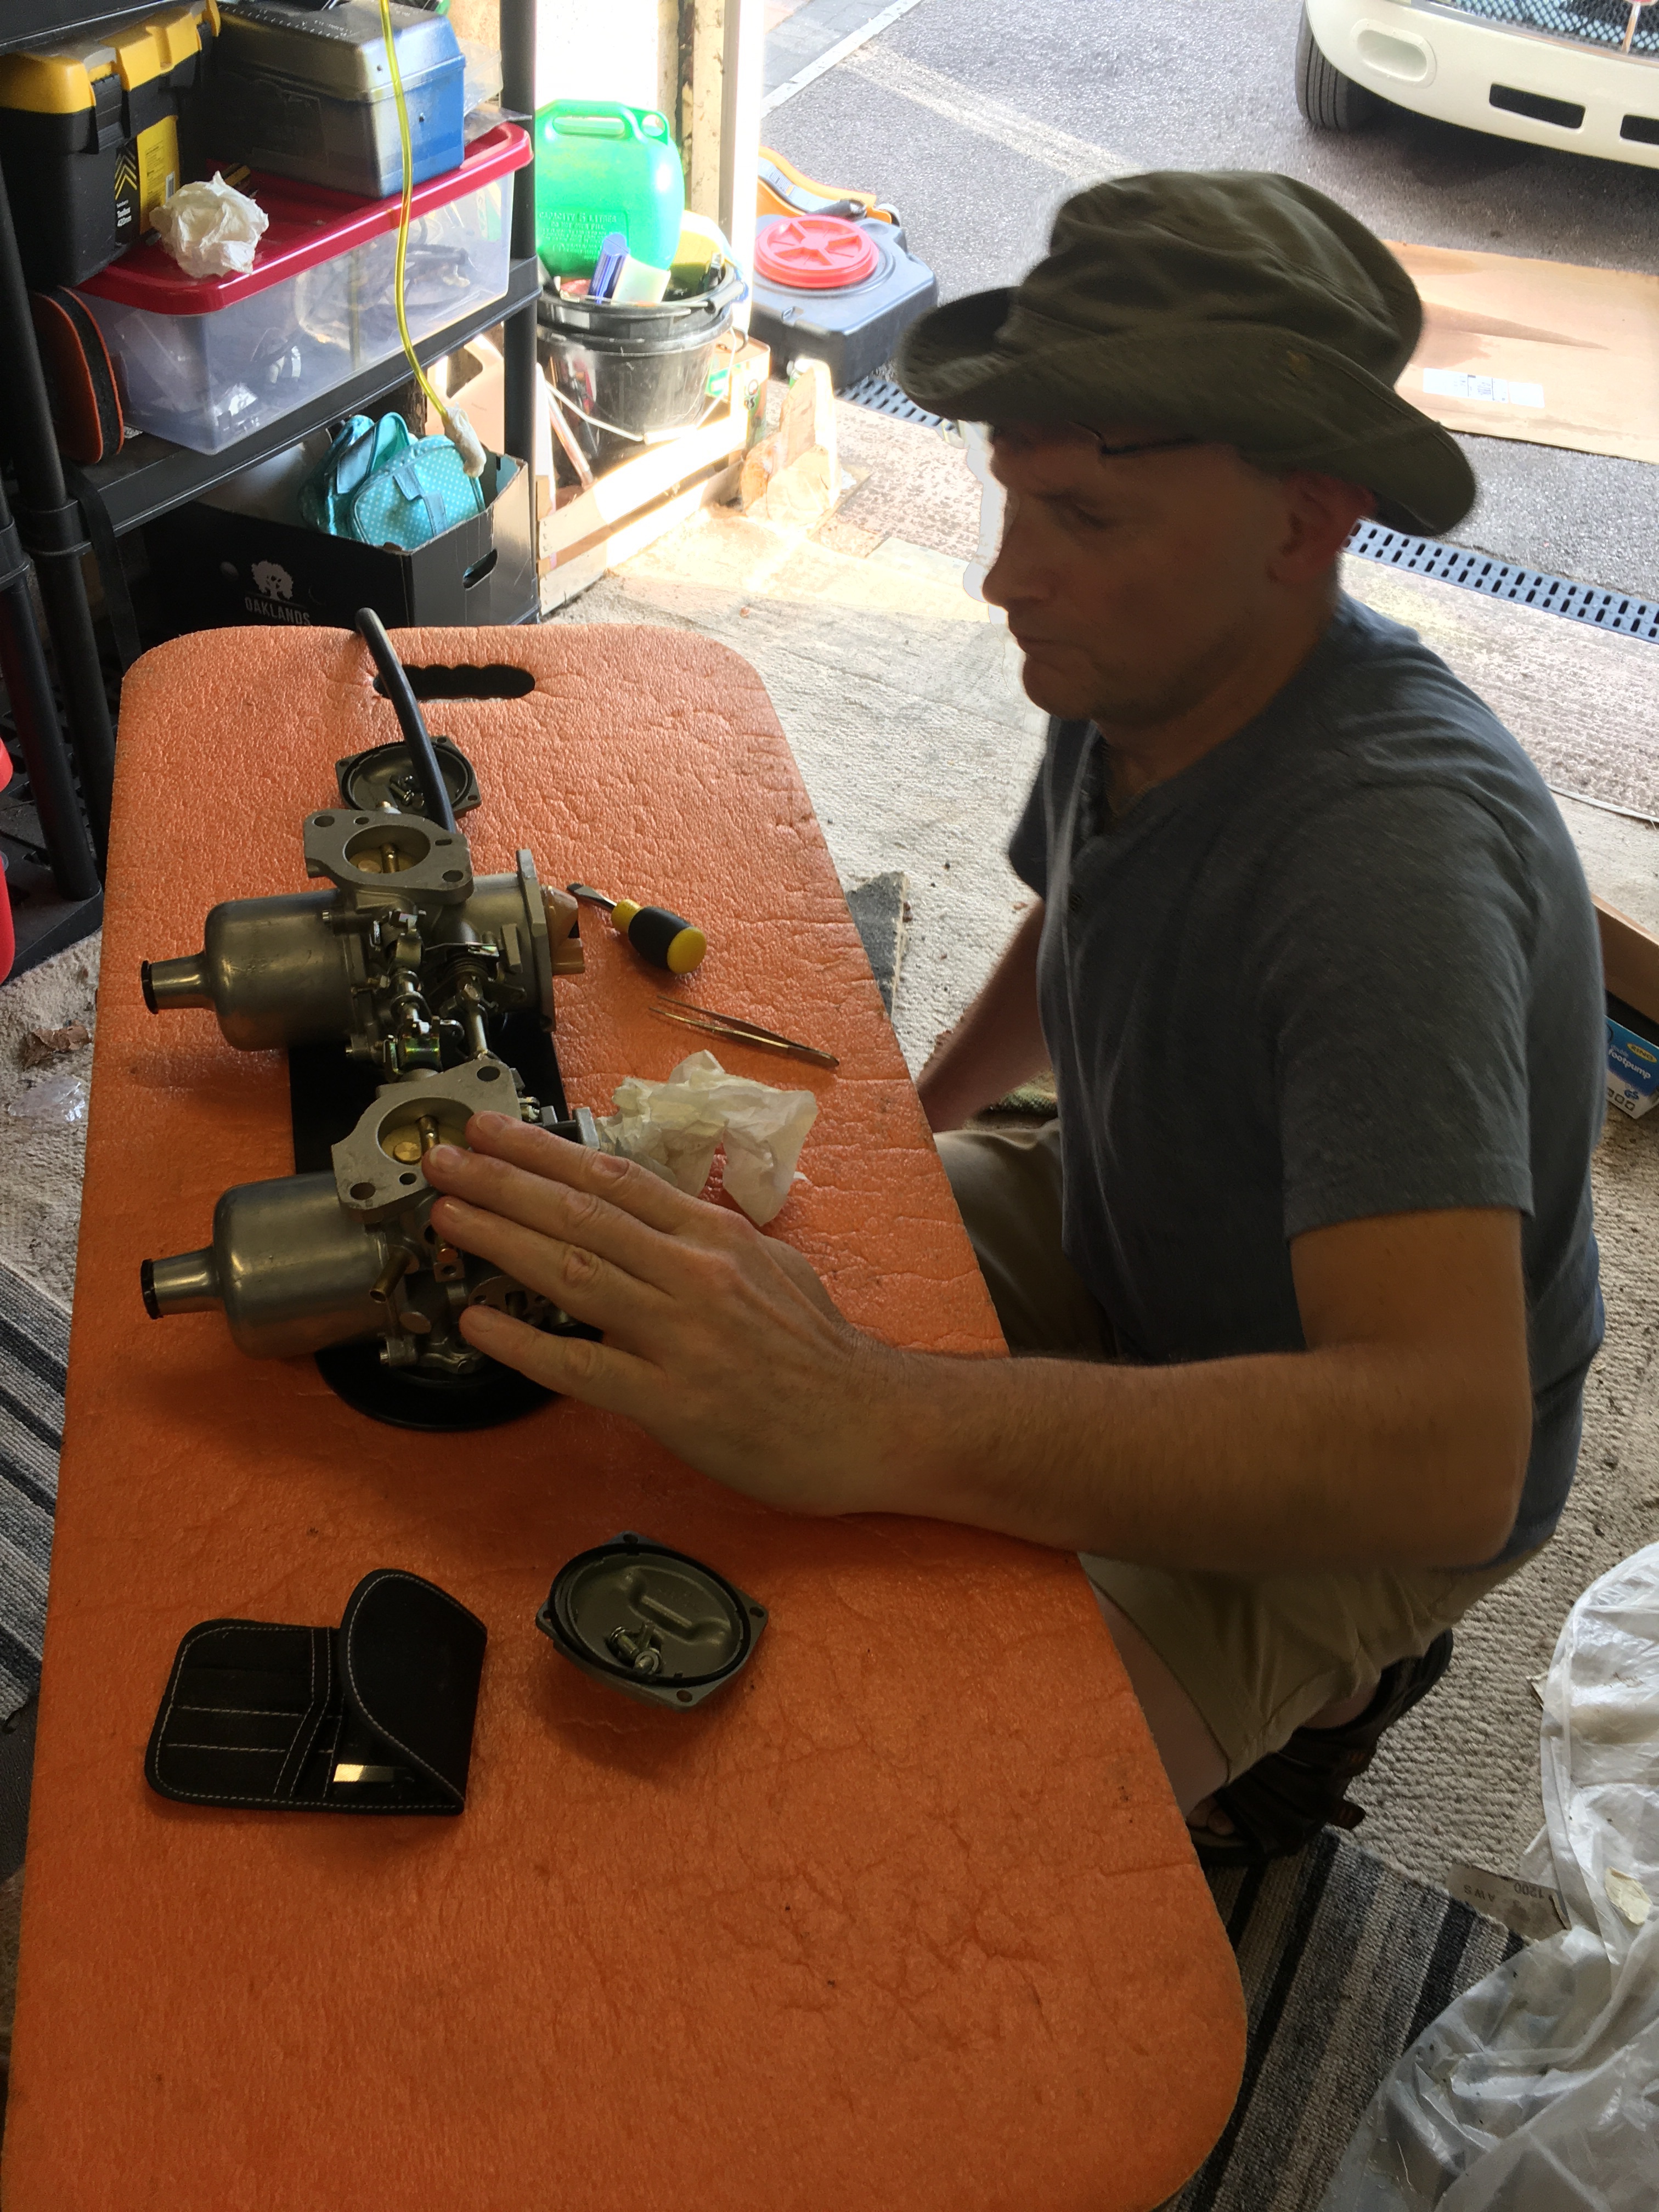
I decided to sort out the choke spindle on the carburetters (carbs for short) which I had managed to fit the wrong way around. What I haven’t recorded here is that I had previously corrected the throttle spindle which I had also fitted the wrong way around. Such is the lot of first time amateur car restorers such as myself, progress is riddled with little mistakes, however, with each mistake, I try to learn something. So to the choke spindle, which is an assembly comprising a spindle which sits within a cup on each carb (the MG has two). The choke mechanism operates when the choke handle is pulled on the dash. This causes the cable to tighten which, being attached to a lug on the spindle causes it to rotate. This rotation causes the choke mechanisms on both carbs to be operated because the ends of the spindles have lugs which fit onto the cams which themselves are on the end of the choke mechanism. The choke mechanism moves the needle inside each carb to richen the mixture, but also opens the throttle because the cams connect with a screw on the throttle spindle.

The fun begins when you realise that the spindles are not held in place in any way other than sitting in the cups on the carbs so when fitting the carbs you have to align the spindle ends (4 in total, 2 for the throttles, 2 for the chokes) with the cups, and have them aligned to the lugs (again 4 in total) while you are trying to to wriggle the carbs onto the mounting studs (4 in total). I make that around 12 points of contact which you are having to manage and it was certainly easier when I was able to phone a friend. To reverse the wrongly installed spindles, I loosened the carbs, but wanted to avoid taking them off as then you have to do the full accordian player impression as the two carbs writhe in your hands. The carb mounting studs are worth a mention, being located cruelly in the most awkward position and in perilous proximity to the razor sharp edges of the heat shield. It would be good to have three elbows on your arm at this point rather than the inadequate one we have to deal with. I won’t bore you with a blow by blow account, but suffice to say I got it all done in two attempts and only one skinned knuckle. I then fitted the air filters and went for a start up.

I connected the battery (ignition switch solution still pending), heard the familiar ticking of the fuel pump and turned the key. One click and then nothing. Mmm. I tried my spare battery, and it cranked over willingly but wouldn’t fire. Then I remembered to reconnect the coil wire I had disconnected. This time the engine started straight away, with full choke of course, and settled at a fast idle. After it had run for a minute or two I pushed the choke in and tweaked the idle speed to get it to idle correctly. I recorded the sound of the engine in the YouTube clip below. To get the authentic bass – use headphones. For an MGB is does sound rather tasty. Its obviously not set up right just yet, but it’ll do for the moment.

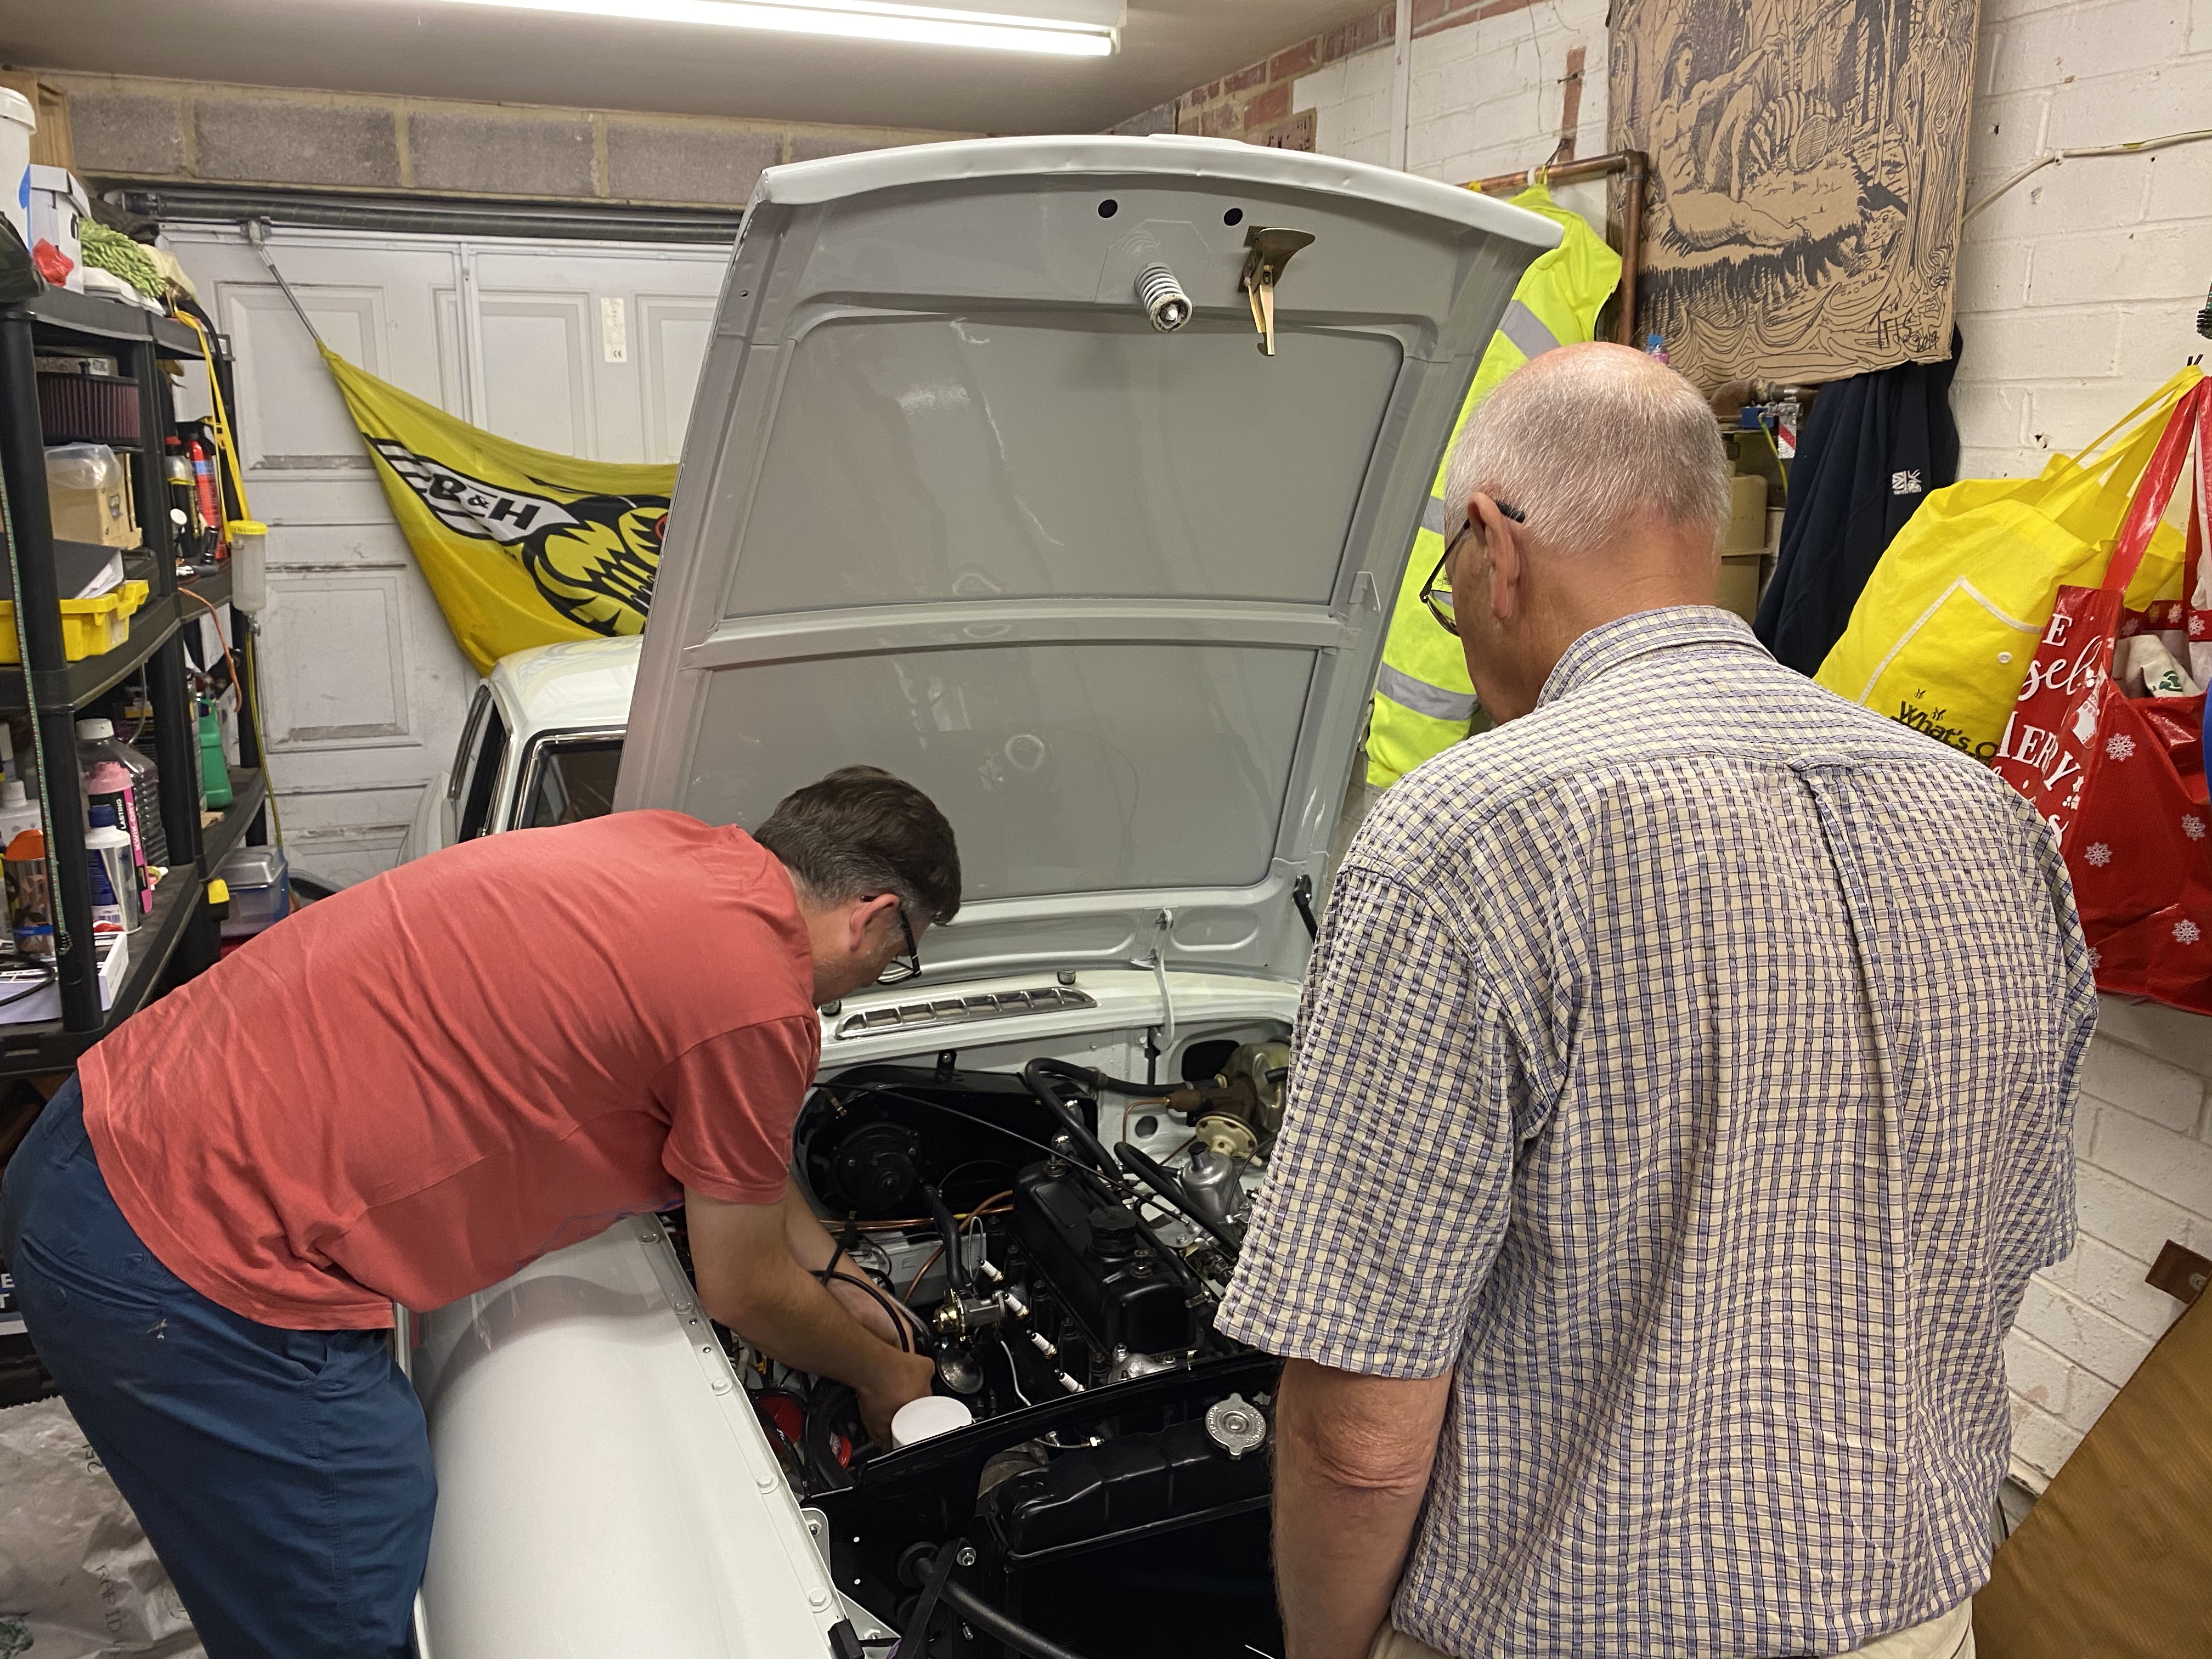
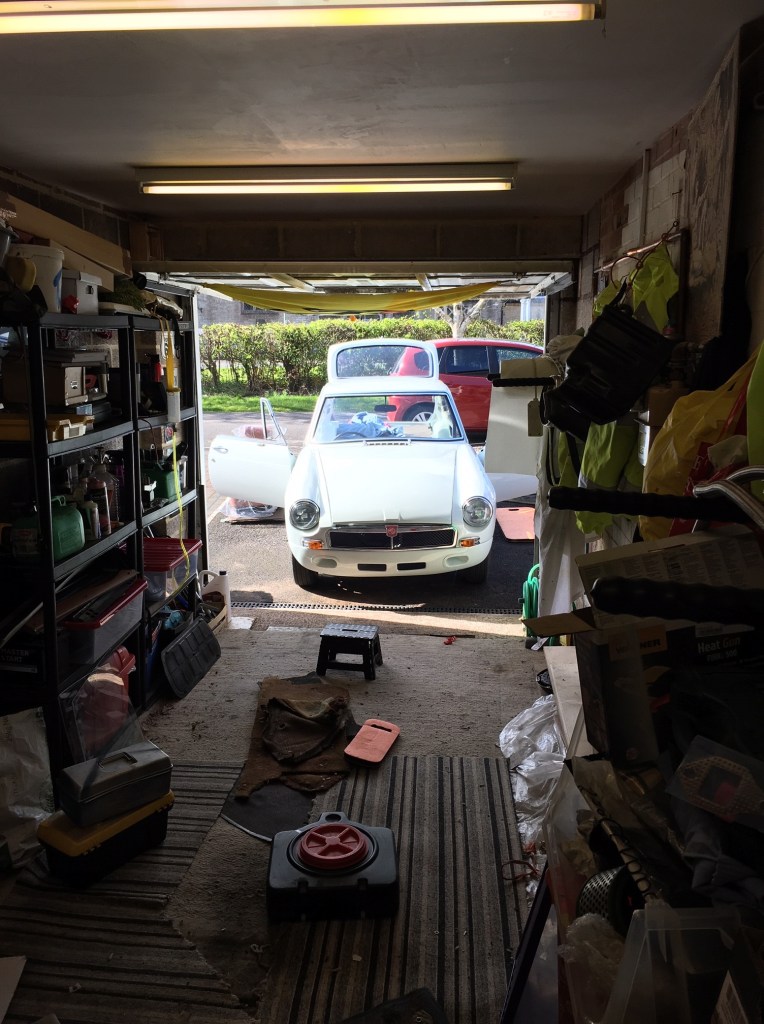
So that was a reasonable afternoon’s accomplishment. Today (Sunday) was a more gloomy day both weather and progress wise. A dull autumn day dawned and after finishing off the chores and watching Church online (another COVID consequence) I pushed the MG onto the drive intending to fit the engine fan I had bought recently. To get access to the pulley I determined it would be neccesssary to loosen the radiator and pull it away from the area. This is relatively simple on the MGB, being six 0.5″ bolts (what else) to remove. Having pulled the radiator back I realised that the fan I had bought was the wrong one – annoying as I thought I had searched it correctly. More catalogue searching required and another item for my MGB parts shop which I will be opening at some stage to sell on all the surplus parts I have amassed over three years. So I had to pointlessly put the radiator back again. It was then I remember that fitting the radiator is more difficult than removing it. The radiator is mounted by the aforementioned six bolts to a steel shroud which is fixed with eight bolts to the inner wings. The challenge is to get this all to align. The shroud in my MGB, despite being resplendant in shiny black from the paint shop, is I believe a bit warped. The off side is particularly difficult and I had to loosen all the bolts on the radiator and shroud on that side to get each bolt to bite on its thread. Having had this difficulty before, I was up to the challenge this time, and a bit of thinking and remembering got the job done in the end. All helped along by my Radio 4 soundtrack in the background, latterly a re run of ‘Just a minute’ with the late Nicholas Parsons.

Thanks for reading – God Bless and Stay Safe.

17 Oct 20 Jaguar Mk2 Driving Experience

Something a bit different! Following up on my recent driving day experience in three modern supercars, today I travelled with Helen to Upton Warren in Worcestershire to drive a Jaguar Mk 2. This was a present for my 50th Birthday from our dear friends Sarah, Lewis, Martha, Freya and Joe and much appreciated – thanks guys. We had an unhurried drive up from our home in Wiltshire and the weather stayed clement, a good start. We arrived at ‘Great Driving Days’ which was situated on an agricultural yard next to a field of Highland cattle. We spotted ‘our’ car on the yard and eagle-eyed Helen spotted that one front corner was pushed in. The guy explained that the car had been ‘bent’ when out on loan earlier in the week, ending up in a ditch. Oh dear. We were offered a swop, but my heart was set on the Mk2. We had a quick overview of the controls and pressed the starter button. Amazingly, it fired instantly, which was impressive. Later my Dad would relate that a friend of his had a Mk2, back when he was a young man, and they always reckoned that his car started before your finger reached the button! I gingerly blipped the heavy throttle, selected first and eased out the clutch. With a whine from the gearbox, the old Jag pulled smoothly away. We rumbled along the track to the main road and with Helen in charge of navigation, turned left onto the main road.

First impressions: Pick up was lively, but I was having some trouble initially with negotiating the gear change from 2nd to 3 via quite a wide gate while smoothly feeding in the throttle. Compared to my daily diesel SUV, the throttle response was really crisp so blipping the throttle when changing down was a real pleasure. The other first impression was of the slow steering, which although it had been converted to power steering had a slow initial turn in with it needing a good quarter turn on even the slighest bend. I was having to recallibrate against modern cars – the slow steering, crisp throttle response, the long throw and wide gate of the gearbox. So I was concentrating quite hard at this point, but appreciating the sound effects of the straight six up front.

After a few minutes I was starting to get to grips with the controls and starting to just enjoy the experience – the view down that lovely bonnet with the leaping Jaguar. Feeling more confident, as the first straight bit of road appeared, I tentatively pushed the throttle all the way in third and allowed it to build revs. This was fantastic, over a certain RPM, the engine note changes and becomes a deep-throated roar accompanied by a decent shove in the back. I looked down at the speedo and we were only doing about 45mph! The beautiful large rev counter was unfortunately not working, so I changed gear ‘by ear’ and I was respectful of the age of the vehicle. All the gauges were reading well – temperature was steady (it had a later electric fan), oil pressure held up, although it dropped at idle and the voltmeter stayed put. The dash is all wood, with great big old gauges with retro script and a row of toggle switches, it really is iconic.

The route we were following had a really good mix of roads, from quiet country lanes to open B-roads and a little bit of A-roads. During the drive, I was starting to discover a dual character to this old Jag. Its first character is all about burbling around in the big squishy seats, enjoying the view and using the torque of the engine to pull you along with minimal changing gear. As we pottered through a narrow country late, I pulled over to let some cyclists come through – the lead cyclist mouthed ‘nice car’ and waved. I agreed! The other character of the car is when you have room to give it some welly in second, snick it up into third, give it some more welly, attain a pretty good turn of speed and then fling it into forth. For an old car, the acceleration is brilliant and the gearchange is really slick once you’ve got the feel of it. In this mode, the Jag is a racing machine, apparently lapping up this kind of treatment. It has to said, with open throttles, at higher revs, it was very noisy, with induction roar, exhaust blare, gear whine and wind noise all contributing to a glorious din. In addition, heat was wafting up the gearlever gaiter from the gearbox – a multi sensory experience!

With my amateur mechanic hat on, I would say that the Jag was idling at too high revs – I wondered if they had set it this way to help people to avoid stalling. Also, the particular car had a few defects which it would have been to rectify, like loose door capping and a stiff throttle pedal which could have done with being eased to make it drive smoother, but I’m being a bit picky.

We stopped for the obligitary photo shoot with Helen taking her usual high standard of still photos and video on her iPhone, including her jumping out of the car and energetically running up the road to film the Jag driving through a ford.

All too soon it was time to return the Jaguar to its home and we arrived back safely to the farm with Jag in one piece. A really enjoyable experience – now to the pictures!

Two hands on the wheel please Mr Trigg – look at that iconic dashboard
Nice artistic detail shot from Mrs Trigg
Mrs Trigg looks adoringly across as her husband manfully tames the big cat
Iconic photo of classic car driving through Ford

So thanks to the Boddy family, Helen and to ‘Great Driving Days’ a small business based in Upton Warren. I would highly recommend them based on this experience. For anyone else doing one of these, you need to set your expectations. These cars are in working order – don’t expect concours condition – and being classics, they are noisy, smelly and antiquainted. That’s the appeal and it was an unforgettable, and repeatable experience!

12 Aug 20 Releasing the carbs

Having established at the weekend, with Matt’s help, that the carburettors were blocked, and having consulted the ‘MG helpline’, A.K.A. my Dad, I found time this evening, with the help of my friend John, to investigate the problem. The UK was in the middle of a heat wave, one in which the temperature and humidity peaked between 5pm and 6pm arond 30 degrees, which was when we started to look at the MG. So the only right thing to do, while we wheeled the MG out, was to crack open a couple of cold beers and take a leasurely look at the problem. With John on board, this was going to be a logical approach to problem solving. Having already proven fuel would flow up to the carbs, we now knew the challenge was with the carb itself.

Step 1: Use a footpump to attempt to blow air into the carb. Result: No air passing through. Conclusion: Float/Needle valve stuck

Step 2: Remove carbs. Removing the carbs in theory is easy, its just four nuts. In practice, its fiddly, because the nuts won’t come off without waggling them to the end of the studs and then getting the angle just right. Having two people on hand is a definate advantage here, unless you are an octopus. Next challenge was to keep the carbs together with the linkages intact. To do this, we had the idea to use the plate that holds the air filters as a sort of jig. That took a bit of work to get right, but without (much) swearing, the carbs rattled free of their studs and were on the work bench.

Step 3: Remove float chamber lids. These come off easily enough, although the ‘O’ ring on the front carb hopped out of its slot and showed little enthusiasm to pop back in. Using the footpump and with the float valve open we used the foot pump again to add pressure and with a nice ‘pop!’ the needle valve on the rear carb freed itself. Surely the front carb would do the same, but it wasn’t shifting, so John tickled it with a pair of fine tweezers and before long both carbs were wheezing along in harmony at each press of the pump. How satisfying.

Step 4: Reassemble and refit the carbs. Hmm. That float chamber ‘O’ ring did not want to play ball and needs to be replaced, however, we think we teased it back in place and made a seal on both float chamber lids. We then man handled and wiggled the carbs back onto their studs, tightened them up and connected the breather pipe, fuel line, throttle and choke linkages.

Step 5: Test start the engine. ‘Hang on a minute,’ said John ‘didn’t you say that the fuel pump and coil are always on when you connect the battery?’ A discussion ensued in which John advised me against firing the engine when we are not confident of how the wiring was configured. So we disconnected the ignition switch and using a multimeter, identified what the various terminals were and then attempted to connect the correct wires. As we were nearing a conclusion on this, the rain came in heavy so we abandoned the task for the day having made some actual progress, but with some work to go to achieve sustained running.

9 Aug 20 Fuelling around

So having demonstrated that the MG would start, it was time to connect up the fuel pipe and provide a reliable supply to the carbs to sustain running. I had a reliable assistant in the form of Matt (Ellie’s boyfriend). First we bought some fresh fuel and charged the tank with 5 litres. Next we connected the fuel pump wiring, connected the battery and heard a reassuring tick from the pump (err, surely after you turned on the ignition…). After a short while we were concerned that no fuel was flowing through and sure enough, on checking I found the pump was plumbed the wrong way around. I wonder who did that?

After a bit of replumbing and we were back in business although still there was no fuel feeding through to the filter let alone the carbs. Vaguely remembering something about air locks we released the pipe at the carbs end and with a hiss we started to see fuel travelling through the filter and turn up to the carbs. Progress!

But this wouldn’t be the Relentless Duck blog without some ‘issues’ and without detailing all the challenges, we did have a leak out of the fuel sender unit. Not being sure why this was leaking we set up a fuel can to catch the drips until the level was low enough for it to stop. The following day, on a break from work, a YouTube video showed how this should have been tightened up. Another day, another thing learned.

With fuel to the carbs, surely the MG would now fire up and continue running? Sadly not, the carbs refused to take the fuel and the removal of the lid from the float chamber revealed it to be dry. Oh dear. Further investigation needed, the outcome of which will be covered in a future post

07 Aug 20 ENGINE START!

I don’t really approve of ‘shouty’ capitals, but I think this entry justifies their use, albeit in the title only. Today, on my 50th birthday, we achieved the Engine Start Milestone. Let me qualify that a bit. When I say ‘we’ I mean, my Dad, mainly. When I say the engine started, I mean just that – we got it to start, but not run. This was principally because to fuel it, we were not using the main tank, but a borrowed fuel bottle hung from the bonnet catch. But it did fire up, several times and briefly make a loud ‘vroom!’ before ceasing when the fuel we had poured down the throat of the carburettor was consumed. The important point is – it starts!

So today being my 50th birthday, we had invited some close family over within the COVID regulations – so a much smaller group than usual and with the requisite social distancing. My darling wife Helen had, as usual, put on a lovely spread and guests arrived and were dining al fresco in the relaxed garden setting under the Gazebo. After waiting for what seemed to be a polite period of time, Dad said to me ‘what about the MG then’ and we discretely retired to the garage to scratch our respective heads on the non-starting issue.

Dad focussed on getting the electrical side of things sorted and this involved correctly wiring the distributor and setting the timing. This took longer than it should have done, which isn’t very interesting to record here, however after muc removal and refitting of the distributor cap and HT leads we had a spark occuring at the right time but no starting of the engine. We turned out attention to the fuel bottle and suspicious that fuel was not actually getting into the carbs, we poured (I should say, carefully measured a precise quantity of fuel) fuel into the throat of the carbs and turned the engine over. With a vroom and a puff of smoke out the exhaust the engine fired for the first time in over two years. Yes! So I am grateful to Dad (and Matt my Daughter’s boyfriend) for this birthday treat! It was all very exciting. We fired it a couple more times to see see if we could maintain the running before concluding that actually some fresh fuel in the tank and connecting the fuel pump was probably the way to go. Sadly we had run out of time, so this job was deferred for next time.

So this is a great encouragement – I’ve had a lovely birthday, which really started on Wednesday with a visit from my oldest (he not old, but I have been friends with him for the longest time) friend Phil, then a surprise gift and cake from my work colleagues on Thursday, leading to today’s event. Tomorrow we have friends over to continue the celebrations, again reined in by the regulations to a very small group. I heard someone say that birthdays should be a three day event – I’m on four days and going strong!

1 Aug 20 a step forwards

I’ve had a problem with oil leaking from the oil filters area for a while and this has prevented me progressing the engine start because cranking the engine resulted in a pool of engine oil under the car. Having had several goes at refitting the oil filter to oil cooler union, today I used my brain and had Helen in the car cranking the engine over and me looking to see where the leak was coming from. Turns out the leak was from the oil filter ONTO the connection so I was looking in the wrong place. So my focus turned to sorting this connection out and following a phone call to Dad I removed and refitted it. No leak on cranking! Problem solved. I couldn’t resist cranking the engine over to fire (which it didn’t) but I did check and I was getting no spark so at least I know one of the problems to sort out.

This lovely engine bay will sound nice too one day
Oil everywhere but where from!

Back to earlier in the day and ongoing (and off going) saga of the doors and their glass. I had previously fitted the quarter lights but on inspection the runners were perished so I recently ordered some new one from Moss and had stripped them down. So while British Grand Prix Practice and Qualifying ran on I sat in the lounge working the new rubbers into place using a blunt ended tea spoon. Apart from where it dug into my palm painfully it wasn’t too bad and I followed the general approach that Andy from Wiltshire Windscreens showed me when he fitted the front and rear screens. So with these done I loosely fitted the back in. I will tighten them when I get the glass as I think you need them loose to get the whole mechanism in and then you tighten it all up.

Also in preparation for the glass (which I need to order) I removed the lower bracket from the rear glass stay. I have ordered new ones of these with nice new felt lining but they don’t come with the bracket. Rather than put the old brackets on as they were. I decided they would be better painted. I used a Hammerite black straight to rust paint, brush applied. It doesn’t need to look good but it should be protected against corrosion hence this approach. I was a bit delayed in fitting the stays as the paint is still drying so I will need to fit those when I next get the MG out.

Waiting for these to dry before fitting

So that’s about it. Keith the TV aerial guy was passing with his mate and said Hi. A couple of other people nodded their appreciation (or sympathy or contempt it’s hard to tell) so it was an encouraging day on the MG. Last thing to say is that to save my back I towed it out the garage this morning with my CRV which worked reasonably well although I did need a willing assistant which was of course the ever patient Helen.

A closing thought about gratitude…

30 Jul 20 Putting my back into it

I was motivated to get outside after work today and do something useful on the MG. I have for a long time bemoaned how I routed the rear loom which turned out to foul the internal trim panels due to a temporary cognitive failure on my part. So I decided to reverse this and find a better route. Reversing the install turned out to be much simpler than I thought.

I then had to work out a better route and curiously it is remarkably unclear what this should be. After a bit of trial and error I have found a route which allows the loom to reach all the right places and also looks like a reasonable location to be clipped in place out of the way and logically. At least I hope so.

It was good to make some progress after having had a lot of (admittedly not entirely unpleasant) distractions. The only down side was a twinge in my back as the MG is getting heavier the more parts I bolt on, and my back is getting no stronger. I may revert to towing it up the drive until she’s a runner.

16 May 20 Going dizzy

I ordered a second hand distributor in an attempt to resolve the non-starting engine. Suspecting a timing issue, my Dad and I have gambled with the idea of getting it started with a good old-fashioned mechanical distributor in lieu of the Accuspark unit. The electronic distributer is great I’m sure, but you can’t see what is working or not, so anyway, today I bolted the new used mechanical distributer into the MG and tightened up the clamp. The distributer clamp is one of those awkward jobs on the MG where the spanner (7/8th) has about 30 degrees of movement and needs to be turned around to get at the next turn. So doing the bolts up to the clamp is a long job and you have to get into a zen like state and push through it. Or you can have a really good podcast playing in the background, such as Adam Buxton’s ramblechat with Louis Theroux.

Before tightening up the distributor clamp (I had actually popped the unit in a couple of weekends ago, including the long job of removing the clamp bolts) I had to see to the troublesome oil cooler pipe connection to the oil filter base. Having thought I had sorted this out previously, I had attempted to start the MG recently and not realising this was not done up correctly, had managed to create a large puddle of oil on the driveway. This is my second offence and although Helen was very understanding I was really annoyed at myself for this careless error. I now actually have a shortage or oil, so will be ordering some more soon and will need to remember to stick some cardboard under the car just in case. The error was to have the crush washer in the wrong place, something easily diagnosed when I checked in the catelogue.

I’ve sorted another issue through a second-hand purchase. The inlet manifold of the MGB has a bolted in connector onto which the vacuum pipe fits. On my inlet manifold, the connector was missing, and I don’t remember removing it. Having scoured the online MG catelogues I identified the part number but it was notified as being on back order, so not available any time soon. So I took the plunge and ordered a second hand inlet manifold from eBay that looked like it had the right fitting. It arrived as described and had the fitting. So problem solved and a paper-weight to boot (the surplus manifold). Now fitted on the MG, if only I could find the plastic end piece which I carefully stored away…

I was pleased with my ebay purchase which I showed to my colleagues via MS Teams

More ordering with SC Parts has resulted in two large boxes arriving at Relentless Duck Restorations Goods Inwards containing shiny new seat rail kits. The seat rails have mystified me for a while. The car only came with three out of the required four, and I have been baffled as to how the rails work. Now with the new rail kits from SC Parts, I can see that there was a lot more missing, so I am now reassured that the fit will be relatively straightforward. Not that I’ll be fitting the seats just yet, as I have the roof lining to fit before I work down to the carpets and seats.

I received a fun classic car related present from fellow enthusiast ‘Puddleduck’. Its the Haynes classis cutaways colouring book. Apparantly colouring in is good for mindfulness, being in the moment and all that. Puddleduck also has the book and he admitted that he sometimes goes onto classic care trader websites to check up on paints schemese and details such as indicator / side light configuration so he can shade in accurately. Crikey, that’s a level of dedication I can only dream of. Anyway, thanks Puddleduck.

28 Apr 20 Daft cat

Just a quick entry to record this picture of our daft cat. My daughter popped into the garage to access the freezer and as often happens, the cat dived in to poke around the garage in search of a mouse (although she is a useless hunter and there are no mice in the garage, unless you count the 2 x frozen mice we have kept for the in-laws pet snake for when lockdown is over). Anyway, standard procedure is to close the door and leave her in there for ten minutes. She’s usually ready to come out. But tonight she decided to stay in the MG and Lou managed to capture this shot – daft cat. Pity she can’t sort out the timing!

Stay safe folks – God Bless

6 Apr 2020 External trim

I am writing this a week later that it was done, so apologies for my tardiness. I spent a lot of time on this long weekend (Monday off) working on the MG, mainly fixing the external trims. The MGB is blessed with a striking stainless steel trim which runs down both sides, made up on three pieces, front wing, door and rear wing. Each trim snap fits onto a number of round fittings which are pop rivetted into the bodywork plus one screw plate per panel. The pop riveting went reasonably well, except that a couple of holes were too big for the pop rivet to take and so I had to miss these out. The o/s rear had a mislaigned hole so I had to miss that one out too. The front wing screw fittings needed to be drilled and I had a mixed experience with this. The n/s wing drilling went reasonably well – aligned well on the horizontal plane, I didn’t really get it far enough forward to completely pull the trim in. So learning this lesson on the o/s wing, I drilled further forward and although perfectly aligned for the trim, the thread came through next to a seam on the inner wing so I couldn’t fit the washed and nut. Annoyingly I had to leave the job partly done. Worth mentioning that the trims snap on nicely if you smack them sharply with the heel of your palm. Okay for the first couple of trims, but a bit painful by the end of the day.

As an aside, I had planned a load of jobs for this weekend, but was frustrated by lack of parts, particularly the seats which are frustrating me with a lack of clear information on how they are fitted and not having all the parts I need [sigh]. I did manage to fit the crush washer to the Oil Cooler pipes. This joint had been leaking oil and then I found the washer in a parts bag. Not doing much good there was it! Now its fitted I no longer have the oil leak, just the stain on the driveway to remind me of my error. Onwards and upwards

My list of jobs – I didn’t get too far!

5 April 2020 Door glass

A fine spring day (Sunday) as the COVID-19 lockdown continues. With the engine start programme on pause, I decided to continue refitting some of the extensive exterior trim on the MG. Having recently taught myself to pop-rivet, and finding out that is the most fun thing ever, I continued to fit the chrome drip rails and today managed to complete both sides. Just one clip missing which will either turn up or I’ll have to buy from Moss. I then turned to the door glass which I have been wanting to fit for a while. Unfortunately, the door glass is very badly scratched (I don’t know how) so I will need to replace them, however, I decided that there was merit in having a go at fitting them anyway as a sort of trial run for when I get the new / second hand ones. Tricky to justify buying new glass at the moment as I can’t collect from Moss (shop closed) and the cost of shipping glass is blooming expensive. Also, I would have to pry off the metal rails which looks tricky, so maybe I’ll source some second hand units via Ebay for as long as that remains. Anyway, back to today’s efforts which went alright actually. I had to remove the quarter lights and then reaquaint myself with the lifting mechanism which is a bit fiddly. I just looked at it and fiddled it around a bit until it fitted – it took a couple of attempts, I then dropped the windows in and they seemed to slide up and down quite convincingly After checking on YouTube I find that I haven’t hitched the glass properly, so something to sort out tomorrow on my day off.

Lots of people say hello as I’m working out the front on the drive, but one visitor today didn’t really understand the whole social distancing thing. I kept backing away as he enthusiastically looked over the MG. He apparently has a couple of Lotus’s he is intending to restore although when he mentioned making one of them into a four door, and commented on how thick the fibreglass was, I began to question his sanity. It was about 7mins and 30 seconds into the conversation before he mentioned ‘Wheeler Dealers’ which is where my interest tends to tail off. Anyway, I think he was probably a bit lonely and confused by the whole Coronavirus thing. It goes to show how it is impacting people in different ways. I wished him well and off he went with his shopping trolley.

Final job today was to scrub the interior trims that I have. I just used some kitchen cleaner to clean the vinyl so I will fit what I have got tomorrow. There are definately some bits missing, so I’ll have to decide how to replace these and draft up an order to one of the many suppliers. I am keen to attempt a repair to the headlining, so there is not much stopping me cracking on with this now.

21 & 22 Mar 20 Significant progress

I am writing up progress over two days today, Saturday and Sunday of this first weekend in which we are living through the most extraordinary changes in our lives due to the COVID-19 outbreak. I’m not going to focus on that, instead I’m going to talk about progress on the MG.

On Saturday I managed to get the MG to crank over – this was a big step forward. I didn’t get it to fire up, but we’ll get to that. The main thing preventing me from starting the engine had been the wiring of the ignition switch. I had been baffled by the switch terminals which I just couldn’t relate to the wiring diagram. Added to that, having got it wrong and frightened myself with the battery terminal sparking, my confidence was low. However, after conversations with my Dad and some on-line help from Nick Dring (thanks guys), I sat in the MG on the driveway on a sunny Saturday and just ran through some wiring scenarios. Using my Dad’s fooproof lamp test to keeps things safe, it took eight attempts to finally get it right. I had the engine cranking over in every ignition switch position including 0, I and II. Position III remained elusive, but it was a great feeling when I finally stumbled on the right combination and it cranked over on position III. Of course I could have avoided all this by taking a photo of the switch before I stripped it down, but its a bit late for that now!

The rest of the day was spent in attempting to get the engine started, ultimately unsuccessfully. I did connect up the choke (not very well), tightened the throttle cable and resolved a couple of areas which were leaking oil due to not being tightened up properly – namely, the rocker cover and the oil filter oil cooler pipe union. For fuel I used a bottle (borrowed from my friend john) connected to the carbs and hung from the bonnet catch. Out of interest, I recorded key parts of the day on my iPhone and made them into a YouTube video, linked below. Be warned, its 14 minutes….

Video of me not starting the MG

Onto Sunday and I diverted from the engine (for which I need some brainy help) to focus on some items of trim which I have deliberately ignored for a good while now. It made for a change to be focussing on something different. Plan for today was to fit the chrome trims to the rear quarter lights. I had previously fitted these just to get them off the garage shelves but they had to come off for me to fit the trims. This meant that I needed to learn how to use a pop rivet gun which I have never used before. A quick YouTube video later and I was a pop-rivetting hero. As any one will tell you, its really easy. The trims are original and despite a clean up using autosol they are a bit ratty, but from what I remember, buying all new is extremely expensive and in these dire times I can’t justify any frivelous expenditure. I can always buy new trims later down the line. I got the o/s all sorted nicely, but the n/s side wasn’t as easy, the trims being a bit buckled and hence more difficult to fit and the rubber seal had gone missing (it’s somewhere in the garage). Anyway, some useful time wokring outdoors on the MG – I halted during the middle of fixing a trim to the A-post on the n/s due to being asked if I would like to go for a walk with Helen and Lou – priorities being what they are, I pushed the MG into the garage and that was the day’s work done.